Good afternoon,
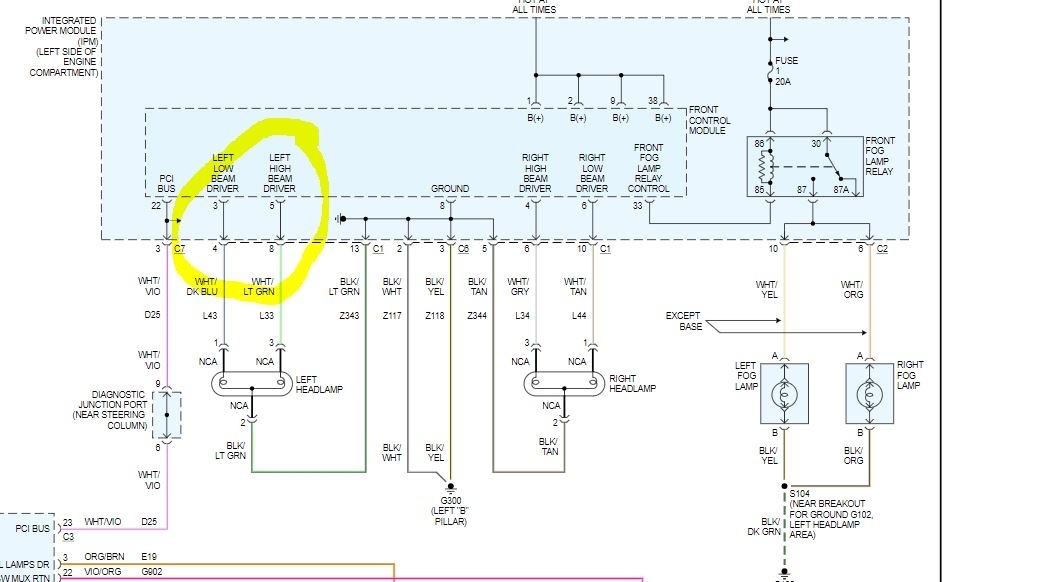
The headlight are controlled by the TIPM or the fuse box module. This is a very common failure for this issue. I attached a diagram for you to view to see if there is power going to the headlamp. If there is no power, the fuse box module is the failure in most cases.
Roy
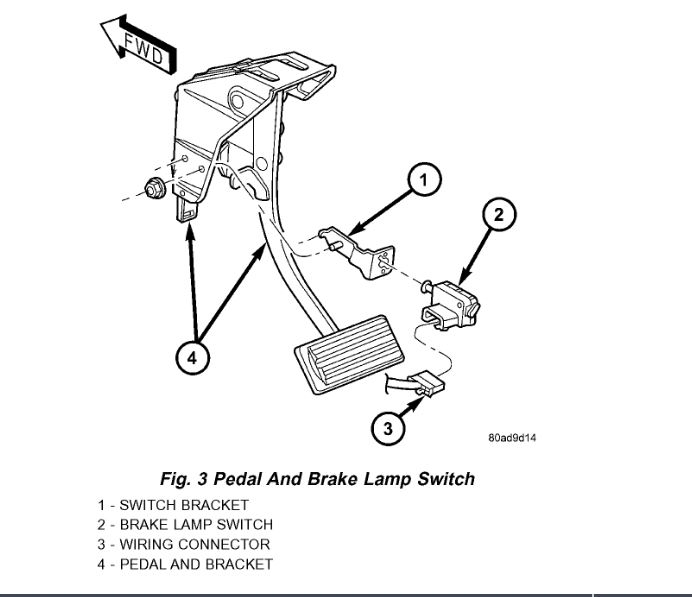
As far as the brake lights, I attached the procedure for the switch at the brake pedal. check it for voltage to the switch.
Roy
REMOVAL
1. Disconnect and isolate the battery negative cable from its post on the battery.
2. Remove silencer panel below steering column and knee blocker.
Fig.3 Pedal And Brake Lamp Switch
imageOpen In New TabZoom/Print
3. Remove the brake lamp switch by rotating the switch in a counterclockwise direction approximately 30 degrees and pulling it out of the bracket.
4. Release the locking tab and disconnect the wiring connector from the switch.
5. Discard the brake lamp switch. It must not be reused.
INSTALLATION
CAUTION: Do not reuse the original brake lamp switch. The switch can only be adjusted once. That is during initial installation of the switch. If the switch is not adjusted properly or has been removed for some service, a new switch must be installed and adjusted.
1. Mount and adjust the NEW brake lamp switch using the following procedure:
a. Connect the wiring connector to the switch and latch the locking tab.
b. Install the switch in its bracket by aligning the index tab on the switch with the slot in the mounting bracket.
c. When the switch is fully seated in its bracket, rotate the switch clockwise approximately 300 to lock the switch into place.
Images (Click to enlarge)
Mar 13, 2019 at 1:36 PM