Hi,
If you hear a vacuum sound, chances are the booster is leaking. That will cause the computer to overcompensate with fuel to return the fuel mixture to make it run.
Now, the vacuum leak is not related to the oil light. However, there is a good chance it is causing the fuel consumption as well as the hard pedal.
Are the brakes sticking? The only way to know for sure is to lift the vehicle and see if they can be turned. If they aren't, let me know.
Before just replacing the booster, make sure no hoses are disconnected or damaged. If you find they are good and the leak is the booster, here are the directions for replacement. The attached pictures correlates with the directions.
____________________________________________
2003 Chevrolet Impala V6-3.4L VIN E
Procedures
Vehicle Brakes and Traction Control Power Brake Assist Vacuum Brake Booster Service and Repair Procedures
PROCEDURES
Vacuum Brake Booster Replacement (3.4L)
Tools Required
- J 22805-B Power Brake Booster Holder
Removal Procedure
Caution: When replacing the power booster brake, make sure that the cruise control cable is not routed between the booster and the cowl. If the cable is damaged or pinched, it must be replaced. Failure to do this could result in personal injury.
1. Remove the left instrument panel insulator.
2. Disconnect the stop lamp switch electrical connector from the stop lamp switch.
3. Remove the retaining clip and disconnect the brake booster pushrod from the brake pedal.
4. Partially drain the cooling system.
5. Remove the cross vehicle brace.
6. Remove the air cleaner inlet duct.
7. Relieve the fuel system pressure.
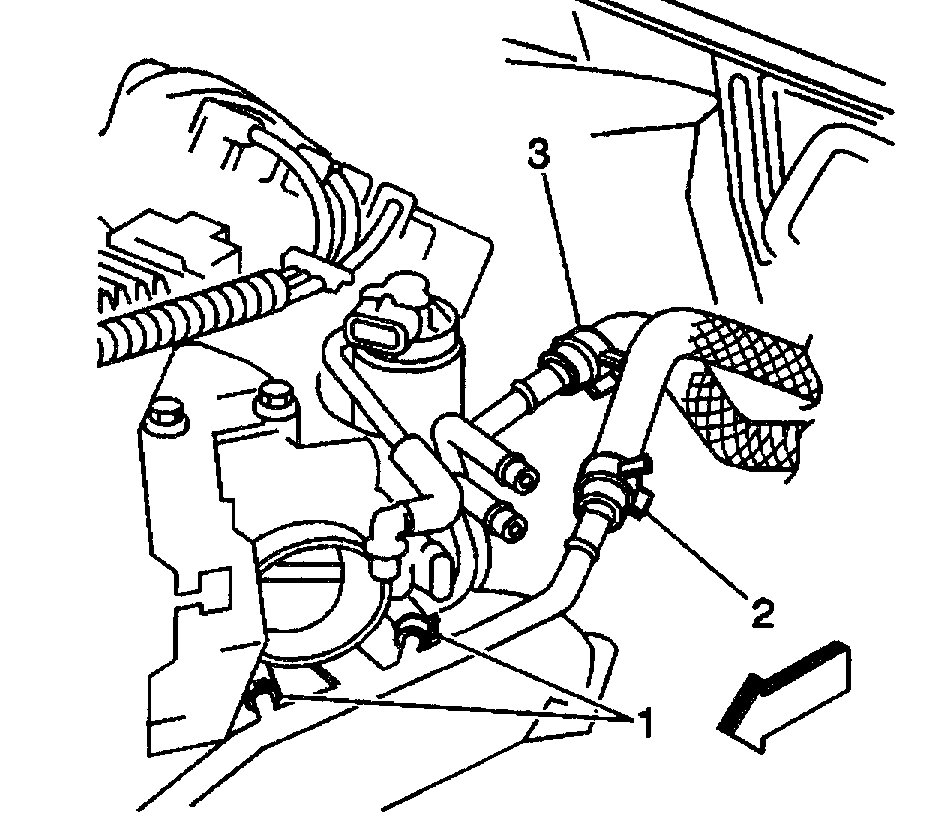
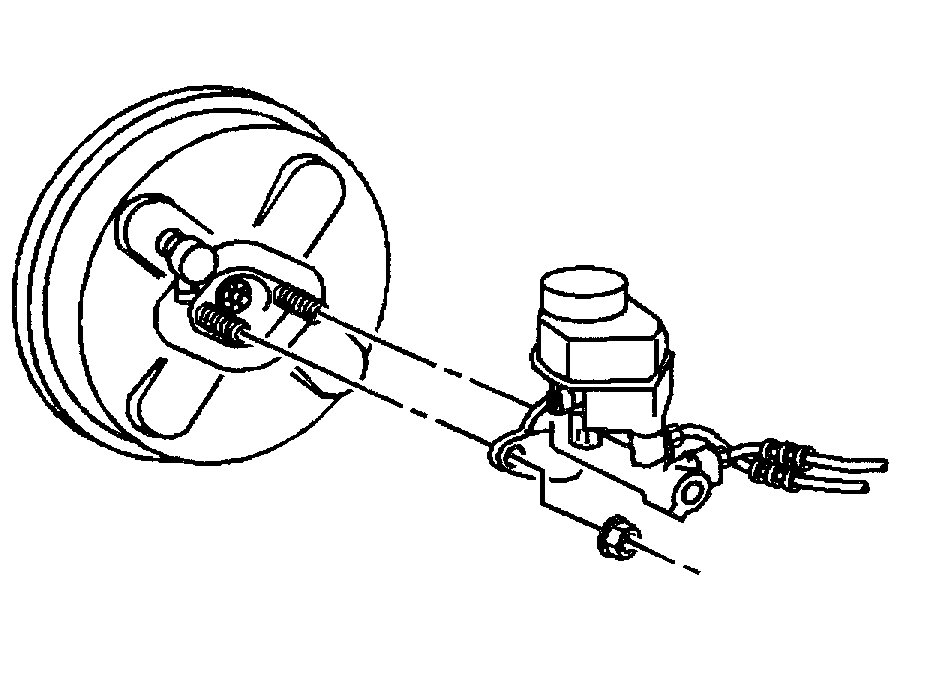
Pic 1
8. Disconnect the following pipes and position the pipes aside.
The EVAP canister purge valve pipe
The fuel feed pipe
The return pipe
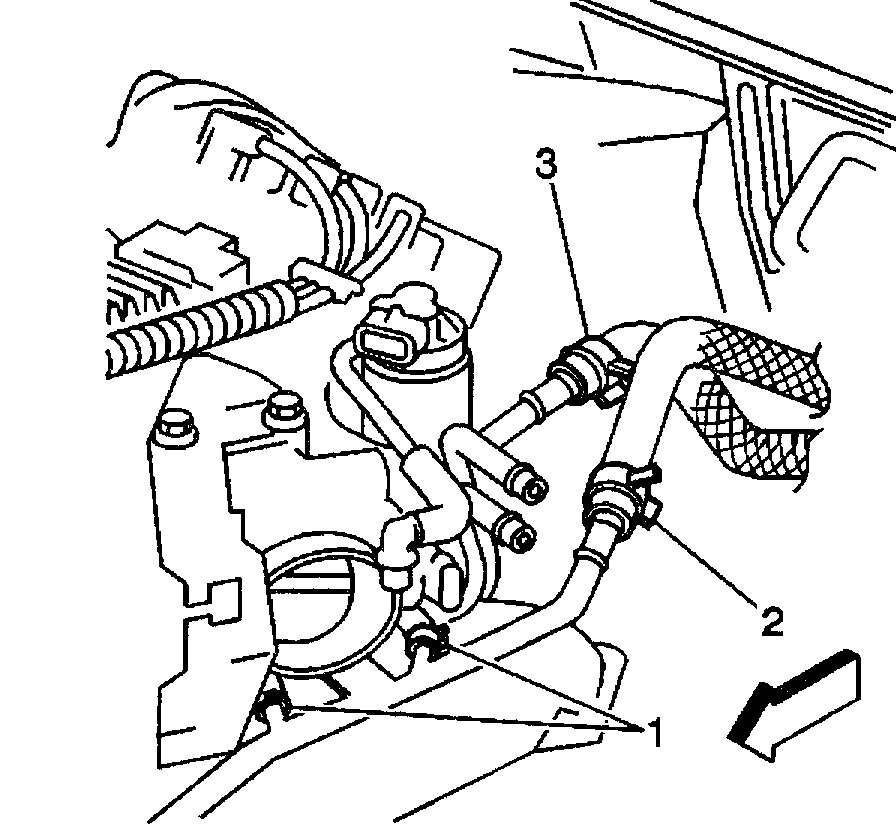
9. Disconnect the coolant outlet (2) and the inlet (3) bypass hoses and position the hoses aside.
10. Remove the heater inlet pipe.
11. Rotate the engine forward for service access.
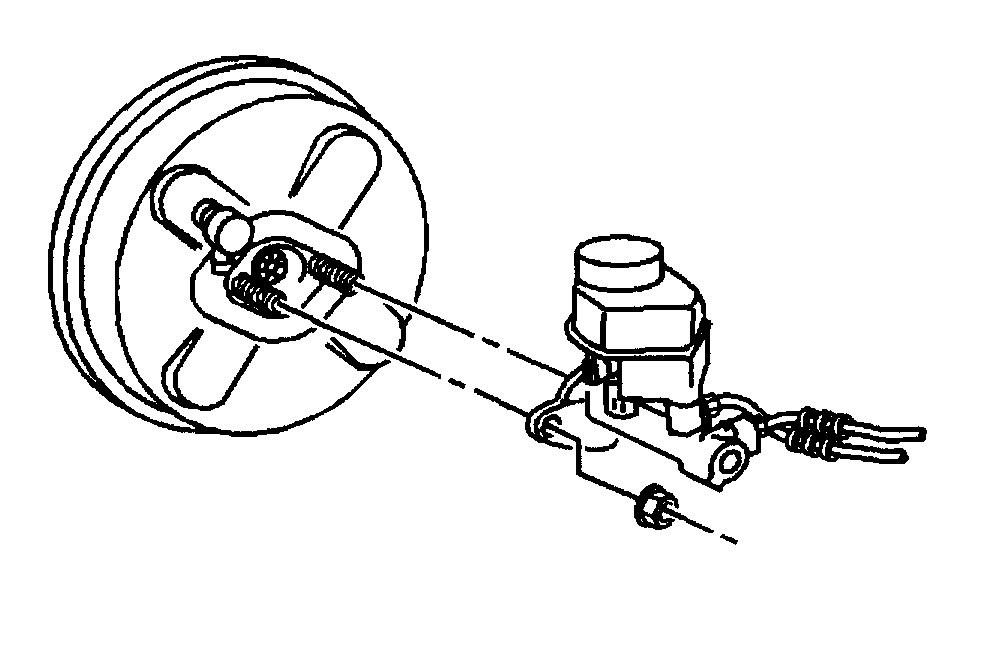
Pic 2
12. Disconnect the electrical connector from the brake fluid level sensor.
Important: It is not necessary to disconnect the brake pipes from the master cylinder to the BPMV.
13. Remove the two master cylinder retaining nuts and position the master cylinder aside.
14. Disconnect the vacuum check valve from the brake booster. Position aside the vacuum hose and the check valve as an assembly.
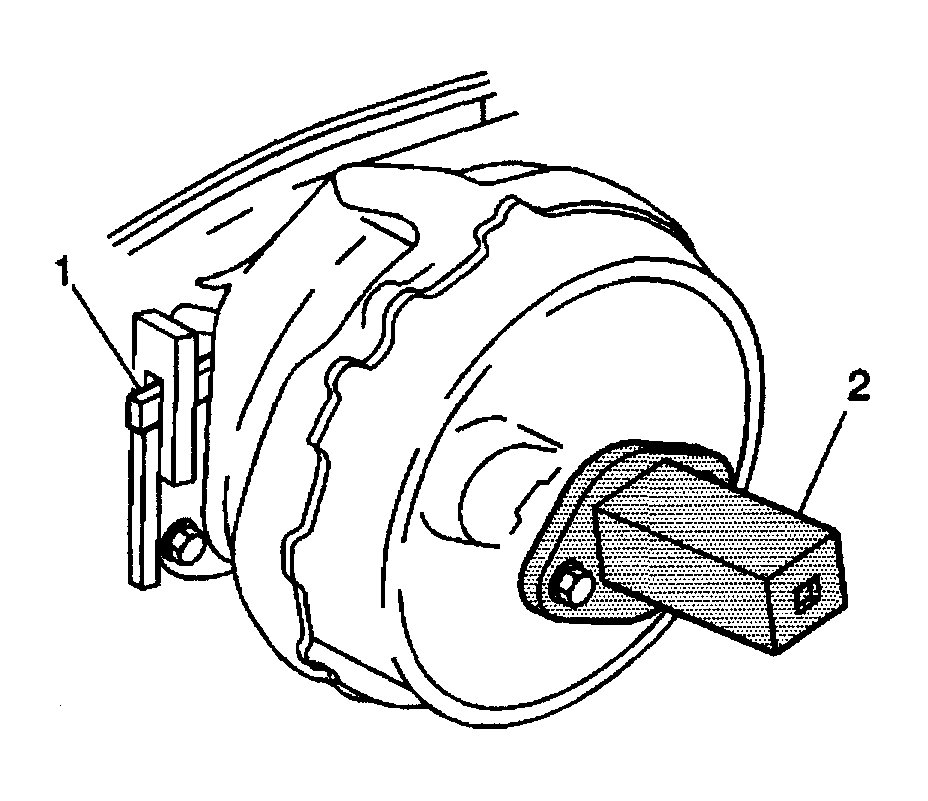
Pic 3
15. Attach J 22805-B to the booster using the master cylinder retaining nuts.
16. Unlock the booster from the cowl.
17. Use a flat bladed tool to depress the brake booster locking tab (1) out of the cowl mounting flange, while turning the booster counterclockwise with a ratchet on J 22805-B (2).
18. Remove the vacuum brake booster.
Installation Procedure
Notice: Internal components of this booster are not serviceable. The housing must not be unstaked and separated. Separating the housing will cause permanent deformation, preventing the booster from holding proper volume.
Notice: Inspect the locking flanges on booster and mounting plate. Replace the booster and mounting plate if the locking flanges are bent or damaged.
Important: Carefully push the pushrod eye through the hole so that you do not damage or dislodge the insulator boot.
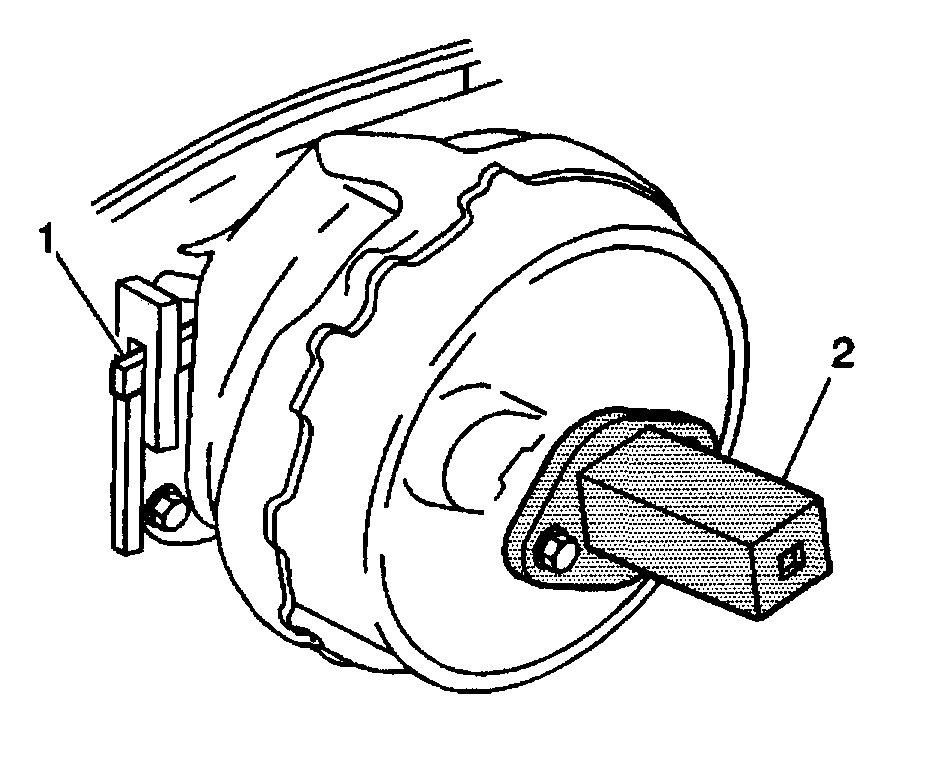
Pic 4
1. Install the vacuum brake booster.
Position the vacuum brake booster on the cowl counterclockwise from the final installation position so that the locking flanges on the components engage.
Important: Ensure that the locking tab and the flanges are in the full engaged position.
2. Turn the vacuum brake booster clockwise with a ratchet on the J 22805-B (2). Do NOT use a flat bladed tool to install the vacuum brake booster. When the booster is correctly installed, the locking tab (1) slides up the flange and engages the locking notch.
3. Remove J 22805-B (2) from the installed vacuum brake booster.
4. Reposition and connect the vacuum hose and check valve assembly to the booster.
Notice: Refer to Fastener Notice in Service Precautions.
Pic 5
5. Reposition the master cylinder onto the booster and install the master cylinder retaining nuts.
Tighten the retaining nuts to 25 Nm (18 ft. Lbs.).
6. Connect the electrical connector to the brake fluid level sensor.
7. Return the engine to the original rest position. Install the left and the right engine mount struts.
8. Install the heater inlet pipe.
Pic 6
9. Reposition and connect the coolant outlet (2) and the inlet (3) bypass hoses.
10. Reposition and connect the following pipes:
The EVAP canister purge valve pipe
The fuel feed pipe
The return pipe
11. Install the air cleaner inlet duct.
12. Install the cross vehicle brace.
13. Fill the cooling system.
14. Connect the brake booster pushrod to the brake pedal and install the retaining clip.
15. Connect the stop lamp switch electrical connector to the stop lamp switch.
16. Install the left instrument panel insulator.
_____________________________________
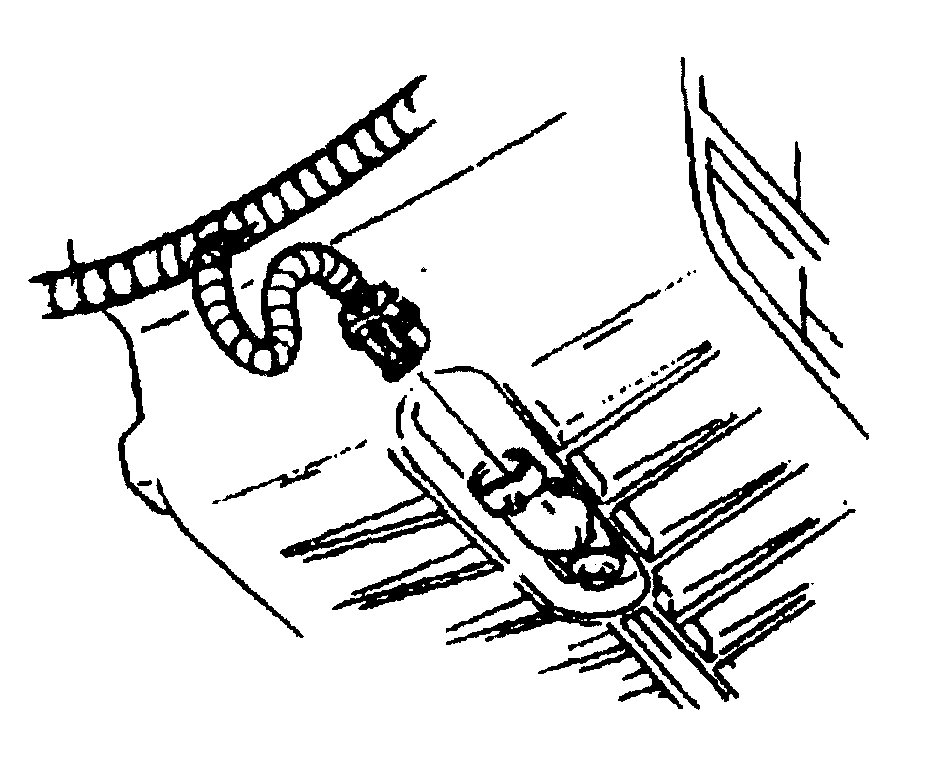
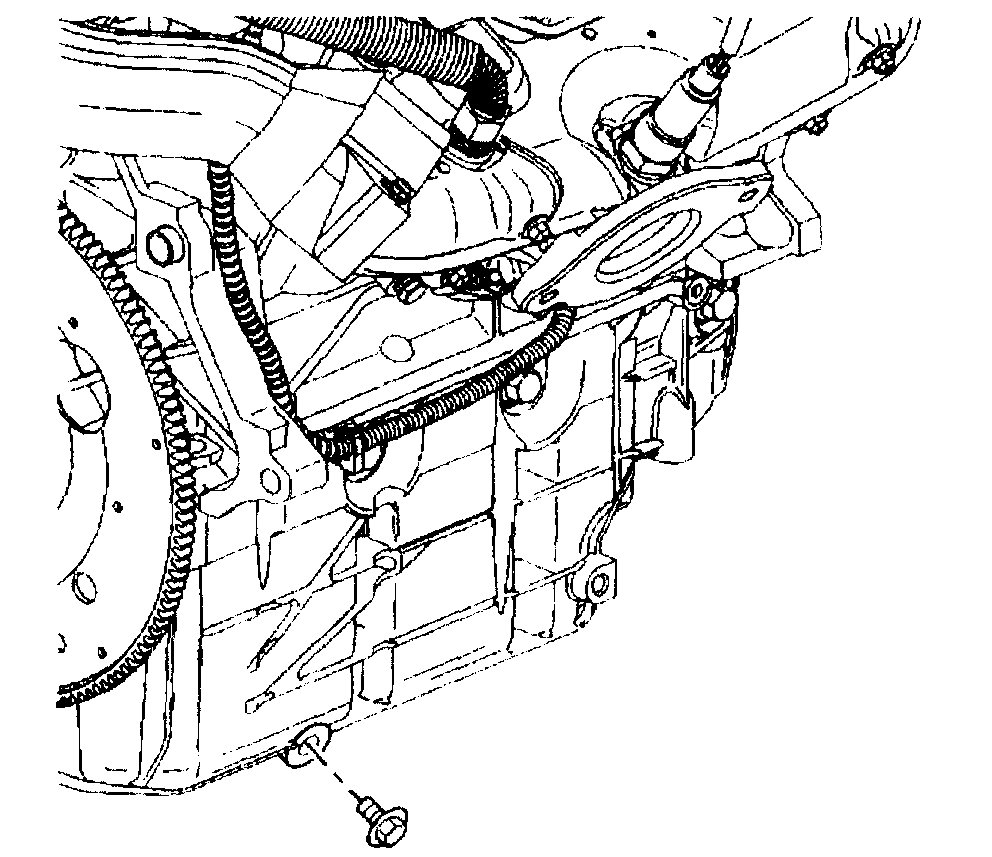
As far as the oil level issue, chances are it is related to the level switch at the bottom of the oil pan. Check to make sure it is connected and there is no wiring damage or corrosion at the connector. If you find nothing visual, replace the sensor. Here are the directions for that procedure. The remaining pics correlate with the directions.
____________________________________
2003 Chevrolet Impala V6-3.4L VIN E
Engine Oil Level Sensor/Switch
Vehicle Sensors and Switches Sensors and Switches - Engine Oil Level Sensor Service and Repair Removal and Replacement Engine Oil Level Sensor/Switch
ENGINE OIL LEVEL SENSOR/SWITCH
Engine Oil Level Sensor and/or Switch Replacement
Removal Procedure
1. Raise and support the vehicle. Refer to Vehicle Lifting.
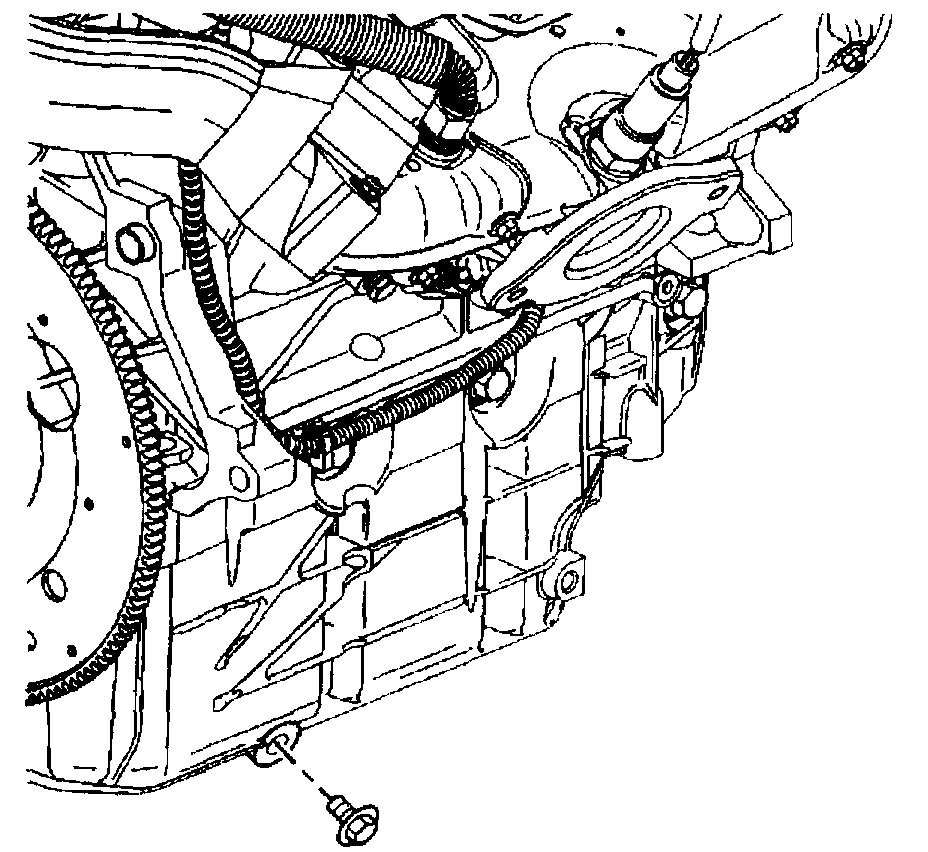
Pic 7
2. Remove the engine oil drain plug in order to drain the engine oil.
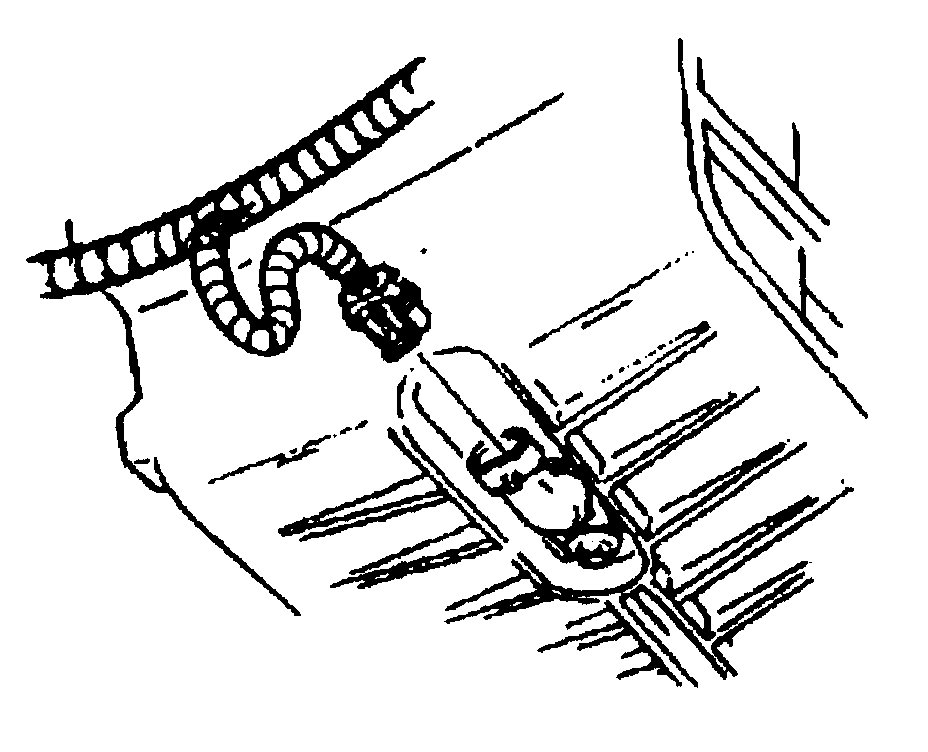
Pic 8
3. Disconnect the oil level sensor electrical connector.
4. Remove the bolt from the oil level sensor.
5. Remove the oil level sensor.
Installation Procedure
pic 9
1. Install the oil level sensor.
Notice: Refer to Fastener Notice in Service Precautions.
2. Install the oil level sensor bolt.
Tighten the bolt to 10 Nm (89 inch lbs.).
3. Connect the oil level sensor electrical connector.
Pic 10
4. Install the engine oil drain plug.
Tighten the plug to 30 Nm (22 ft. Lbs.).
5. Lower the vehicle.
6. Fill the crankcase with engine oil.
_____________________________
Let me know if this helps or if you have other questions.
Take care,
Joe
Images (Click to make bigger)
Friday, March 12th, 2021 AT 11:16 AM
