Hi,
I just went through the directions. I see nothing indicating it has to be a specific way. If it was mine, I would face the nut in the directions it would be most easy to access. Here are the directions right from Alldata:
________________________
1998 Ford Taurus V6-3.0L DOHC VIN S
Lower
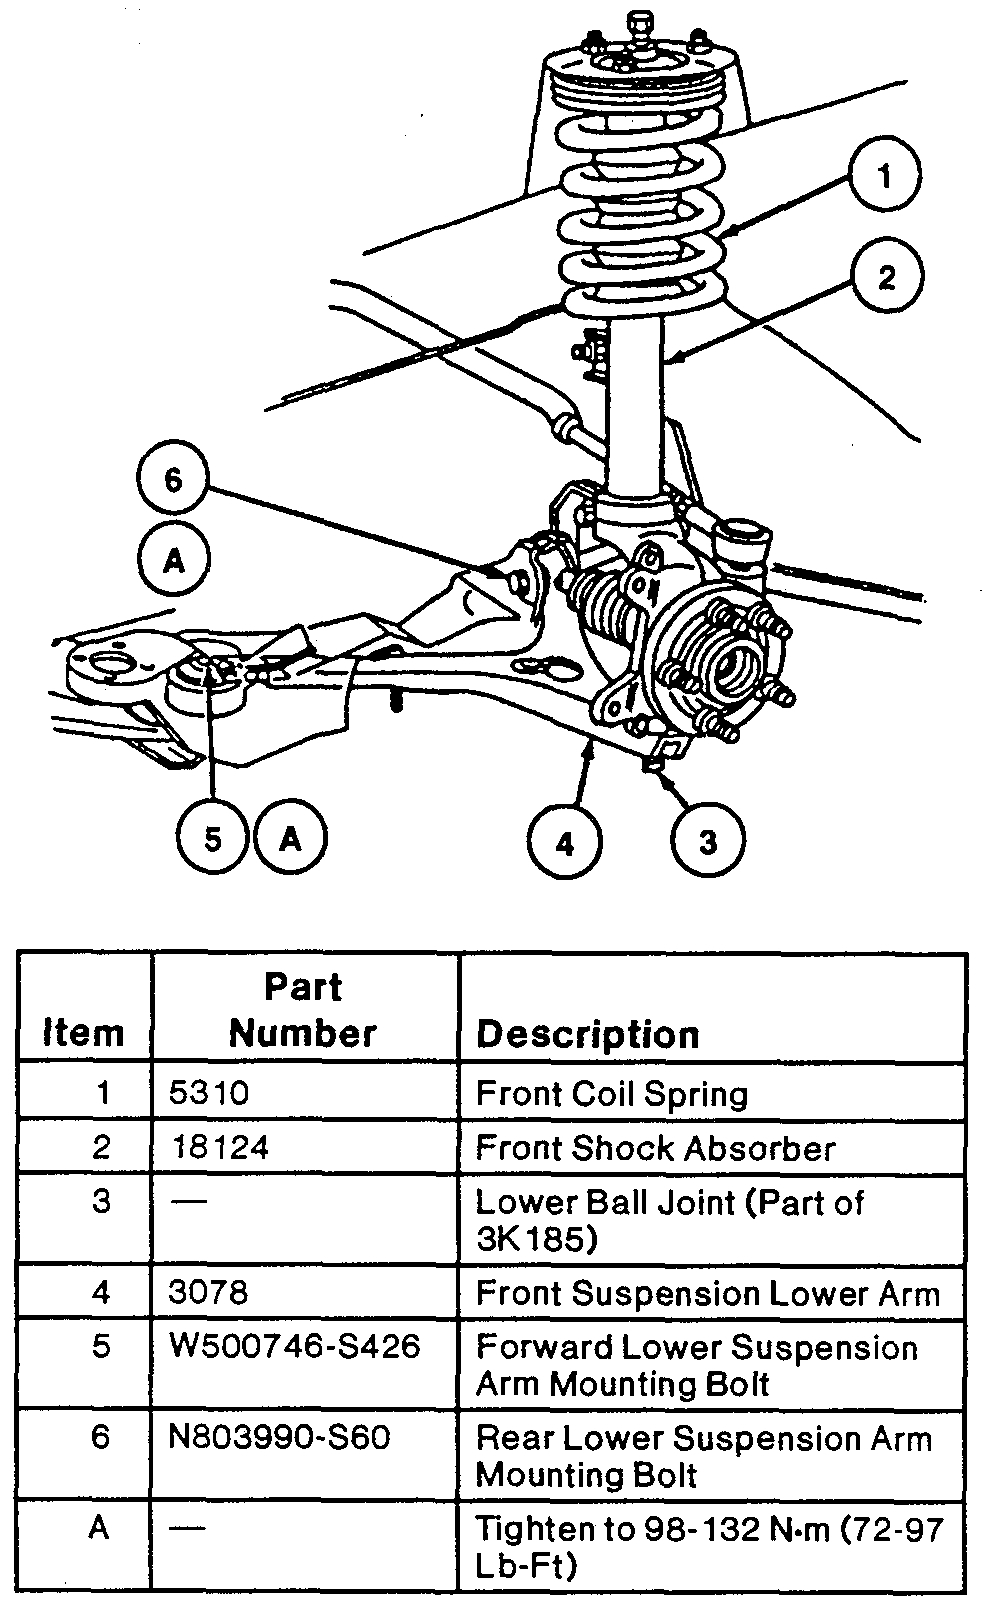
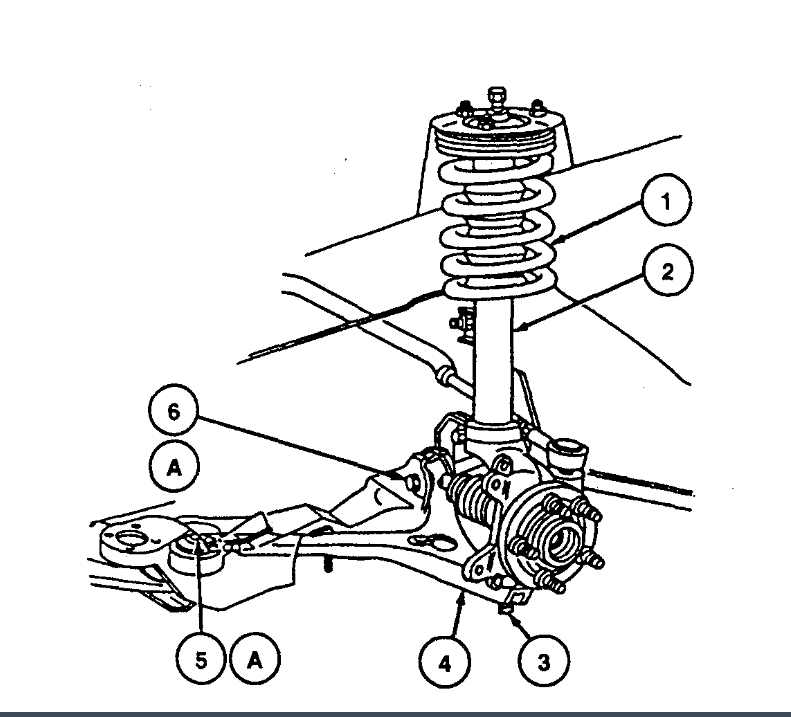
Vehicle Steering and Suspension Suspension Control Arm Service and Repair Procedures Control Arm Front Lower
LOWER
pic 1
REMOVAL
1. Turn ignition switch to the off position and place steering column in the unlock position.
2. Raise vehicle on hoist.
a. Disconnect height sensor wiring connector.
b. Remove wiring harness from routing clip on front shock absorber.
c. Remove air suspension height sensor from height sensor ball studs.
3. Remove and discard lower ball joint nut. Using Ball Joint Remover T96P-3010-A and Tie Rod End Remover Adapter T81P-3504-W, separate lower ball joint from front suspension lower arm.
4. Using Rotunda Spring Compressor 164-R3571 or equivalent compress front coil spring until lower ball joint clears front suspension lower arm.
5. Remove forward lower suspension arm mounting nut and bolt.
6. Remove rear lower suspension arm mounting nut and bolt. Remove front suspension lower arm from vehicle.
INSTALLATION
1. Position front suspension lower arm into front sub-frame. Install forward and rear lower suspension mounting bolts and nuts. Tighten rear bolt to 98-132 Nm (72-97 ft. lbs.). Tighten front bolt to 77-103 Nm (57-75 ft. lbs.).
2. Release Rotunda Spring Compressor 164-R3571 or equivalent while guiding lower ball joint into front suspension lower arm. Remove spring compressor.
3. Install new lower ball joint nut. Tighten to 68-92 Nm (50-67 ft. lbs.).
a. Install air suspension height sensor onto height sensor ball studs.
b. Position wiring harness in routing clip on front shock absorber.
c. Connect height sensor wiring connector.
4. Install wheel and tire assembly. Tighten lug nuts to 115-142 Nm (85-104 ft. lbs.).
5. Lower vehicle.
_____________________________
Let me know if that helps.
Joe
Dec 31, 2019 at 8:15 PM