TIMING CHAIN Removal
1. Remove cylinder head covers. Lift out ignition coils and spark plugs. Disconnect hose from coolant pipe. Remove camshaft position sensor. Remove water pump.
2. With cylinder No. 6 coming up on TDC, turn crankshaft in normal direction of rotation until hole in lower left side of block and flywheel hole align. Install TDC Position Pin (11-2-300) to hold crankshaft at TDC. Remove timing chain tensioner and upper timing chain covers.
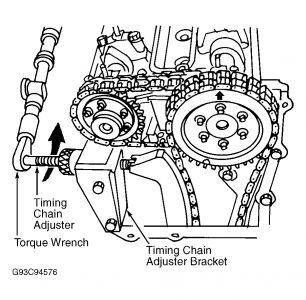
3. Loosen 3 bolts 1/2 turn on each sprocket of cylinder head camshafts. Temporarily install upper right side timing chain cover. Install Timing Chain Bracket (11-2-400) to side of right cylinder head. See Fig. 10 . Install Timing Chain Adjuster (1-3-390) enough to remove slack from timing chain. See Fig. 10 . Remove TDC Position Pin (11-2-300). Turn engine one complete revolution.
fig. 10
4. With engine at TDC of No. 1 cylinder, install TDC Position Pin (11-2-300). Loosen remaining bolts 1/2 turn on each sprocket of cylinder head camshafts. Ensure cylinder No. 1 intake and exhaust cam lobes face each other. See Fig. 3 . Ensure cylinder No. 5 intake and exhaust cam lobes face correctly. See Fig. 4
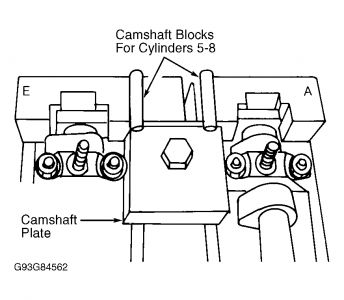
5. Ensure arrows on intake camshaft sprockets point up. See Fig. 3 and Fig. 4 . Install Camshaft Alignment Blocks (11-2-441 and 11-2-442) and Mounting Plates (11-2-443 and 11-2-444) to rear of each cylinder head. See Fig. 5 and Fig. 6 .
fig.3

fig.4
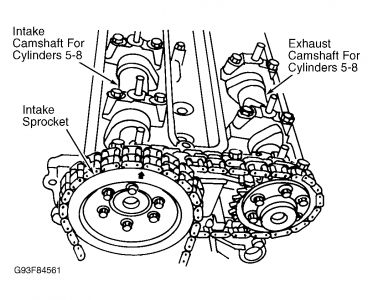
fig.5
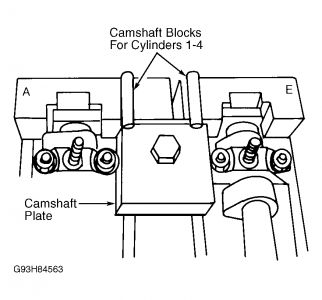
fig. 6
6. Remove Timing Chain Adjuster (1-3-390). Remove timing chain cover. Remove bolts and sprockets from intake camshaft. Tie lower timing chain to chain rails and guides. See Fig. 11 .
fig.11
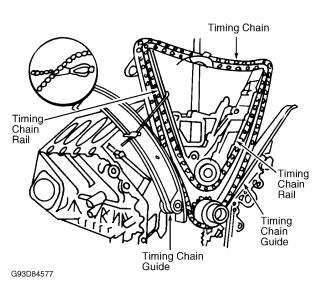
7. Remove vibration damper and lower timing case cover. See CRANKSHAFT FRONT SEAL . Remove timing chain tensioner guide from right side. Remove timing chain. Remove timing chain oiler. Remove bolts and remaining chain guide and rails.
8. Remove timing chain idler sprocket (above crankshaft timing sprocket). If necessary, install Tensioner Retainer (11-3-420) to upper timing chain tensioner. See Fig. 12 . Remove upper timing chains and sprockets from camshafts. Using Gear Pullers (11-2-004 and 11-2-000) and support washer, pull crankshaft timing chain sprocket off of crankshaft.
fig12

Installation
Heat crankshaft timing chain sprocket to 302 °F (150 °C) and install on crankshaft. Install timing chain idler sprocket, chain tensioner rails and guides (if removed). Install timing chain oiler. Install timing chain around sprockets, idler sprocket and guides. Install upper timing chains and sprockets. Remove Tensioner Retainer (11-3-420). Secure lower timing chain to rails until sprockets are installed. Install lower timing chain cover and vibration damper. Install and adjust camshaft sprockets. See CYLINDER HEAD . To complete installation, reverse removal procedure.
Oct 3, 2010 at 2:30 PM