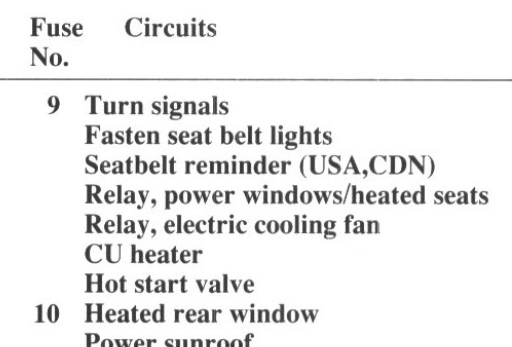
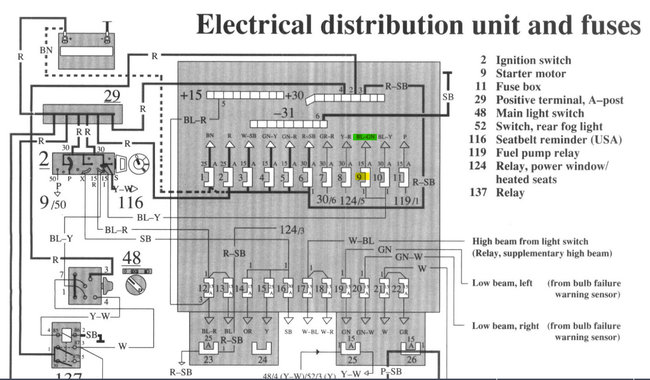
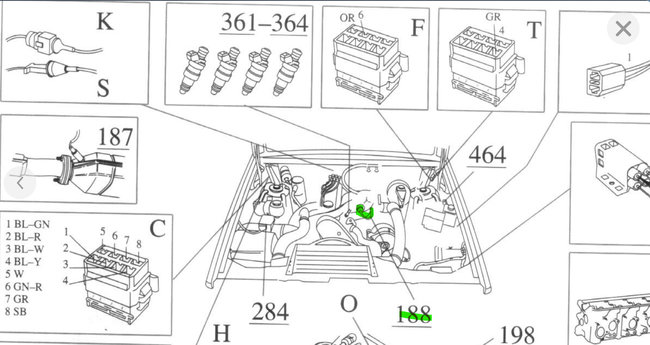
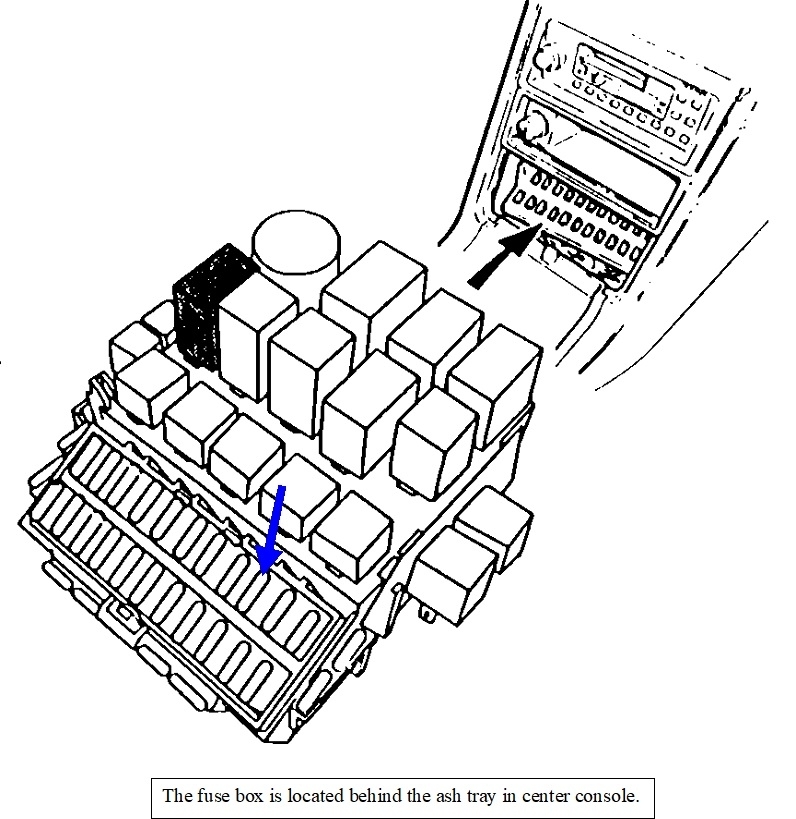
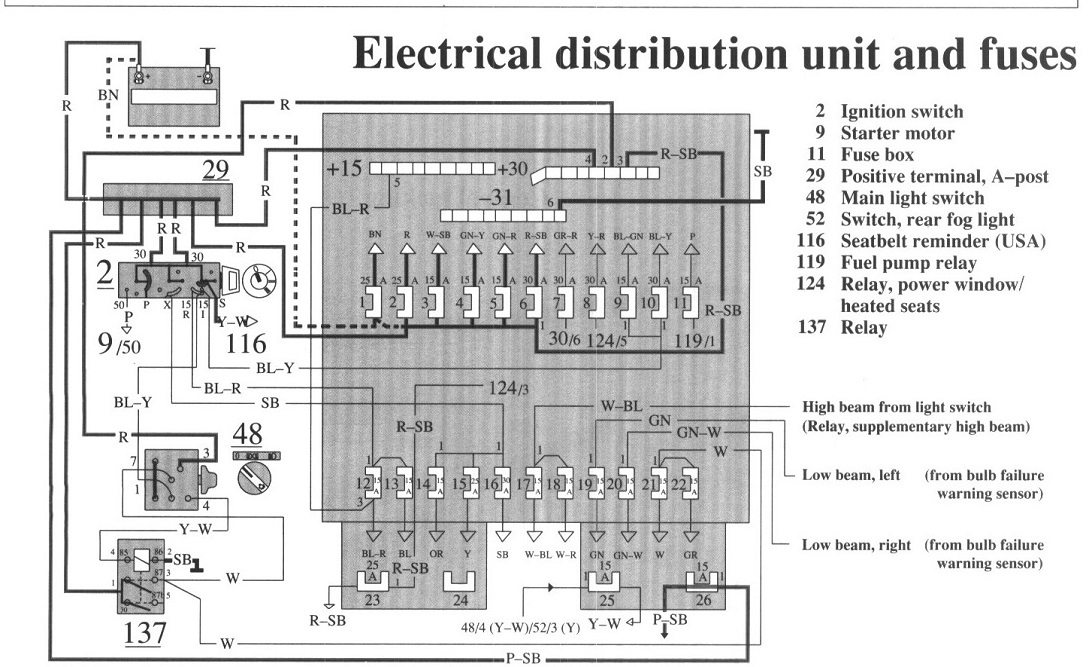
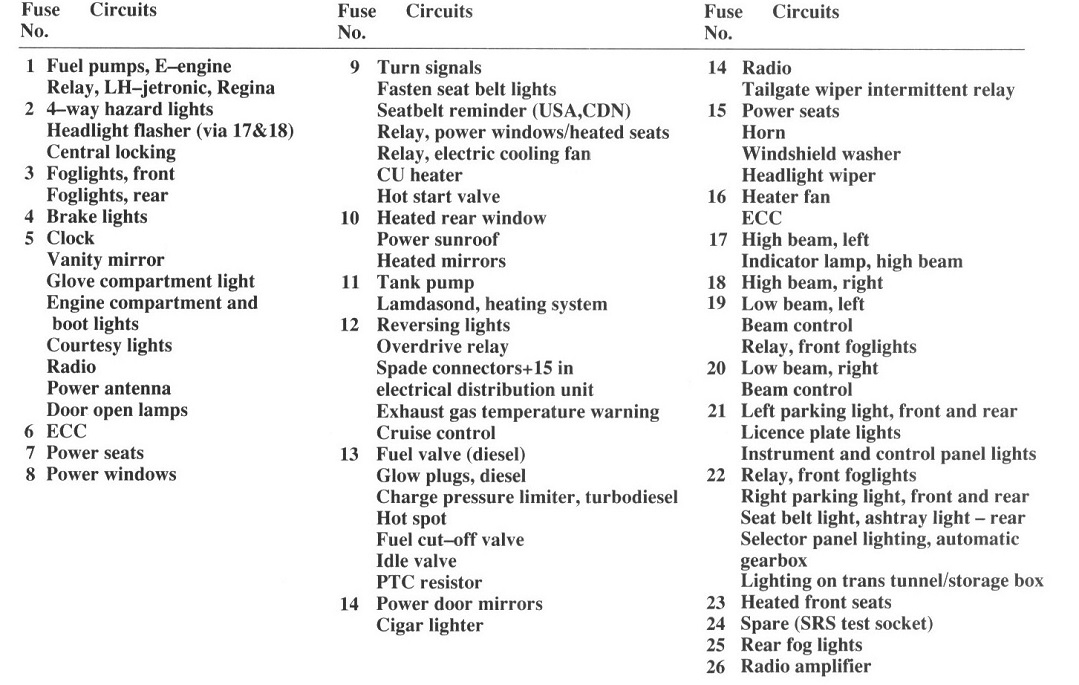
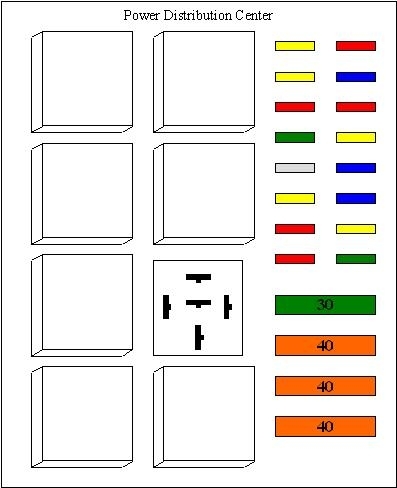
Hi guys. I too had a real hard time following Volvo's diagrams, so I was hesitant to get involved with a problem I probably can't see through to the end. However, if it will be of any help, I'm adding what little I was able to figure out. First let's be sure I'm looking at the right fuse. Fuse # 9 has the blue arrow pointing to it in the first drawing. In the second drawing I posted the fuse box layout. Fuse # 9 is listed as being for the turn signals, cooling fan, power windows, heated seats, and some systems I'm not familiar with. The third and fourth drawings are just of the fuse box layout expanded in two parts to make for easier viewing. I don't see any reference to the ignition system, so please forgive me if I looked up something wrong.
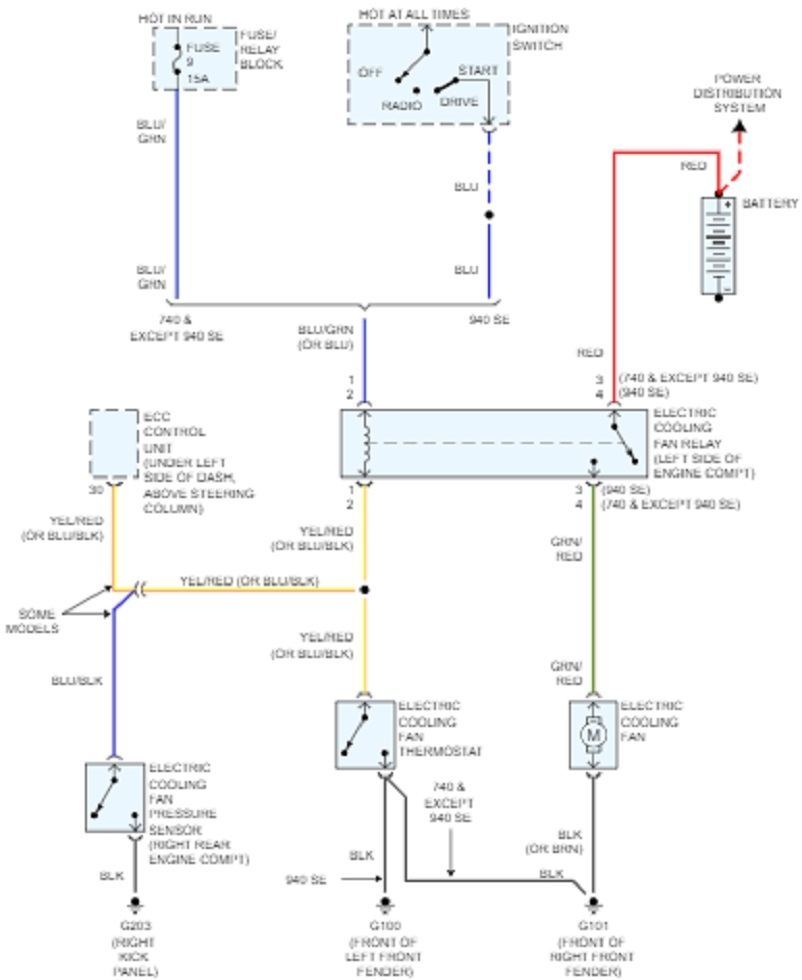
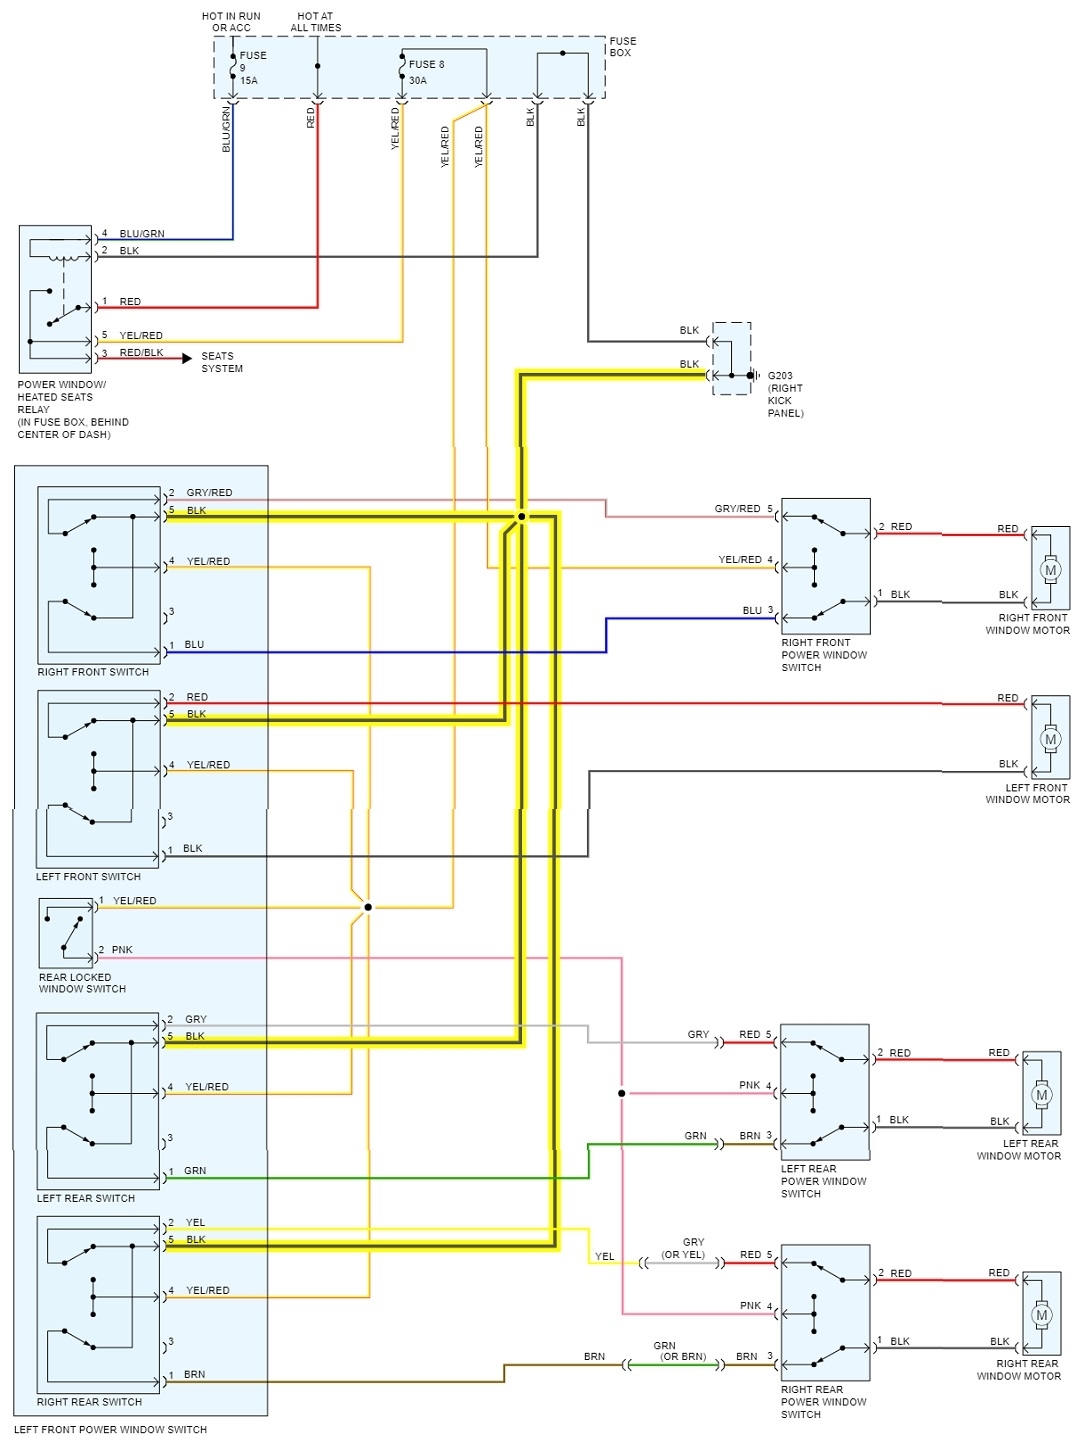
Since I went through the work of formatting some pertinent diagrams, I'm including them, again, if they will help. The fifth diagram is for the cooling fan circuit. The sixth one is for the power windows. In these two circuits, fuse # 9 isn't involved in the high-current side of the systems, so there's a good chance this is not the place to look for something shorted.
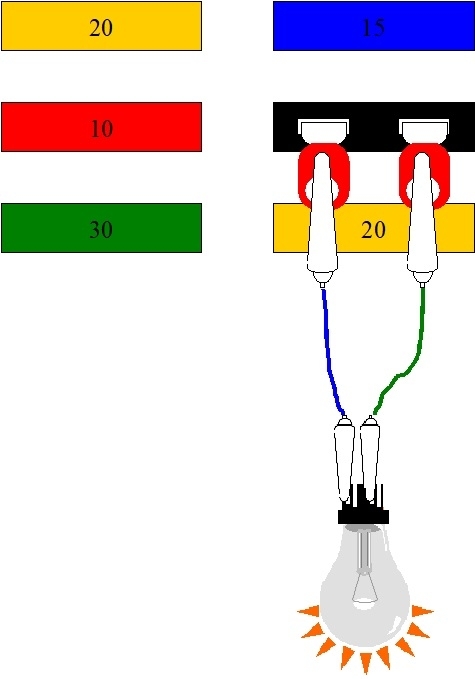
Here's a trick to let you work in the circuit without wasting a lot of replacement fuses. Replace the blown fuse with a light bulb. A 3157 brake light bulb works well. It will allow up to one amp of current to flow, so the circuit will still be protected. When the short is present and the circuit is powered up this way, the bulb will be full, normal brightness, and hot, so be careful that it isn't laying on something that will melt or burn. When you do something to remove the short, the bulb will get dim or go out, and the circuit will resume trying to work, but the bulb may limit current too much. In that case you can substitute a head lamp bulb. Those will allow around five amps to flow. When the short reappears, the circuit and wiring will still be protected as current won't go over five amps.
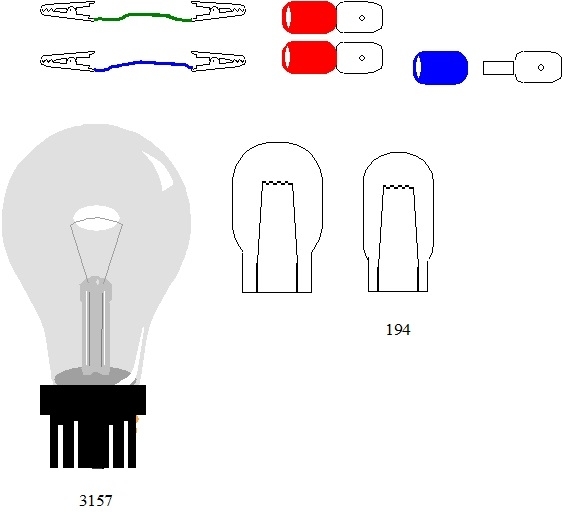
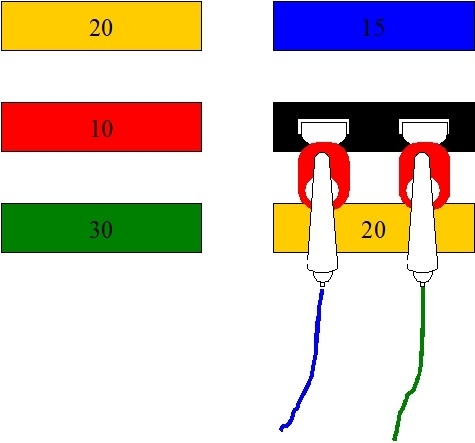
The procedure starts with drawings # 7 and 8 showing a typical fuse box. Drawing # 9 shows the needed items, a bulb, two clip lead / jumper wires, and two universal crimp-type spade terminals. Those terminals must not be fatter than the terminals on the fuse so as to not spread those terminals in the fuse box. That can lead to intermittent connections in the future. If your car uses an older round fuse, just attach the clip leads directly to the fuse box terminals. then there's no need for the spade terminals.
In drawing # 10, the terminals have been plugged into the fuse socket terminals, again, if that's the type of fuses you have. In # 11, the clip leads are attached, and in # 12, the bulb finishes this up.
Expect the bulb to be full brightness when you turn the ignition switch to the point the fuse had been blowing. When this occurs, you can start doing things to see what makes the short go away. That could include removing relays, unplugging connectors, wiggling or moving wiring harnesses around, and even opening and closing the doors. If your model has power window switches on the door panels, the wires running between the door hinges can become frayed or broken. Some bare wires could touch each other creating the short. The clue there is the test bulb will likely flicker bright and dim as the door is moved and the wires shift positions.
This trick can be used at a relay socket too. That can allow the circuit to be powered up without regard to turning on the ignition switch or waiting for a computer to turn on that relay. I'll watch in the background to see if you need any of my wondrous advice.
Images (Click to enlarge)
Sep 20, 2022 at 3:03 PM