Good evening,
The mode door is inside the dash. I posted a picture for you to view along with the procedure. The bad part is the dash has to be removed to gain access.
Roy
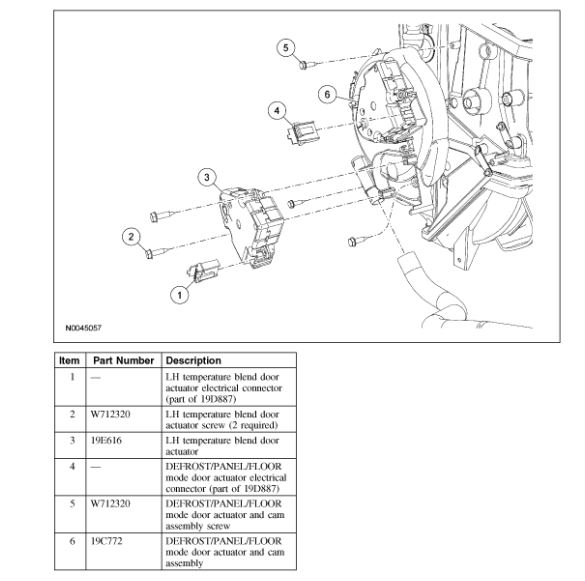
Removal and Installation
1. Turn the steering wheel to the straight-ahead position and turn the ignition switch to the OFF position.
- Remove the key.
2. Depower the supplemental restraint system (SRS). See: Air Bag(s) Arming and Disarming Service and Repair
3. Remove the floor console. See: Console > Service and Repair
4. Remove the selector lever or the gearshift lever.
Automatic: See Automatic Transmission/Transaxle / Shifter AT See: Shifter A/T > Service and Repair
Manual: See Manual Transmission/Transaxle / Shifter MT See: Shifter M/T > Service and Repair
5. Remove the LH and RH instrument panel side finish panels.
6. Remove the RH and LH weatherstrips from the front door openings near the instrument panel.
7. Remove the RH and LH A-pillar trim panels. See: Trim Panel > Service and Repair
8. Remove the RH and LH lower cowl panels.
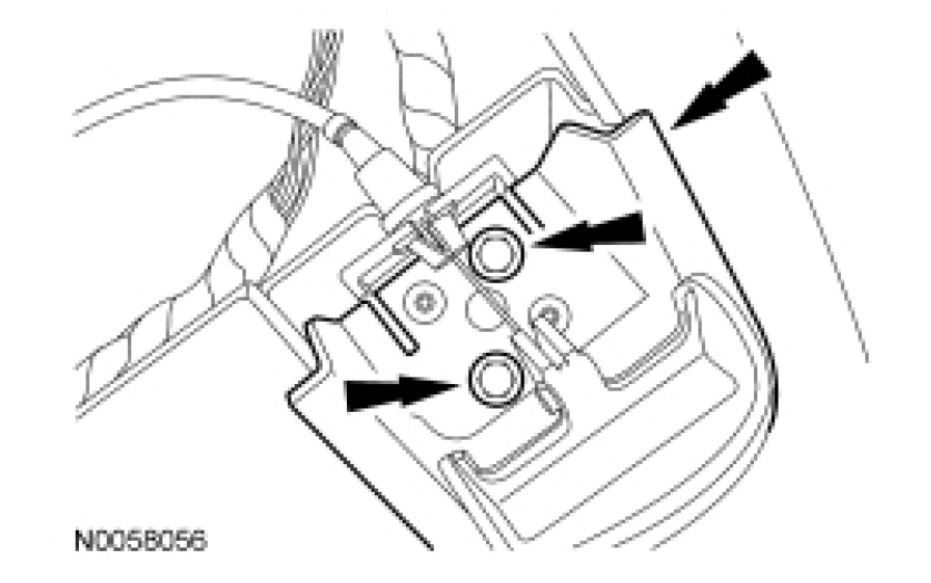
9. If equipped, remove the RH lower instrument panel insulator.
imageOpen In New TabZoom/Print
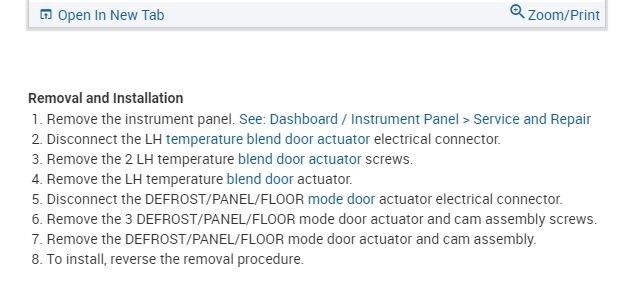
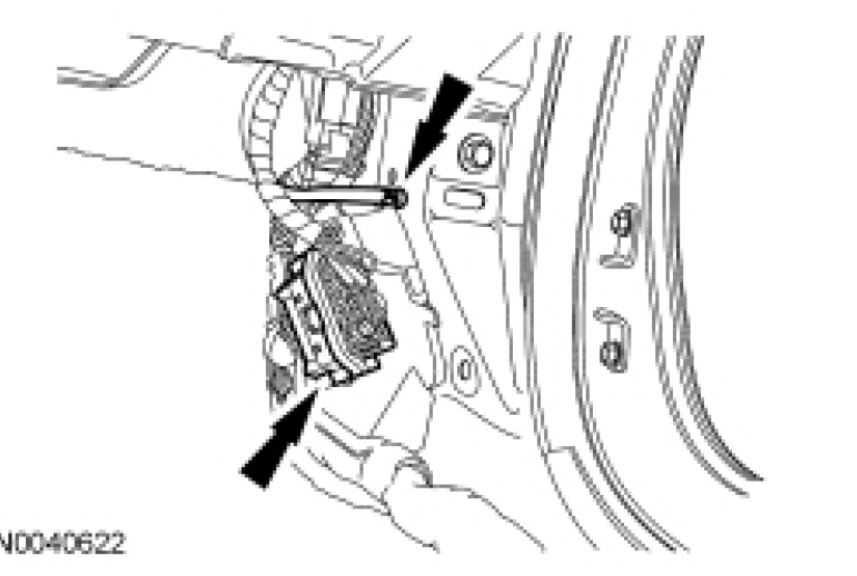
10. Disconnect the 2 electrical connectors located at the LH lower cowl.
imageOpen In New TabZoom/Print
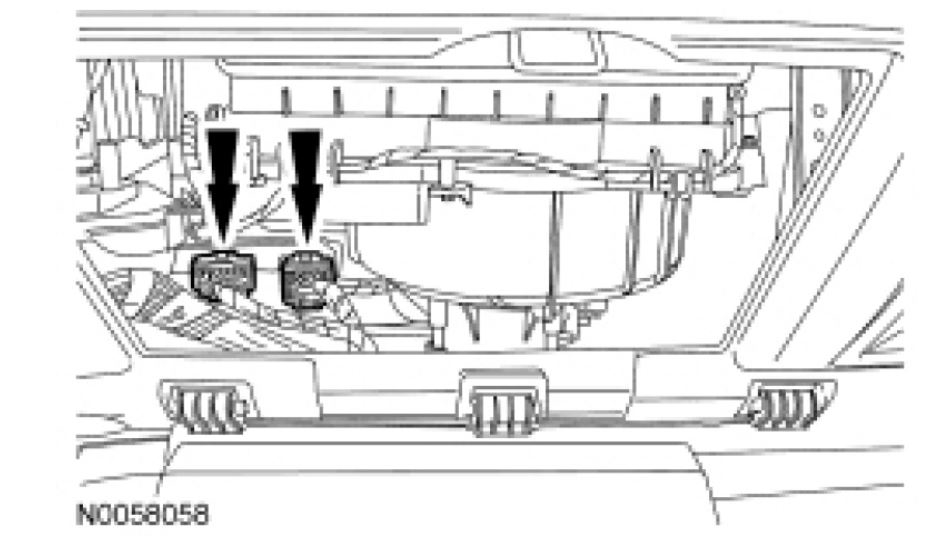
11. Remove the small gray connector and the large black connector from the Smart Junction Box (SJB) .
imageOpen In New TabZoom/Print
12. Remove the 2 screws and position the hood release handle aside.
imageOpen In New TabZoom/Print
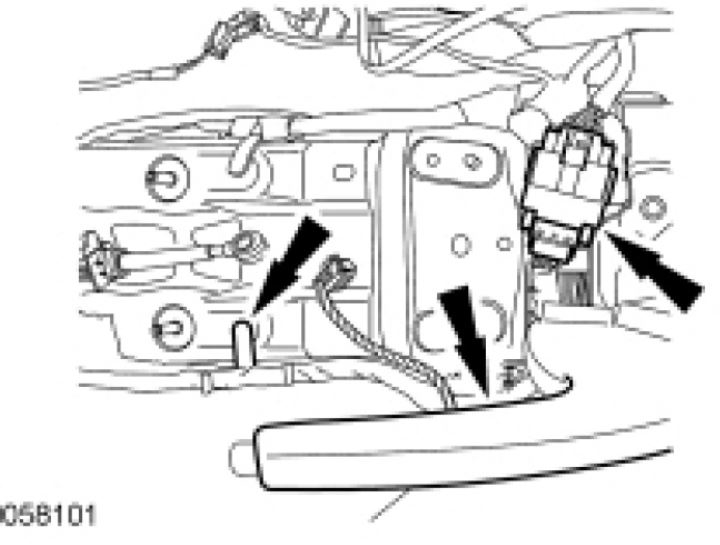
13. Disconnect the bulkhead electrical connector and the antenna cable located at the RH lower cowl.
imageOpen In New TabZoom/Print
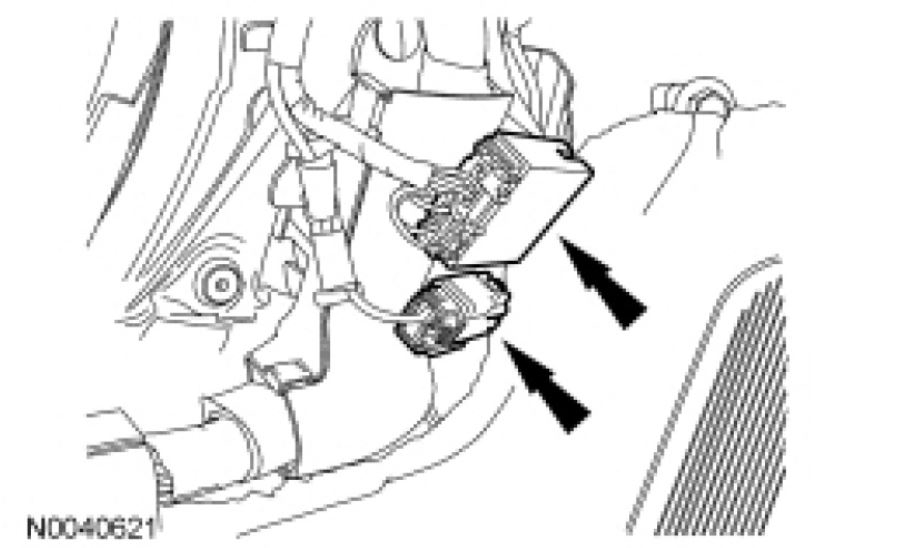
14. Fully lower the glove compartment door and disconnect the 2 A/C electrical connectors.
imageOpen In New TabZoom/Print
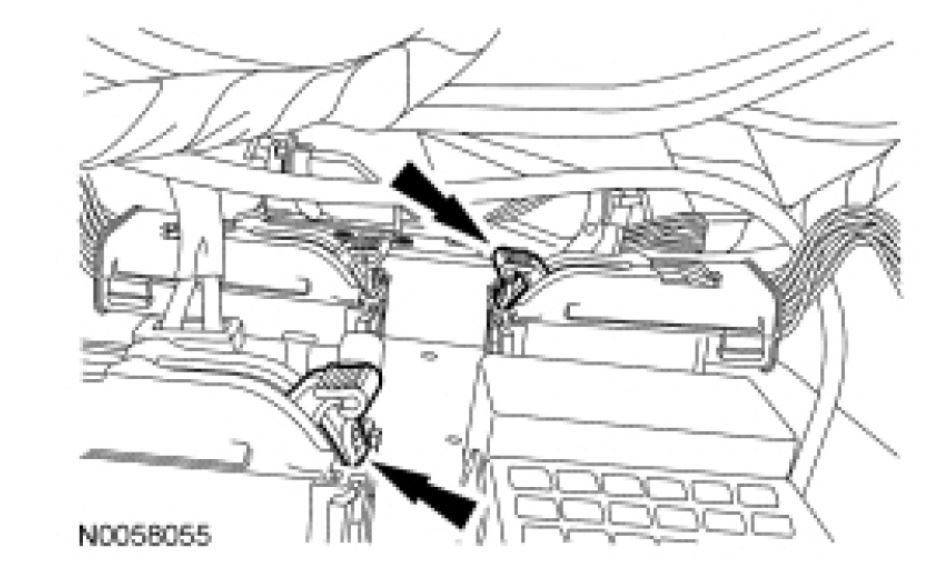
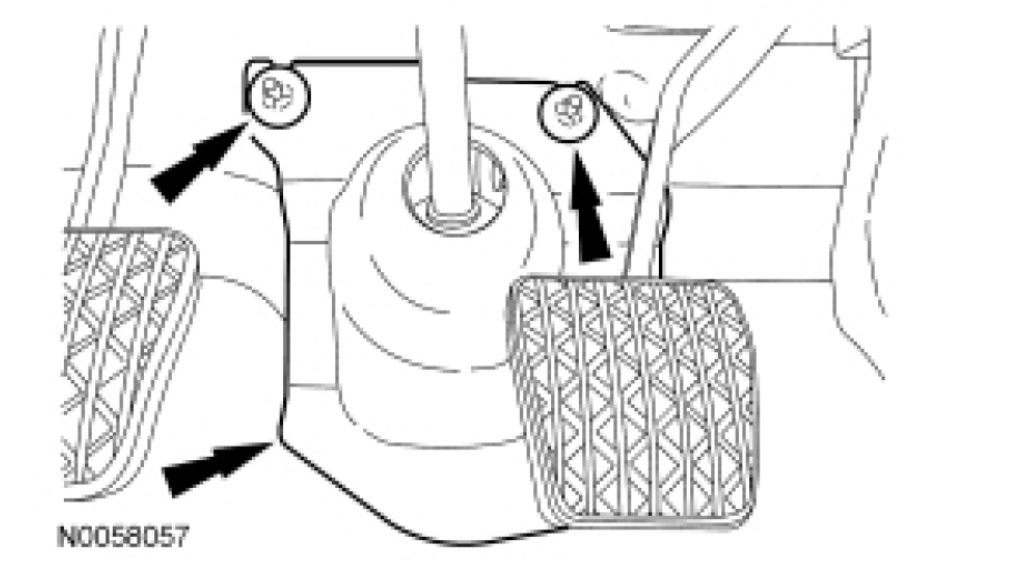
15. Disconnect the 2 electrical connectors and retainers located on the floor between the 2 front seats.
imageOpen In New TabZoom/Print
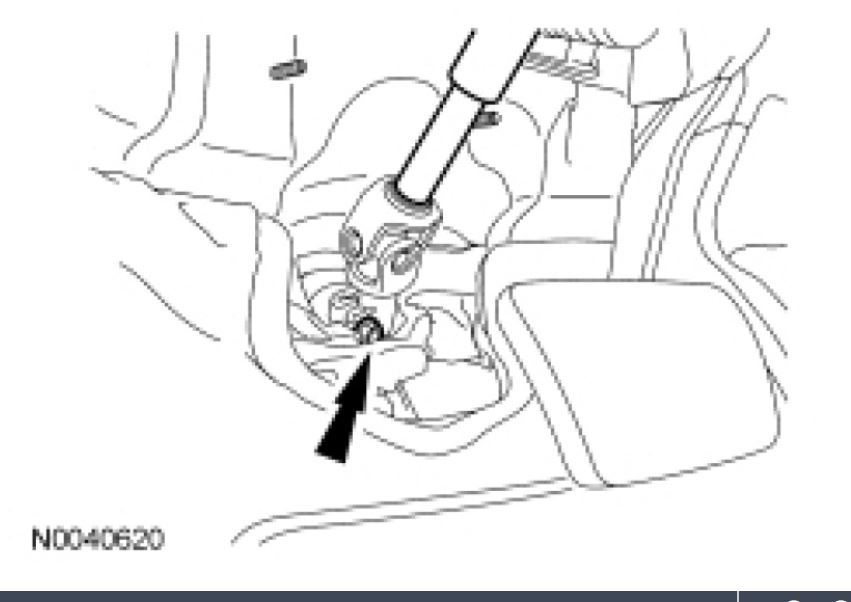
16. Remove the 2 nuts and position the steering column pinch bolt cover aside.
imageOpen In New TabZoom/Print
17. Remove and discard the steering column shaft-to-steering column bolt.
To install, use a new steering column shaft-to-steering column bolt and tighten to 25 Nm (18 lb-ft).
18. NOTICE: Do not allow the steering column shaft to rotate while the intermediate shaft is disconnected or damage to the clockspring may result. If there is evidence that the shaft has rotated, the clockspring must be removed and recentered. See: Restraints and Safety Systems
NOTE: Index-mark the steering column shaft position to the steering gear for reference during installation.
Detach the upper steering column shaft from the steering column.
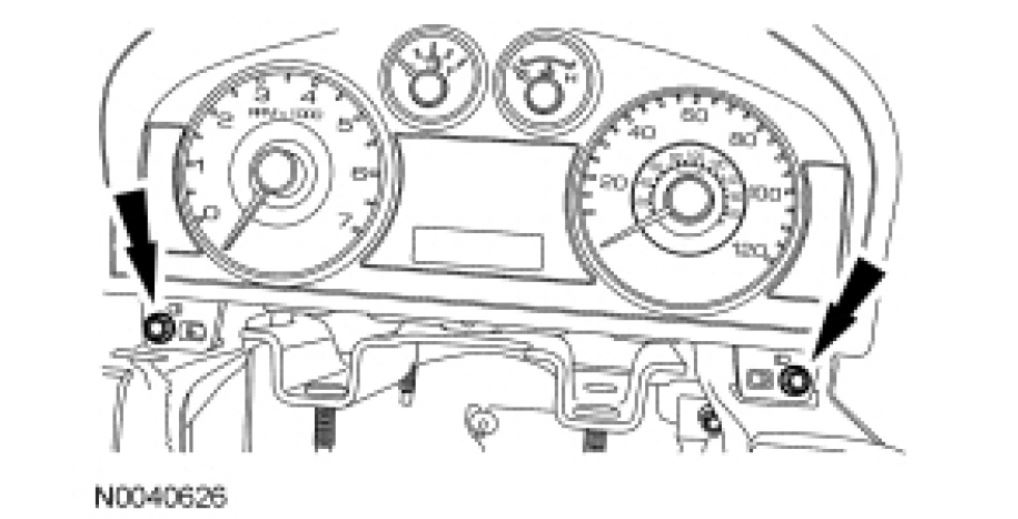
19. Remove the instrument cluster finish panel.
imageOpen In New TabZoom/Print
20. Remove the instrument cluster.
Remove the 2 screws.
Remove the instrument cluster.
Disconnect the electrical connector.
imageOpen In New TabZoom/Print
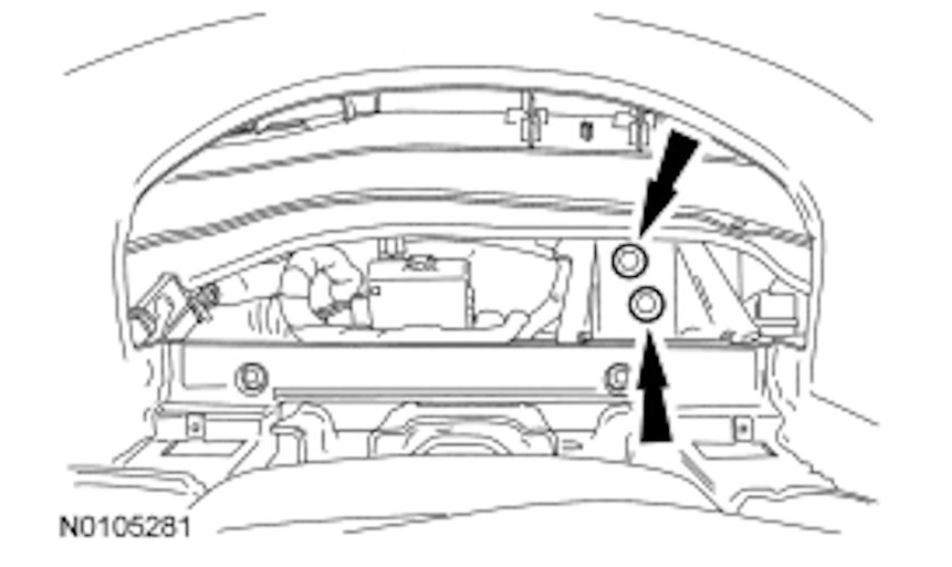
21. Through the instrument cluster opening, remove the 2 instrument cluster opening bolts.
To install, tighten to 18 Nm (159 lb-in).
22. Remove the 2 instrument panel lower bolts.
To install, tighten to 8 Nm (71 lb-in).
23. Remove the 2 instrument panel center brace bolts.
To install, tighten to 20 Nm (15 lb-ft).
24. NOTICE: To avoid damaging the instrument panel, the aid of an assistant is required to carry out this step.
Remove the instrument panel.
Remove the 3 instrument panel side bolts.
To install, tighten to 18 Nm (159 lb-in).
25. To install, reverse the removal procedure.
Images (Click to enlarge)
Nov 20, 2019 at 3:56 PM