Good morning.
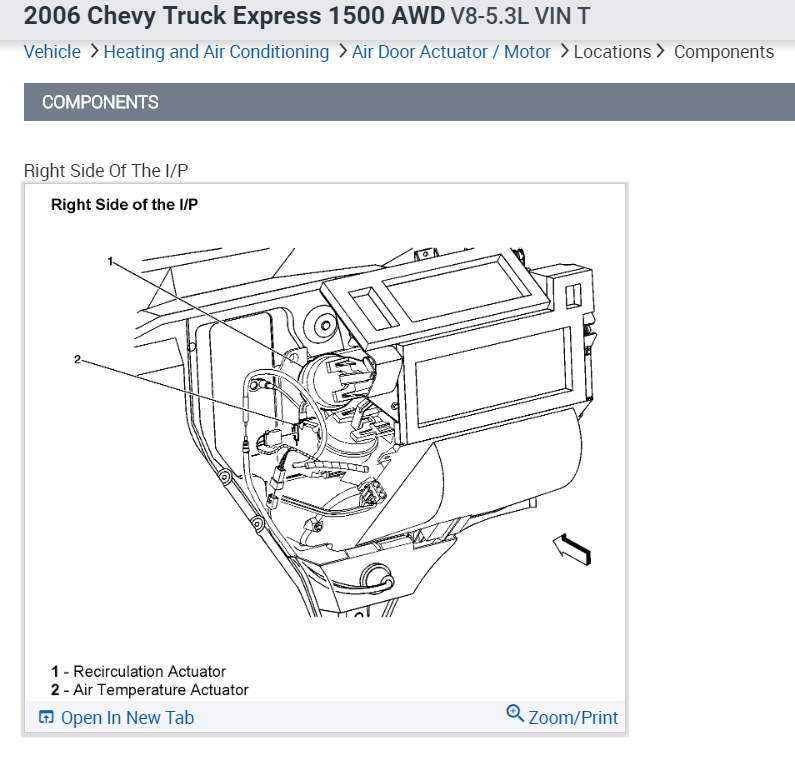
The actuator is on top of the heater case on the passenger side of the dash. The instrument panel must be removed to gain access to the actuator the full list is in the diagrams below the text.
Roy
Removal Procedure:
Caution: Refer to SIR Caution in Service Precautions.
Caution: Refer to Battery Disconnect Caution in Service Precautions.
1. Disconnect the battery negative cable(s).
2. Remove the right knee bolster. Refer to Knee Bolster Replacement - Right (See: Dashboard / Instrument Panel > Removal and Replacement).
3. Remove the body control module (BCM).
4. Disable the SIR system. Refer to SIR Disabling and Enabling Zone 3 and SIR Disabling and Enabling Zone 5 in Restraint Systems.
5. Remove the left knee bolster. Refer to Knee Bolster Replacement - Left (See: Dashboard / Instrument Panel > Removal and Replacement).
6. Remove the left knee bolster bracket. Refer to Knee Bolster Bracket Replacement - Left (See: Dashboard / Instrument Panel > Removal and Replacement).
7. Remove the steering column.
8. Remove the instrument panel (I/P) cluster trim plate bezel. Refer to Trim Plate Bezel Replacement - Instrument Panel (I/P) Cluster (See: Dashboard / Instrument Panel > Removal and Replacement).
9. Remove the instrument cluster assembly.
10. Remove the left hinge pillar trim panel. Refer to Trim Replacement - Hinge Pillar (See: Trim Panel > Removal and Replacement) in Interior Trim.
11. Remove the right hinge pillar trim panel. Refer to Trim Replacement - Hinge Pillar (See: Trim Panel > Removal and Replacement) in Interior Trim.
12. Remove the right knee bolster bracket. Refer to Knee Bolster Bracket Replacement - Right (See: Dashboard / Instrument Panel > Removal and Replacement).
13. Remove the passenger side SIR module.
14. Remove the I/P upper trim pad. Refer to Trim Pad Replacement - Instrument Panel (I/P) Upper (See: Dashboard / Instrument Panel > Removal and Replacement).
15. Remove the engine cover. Refer to Engine Cover Replacement (See: Access Cover, Engine > Removal and Replacement > Engine Cover Replacement) in Interior Trim.
16. Remove the radio and mounting bracket, if equipped.
17. Remove the I/P compartment, if equipped. Refer to Compartment Replacement - Instrument Panel (I/P) (See: Glove Compartment > Removal and Replacement).
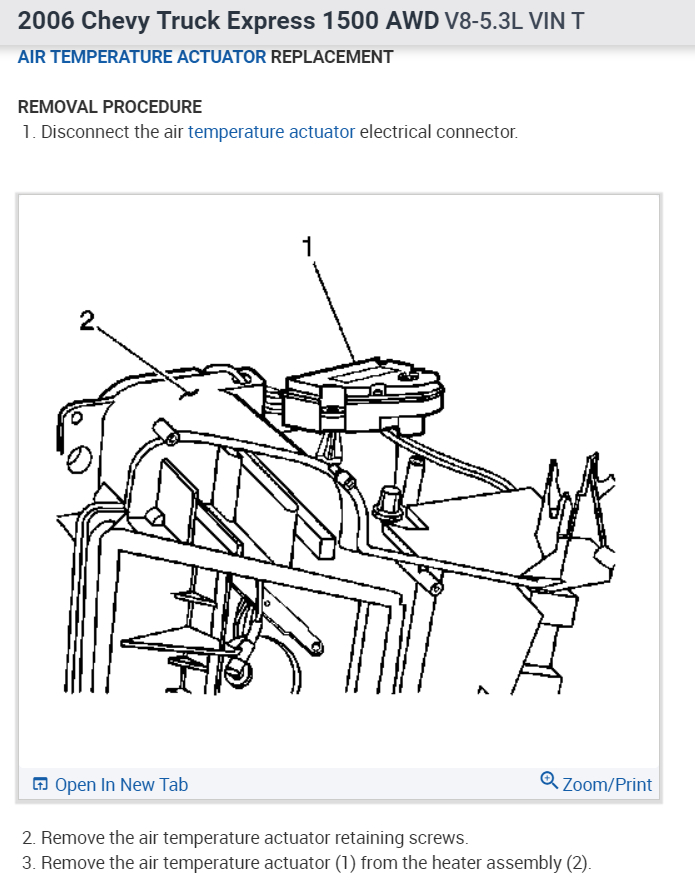
18. Remove the heater and the A/C control.
19. Remove the steering column wiring harness from the instrument panel carrier.
20. Remove the bolts that retain the I/P carrier to the vehicle.
21. Rotate the I/P carrier out and downward in order to gain access to the HVAC ducts and the electrical harness.
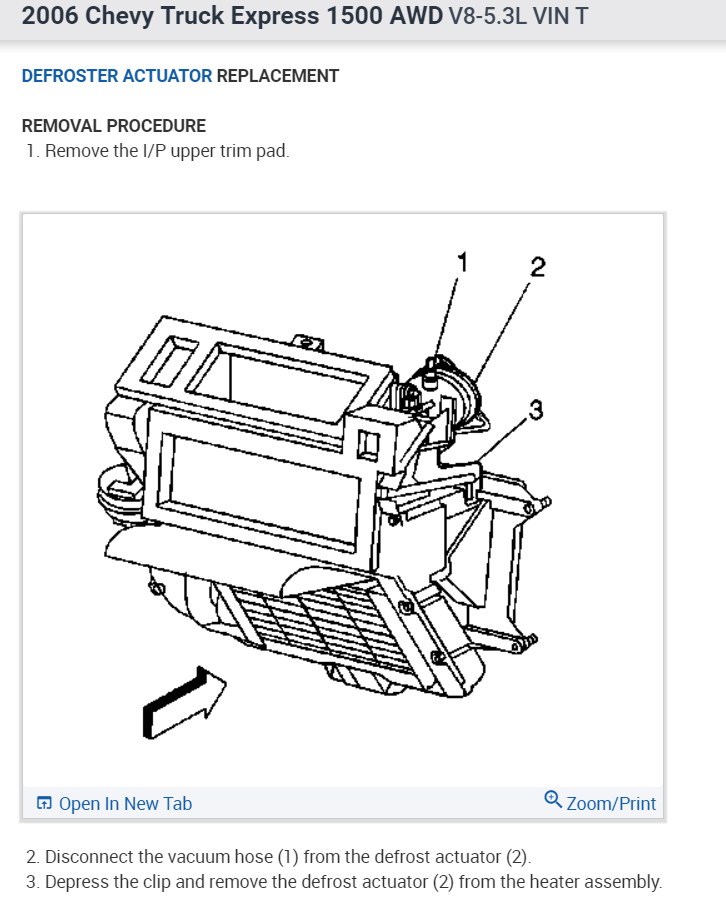
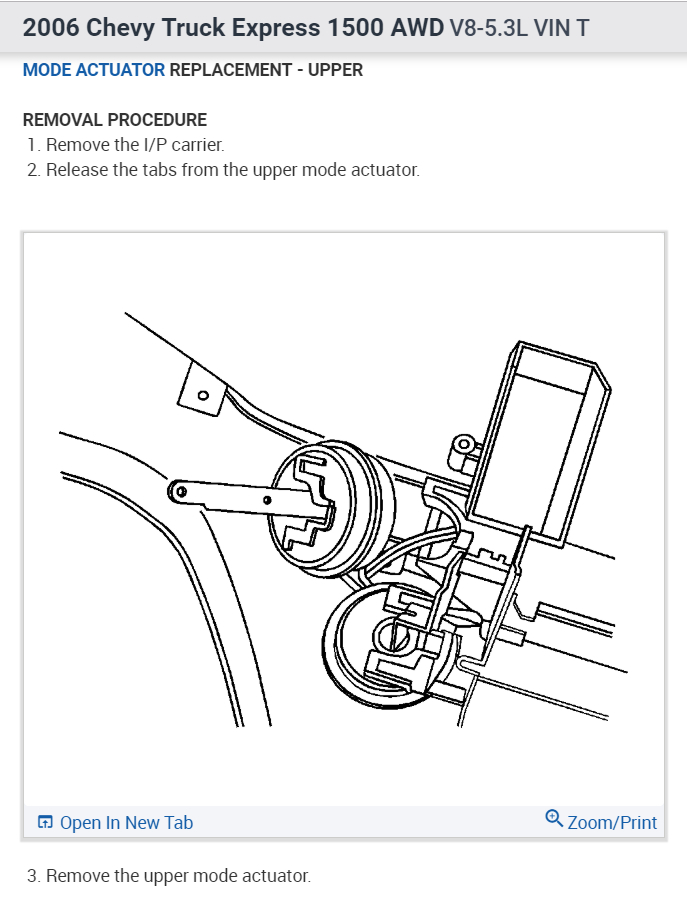
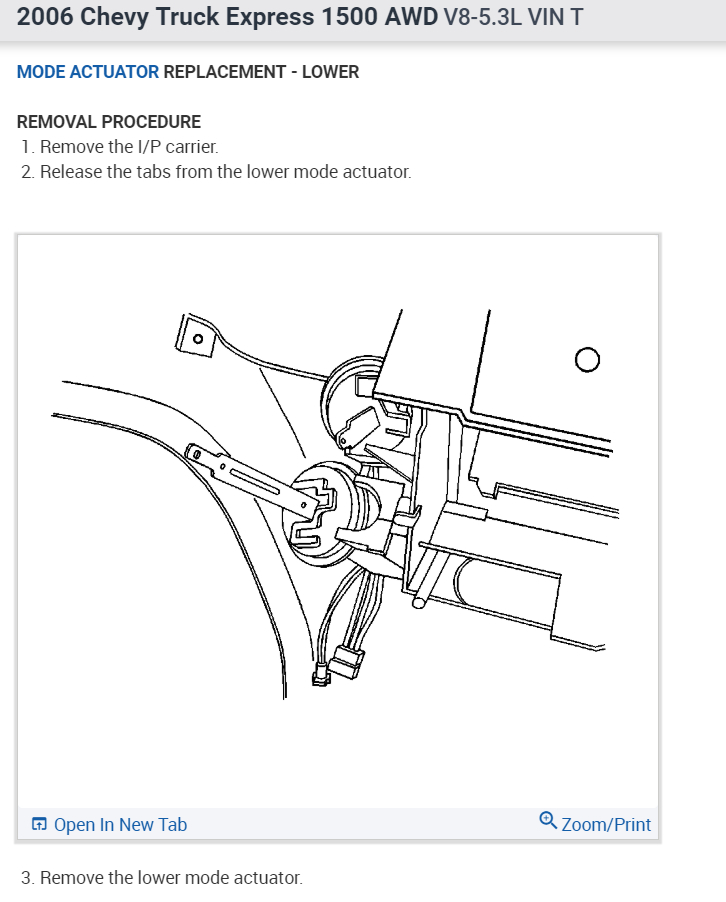
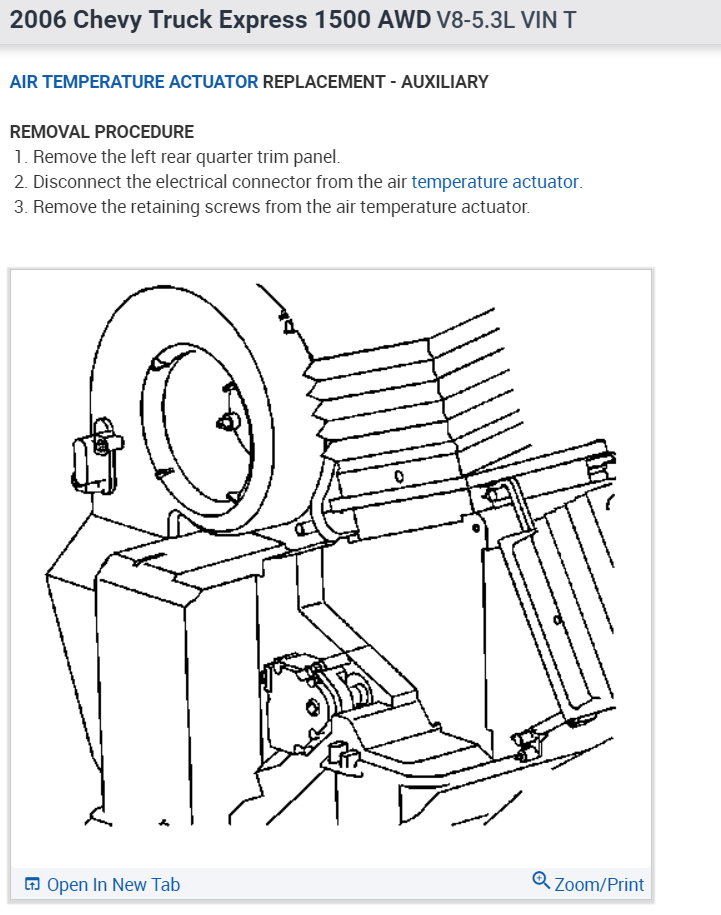
Check out the diagrams (Below). Please let us know if you need anything else to get the problem fixed.
Images (Click to enlarge)
Jun 6, 2018 at 5:53 AM