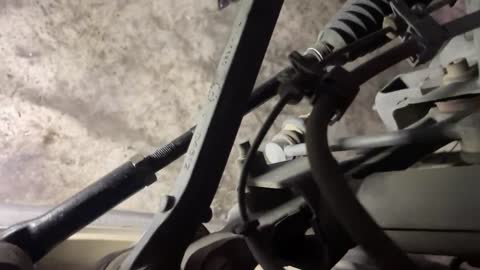
This is actually a copy from some Asian import designs. Some of the ball joints are built as part of the control arms and are replaced as the complete assembly. Those cost a lot less than the cost of labor to replace an individual ball joint. No special tools are needed. There is one common mistake a lot of competent do-it-yourselfers make though to be aware of. That being when to tighten the pivot bolts for the rubber bushings. Too many people do that while the vehicle is raised up with the suspension hanging down. Instead, the vehicle must be lowered onto the tires so it's sitting at normal ride height. That's when the bolts must be tightened. If they're tightened with the suspension hanging down, that is where the center tube of the bushing will be clamped. That puts the rubber part in a permanent twist when the vehicle is lowered to the ground. That twist greatly reduces the life of the bushing.
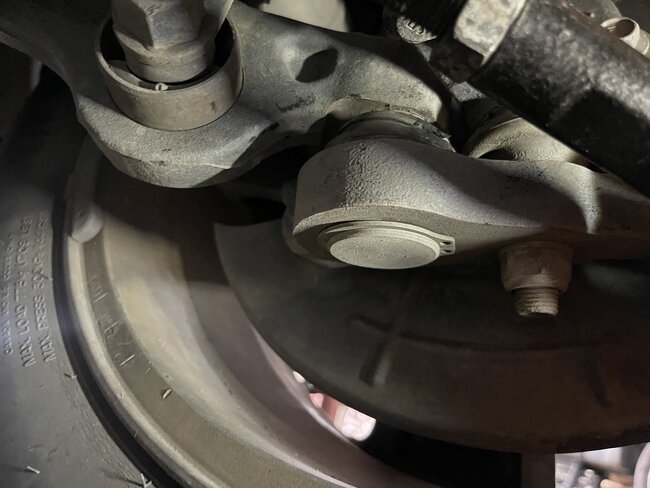
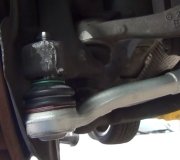
Thank you for the photos. The second one shows the other style of ball joint. This is a very common pressed-in joint. Every manufacturer used these at one time or another. You need a special C-clamp tool. The photos below show two different versions of that tool. The first one has been around since forever. I bought mine in the mid 1980s. There's a larger version of that one now to handle pickup trucks. The second photo shows a newer version. You can find these at Harbor Freight Tools, on the tool trucks that show up at every shop each week, and you can usually borrow one from an auto parts store that borrows or rents tools. In my city, they make you buy it, then you get a full refund when you take it back. If you prefer to keep a tool, you still return it then they give or order you a brand new one.
I have been known to get these pressed-in joints out with a hammer, but I would only attempt doing it that way on my older vehicles, never for a customer. You can't pound the new one in without mucking it up. This job is so much easier with the C-clamp and cones. One hint though, when pressing the new joint in, some people do that with a 1/2" air impact wrench to turn the pressing screw. That goes fast but you can't really keep an eye on the joint or if the cones bounce off-center. I prefer to tighten the pressing screw with a hand wrench, then tap the end of the screw with a hammer. The shock bounces the joint in enough that you can tighten the screw some more by hand. It also doesn't rattle cones or cause them to shift position. A joint can be replaced this way in three to four minutes.
The next thing to consider is loose or sloppy tie rod ends and ball joints do not cause shaking. They can allow shaking to become more noticeable, but any vibration or shaking has to be caused by something that is rotating. That can be a bent wheel, a warped brake rotor, or a tire that's out of balance or has a broken belt. Worn inner CV joint housings can cause an elusive shaking in the steering wheel during high loads or when accelerating, but that usually goes away at higher speeds.
The person doing the alignment is supposed to perform an inspection of the steering and suspension parts, and "read" the tire wear patterns. Given the age of the vehicle, that inspection should include measuring chassis ride height. No car can be aligned with worn parts because they are what holds each wheel in alignment. If we charge for an alignment when we know we can't deliver proper results, you're not getting what you paid for.
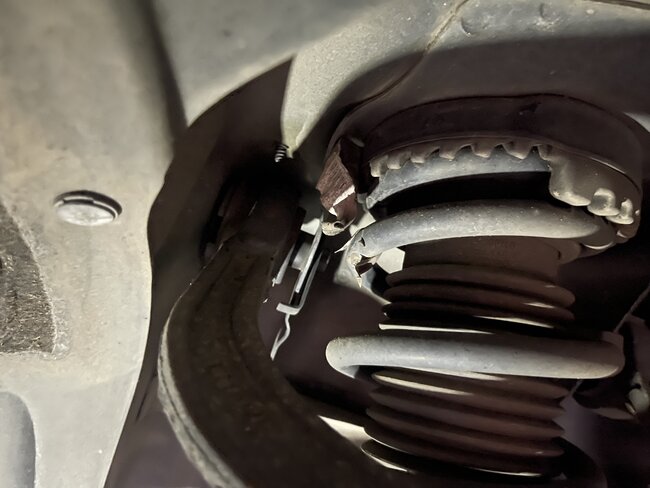
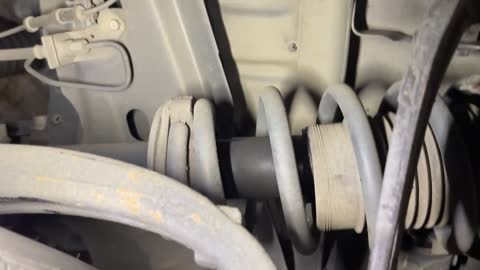
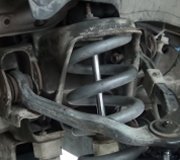
Chassis ride height sags with age from weak coil springs. There is labor time and some risk to safety when working with those springs. An alternative that is a much better value is to install a pair of "Quick Struts", especially if you also see movement between the strut's shaft and upper body, or when the upper mounting plate is worn. You get all new parts including the strut, coil spring, upper mounting plate, and bumper or cushion, already assembled. That makes it a simple bolt-on item.
If your car's ride height is still okay, those Quick Struts can still be the better choice because even though they cost a little more, you save more than that in lower labor cost. When the ride height is low, an alignment can still be performed, but the numbers on the computer screen only apply to a car that's standing still. This doesn't take into account the arcs and motions the parts and wheels go through as the vehicle bounces up and down on the road. Even though the numbers appear to be perfect, incorrect ride height can still result in miserable tire wear.
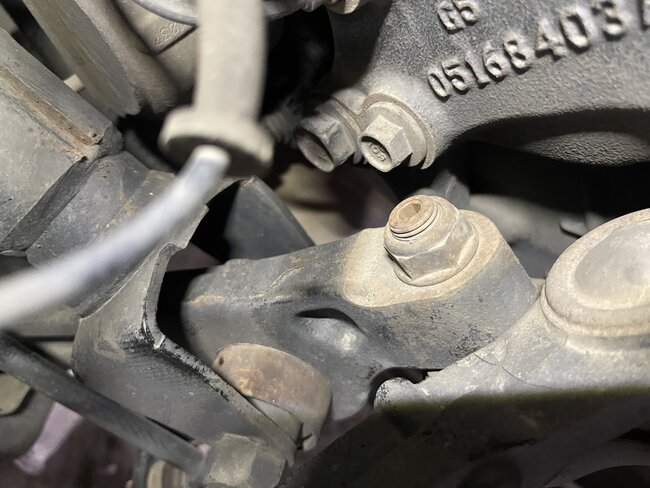
When you replace this pressed-in ball joint, note the snap ring on the bottom. That's just there for added insurance so it can't pop out on its own. Remove that snap ring, and unbolt and remove the tapered stud from the spindle. One of the hollow cones in the tool kit will slip over the tapered stud and joint's body, and rest around it on the control arm. One end of the C-clamp goes over that cone. You'll need a disc on the cone too for the tapered stud to pass through as it is pressed out. Use the disc with the larger center hole, (left one in the red case in the first photo). The ridges on those discs mate with the cones to keep them from sliding off. All you need on the bottom is to push the joint up into the cone with the pressing screw. You can add the other cast iron disc in there if you want to, but with that in there, the joint might not get pushed far enough to fall out. If that happens, finish that procedure without the extra disc. On the bottom of the disc on the right corner in the photo, there's a hole that mates with the end of the pressing screw to keep them from sliding apart. As before, I like to do this with a hand wrench and a few taps with a hammer on the end of the pressing screw.
A smaller-diameter cone sits on the new ball joint's flange to pull the joint into the hole on the control arm. The C-clamp is used in the same orientation, but now you need a larger cone on the bottom for the joint to come into, and a disc on the cone for the pressing screw to push against. This is much easier to do than it is to describe. There will be a sheet of instructions with the kit to show this in better detail.
As a side note, some pressed-in ball joints go in the other way, (pressing them down to remove them, and up to install). Some of those ball joints are built with a metal plate on the bottom, (with the threaded hole for a grease fitting), instead of being part of the housing. Those plates are thin and will become badly dented if you press on them to push them in. All you need is the disc with the smaller center hole to press on the joint's housing. This way the joint can even be pressed in with the grease fitting already installed, but I don't recommend it. I always seem to break those fittings off in the process.
Let me know if this helps or if you have more questions.
Tuesday, April 4th, 2023 AT 5:21 PM