Hi and welcome to 2CarPros.
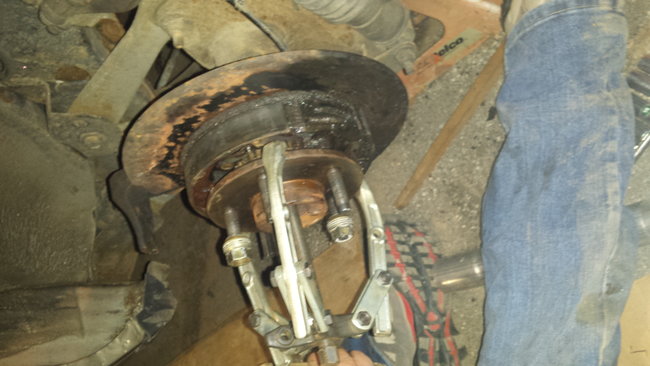
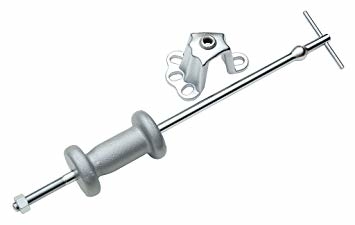
If he is trying to use the 3 jaw puller, it won't work. In reality, that is a single piece and he is pulling on the same thing he is pushing on. It can't move. Either it has to bend or break under those conditions. What he needs is a slide hammer. It will bolt on to the studs and then he will slide the handle outward and that will pull the axle. Most any parts store will have one and rent it to you. It's called a slide hammer. Some of these can really be hard to get out, so tell him not to be afraid to get a heaver slide hammer and hit it hard in an outward swing.
Here are the directions for removing the axle shaft. The attached pictures correlate with these directions. The first 22 pictures correlate with axle removal.
__________________________
Axle Shaft
Removal
1. Position the vehicle on a hoist.
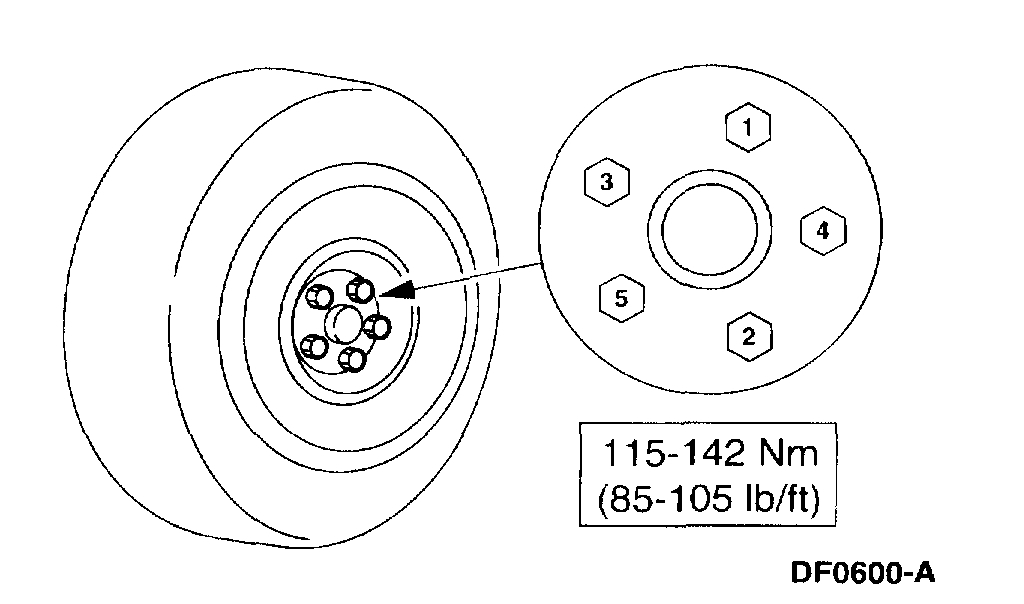
2. CAUTION: Do not use heat to loosen a seized wheel nut. Heat can damage the wheel and the rear wheel bearings.
Loosen the wheel nuts.
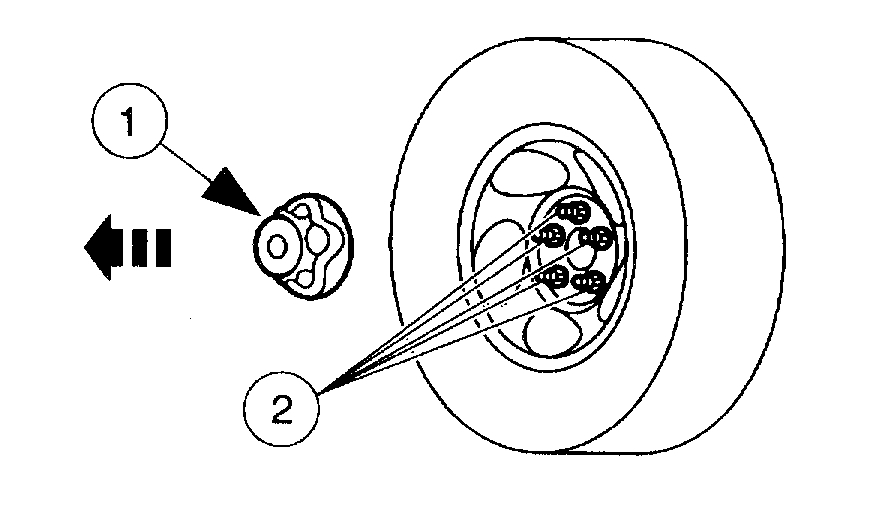
1 Remove the center cap.
2 With the weight of the vehicle on the wheels, loosen the wheel nuts.
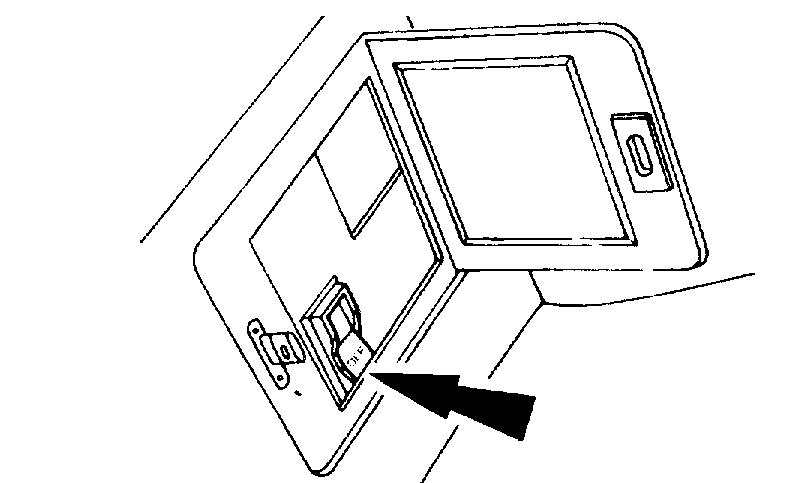
3. WARNING: When equipped with rear air springs, the electrical power to the air suspension system must be shut off prior to hoisting, jacking or towing an air suspension vehicle. This can be accomplished by turning off the air suspension switch located in the LH side of the luggage compartment. Failure to do so can result in unexpected inflation or deflation of the air springs, which can result in shifting of the vehicle during these operations.
Turn the air suspension switch off.
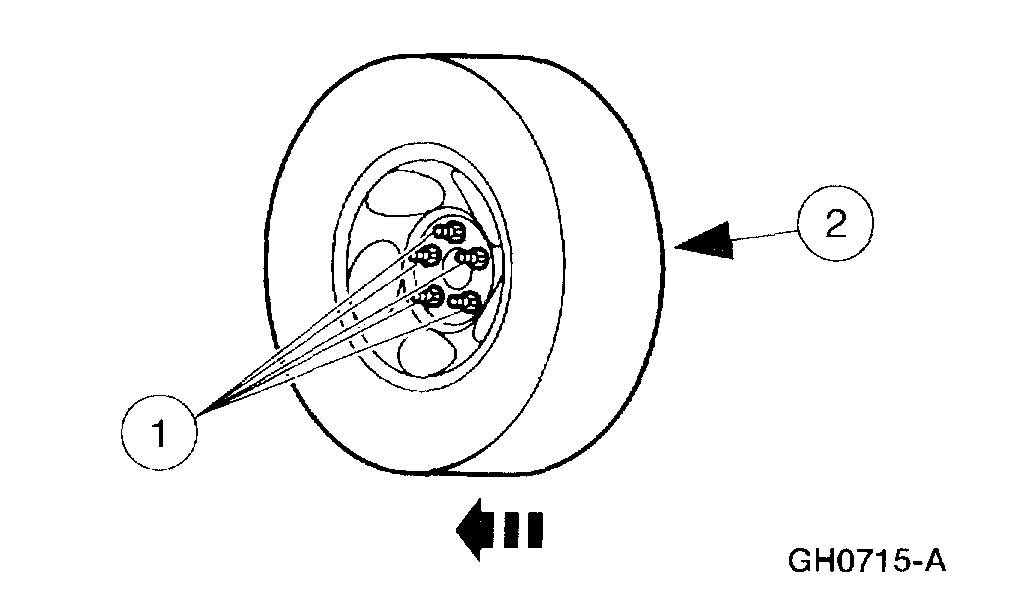
4. Remove the rear wheel and tire assembly.
1 Remove the wheel nuts.
2 Remove the wheel and tire assembly.
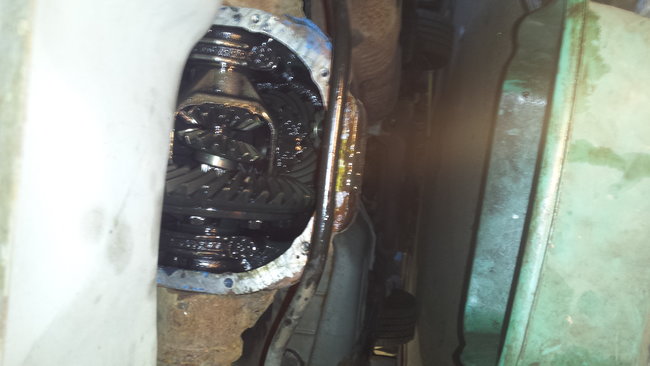
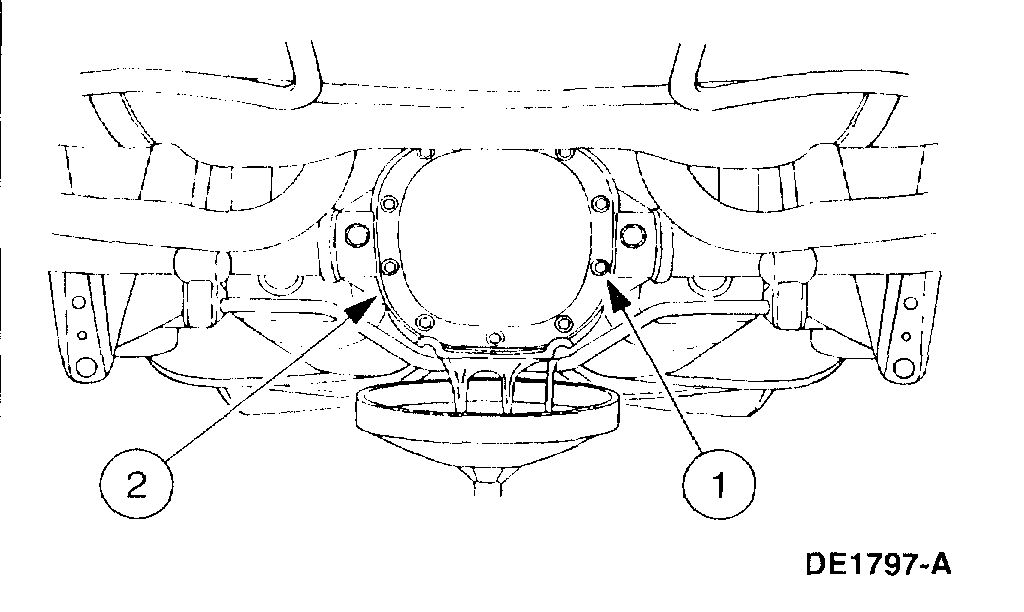
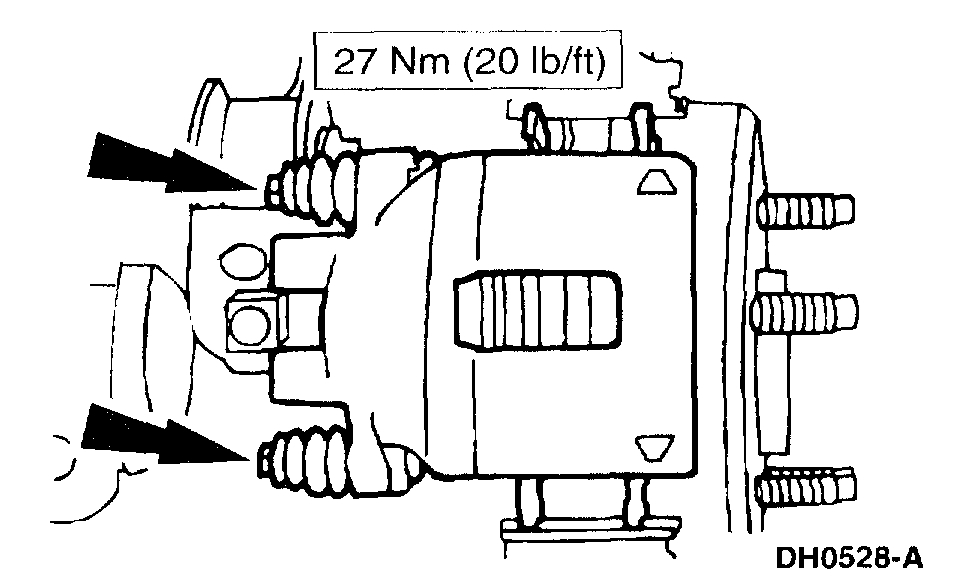
5. Remove the differential housing cover.
1 Remove the 10 differential housing cover bolts and drain the lubricant from the rear axle housing.
2 Remove the differential housing cover.
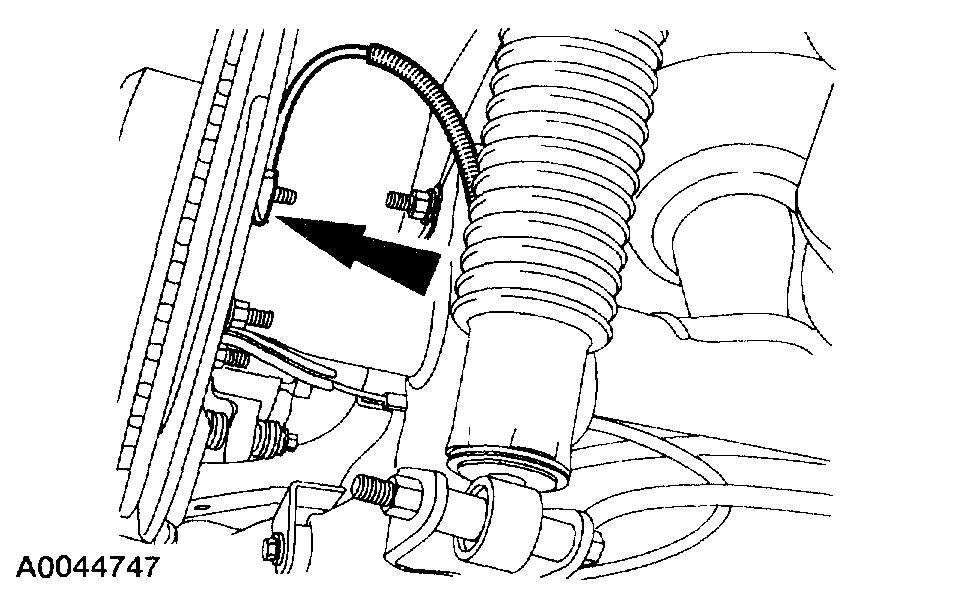
6. Remove the rear brake anti-lock sensor.
7. NOTE: When removing the rear brake caliper in this procedure, it is not necessary to disconnect the hydraulic lines.
Remove the rear brake caliper and the brake disc.
^ Support the rear brake caliper with mechanics wire.
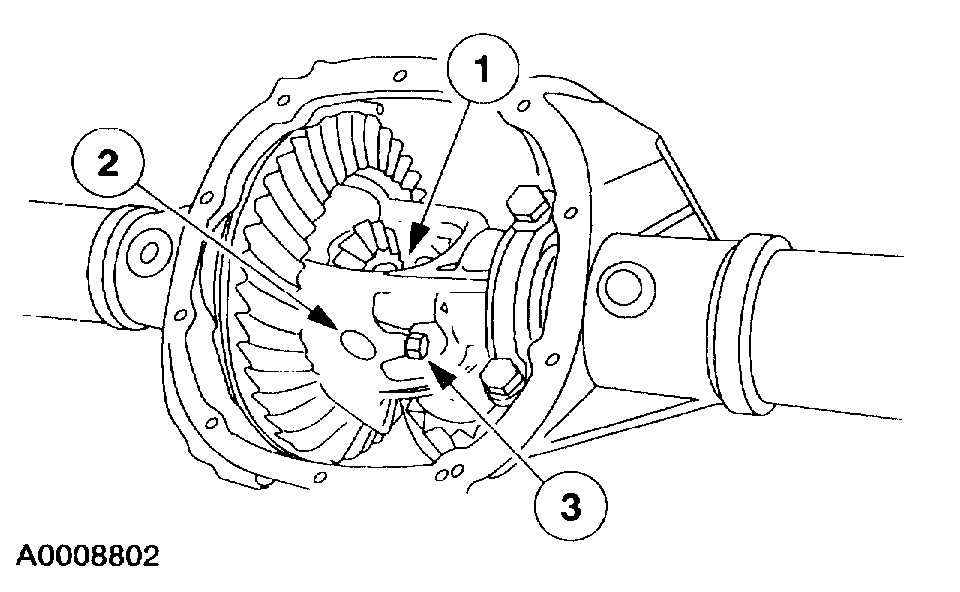
8. CAUTION: Once the differential pinion shaft has been removed, turning the differential case or an axle shaft can cause the differential pinion gears to fall out of the assembly. This can result in chipped or damaged components.
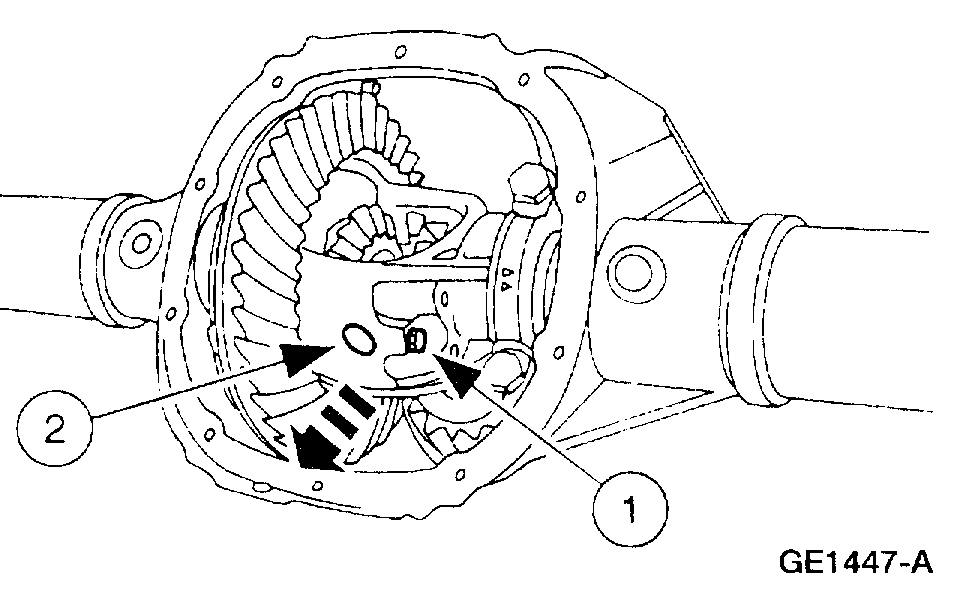
Remove the differential pinion shaft.
1 Remove the differential pinion shaft lock bolt.
2 Remove the differential pinion shaft.
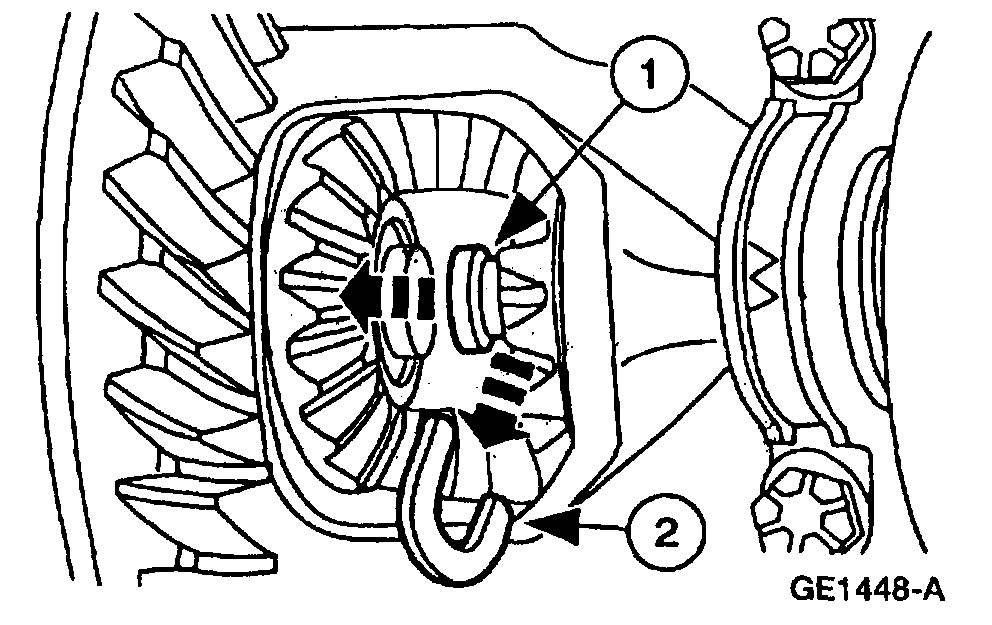
9. CAUTION: Do not damage the rubber O-ring in the U-washer groove.
Remove the U-washer.
1 Push the axle shaft inboard.
2 Remove the U-washer.
10. Reinstall the differential pinion shaft.
1 Push the axle shaft outboard.
2 Install the differential pinion shaft
3Install the differential pinion shaft lock bolt finger-tight.
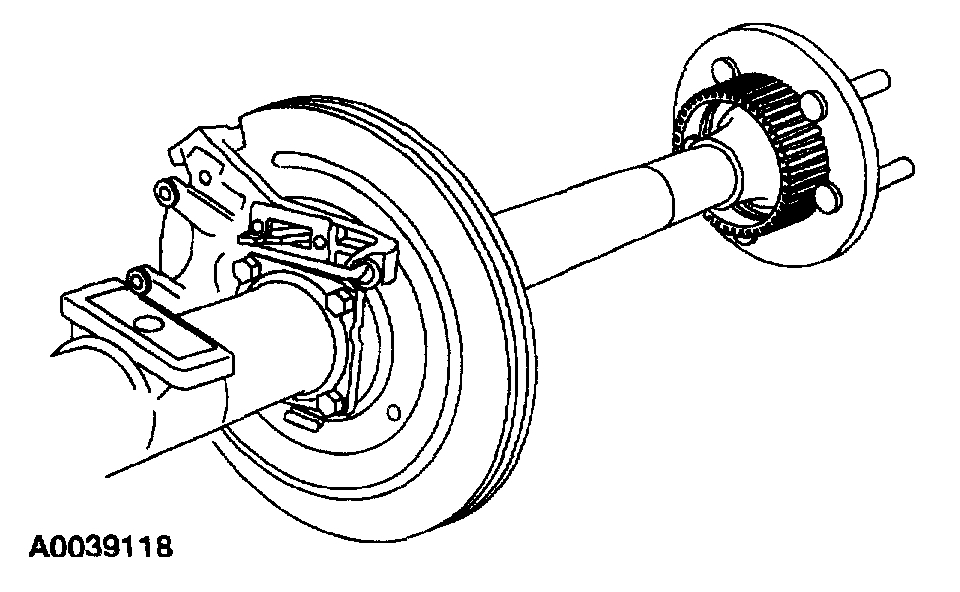
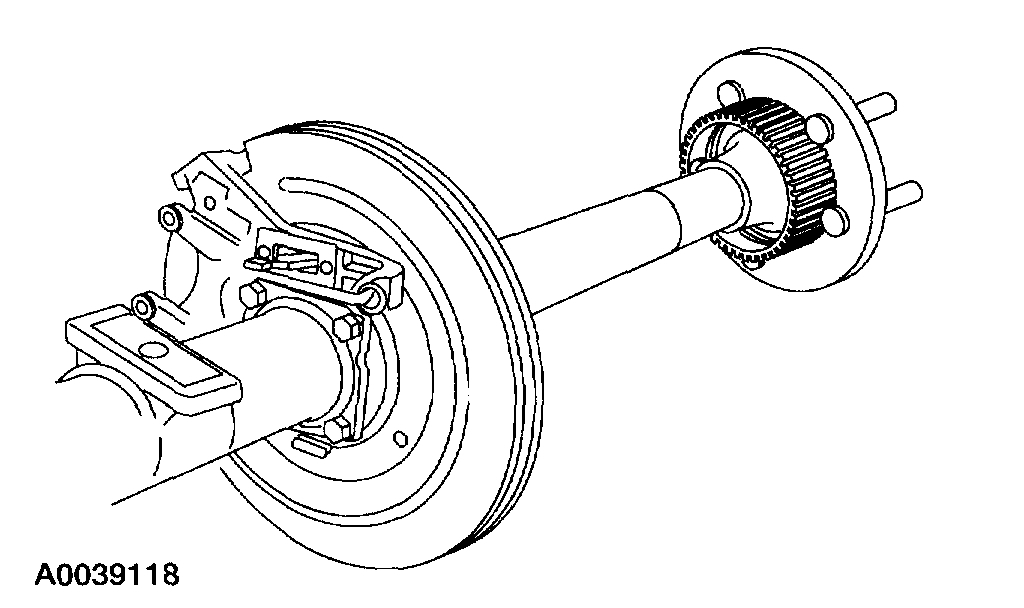
11. CAUTION: Do not damage the wheel bearing oil seal.
Remove the axle shaft.
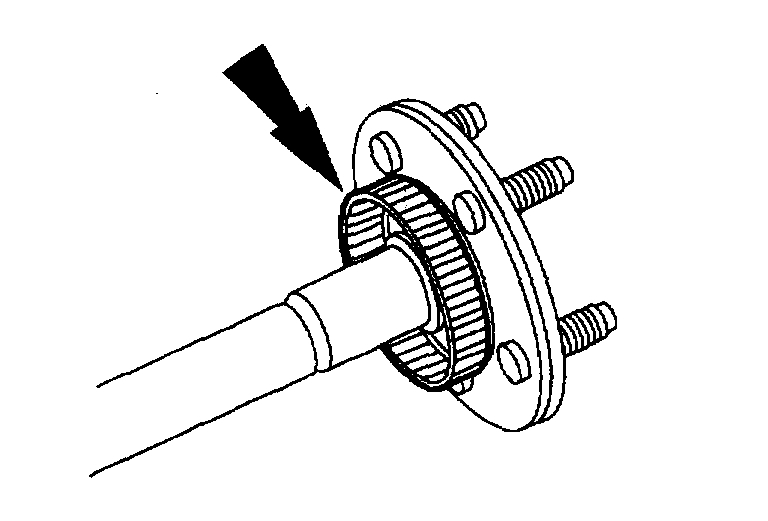
12. Using a thin-blade cold chisel between the rear brake anti-lock sensor indicator and the axle shaft, strike the chisel evenly around the flange. Force the rear anti-lock sensor indicator off the rear brake anti-lock sensor indicator journal. Discard the rear brake anti-lock sensor indicator.
Installation
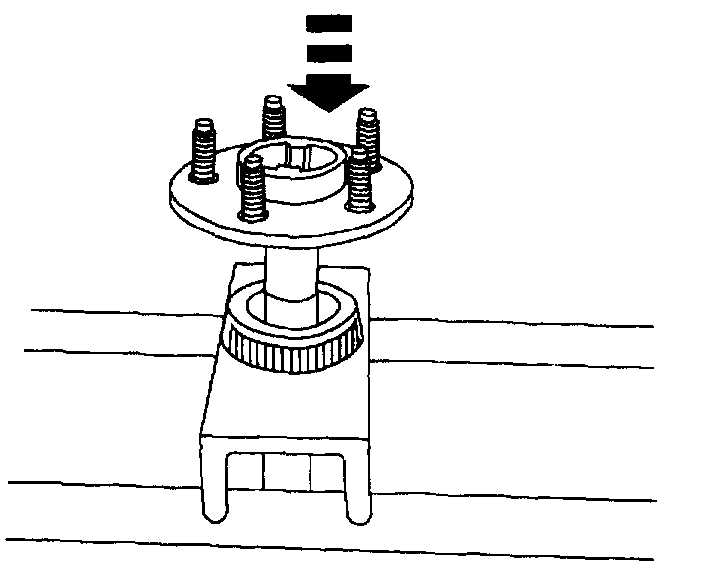
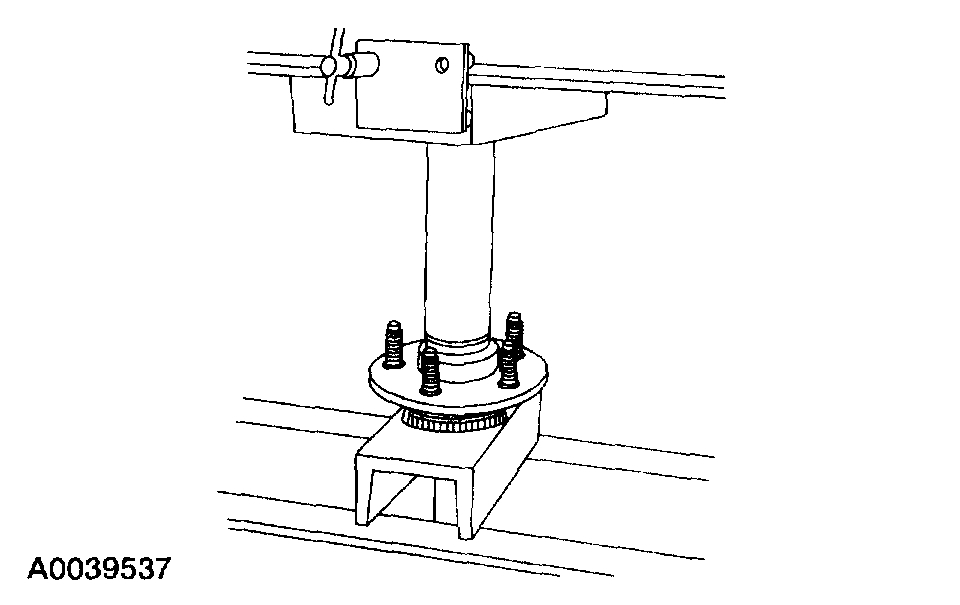
1. Place rear brake anti-lock sensor indicator on a bearing plate and insert the axle shaft through the indicator.
2. Press the axle shaft through the rear brake anti-lock sensor indicator until it bottoms out on the axle flange.
3. Lubricate the lip of the wheel bearing oil seal.
^ Use Premium Long-Life Grease XG-1-C or equivalent meeting Ford specification ESA-M1C75-B.
4. CAUTION: Once the differential pinion shaft has been removed, turning the differential case or an axle shaft can cause the differential pinion gears to fall out of the assembly. This can result in chipped or damaged components.
Remove the differential pinion shaft.
1 Remove the differential pinion shaft lock bolt.
2 Remove the differential pinion shaft.
5. CAUTION: Do not damage the wheel bearing oil seal.
Install the axle shaft.
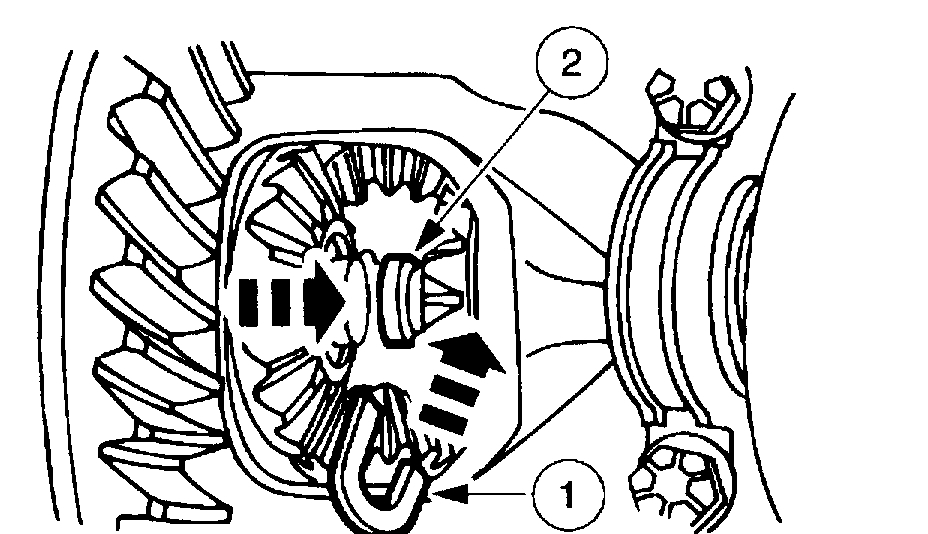
6. CAUTION: Do not damage the rubber O-ring in the U-washer groove.
Install the U-washer.
1 Position the U-washer on the button end of the axle shaft.
2 Pull the axle shaft outward to seat the U-washer in the side gear.
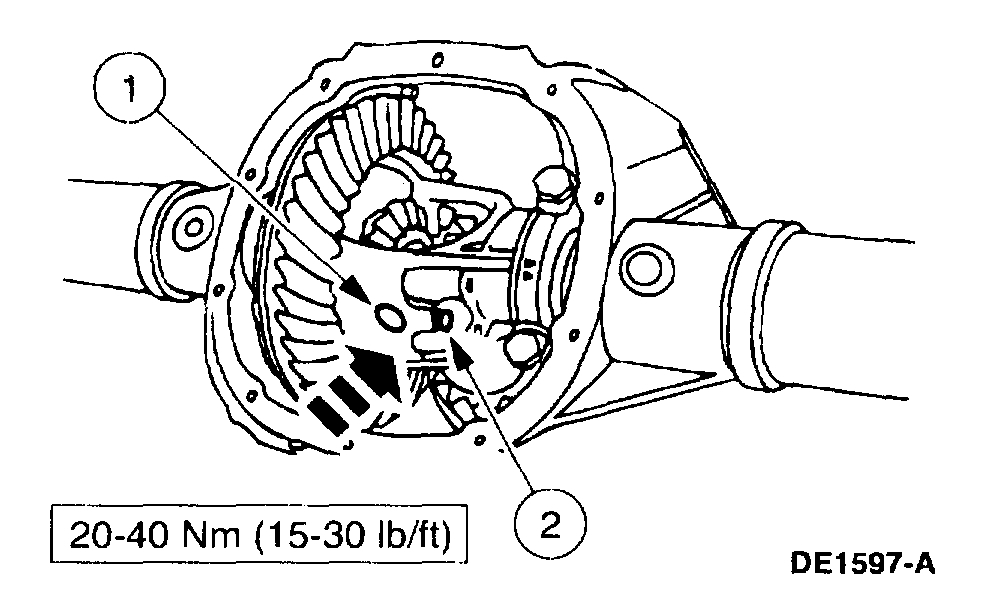
7. Install the differential pinion shaft.
1 Align the hole in the differential pinion shaft with the lock bolt hole.
2 Install the differential pinion shaft lock bolt.
8. Install the brake disc and the brake caliper.
9. Install the rear brake anti-lock sensor.
10. Install the differential housing cover and fill the differential housing with the specified lubricant.
1 Position the cover.
2 Install the bolts.
11. WARNING: Always remove any corrosion, dirt or foreign material that may be present on the mounting surfaces of the wheel or the surface of the wheel hub or rear brake disc that contacts the wheel. Installing wheels without correct metal-to-metal contact at the wheel mounting surfaces can cause the wheel nut to loosen and the wheel to come off while the vehicle is in motion, causing loss of control.
Clean the wheel hub and mounting surfaces.
12. Install the wheel and tire assembly.
13. Install the center cap.
14. NOTE: If equipped with air suspension, reactivate the system by turning the air suspension switch on.
Lower the vehicle.
_______________________________________
Here are the directions for bearing and seal replacement. The remaining pictures correlate with bearing and seal replacement.
______________________________________
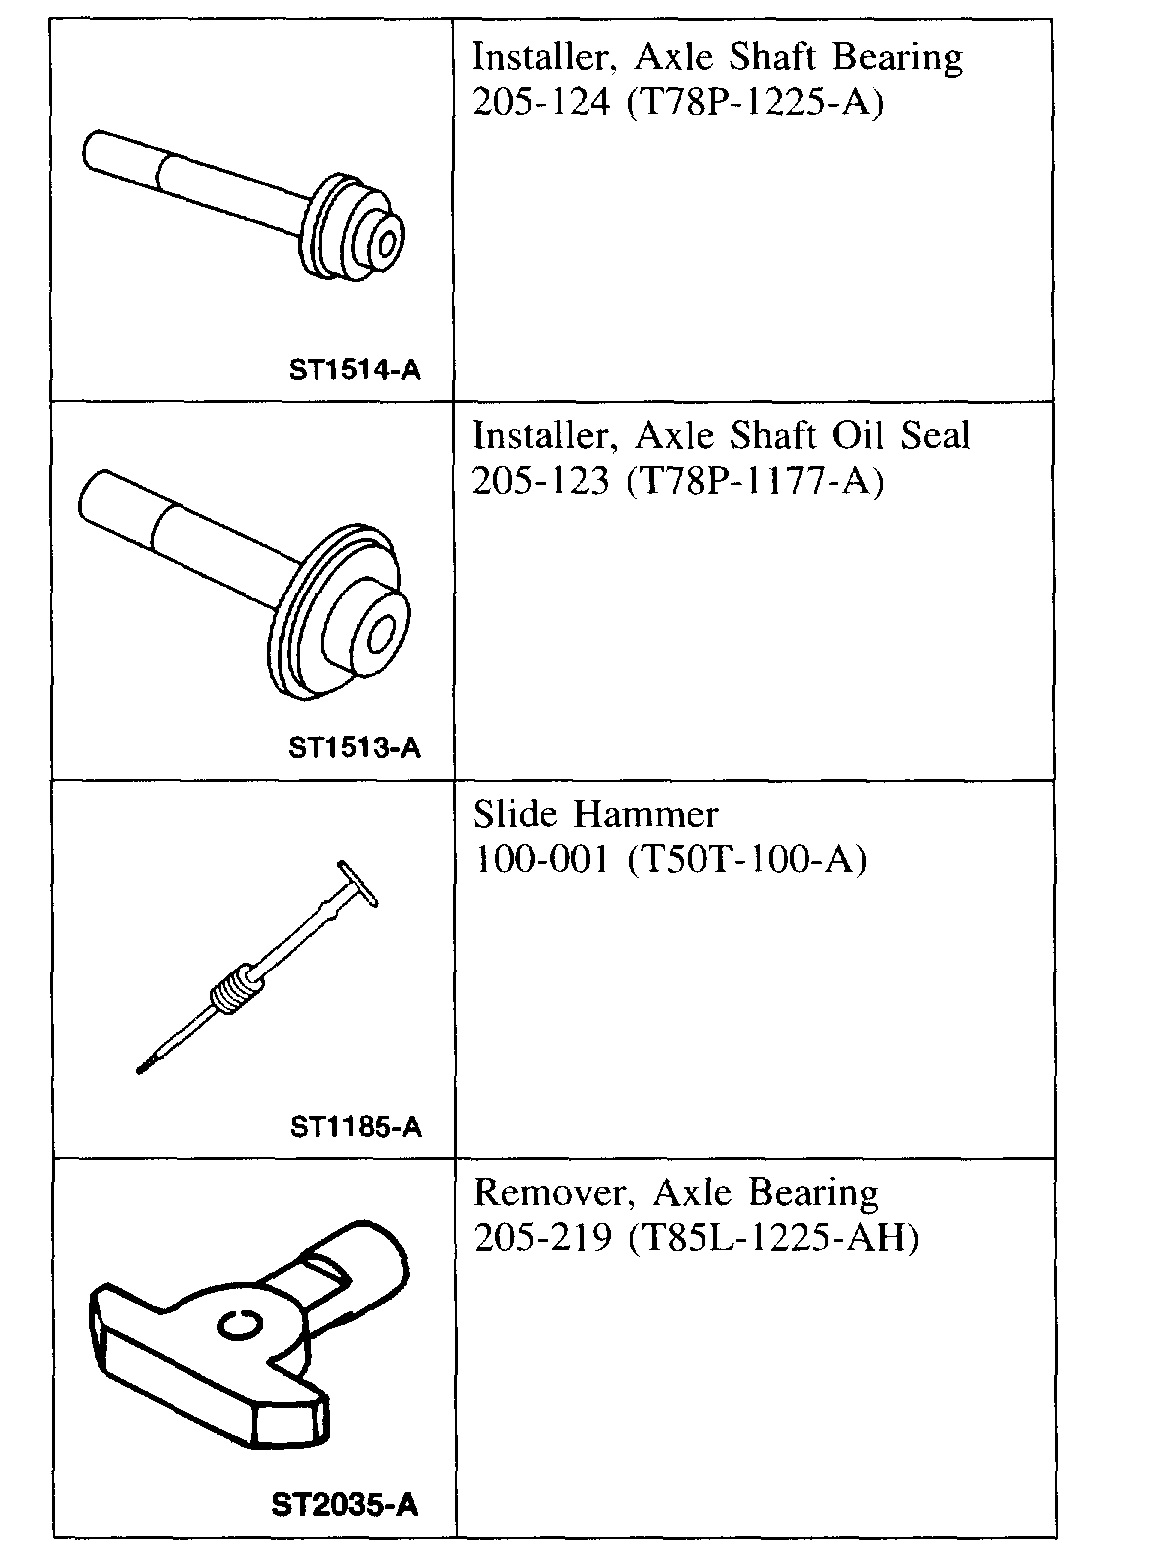
Rear Wheel Bearing and Axle Shaft Oil Seal
Special Tool(s)
Removal
1. Remove the axle shaft.
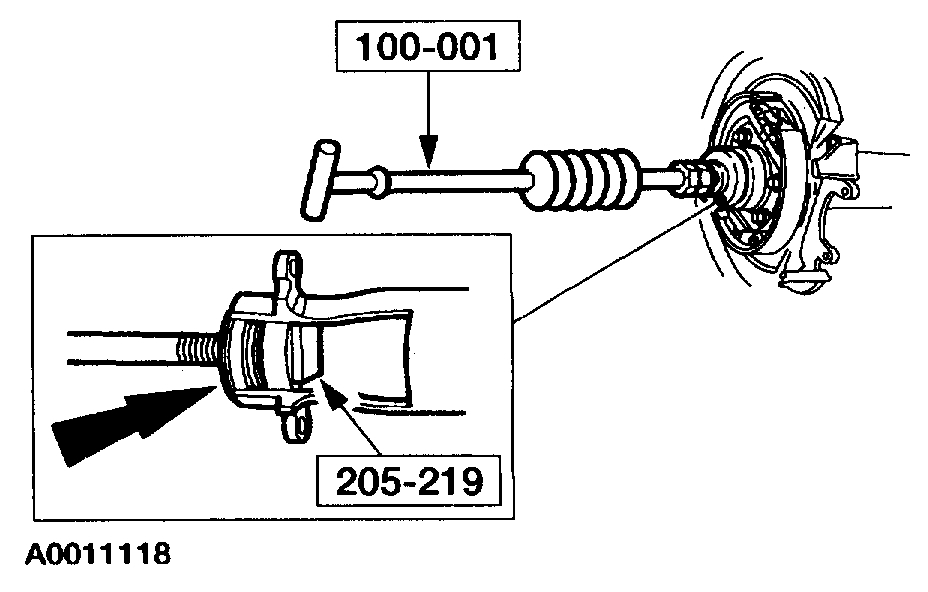
2. CAUTION: Never remove the wheel bearing oil seal by itself. Always remove the wheel bearing oil seal and the rear wheel bearing at the same time.
NOTE: If the wheel bearing oil seal is leaking, the axle housing vent may be plugged with foreign material.
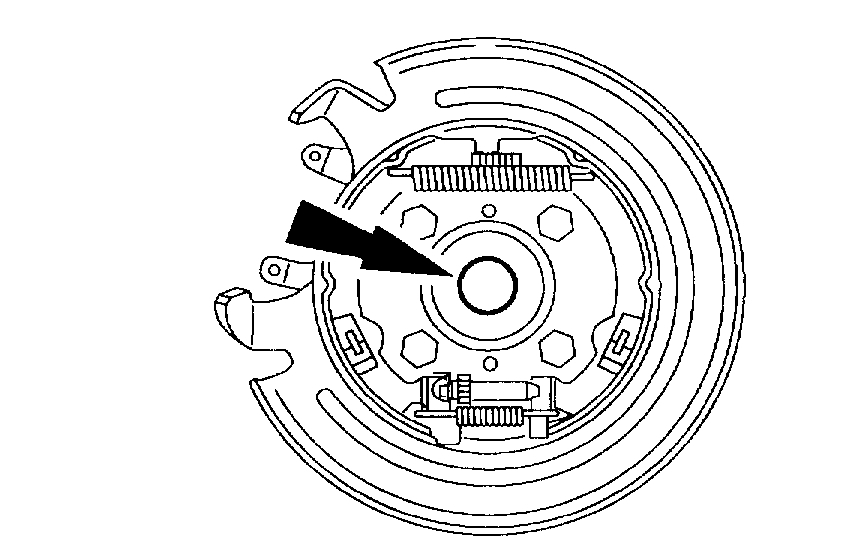
Using the special tools, remove the rear wheel bearing and wheel bearing oil seal.
Installation
1. Lubricate the new rear wheel bearing.
^ Use SAE 8OW-90 Premium Rear Axle Lubricant XY-8OW90-QL or equivalent meeting Ford specification WSP-M2C197-A.
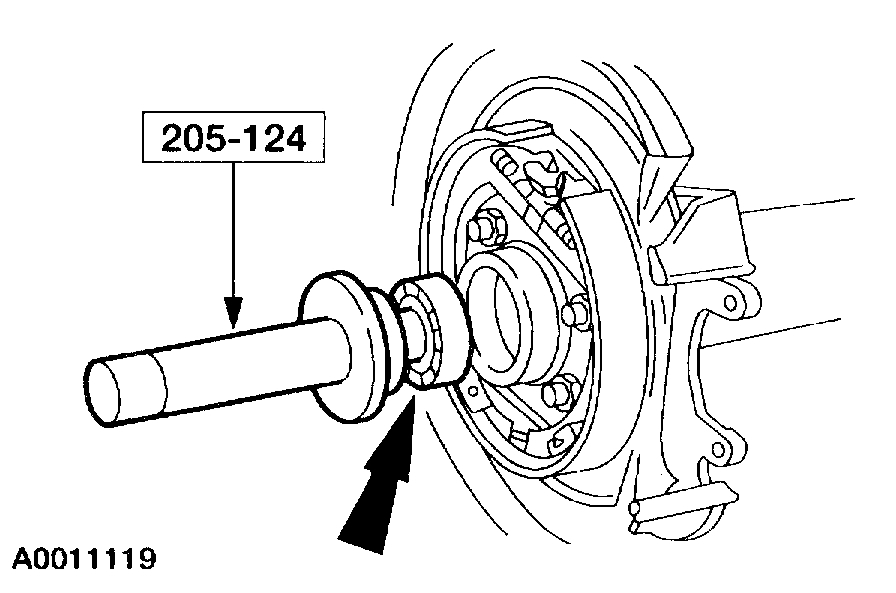
2. Using the special tool, install the rear wheel bearing.
3. Lubricate the lip of the new wheel bearing oil seal.
^ Use Premium Long-Life Grease XG-1-C or equivalent meeting Ford specification ESA-M1C75-13.
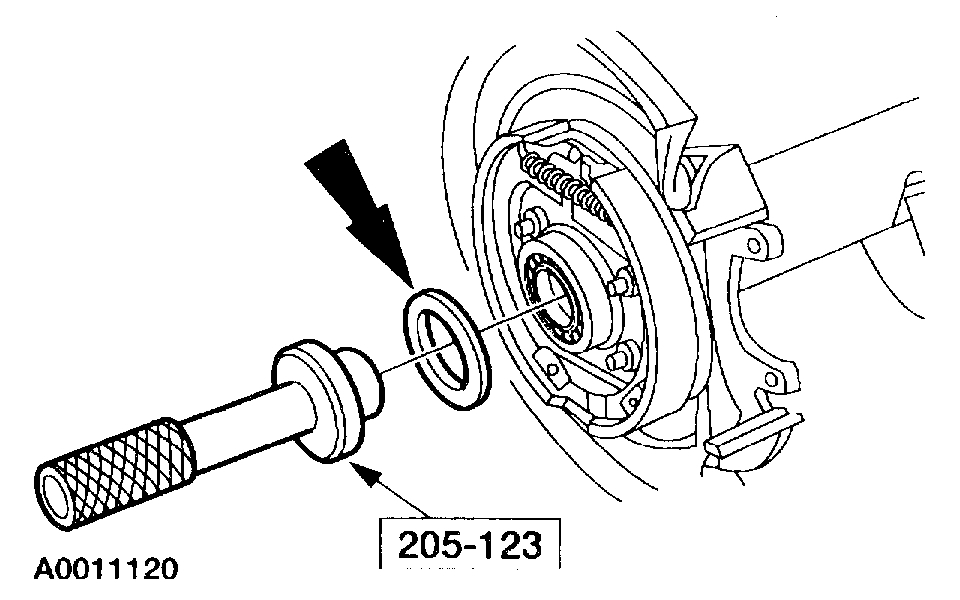
4. Using the special tool, install the wheel bearing oil seal.
5. Install the axle shaft.
_____________________________________________
I hope this helps. Let me know if you have other questions or need help.
Take care,
Joe
Images (Click to enlarge)
Jan 12, 2019 at 2:26 PM