Welcome to 2CarPros.
By any chance, did coolant get into the alternator? It can cause it to short. The bad thing with coolant, it won't evaporate. Sharon, these trucks have a voltage regulator that is built into the engine control module (ECM). You don't want that to be damaged. If you checked it and it's not charging, I really recommend that you remove the alternator and have it bench tested at a parts store. Most will do it for free. If something fails in the alternator, I have seen them damage the regulator and then the vehicle requires the entire module.
Here is a simple way to confirm it isn't charging. I'm not sure if you are only looking at a gauge.
https://www.2carpros.com/articles/how-to-check-a-car-alternator
Here is a link that shows in general how one is replaced:
https://www.2carpros.com/articles/how-to-replace-an-alternator
Here are the directions specific to your vehicle for removal and replacement. The attached pics correlate with the directions.
PROCEDURES
REMOVAL
WARNING: DISCONNECT BOTH NEGATIVE CABLES FROM BOTH BATTERIES BEFORE REMOVING BATTERY OUTPUT WIRE (B+ WIRE) FROM GENERATOR. FAILURE TO DO SO CAN RESULT IN INJURY OR DAMAGE TO ELECTRICAL SYSTEM.
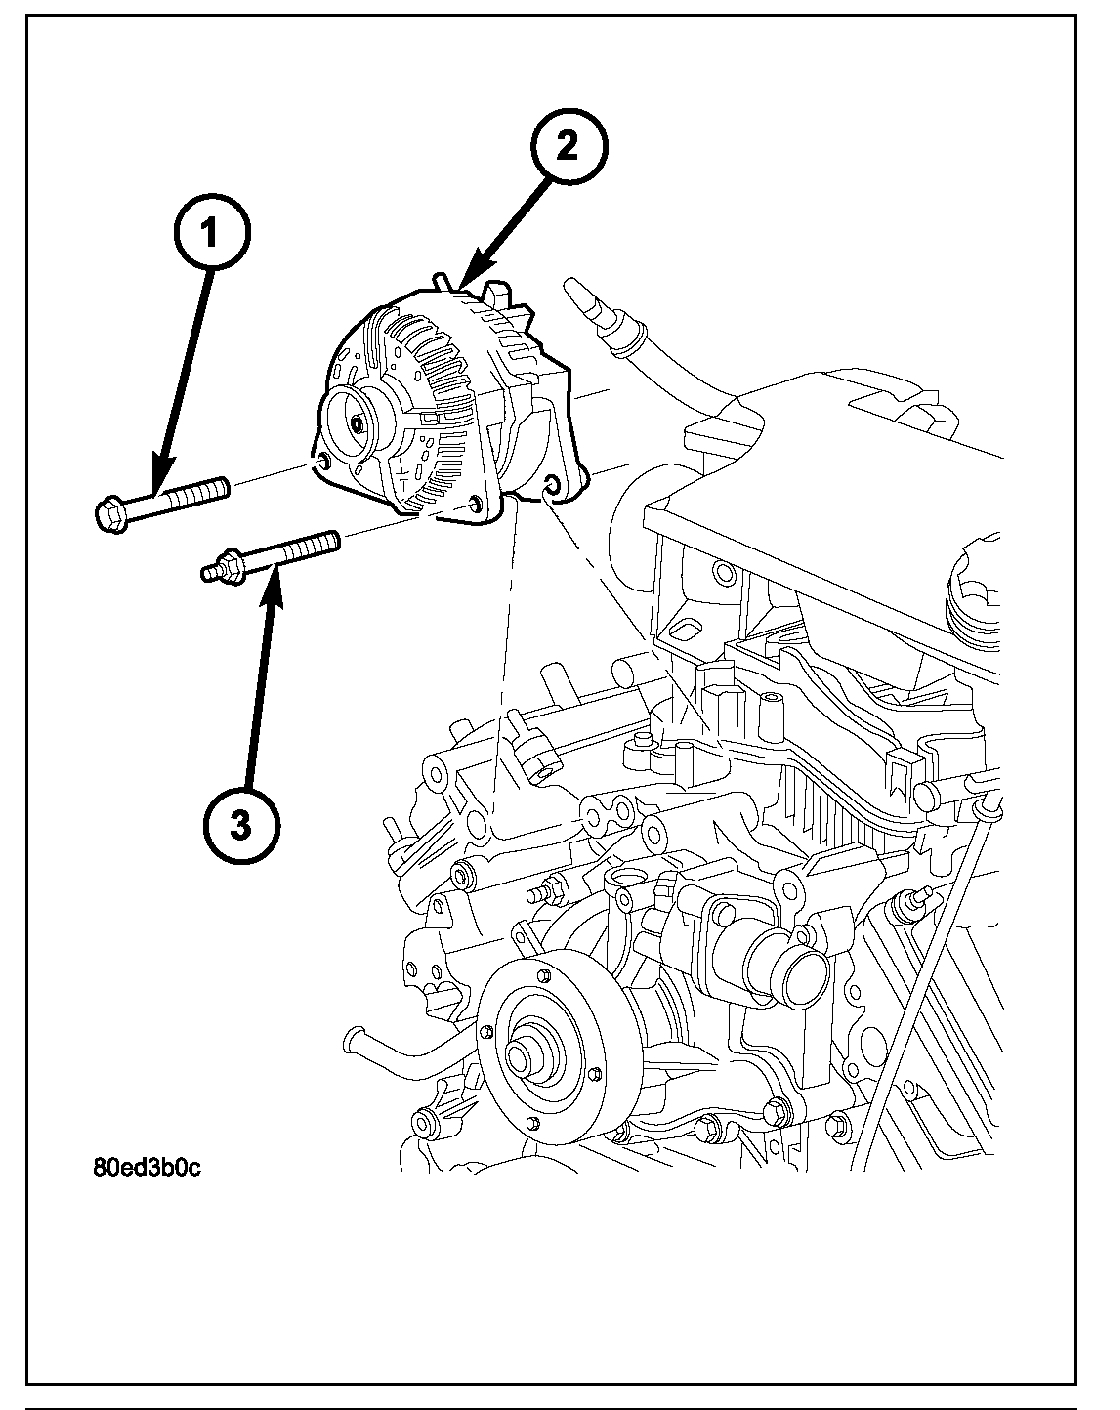
pic 1
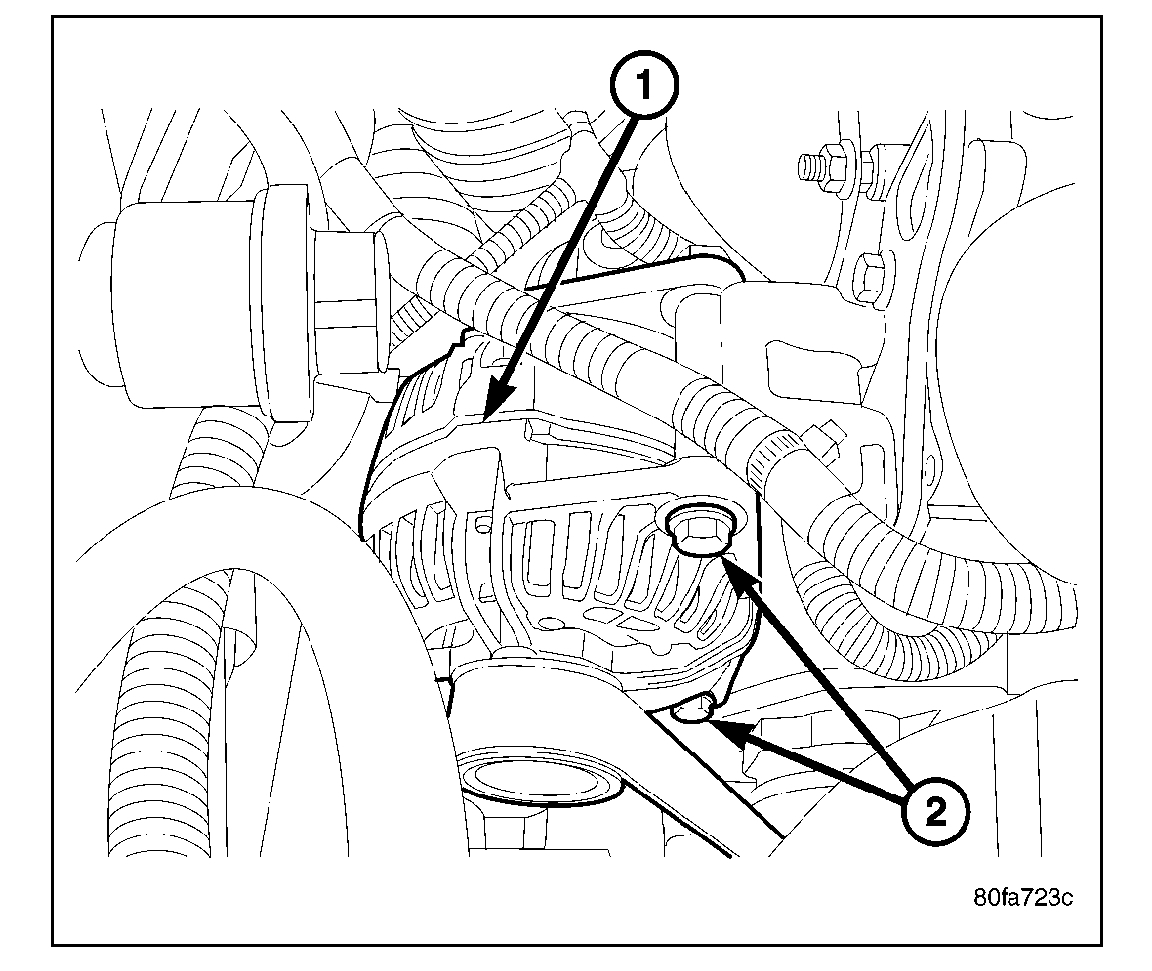
pic 2
1. Disconnect both negative battery cables at both batteries.
2. Remove generator drive belt. Refer to Cooling System for procedure.
3. Unsnap plastic insulator cap from B+ output terminal.
4. Remove B+ terminal mounting nut at rear of generator. Disconnect terminal from generator.
5. Disconnect field wire connector at rear of generator by pushing on connector tab.
6. Remove upper mounting bracket bolt (2).
7. Remove lower mounting bracket bolt and nut (2).
8. Remove generator from vehicle.
INSTALLATION
1. Position generator to upper and lower mounting brackets and install upper bolt and lower bolt/nut.
2. Tighten all bolts/nut. Refer to Torque Specifications.
3. Snap field wire connector into rear of generator.
4. Install B+ terminal eyelet to generator output stud. Tighten mounting nut. Refer to Torque Specifications.
CAUTION:
- Never force a belt over a pulley rim using a screwdriver. The synthetic fiber of the belt can be damaged.
- When installing a serpentine accessory drive belt, the belt MUST be routed correctly. The water pump may be rotating in the wrong direction if the belt is installed incorrectly, causing the engine to overheat. Refer to belt routing label in engine compartment, or refer to Belt Schematics in Cooling System.
5. Install generator drive belt.
6. Install both negative battery cables to both batteries.
______________________
Let me know if this helps or if you have other questions.
Take care,
Joe
Images (Click to enlarge)
Jul 26, 2019 at 7:21 PM