Hello,
Here is a guide that will help you see the timing marks and get you back on the road
https://www.2carpros.com/diagrams/volvo/v40/2001
Note! The crankshaft and camshafts must not be turned more than is stated in the method description! If the shafts are turned in any other way the valves may be damaged.
Preparations
Prepare the car. See Camshaft seals, replacing See: Camshaft Oil SealService and RepairRemoval and Replacement.
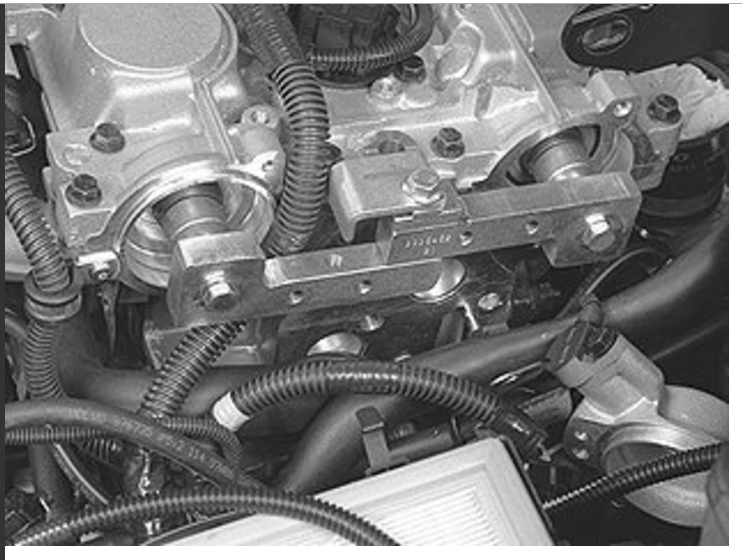
Install camshaft adjustment tool 999 5452 CAMSHAFT ADJUSTMENT TOOL See: Tools and Equipment999 5452 Camshaft Adjustment Tool at the rear of the camshafts.
Remove:
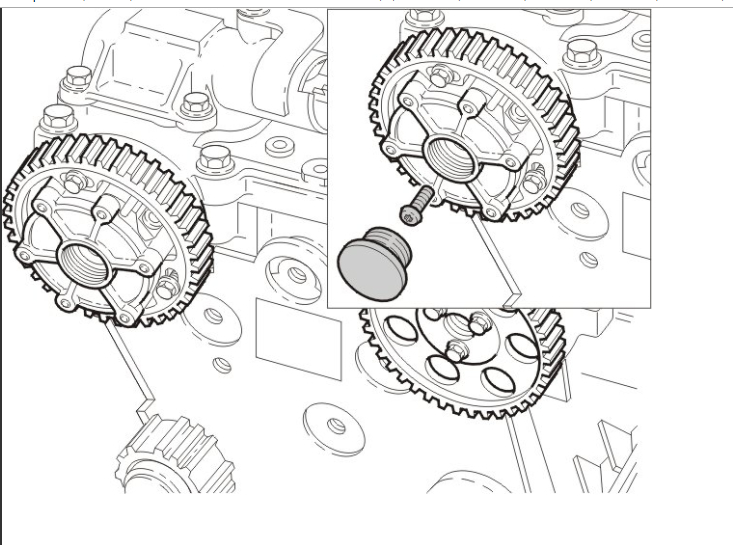
the plug at the front edge of the variable valve timing unit (TORX 55)
the center screw in the variable valve timing unit (TORX 55).
Carefully pull out the timing gear pulley with the variable valve timing (VVT) unit. A small amount of oil may run out. Place paper underneath.
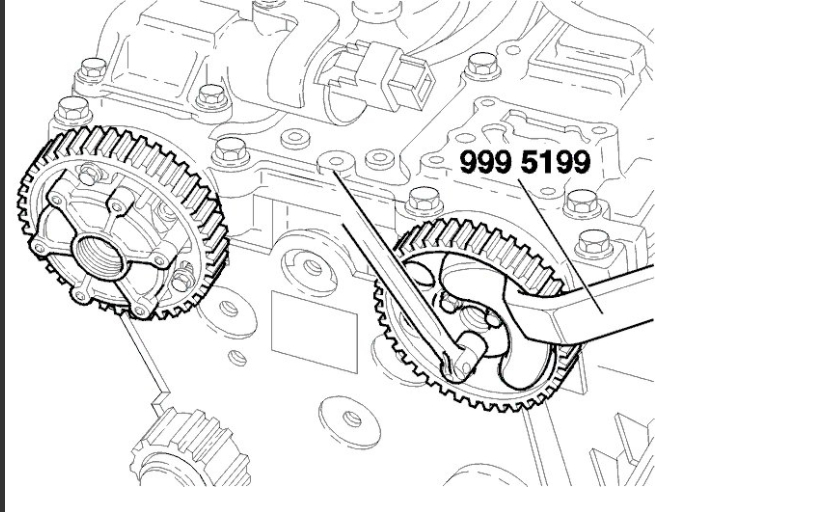
Remove:
the screws for the timing gear pulley. Use counterhold 999 5199 COUNTERHOLD See: Tools and Equipment999 5199 Counterhold
the timing gear pulley
tool 999 5452 CAMSHAFT ADJUSTMENT TOOL See: Tools and Equipment999 5452 Camshaft Adjustment Tool
the screw holding the inner timing cover to the cylinder head.
Timing gear pulleys without variable valve timing units: - Remove the timing gear pulley. - Remove tool 999 5452
Secure the crankshaft position
Install the adjustment tool.
Remove:
the front air baffle
the support between the cylinder block and the intake manifold
the mounting screws for the starter motor.
Place the starter motor to one side.
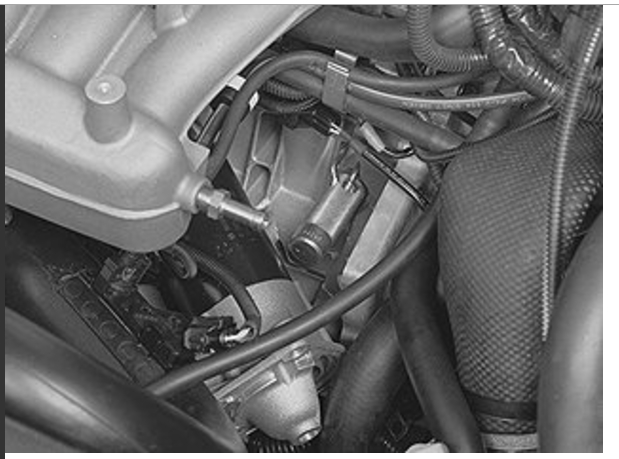
Remove the blind cover plug and cover washer.
Turn the crankshaft clockwise slightly to avoid the adjustment tool being in the wrong position.
Install adjustment tool 999 5451 ADJUSTMENT TOOL See: Tools and Equipment999 5451 Adjustment Tool. Ensure that the adjustment tool bottoms out against the cylinder block.
Turn the crankshaft back counter-clockwise until it stops against the drift.
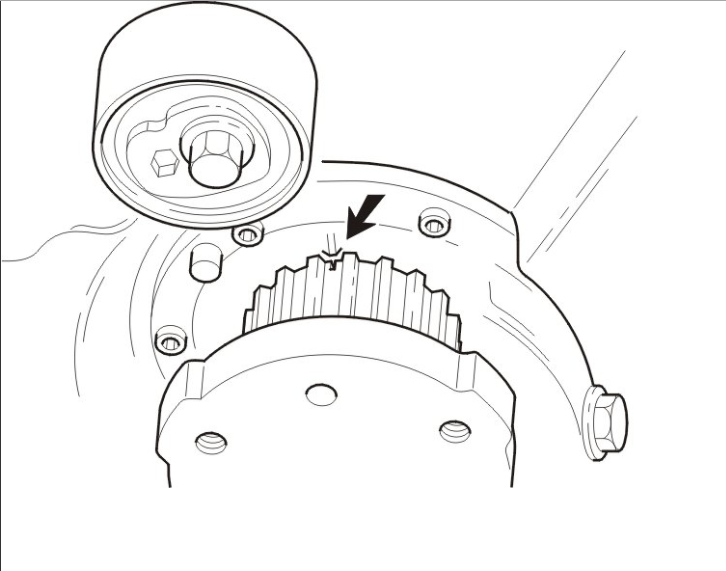
Check that the marking on the crankshaft timing gear pulley corresponds with the marking on the oil pump.
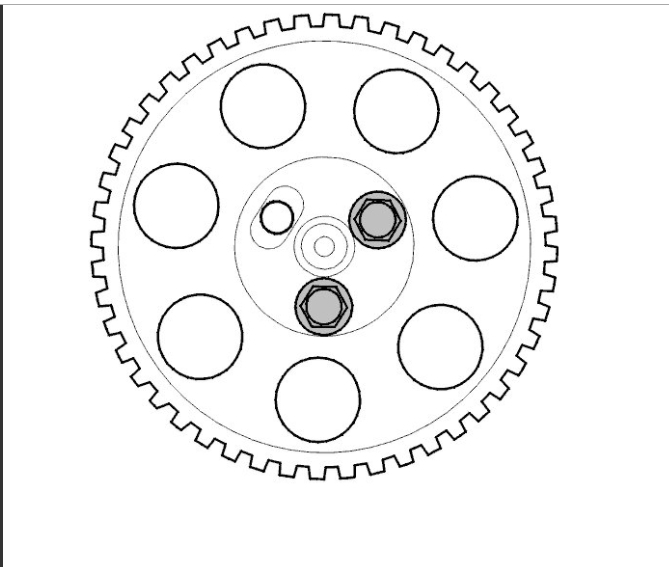
Install the timing gear pulley using the center screw on the camshaft.
Ensure that the markings on the timing gear pulleys/upper timing cover correspond. Do not tighten.
Install:
the upper timing cover
the timing gear pulley without variable valve timing on the camshaft. Use the two screws positioned so that the markings on the timing gear pulleys and upper timing cover correspond. Do not tighten.
Installing the timing belt
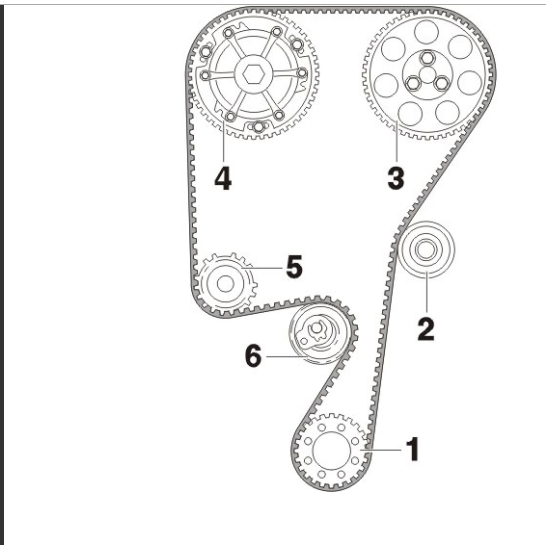
Install the timing belt on the timing gear pulleys.
Note! Adjust so that the screws in the timing gear pulley without variable valve timing do not reach the limit position in the oval holes.
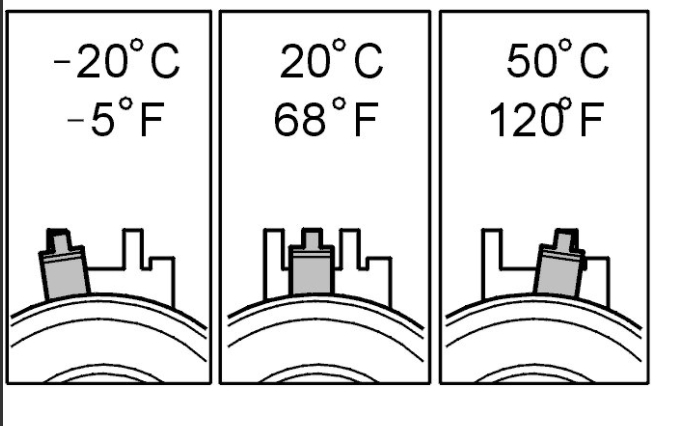
Note! This adjustment is to be made with a cold engine. Suitable temperature is approximately 20°C/67°F. At higher temperatures (with the engine at operating temperature or a high outside temperature for example) the indicator is further to the right.
The illustration shows the position of the indicator at different engine temperatures.
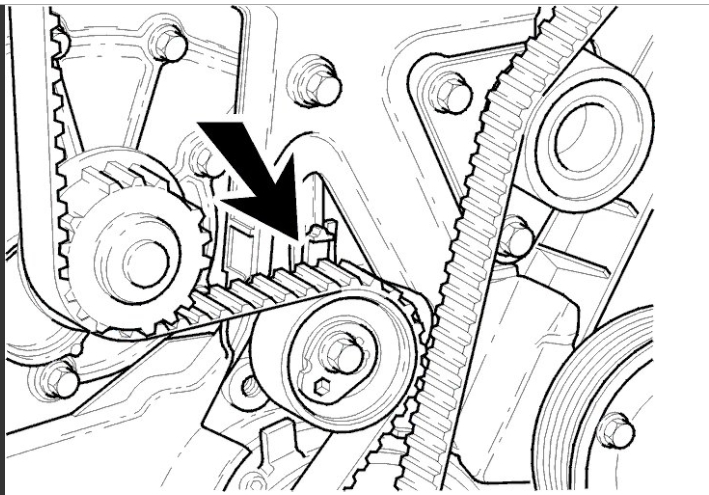
The belt must be tensioned between the intake camshaft pulley, the idler pulley and the crankshaft
Hold the belt tensioner center screw secure. Turn the belt tensioner eccentric counter-clockwise until the tensioner indicator passes the marked position.
Then turn the eccentric back so that the indicator reaches the marked position in the center of the window
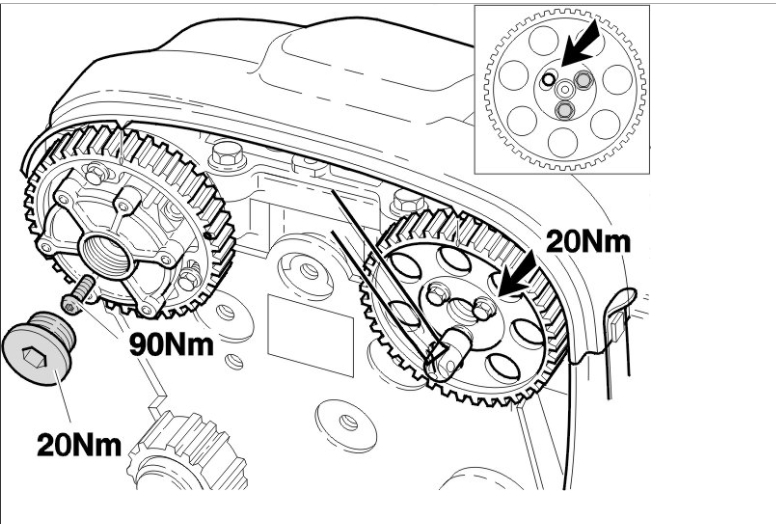
Hold the eccentric securely. Tighten the center screw. Tighten to 20 Nm .
Tightening the variable valve timing unit and timing gear pulley
Tighten the center screw on the timing belt tensioner with variable valve timing. Tighten to 90 Nm .
Install the plug. Tighten to 35 Nm .
Install the third screw on the timing gear pulley without variable valve timing. Tighten to 20 Nm .
Remove the adjustment tools.
Press the belt to check that the indicator on the tensioner moves easily
Install the upper timing cover
Turn the crankshaft two turns. Check that the markings on the crankshaft and camshaft pulley correspond.
Note! Check that the indicator on the belt tensioner is within the marked area.
Please let us know if you need anything else to get the problem fixed.
Cheers, Ken
Images (Click to enlarge)
Aug 16, 2017 at 12:00 PM