Terry:
The sad part is if the thermostat needs replaced, you need to go through this all over again. Honestly, the bleeding process (bleeder) should have been opened when it was first being refilled. I wonder if that is why there is air blocked in places that are stubborn to get. Honestly, it may be time to replace the thermostat. It may be sticking or not fully opening.
Regardless, here are the directions for replacing the thermostat. I figured I would include them. The attached pictures correlate with these directions.
THERMOSTAT REPLACEMENT
Removal Procedure
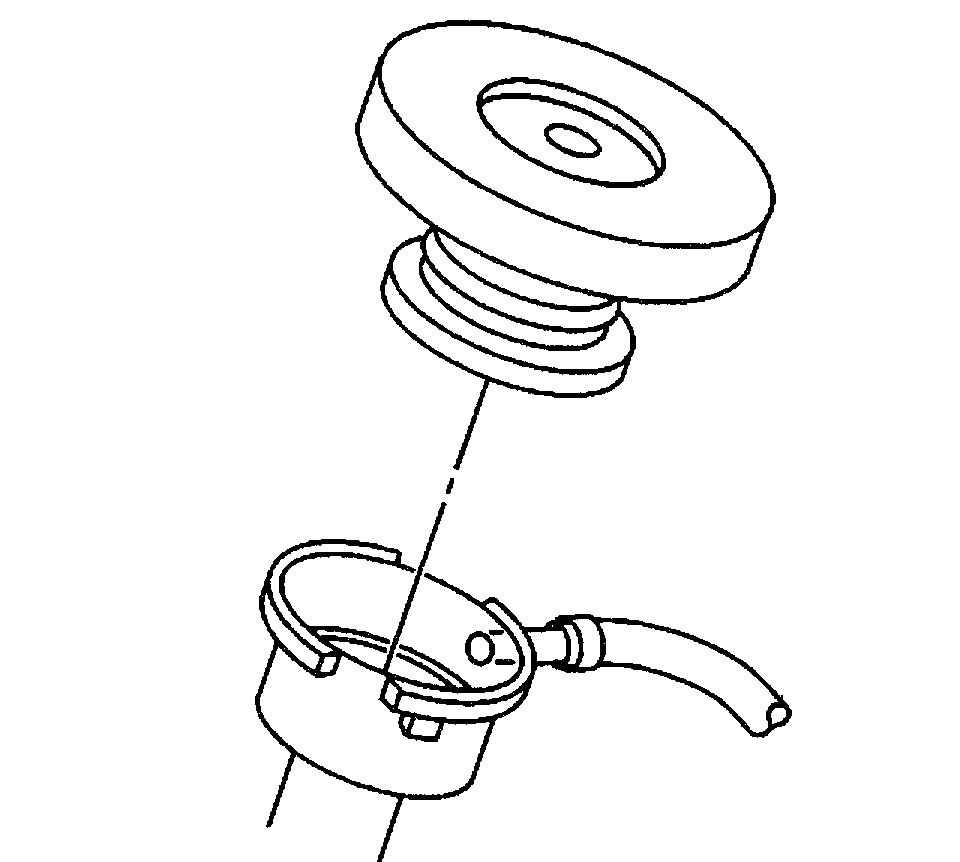
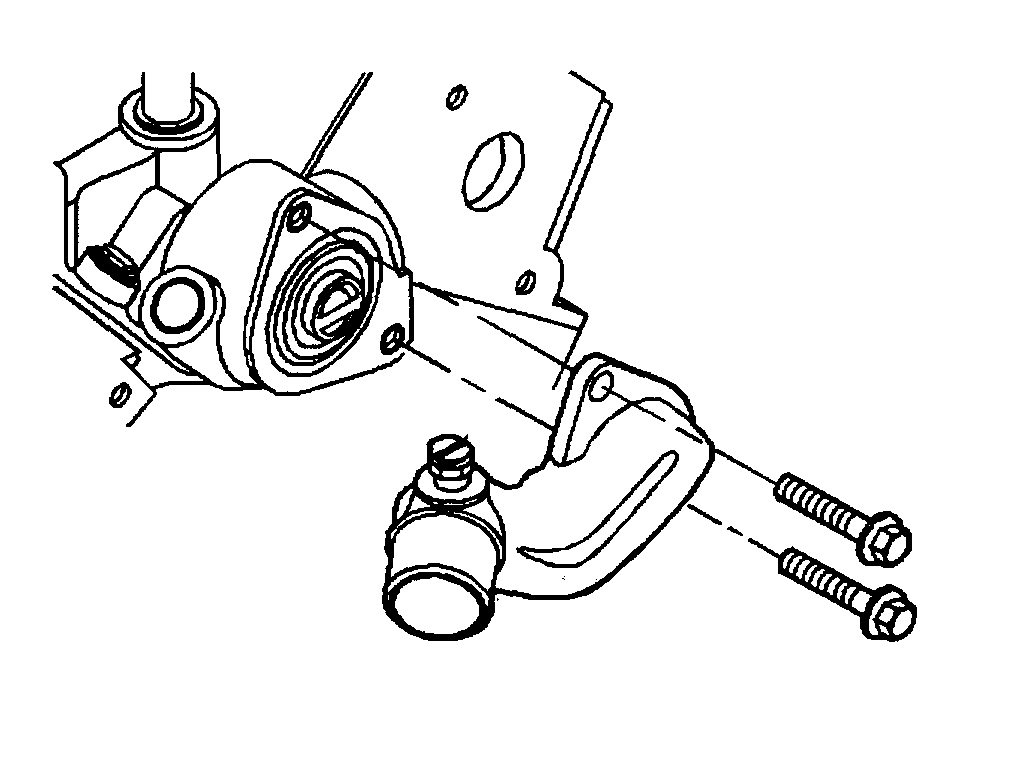
Picture 1
1. Remove the air cleaner and duct assembly. Refer to Air Filter Element Replacement in Computers and Controls.
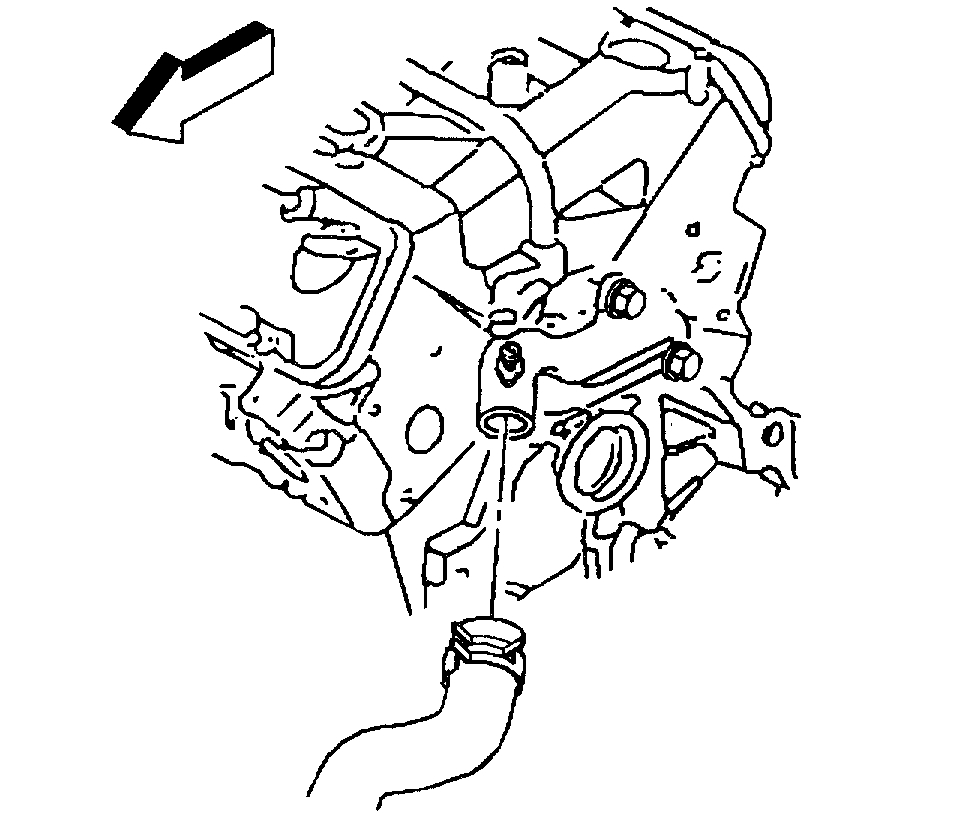
2. Drain the coolant until the coolant level is below the thermostat. Refer to Draining and Filling Cooling System.
3. Remove the radiator hose from the thermostat housing. Refer to Radiator Hose Replacement - Inlet.
4. Remove the thermostat housing bolts and clean any sealer from the bolt threads.
5. Remove the thermostat housing and gasket.
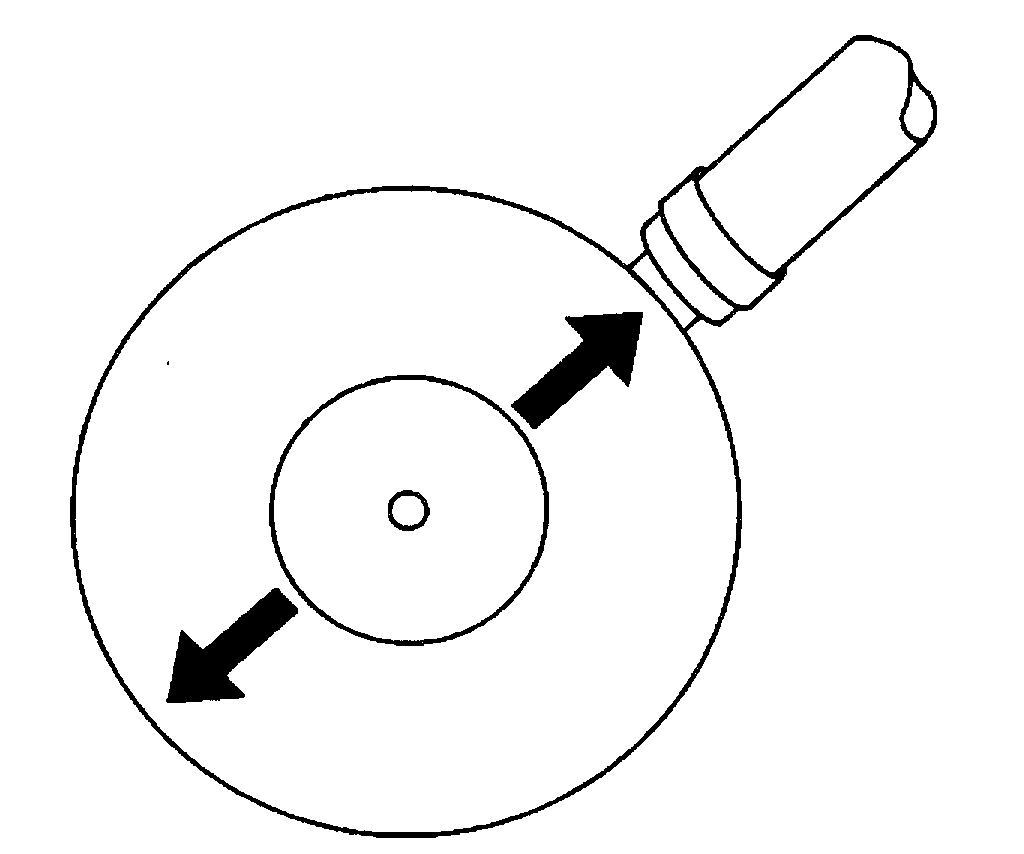
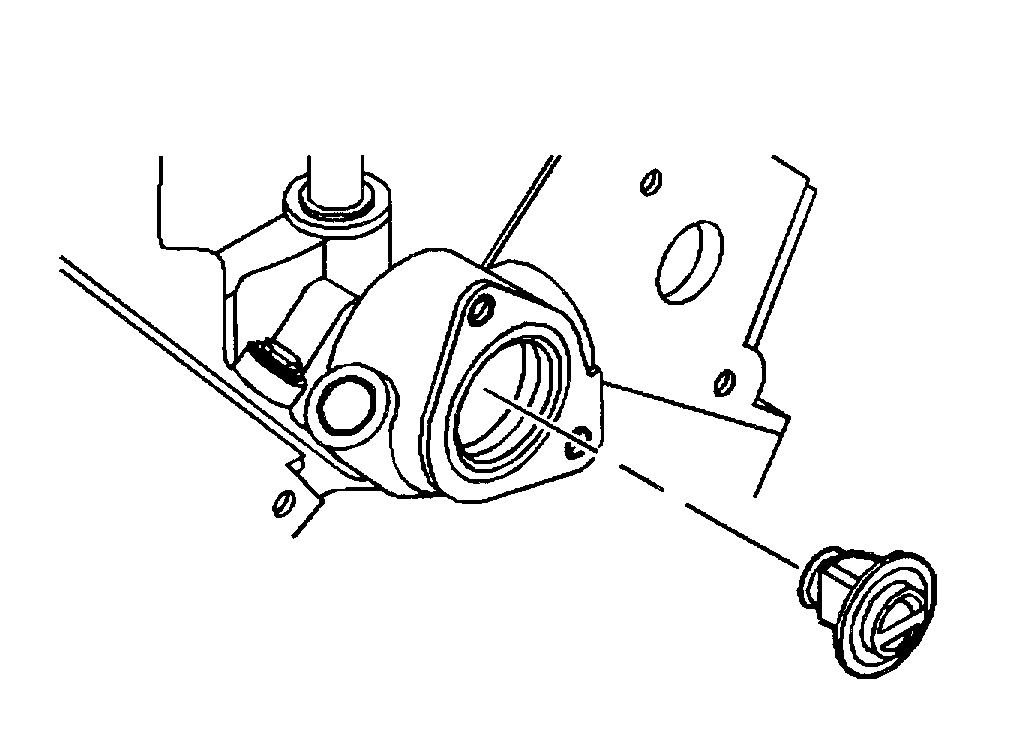
Picture 2
6. Remove the thermostat.
7. Clean the mating surfaces.
Installation Procedure
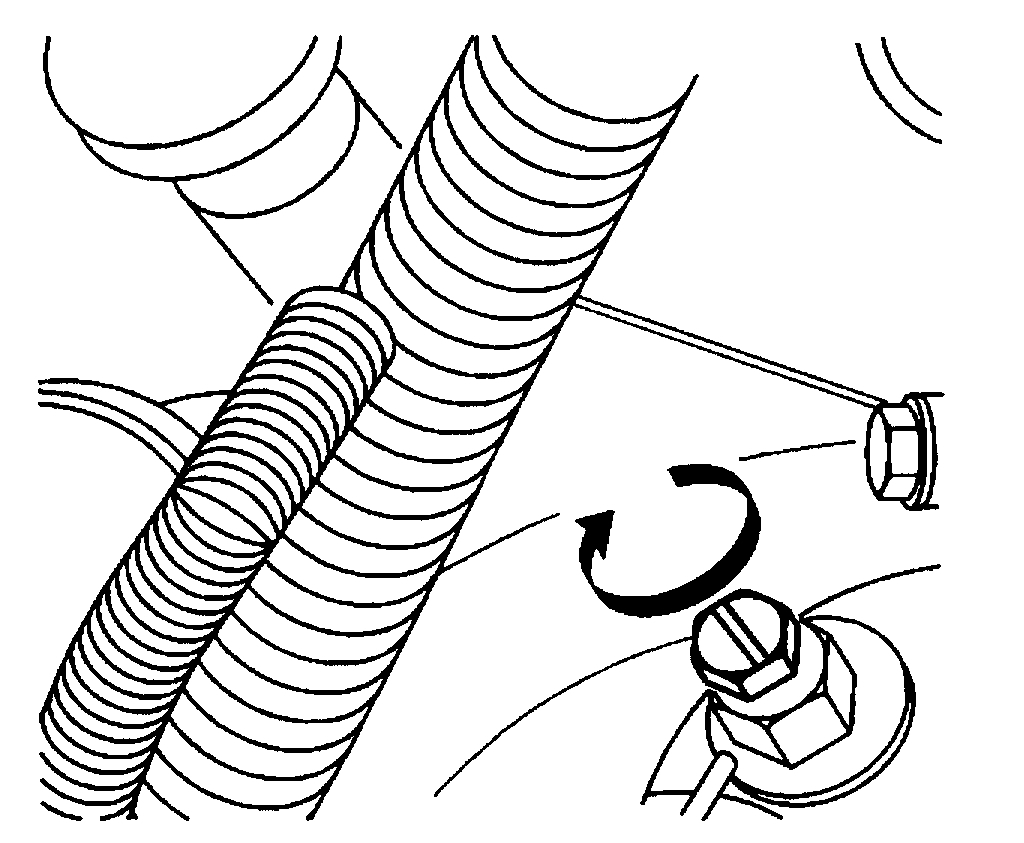
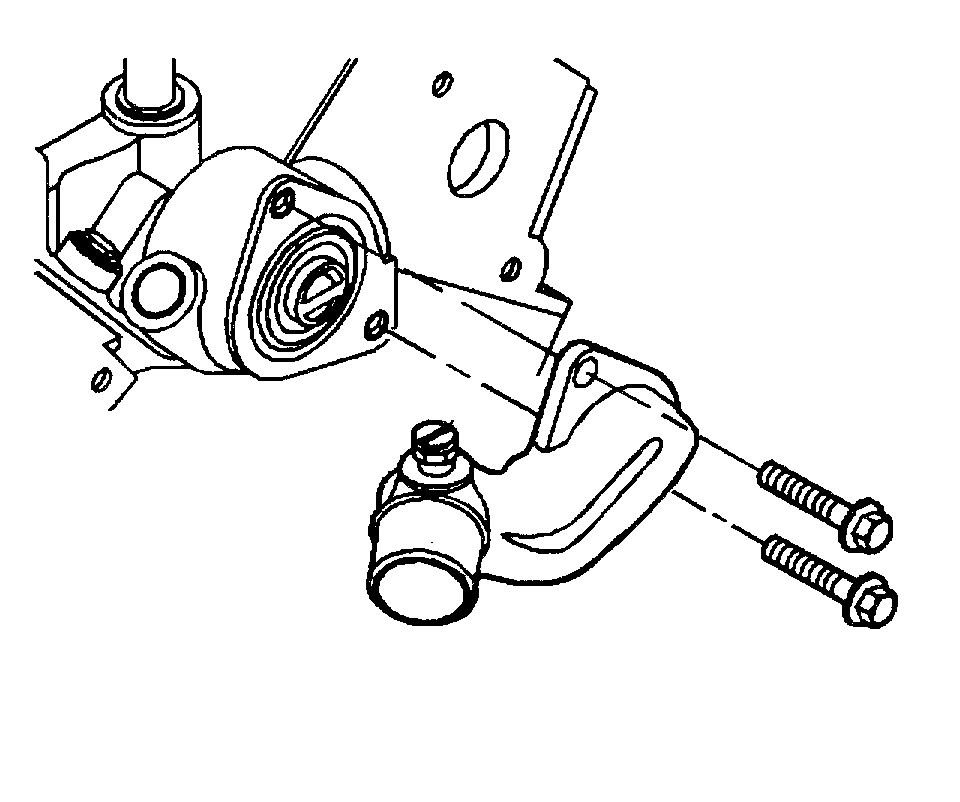
Picture 3
1. Install the thermostat.
Picture 4
2. Install the thermostat housing and gasket.
3. Install RTV sealer (GM P/N 1052366 or the equivalent) to the thermostat housing bolt threads.
Notice: Refer to Fastener Notice in Service Precautions.
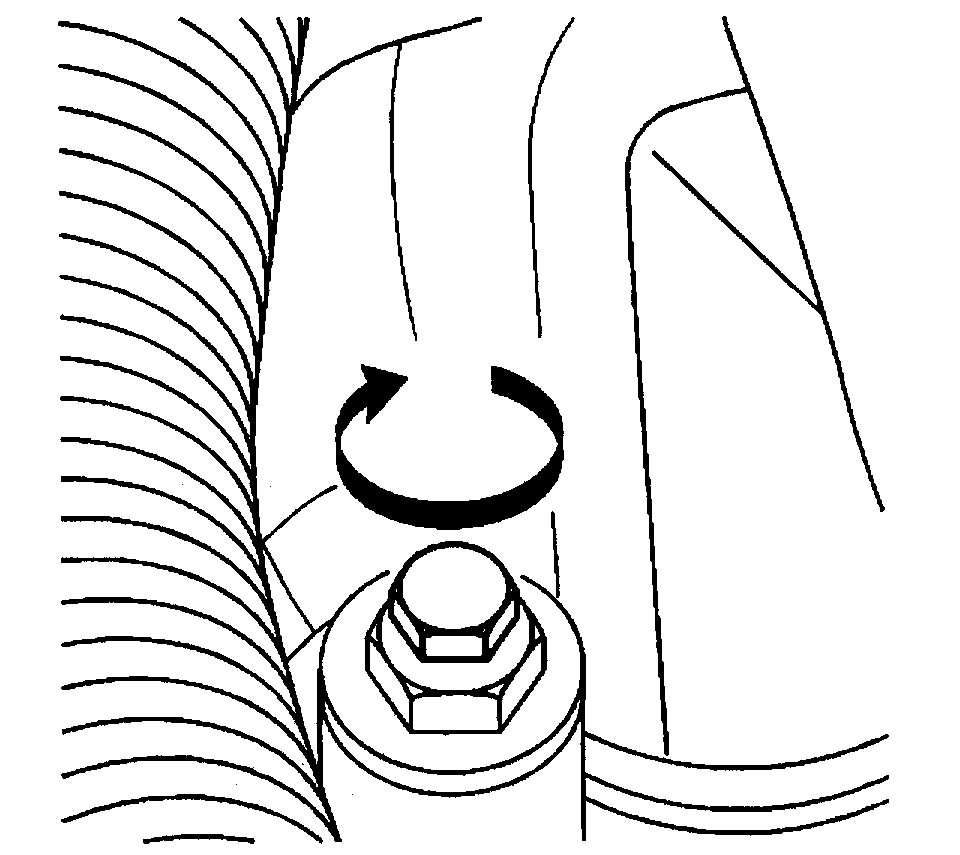
Picture 5
4. Install the thermostat housing bolts.
Tighten the bolts to 25 Nm (18 ft. Lbs.).
5. Install the radiator hose to the thermostat housing. Refer to Radiator Hose Replacement - Inlet.
6. Install the air cleaner and duct assembly. Refer to Air Filter Element Replacement in Computers and Controls.
7. Fill the cooling system. Refer to Draining and Filling Cooling System.
8. Inspect the cooling system for leaks. Repair as necessary.
___________________________________________________
Also, here are the directions for replacing the mode door actuator so you can control air flow. The attached pics correlate with these directions
__________________________________________________
MODE ACTUATOR REPLACEMENT
REMOVAL PROCEDURE
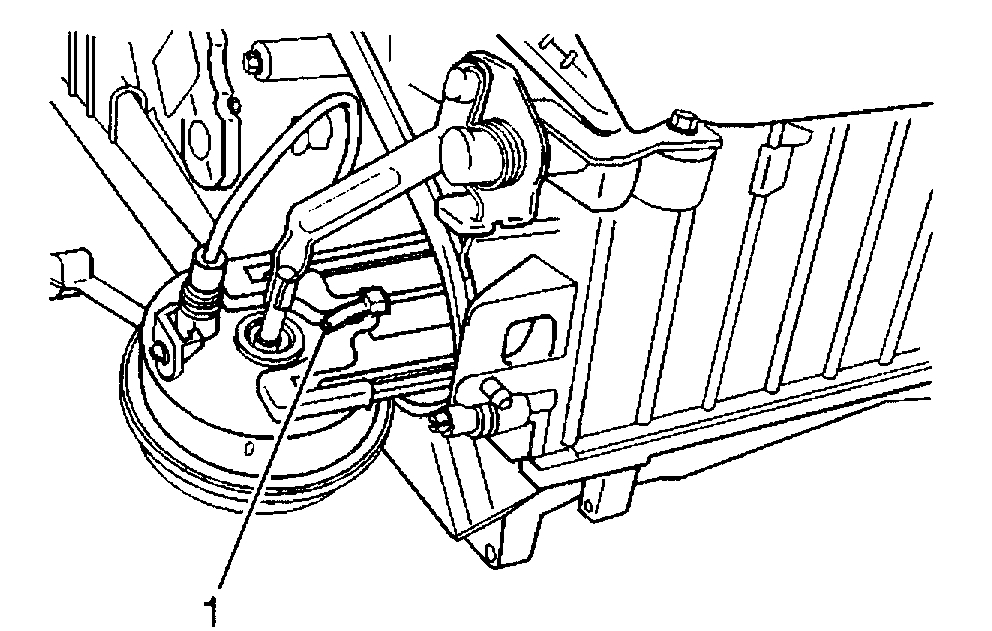
Picture 6
1. Remove the left instrument panel insulator.
2. Remove the knee bolster from the instrument panel.
3. Disconnect the vacuum lines from the mode valve vacuum actuator.
4. Cut the tie strap (1) that is on the back side of the mode valve vacuum actuator.
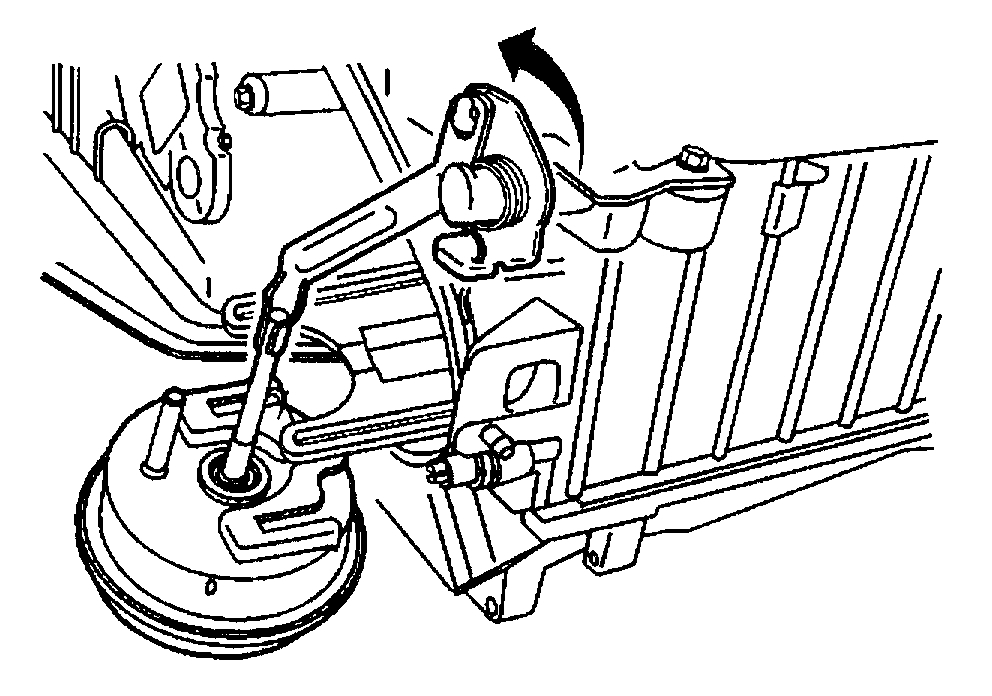
Picture 7
5. Lift to release the mode vacuum actuator retaining tab and just begin to slide the vacuum actuator toward the steering column.
6. Rotate the mode valve lever fully forward (counterclockwise) and hold in place until instructed.
7. Carefully rotate the vacuum actuator toward the front of the vehicle until the actuator is released from the mounting pins on the HVAC module case.
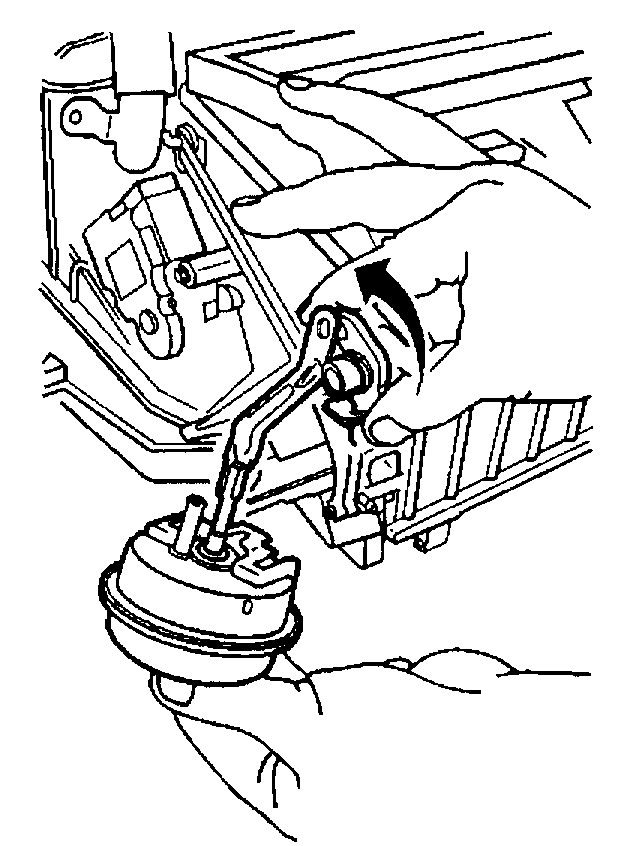
Picture 8
8. Extend the vacuum actuator below the HVAC module case mounting pins, then slide the vacuum actuator rearward in vehicle, past the pins.
9. Disconnect the vacuum actuator pushrod from the mode valve lever and remove the vacuum actuator.
10. Release the mode valve lever.
INSTALLATION PROCEDURE
Picture 9
1. Fully extend the mode valve actuator pushrod.
2. Rotate the mode valve lever fully forward (counterclockwise) and hold in place until instructed.
3. Connect the mode vacuum actuator pushrod to the mode valve lever.
Picture 10
4. With the vacuum actuator below the HVAC module case mounting pins, slide the vacuum actuator forward in the vehicle, past the pins.
5. Carefully rotate the vacuum actuator toward the rear of the vehicle until the actuator slots engage onto the mounting pins on the HVAC module case.
6. Check that the vacuum actuator pushrod is not binding on the mode valve lever.
7. Push the vacuum actuator toward the HVAC module case to secure the retaining tab.
8. Release the mode valve lever.
Picture 11
9. Install a new tie strap (1) to the base of the mode vacuum actuator.
10. Connect the vacuum lines to the actuator.
11. Install the knee bolster.
12. Install the left instrument panel insulator.
_______________________
I wish I could be there to help. Let me know if you have questions or need anything.
Take care,
Joe
Images (Click to make bigger)
Monday, February 4th, 2019 AT 1:17 PM
(Merged)