Hi,
There are a few different actuators. Since you said air flow, I suspect it is the one for air flow direction (mode door actuator). If that is wrong, let me know.
Here are the directions for removal and replacement of the mode door actuator. The attached pics correlate with the directions.
___________________________________________
2002 Chevy Truck C 2500 Truck 2WD V8-6.0L VIN U
Mode Actuator Replacement (W/ D07)
Vehicle Heating and Air Conditioning Air Door Actuator / Motor Service and Repair Procedures HVAC System - Automatic Mode Actuator Replacement (W/ D07)
MODE ACTUATOR REPLACEMENT (W/ D07)
REMOVAL PROCEDURE
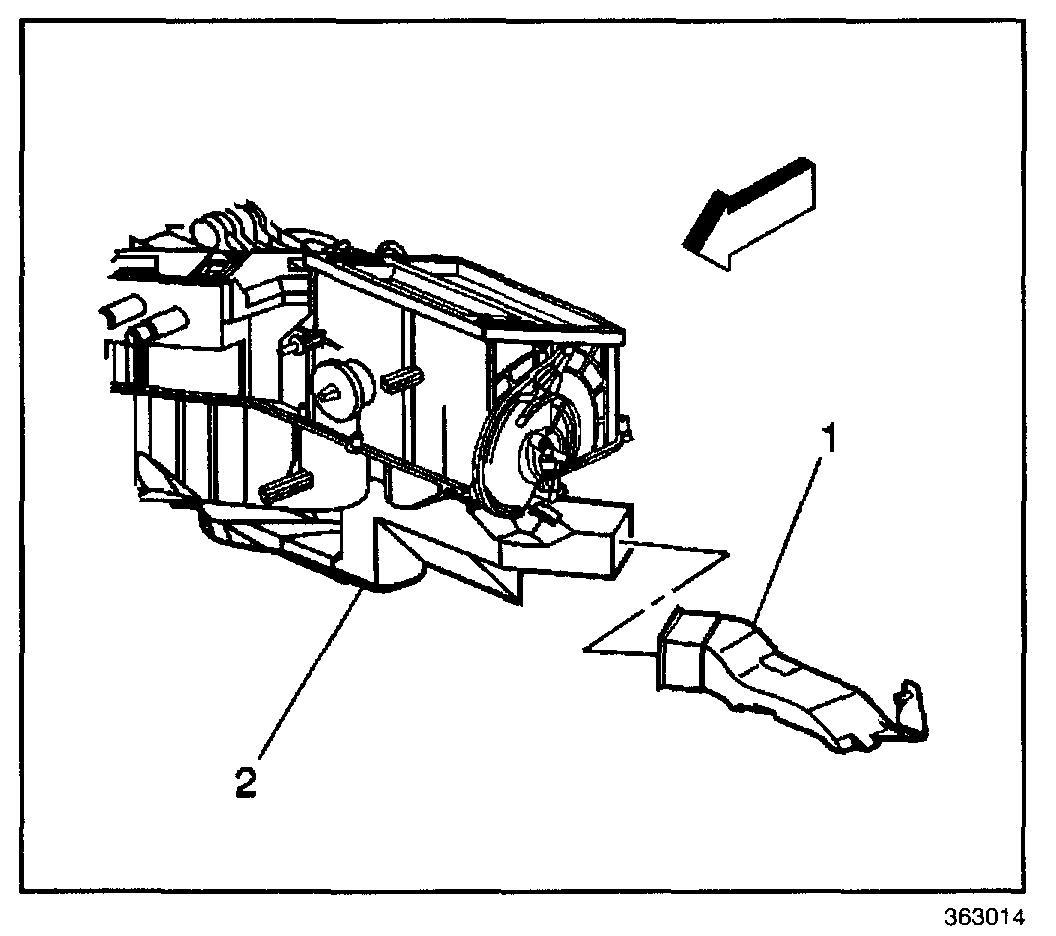
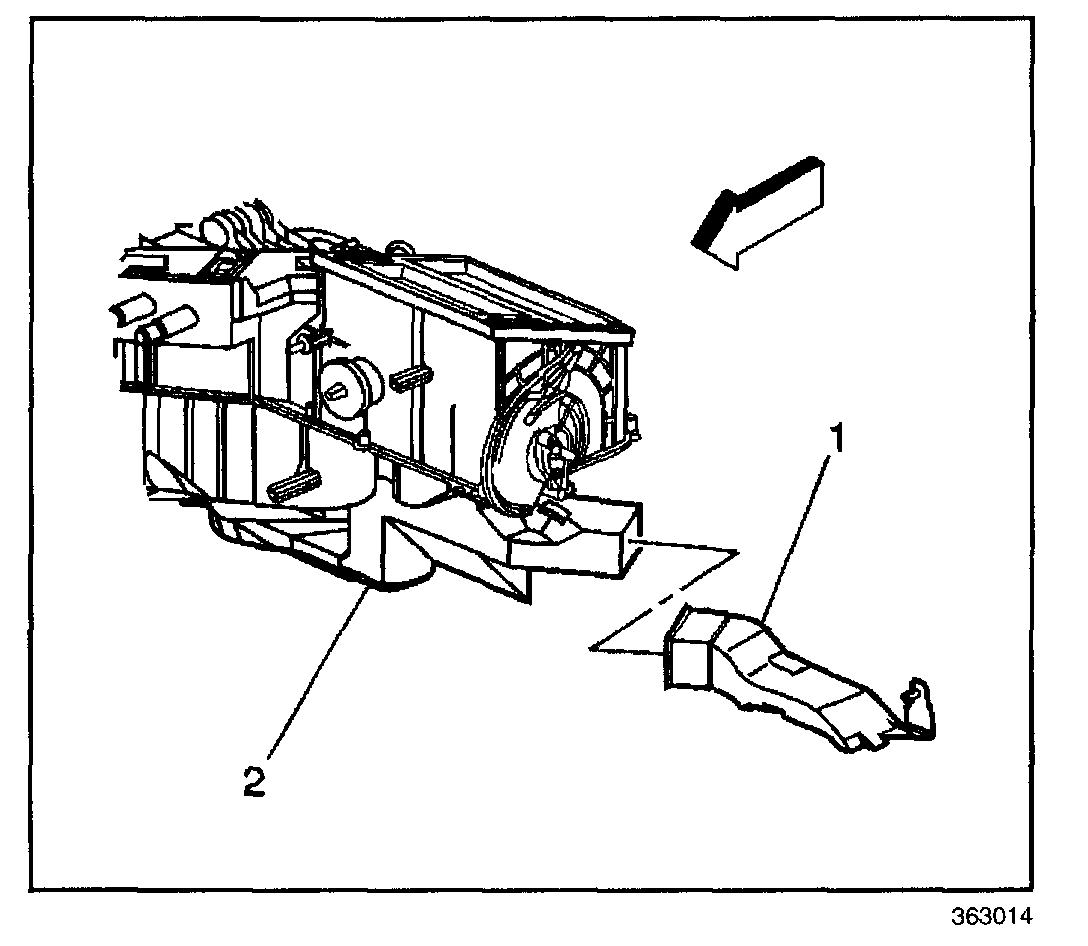
pic 1
1. Remove the floor air outlet duct extension (1) from the floor duct (2).
2. Remove the center console.
3. Remove the screws from the center console duct.
4. Remove the center console duct.
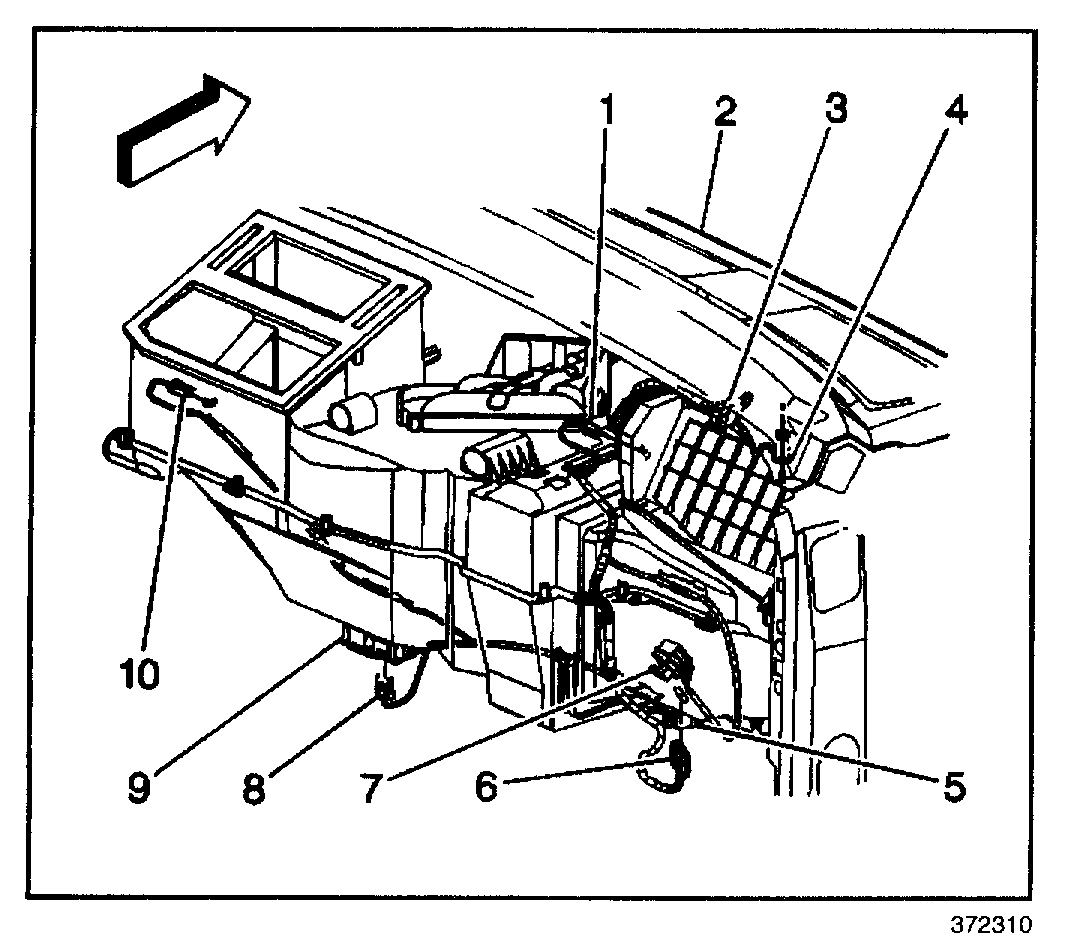
Pic 2
5. Disconnect the electrical connection from the mode actuator (10).
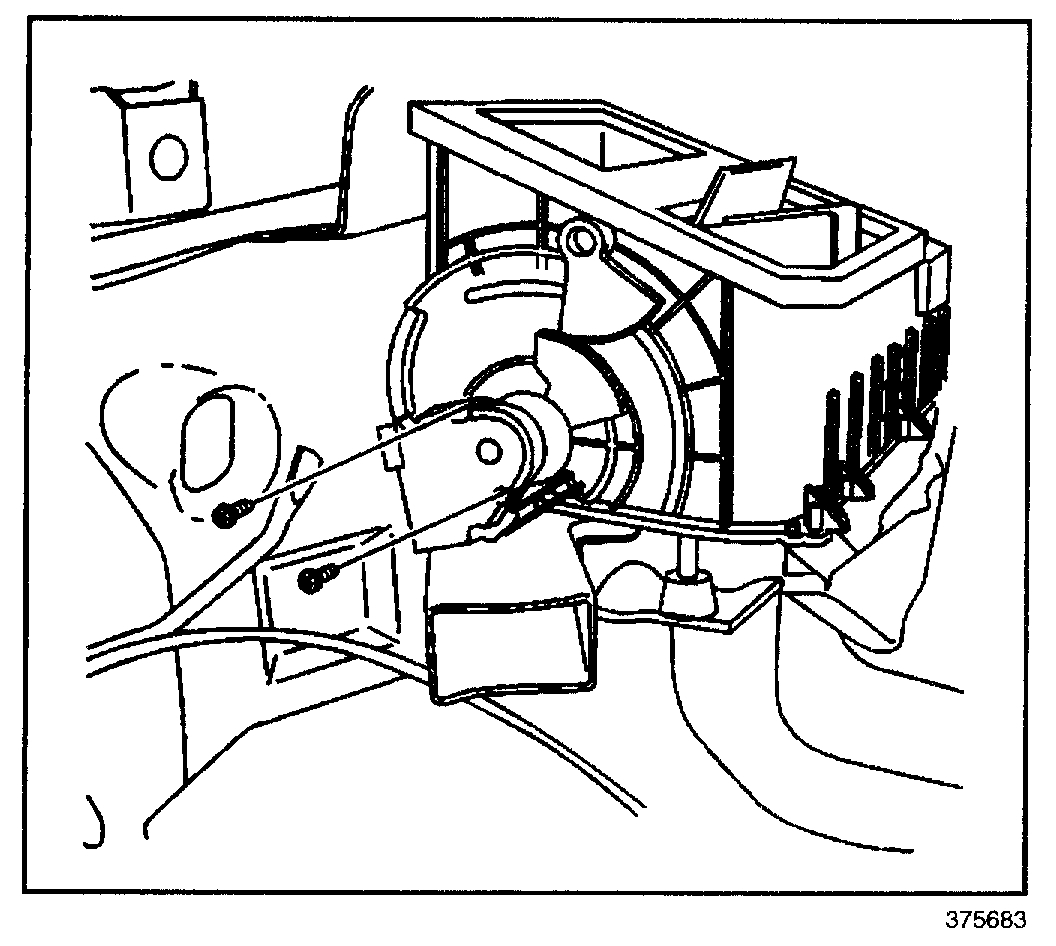
Pic 3
6. Remove the mode actuator mounting screws from the HVAC module.
7. Remove the mode actuator as an assembly with the actuator cam.
INSTALLATION PROCEDURE
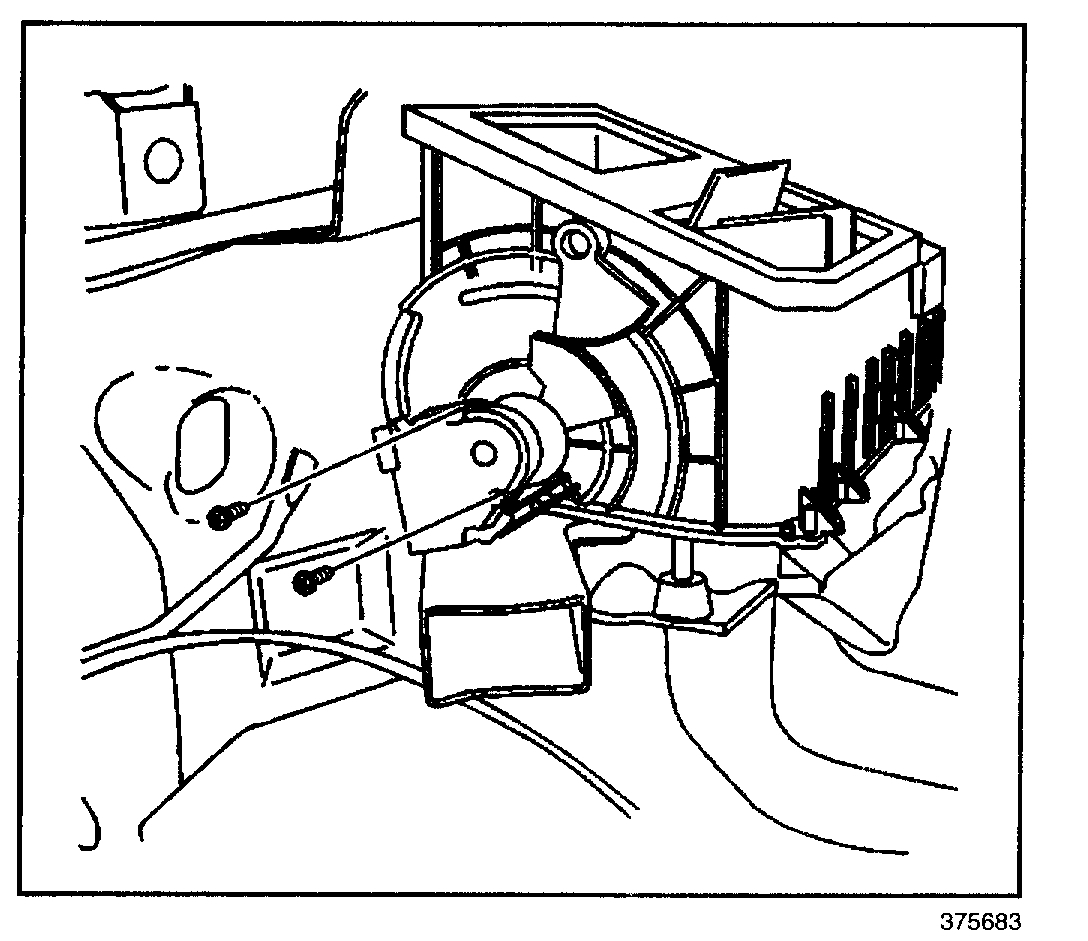
pic 4
1. Install the mode actuator as an assembly with the actuator cam.
- Line up the heater/defroster valve lever with the mode actuator cam slot.
- Line up the A/C valve lever with the mode actuator cam.
NOTE: Refer to Fastener Notice in Service Precautions.
2. Install the mode actuator mounting screw to the HVAC module.
Tighten
Tighten the screw to 1.6 N.M (14 lb in).
Pic 5
3. Connect the electrical connection at the mode actuator (10).
Pic 6
4. Install the center console duct.
5. Install the screws from the center console duct.
Tighten
Tighten the screw to 1.6 Nm (14 lb in).
6. Install the center console.
7. Install the floor air outlet dud extension (1) to the floor air duct (2).
Let me know if this helps or if you have other questions.
Take care,
Joe
Images (Click to make bigger)
Sunday, December 13th, 2020 AT 9:40 PM