Good evening,
I attached the procedure for you below.
The labor time in a shop is 3 hours. I would at least double that time doing it yourself.
Roy
Control Valve Body Cover Replacement
Removal Procedure
1. Disconnect the negative battery cable. Refer to Battery Negative Cable Disconnection and Connection See: Negative > Removal and Replacement > Battery Negative Cable Disconnection and Connection.
2. Disconnect the radiator outlet hose from the radiator. Refer to Radiator Outlet Hose Replacement (LEA) See: Radiator Hose > Removal and Replacement > Radiator Outlet Hose Replacement.
imageOpen In New TabZoom/Print
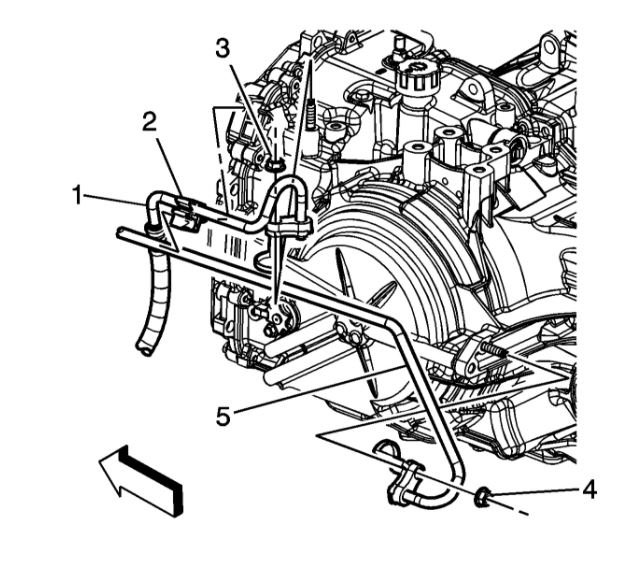
3. Remove the oil cooler inlet (1) and outlet (2) hoses from the retainer (2) on the control valve body cover.
4. Raise and support the vehicle. Refer to Lifting and Jacking the Vehicle See: Vehicle Lifting > Procedures > Lifting and Jacking the Vehicle.
5. Remove the front transmission mount. Refer to Transmission Front Mount Replacement See: Transmission Mount, A/T > Removal and Replacement > Transmission Front Mount Replacement.
6. Drain the transmission. Refer to Transmission Fluid Drain and Fill See: Automatic Transmission/Transaxle > Removal and Replacement > Transmission Fluid Drain and Fill.
imageOpen In New TabZoom/Print
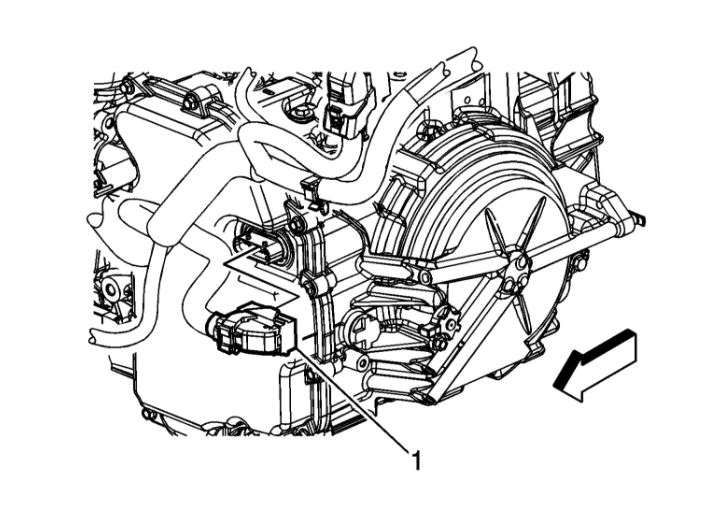
7. Disconnect the control valve body transmission control module (TCM) electrical connector (1), then the wiring harness from the cover.
imageOpen In New TabZoom/Print
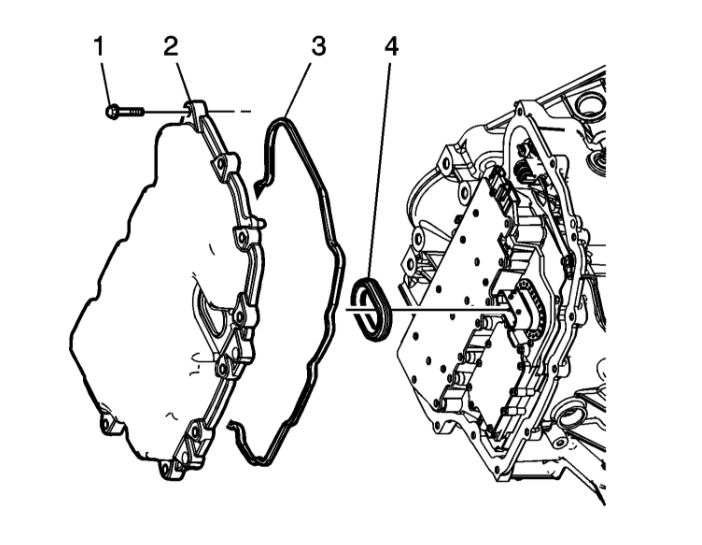
8. Remove the control valve body cover bolts (1).
9. Support the transmission with a transmission jack.
10. Using the transmission jack raise the transmission to gain clearance for removal of the control valve body cover.
11. Remove the control valve body cover.
12. Remove the control valve body cover gasket.
Caution:
Support the control solenoid valve assembly around the connector when removing the seal. Excessive pulling force can damage the internal electrical connections.
13. Remove the control valve body cover wiring connector hole seal.
14. Remove all traces of the old gasket material. Clean the transmission case and control valve body cover gasket surfaces.
Images (Click to enlarge)
Dec 31, 2020 at 4:22 PM