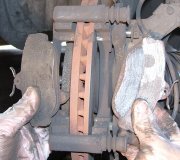
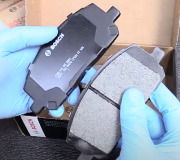
The pistons had to be pressed back into the caliper housings to make room for the new, thicker pads. Once everything is reassembled, those pistons must be run back out to adjust them. A common mistake made by many competent do-it-yourselfers is they push the brake pedal all the way to the floor multiple times. If you're lucky, or if the master cylinder is less than about a year old, that will work. The brake pedal will become high and hard, as normal, and at that point the calipers are adjusted. If you're not lucky, the master cylinder will be damaged and have to be replaced.
Crud and corrosion builds up in lower halves of the bores where the pistons don't normally travel in the master cylinder. When the pedal is pushed more than half way to the floor, the rubber lip seals are run over that crud and that can rip them. That results in internal leakage. You won't lose brake fluid, but it will bypass those seals rather than being pushed down to the wheels.
Rotors that are thinner than the published legal limits will not cause a low brake pedal. The pistons will simply run further out of the caliper housings to self-adjust, like normal. No professional will machine a rotor beyond it's "machine-to" spec. That puts their reputation at stake and leaves them open to a lawsuit. Beyond that, rotors have another "discard" spec that allows them to wear a little more than what they can be machined to. Calipers are designed to accommodate that rotor wear, plus a little more. If a do-it-yourselfer were to machine a rotor way too much, or a driver ignores grinding brakes and the rotor becomes much too thin, the piston will twist in the caliper or it will fall out. Either way, you'd have a real low brake pedal, but also a huge pile of brake fluid on the ground just inside that tire. If you're not losing brake fluid, rotor thickness isn't an issue as far as pedal feel and height is concerned.
The order you bleed brakes is of no concern. Some people do the left front one first because it takes the least amount of fluid to get one circuit fully-bled. Some start with the right rear to get the most air out of the system with the first wheel. Also, a lot of rear-wheel-drive vehicles have just one brake line running to the rear, then it splits and goes to each rear wheel. Bleeding the left or right rear wheel is the same and removes the same amount of air. When I used to rebuild calipers and wheel cylinders as part of a standard brake job, (1980s), I always bled the wheel I was standing closest to first, and I always used only gravity-bleeding. When brake fluid started to drip from a bleeder screw, I tightened that one, then waited for the next one to start dripping. If a customer was in a hurry, we might get a helper involved to push the brake pedal, but never more than half-way to the floor, and just enough to get the fluid flowing. Once all four bleeder screws were closed, I would irritate the brake pedal a couple of times by hand. With no power assist, the pedal can only be pushed about two inches, and much less on GM cars. That was enough to wash any stuck air bubbles into the wheel cylinders and calipers. You'd already have a solid pedal, but I'd open each bleeder screw once more to let those little bubbles out.
The order of bleeding, like so many warnings, goes back to a problem with GM front-wheel-drive cars. They have a valve in the master cylinder that blocks fluid flow when it's tripped. Think of a teeter totter that's level and balanced, and it's between the two outlet ports. As long as equal fluid pressure builds up in both halves of the hydraulic system, that valve stays balanced, and no port is blocked. Now, if you were to develop an external leak, pressure could only build up on the side without the leak. That unequal pressure will cause the valve to move and block the port feeding the leak. That prevents loss of brake fluid so it keeps the good side working. In fact, it works so well that many drivers don't even notice a problem except the red "Brake" warning light turns on.
The same thing happens when you bleed with a helper. With one bleeder screw open, no pressure can build in that half of the system when the pedal is pressed. That trips the valve, then no fluid will flow to that front wheel or the opposite rear wheel. Many professionals think that can be avoided by bleeding in a certain order, but that doesn't make sense. How does that valve know the difference between bleeding that one wheel or there's a leak in that wheel's circuit? Many do-it-yourselfers also replace the master cylinder when they can't get fluid to flow from that one port, then they run into the same problem with the new one when they again resort to pedal-bleeding with a helper. (By the way, the only way I've ever found to reset those valves was to go to one of the wheels that won't flow any fluid, open that bleeder screw, then give it a quick, short burst of compressed air, then let it gravity-bleed. You don't want to send air back into the line any more than necessary. It just takes a little to reset the valve).
There have been multiple contributors to this problem, and in most cases the model year, engine size, mileage, and transmission type aren't listed. Mileage is used to make generalizations as to best suspects. Different model years use different anti-lock brake systems, and the engine and transmission used can affect the type of ABS system used. If a truck has a rear-wheel-anti-lock, (RWAL) system, when it comes to bleeding brakes, you treat the valve as if it isn't even there. They don't interfere with anything, and air won't be trapped inside them.
Chrysler typically uses four independent circuits with their four-wheel-ABS systems, so any one wheel's braking force can be modulated independently. GM often used similar systems, but they tie the two rear wheels together and have a three-channel control system. Brake fluid pressure is reduced to both rear wheels when just one of them slows down too quickly. These systems operate by blocking fluid flow to a wheel that's slowing down too quickly. If it doesn't pick speed back up to match the second and third-fastest wheels, it bleeds off some fluid pressure. Once wheel speed comes back up, it opens a different valve to apply stored fluid to reapply that brake, That sequence of "block, bleed, apply" can occur is rapidly as 30 times per second, but 15 times is more common. That's the buzzing and vibrating observed when the system engages.
That "apply" function can deliver pressurized brake fluid from a motor-driven pump that ramps up the instant a skid is detected, (Neons) or that can come from highly-pressurized fluid that's stored in an accumulator. Many of those systems also use that pressurized fluid for the power assist function. You'll hear the pumps run sometimes when just starting the engine, then again after multiple normal stops as the pressurized fluid is used up. It can take as many as 40 pedal applications with the ignition switch off to totally empty the accumulator. At that point, any air that might have gotten in it will be expelled back to the reservoir.
Some systems use a different design to store a small amount of pressurized brake fluid in separate chambers for each circuit. This is where air can become trapped, but only if the brake fluid is drained out of the reservoir, and then new fluid is sent down along with the air in the lines leading from the master cylinder. There is usually no way to get that air out without using a scanner. It will command the ABS Computer to open those valves briefly while you're instructed to open two bleeder screws. The valves will open, and the fluid with the air in it will have somewhere to flow to. This is where a lot of people are running into problems with low brake pedals after bleeding the system.
If you find you need to replace the master cylinder, bench-bleeding is mandatory, and a simple procedure, but then everyone thinks you have to bleed at the wheels. If you think about this logically, there won't be any air in the lines except for the first inch or two, since brake fluid isn't going to run up and air isn't going to flow down through the brake fluid. I've replaced dozens of master cylinders since the 1980s, and especially in the last 25 years, I've never needed to bleed at the wheels. My procedure is to loosen the soft metal line nuts, remove the master cylinder's mounting nuts, pull the master cylinder forward off the studs, then use it as a handle to bend the brake lines up a little. That will prevent brake fluid from running out of those lines. Unscrew the lines, (use rags to prevent brake fluid from dripping on the paint), then screw the lines into the freshly bench-bled new master cylinder. While you're installing the line nuts, a tiny amount of air will start to flow up towards the reservoir, and brake fluid will flow down to replace it. Bend the lines back down and reinstall the master cylinder to the power booster. Snug the line nuts, then back one off about 1/4 turn. Have a helper press the brake pedal very slowly, but no more than half way. (He's usually the new guy in the shop and you want to get him in the habit of never pressing the brake pedal more than half-way to the floor). It should take about 15 seconds to push the pedal that far. Snug that line nut, then have the helper release the brake pedal quickly. Open that nut again and repeat the procedure if needed until no air bubbles come out. Tighten that nut, then do the same thing for the other line. Pushing the pedal slowly gives air time to float back up as the fluid is going down. Releasing it quickly washes any air bubbles back into the reservoir along with the fluid that's rushing back.
Using the helper in this manner is also not necessary. I've replaced a few master cylinders on my own vehicles, at home, with no one to help. Just install the bench-bled new unit, then go out and drive it like normal. Any air bubbles that might be in the lines aren't going to go down to the wheels. They'll keep floating back up and will flow into the reservoir.
Was this helpful?
Yes
No
Tuesday, February 9th, 2021 AT 3:27 PM