Hi,
Replacing front brake pads and rotors isn't too hard to do. Since they usually last around 25,000 miles, you can get lifetime parts and never have to pay for parts again.
Let's get started. First, here is a link that shows in general how it's done. You can use this as a guide when working on your vehicle:
https://www.2carpros.com/articles/how-to-replace-front-brake-pads-and-rotors-fwd
Here are the directions specific to your vehicle. The pics below correlate with the directions.
__________________________________________
2004 Saturn Truck VUE 2WD L4-2.2L VIN D
Brake pad and Caliper Bracket Replacement
Vehicle Brakes and Traction Control Hydraulic System Brake Caliper Service and Repair Procedures Brake Caliper Bracket Replacement
BRAKE CALIPER BRACKET REPLACEMENT
Brake Caliper Bracket Replacement
Caution: Refer to Brake Dust Caution in Service Precautions.
Removal Procedure
Caution: Do not move the vehicle until a firm brake pedal is obtained. Failure to obtain a firm pedal before moving vehicle may result in personal injury.
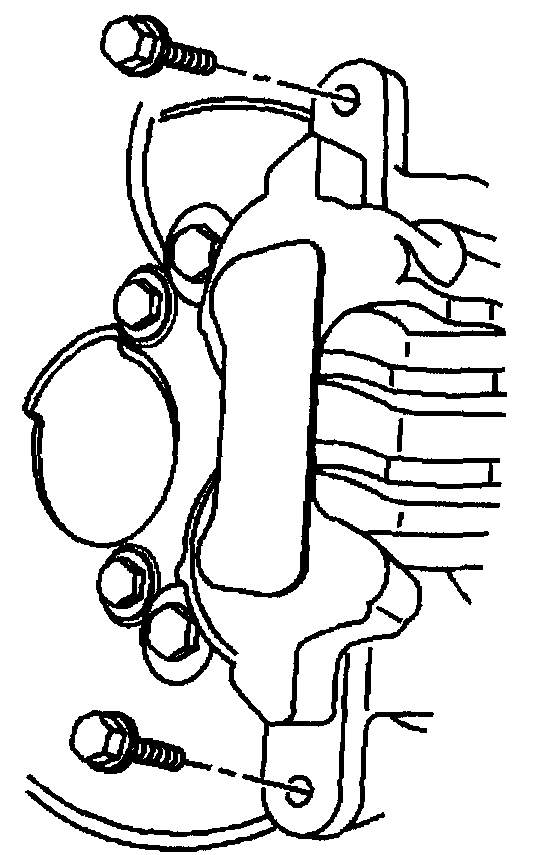
pic 1
1. Remove the brake caliper from the brake caliper bracket.
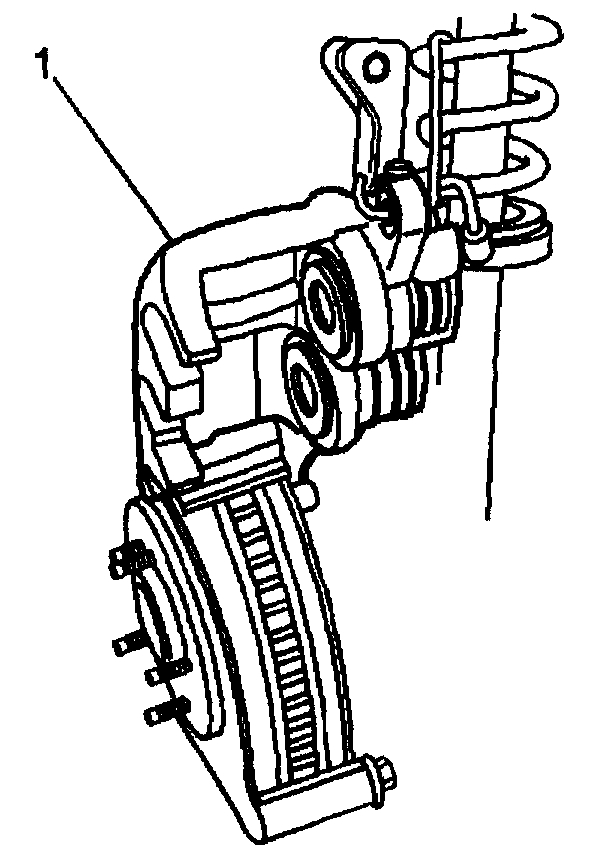
Notice: Support the brake caliper with heavy mechanic's wire, or equivalent, whenever it is separated from it's mount and the hydraulic flexible brake hose is still connected. Failure to support the caliper in this manner will cause the flexible brake hose to bear the weight of the caliper, which may cause damage to the brake hose and in turn may cause a brake fluid leak.
pic 2
2. Support the brake caliper (1) with heavy mechanic's wire, or equivalent; do NOT disconnect the hydraulic brake flexible hose from the caliper.
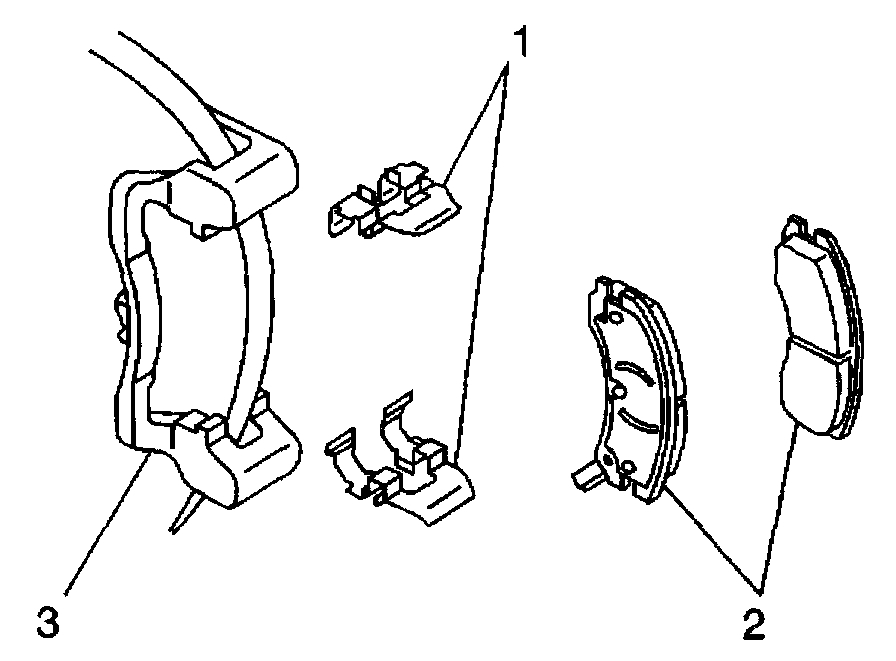
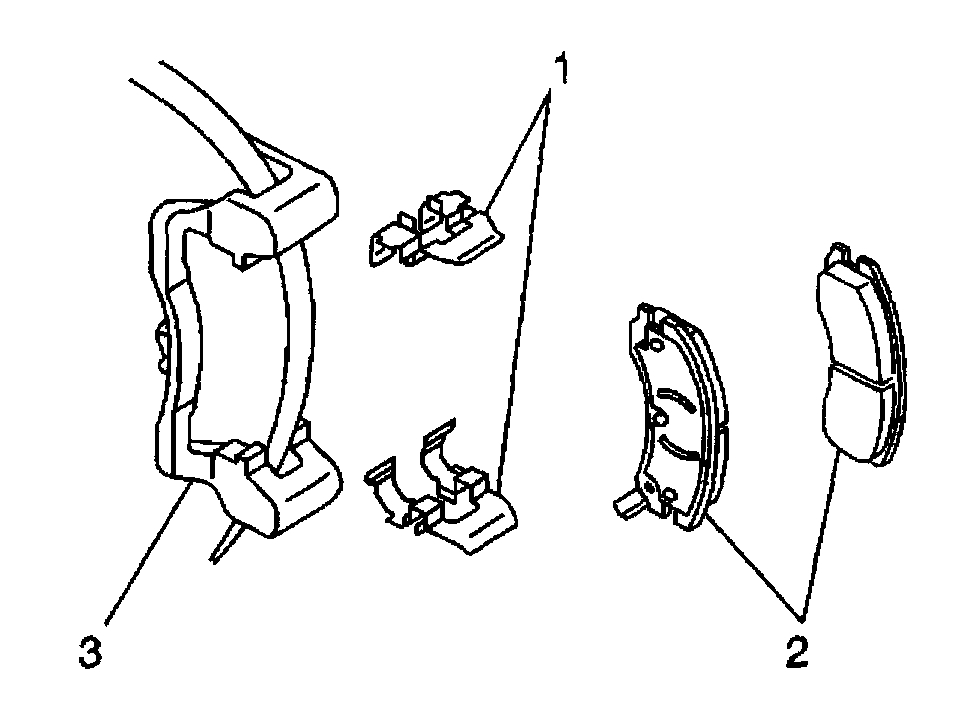
pic 3
3. Remove the brake pads (2) from the brake caliper bracket (3).
4. Remove the brake pad retainers (1) from the brake caliper bracket (3).
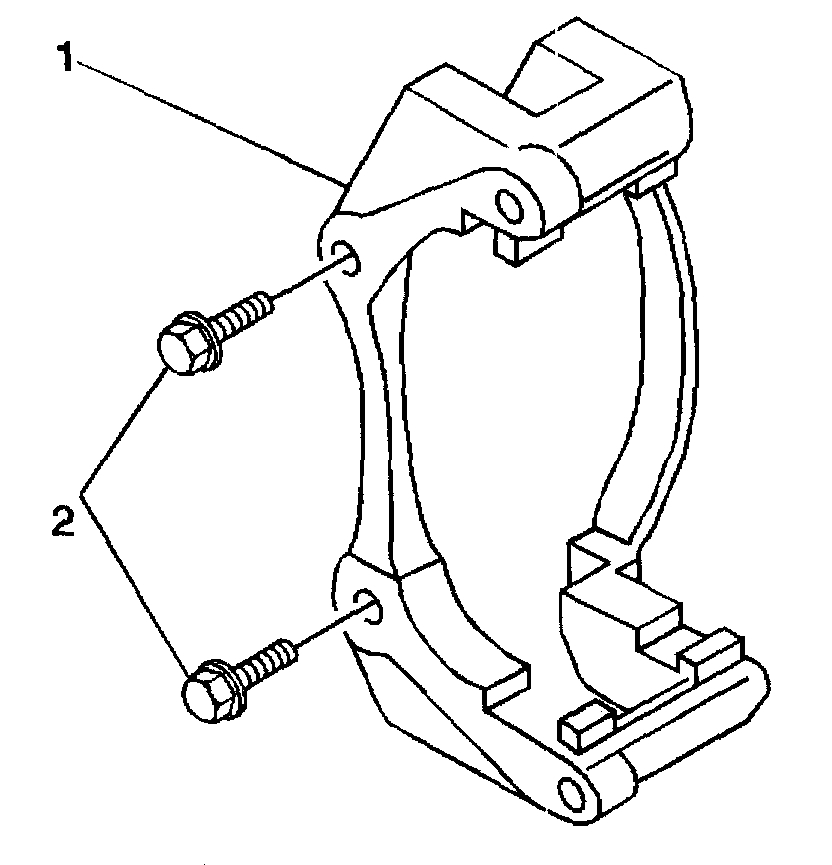
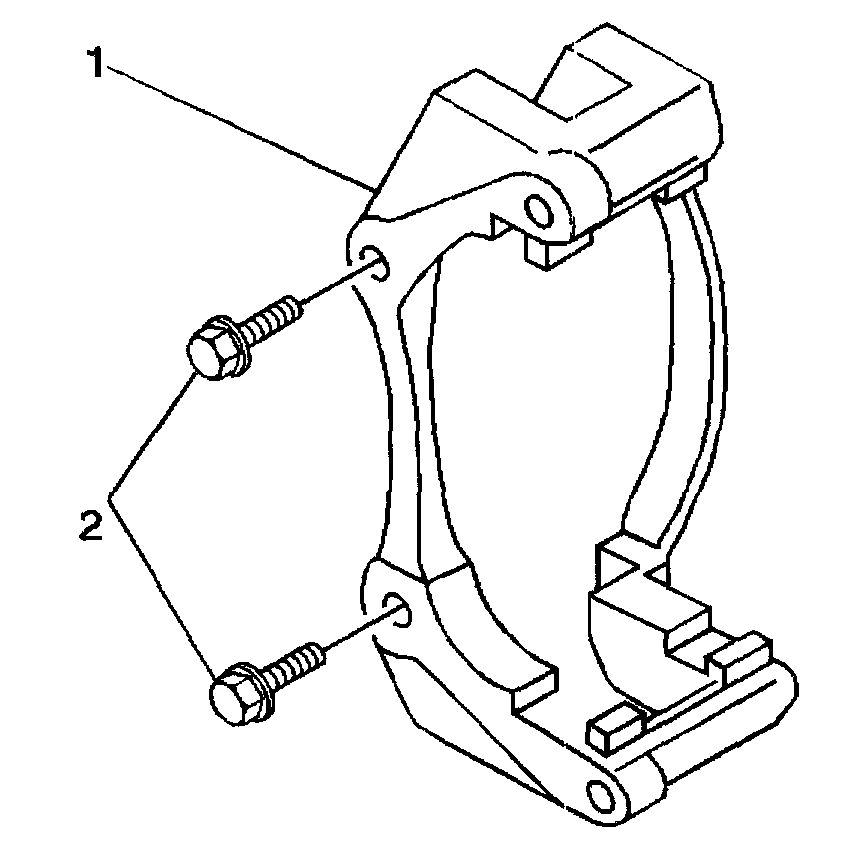
pic 4
5. Remove the brake caliper bracket bolts (2).
6. Remove the brake caliper bracket (1) from the knuckle.
Installation Procedure
pic 5
1. Install the brake caliper bracket (1) to the knuckle.
Important: If reusing the caliper bracket bolts, the threads of the caliper bracket bolts and the threads of the knuckle mounting holes must be thoroughly cleaned and free of debris prior to the application of thread locker.
2. Prepare the bolts and the threaded holes for assembly:
2.1. Thoroughly clean the residue from the bolt threads by using denatured alcohol or equivalent and allow to dry.
2.2. Thoroughly clean the residue from the threaded holes by using denatured alcohol or equivalent and allow to dry.
2.3. Apply threadlocker Saturn P/N 21005994, or equivalent to two-thirds of the threaded length of the lower caliper bracket bolts.
2.4. Allow the threadlocker to cure approximately ten minutes before installation.
Notice: Refer to Fastener Notice in Service Precautions.
3. Install the two brake caliper bracket bolts (2).
^ Tighten the front brake caliper bracket bolts to 185 Nm (136 lb ft).
pic 6
4. Install the brake pad retainers (1) to the brake caliper bracket (3).
5. Install the brake pads (2) to the brake caliper bracket (3).
6. Install the brake caliper (1) to the front brake caliper bracket (2).
__________________________
Rotor Replacement
Once the caliper bracket is removed, the rotor can be removed. Make sure to install the new rotor before reinstalling the caliper mount.
I hope this helps. Let me know if you have other questions.
Take care and God Bless,
Joe
Images (Click to enlarge)
Mar 8, 2021 at 9:27 AM