Hi,
Replacing brake pads and rotors isn't too difficult. In general, you can expect them to last around 25,000 miles before being worn down. However, that is based on driving habits.
First, here is a link that shows in general how to replace front brake pads and rotors on a front wheel drive:
https://www.2carpros.com/articles/how-to-replace-front-brake-pads-and-rotors-fwd
______________________________
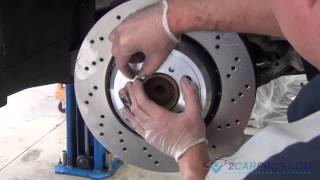
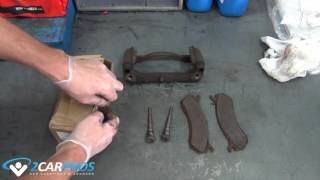
Now the C-Max isn't offered in the US, but I believe it is the same as our Ford Focus. Here are the directions for brake pad and rotor disc for a focus. It should be very similar to what you have. The attached pics correlate with the directions.
_____________________________
2004 Ford Focus L4-2.0L DOHC VIN 3
Front
Vehicle Brakes and Traction Control Disc Brake System Brake Pad Service and Repair Procedures Front
FRONT
Removal
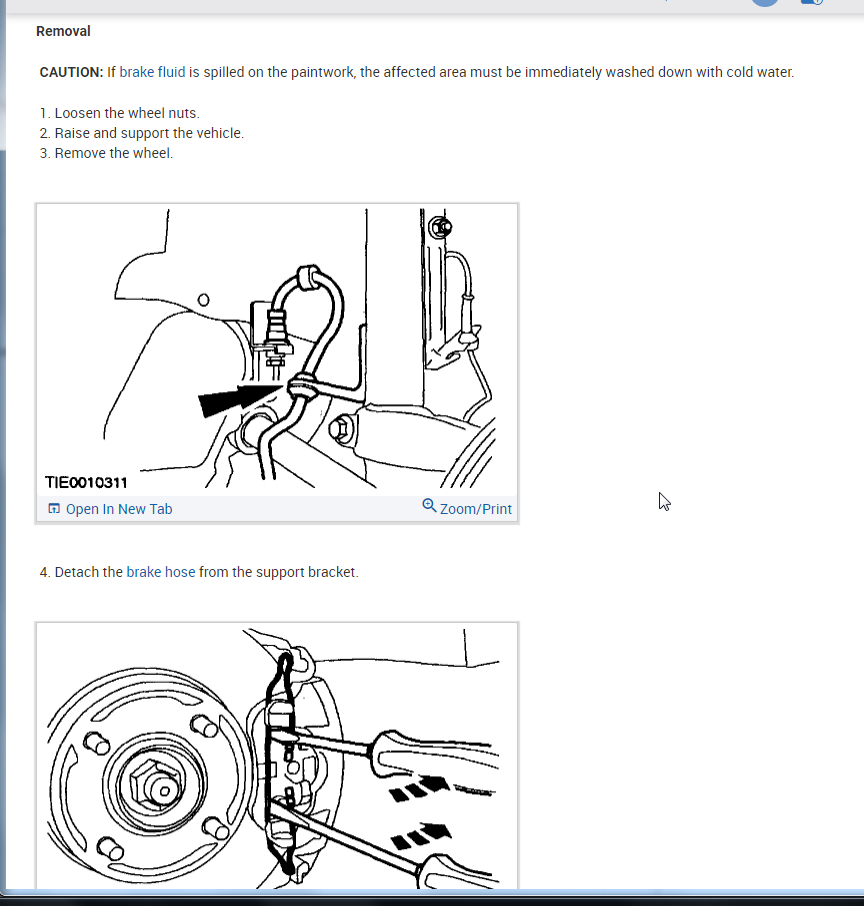
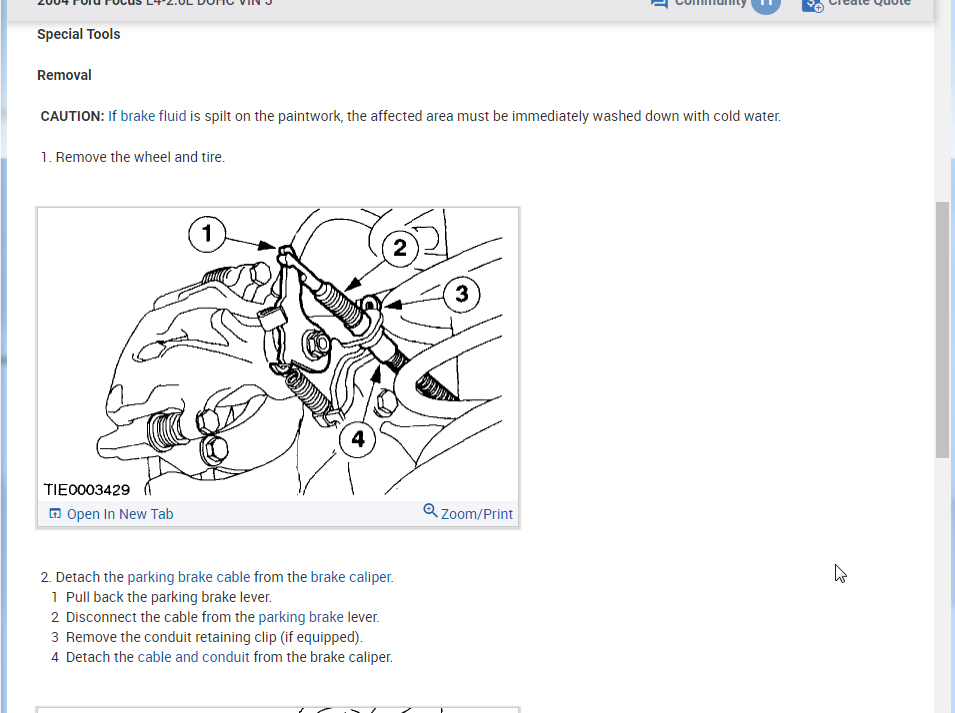
CAUTION: If brake fluid is spilled on the paintwork, the affected area must be immediately washed down with cold water.
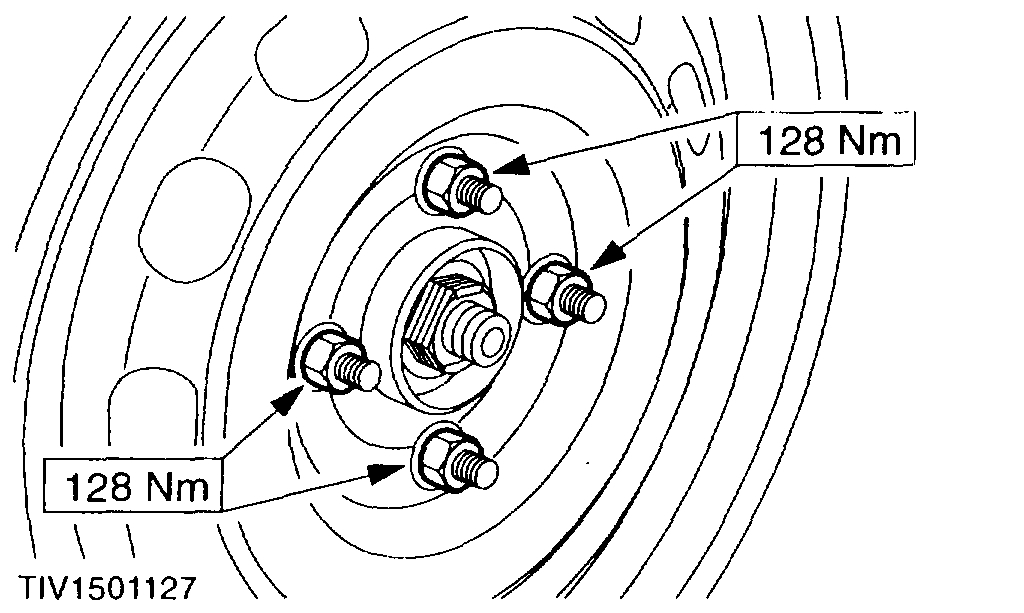
1. Loosen the wheel nuts.
2. Raise and support the vehicle.
3. Remove the wheel.
pic 1
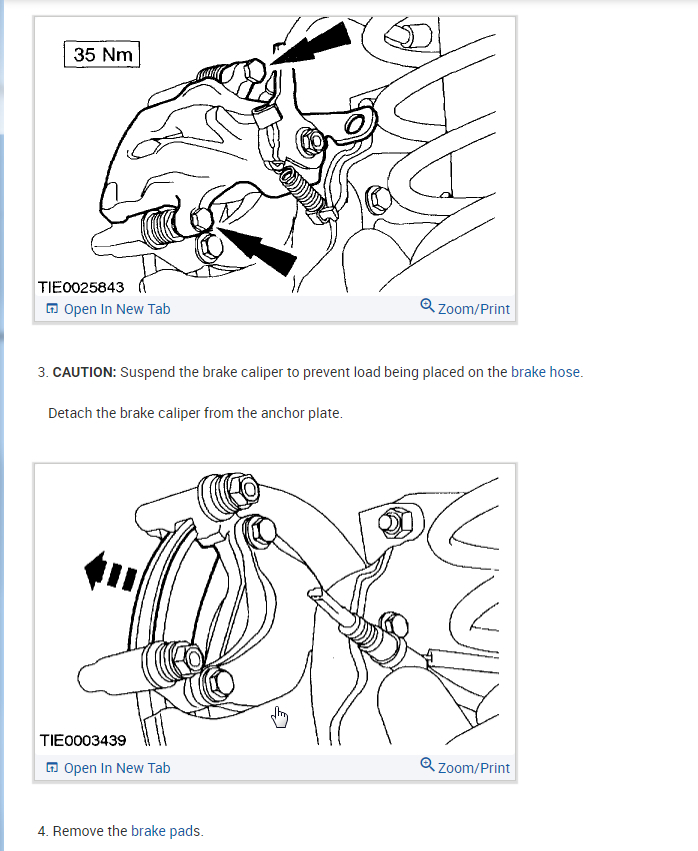
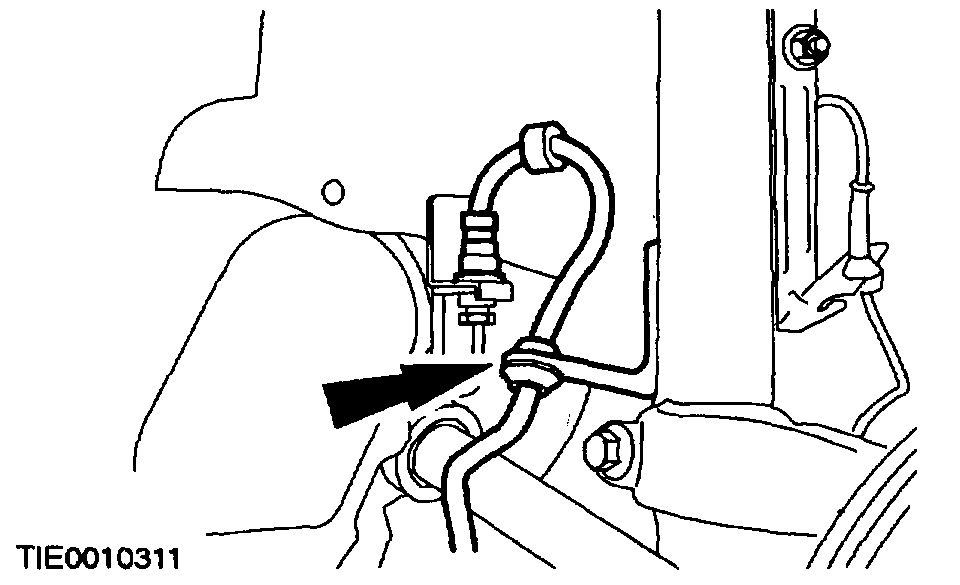
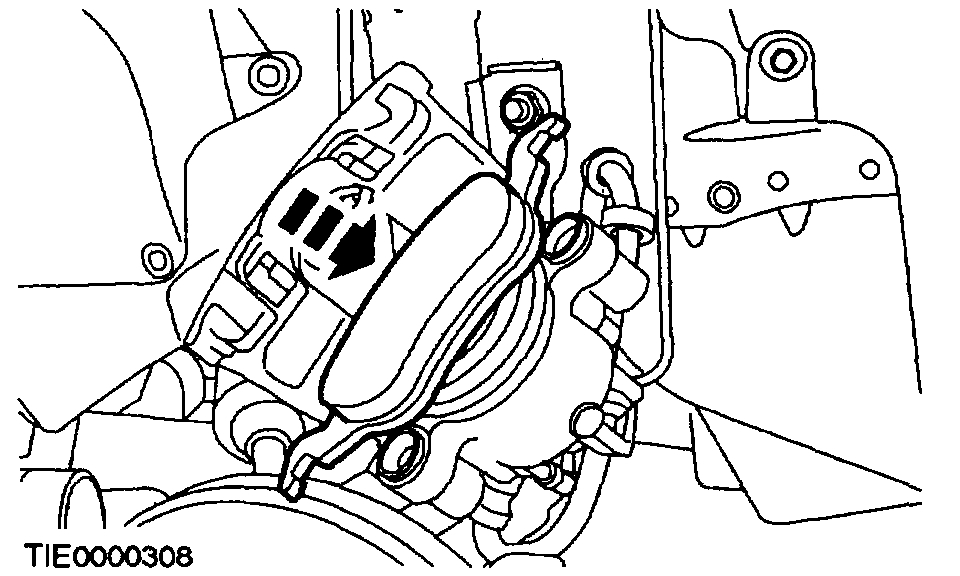
4. Detach the brake hose from the support bracket.
pic 2
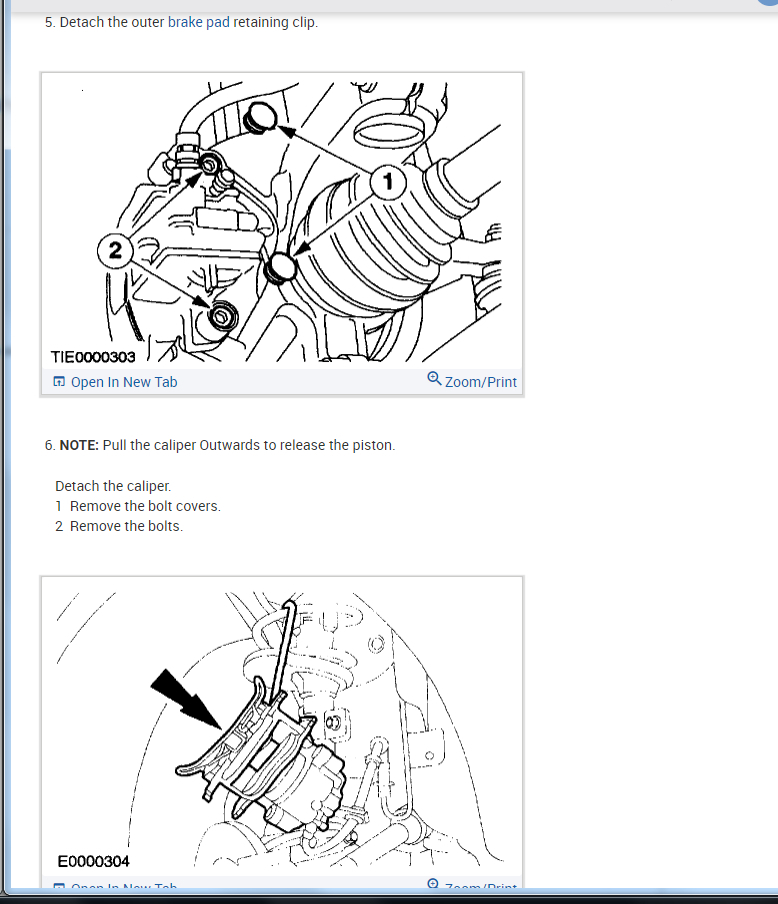
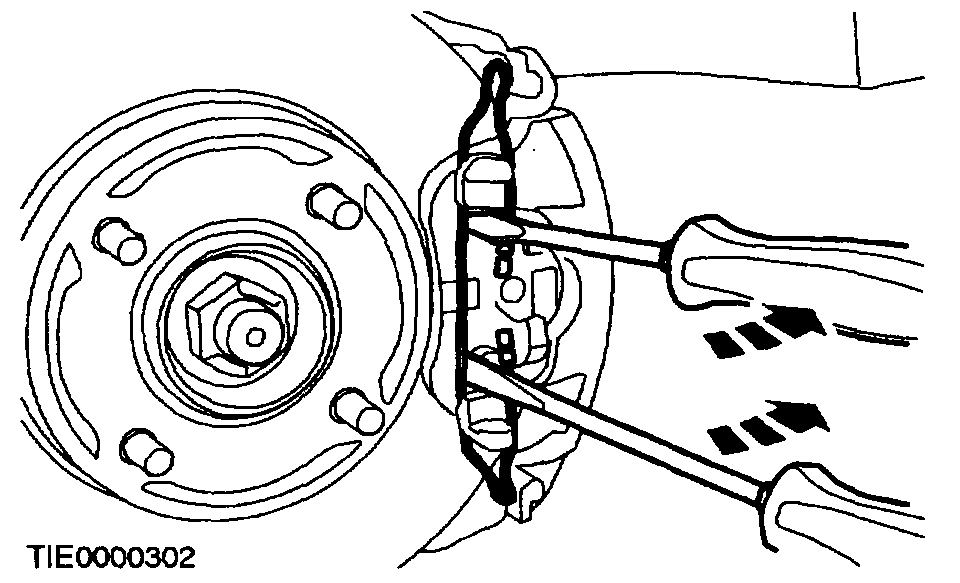
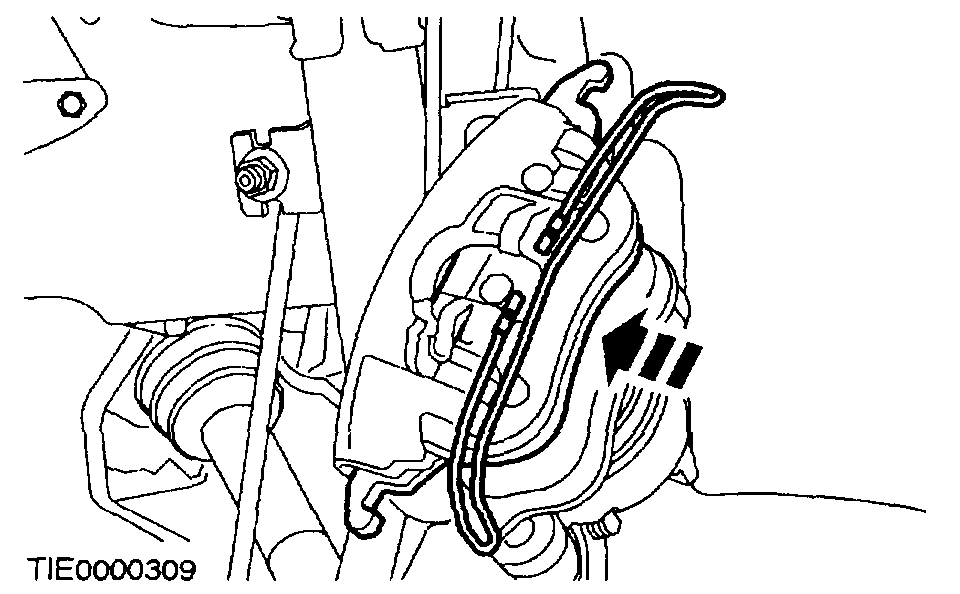
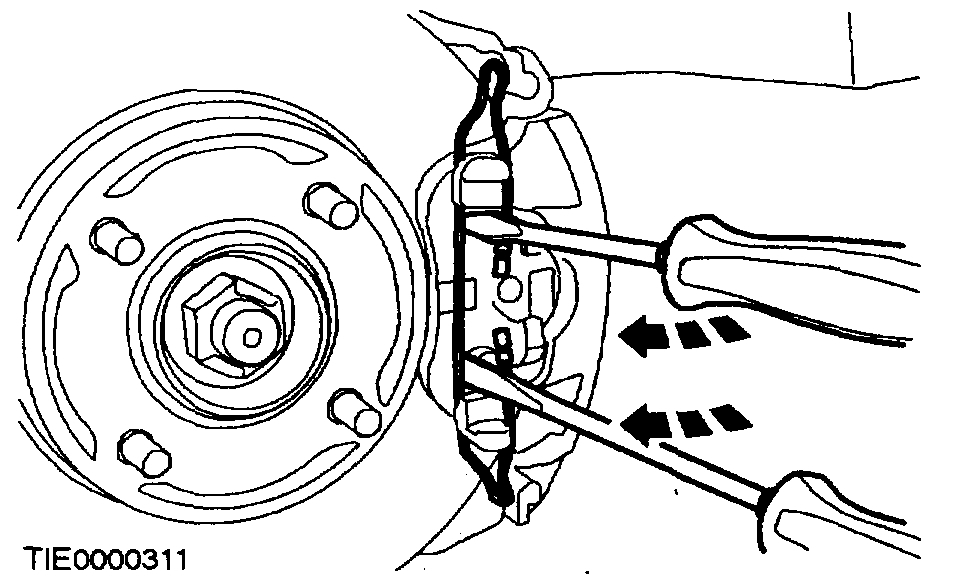
5. Detach the outer brake pad retaining clip.
pic 3
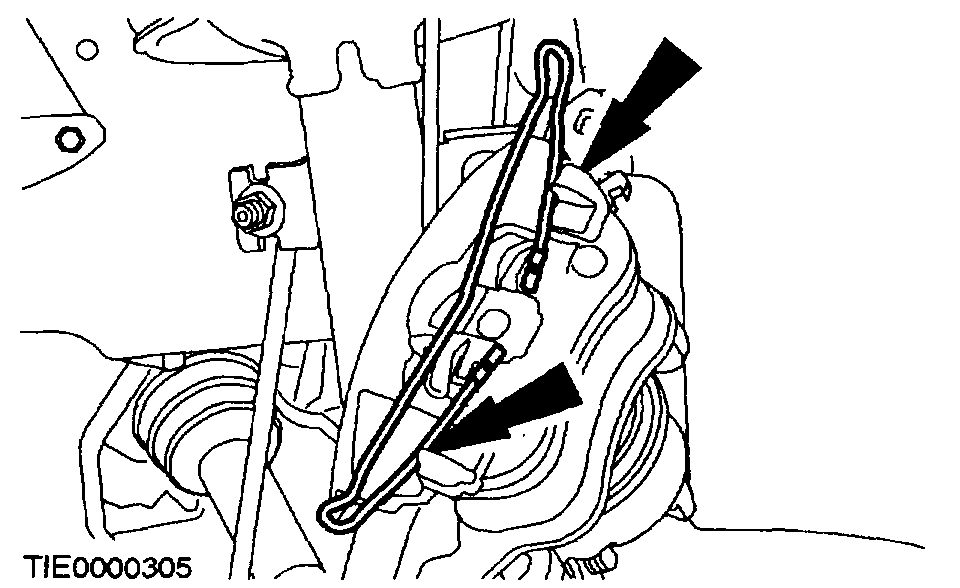
6. NOTE: Pull the caliper Outwards to release the piston.
Detach the caliper.
1 Remove the bolt covers.
2 Remove the bolts.
pic 4
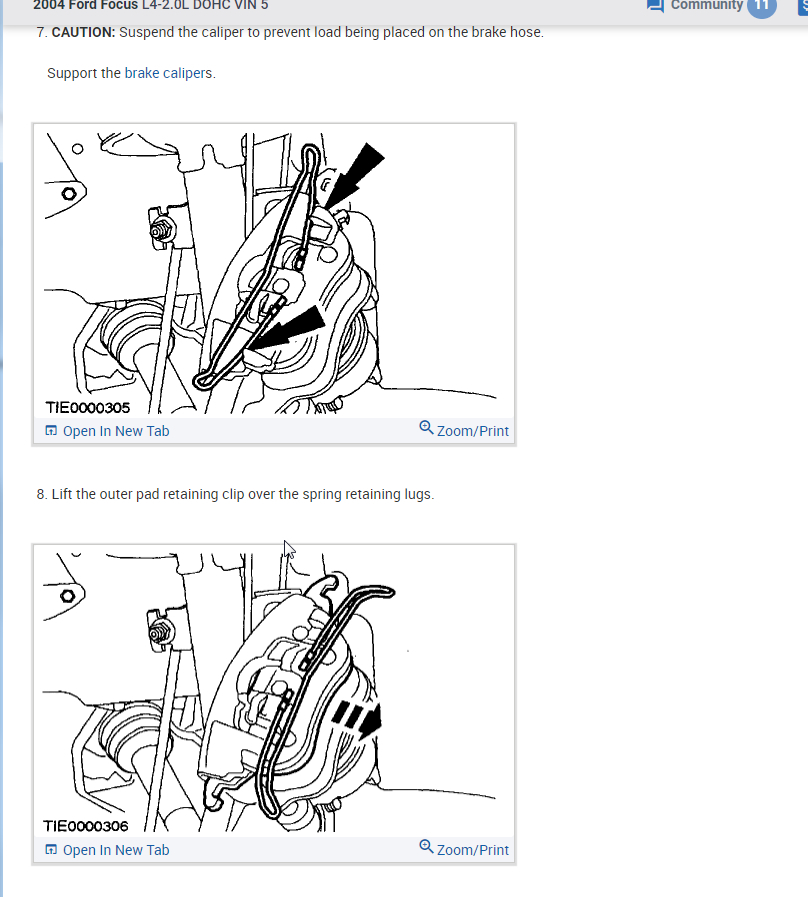
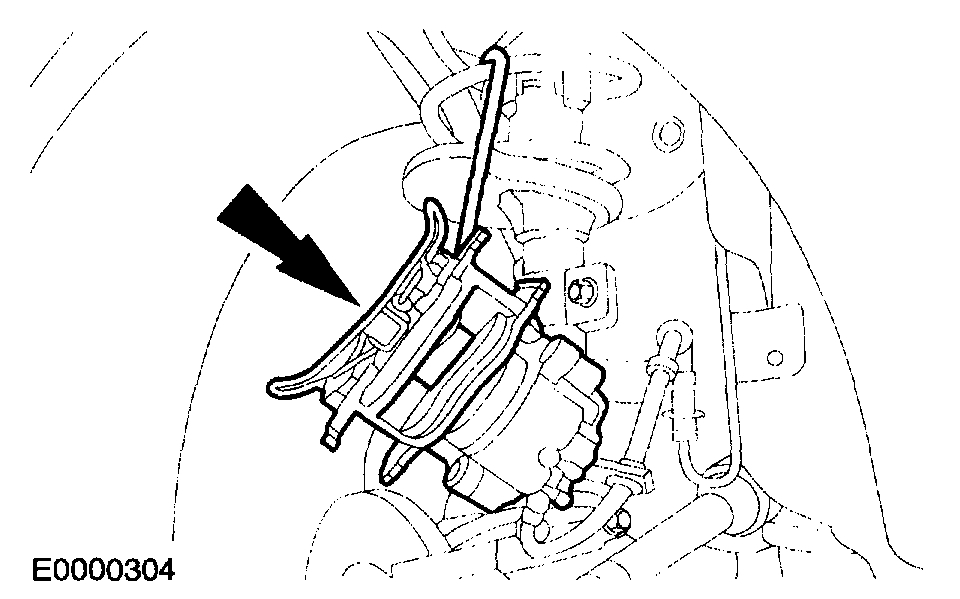
7. CAUTION: Suspend the caliper to prevent load being placed on the brake hose.
Support the brake calipers.
pic 5
8. Lift the outer pad retaining clip over the spring retaining lugs.
pic 6
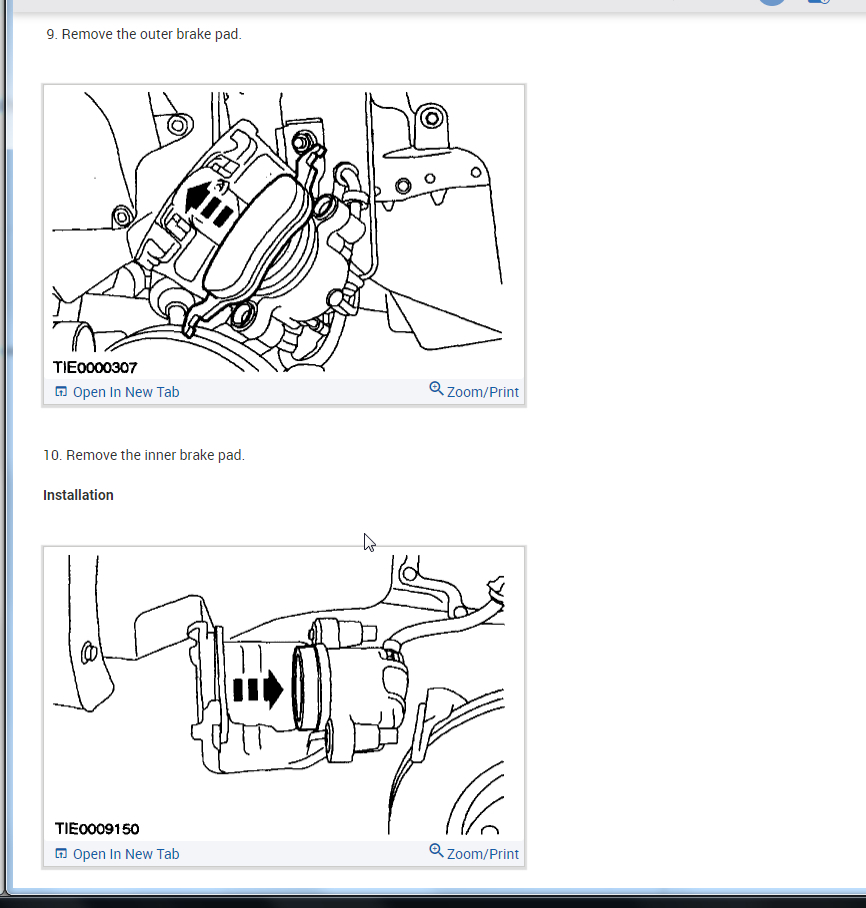
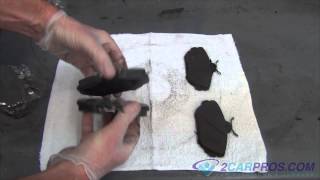
9. Remove the outer brake pad.
pic 7
10. Remove the inner brake pad.
Installation
pic 8
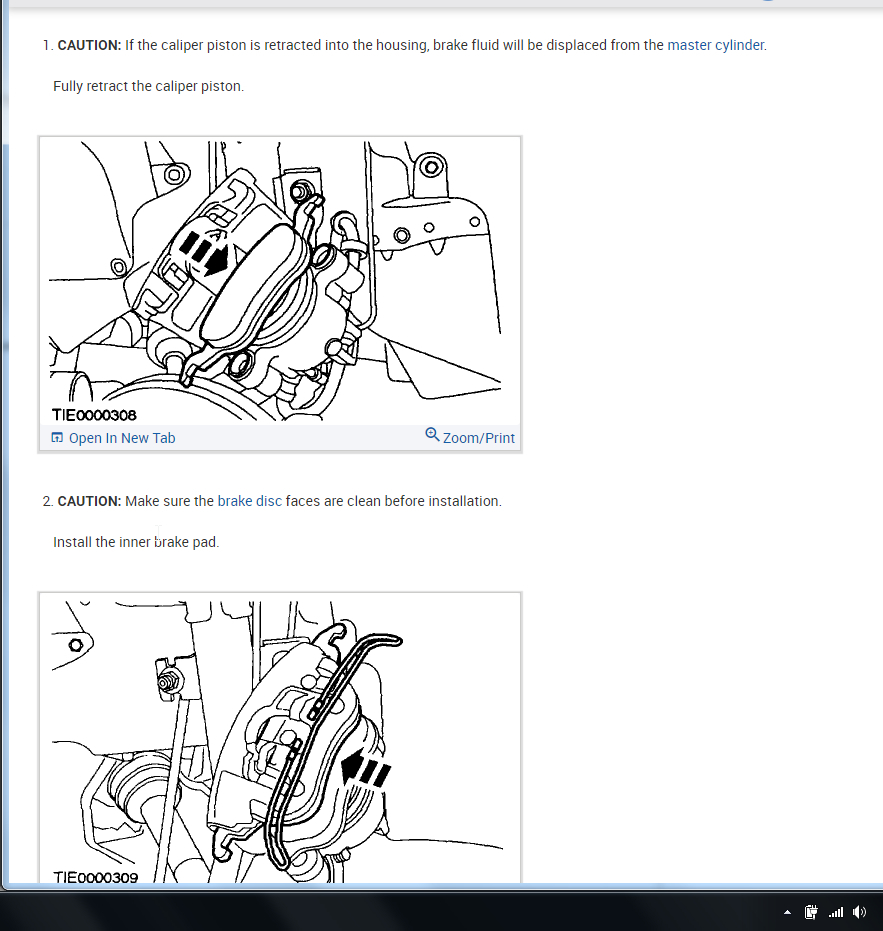
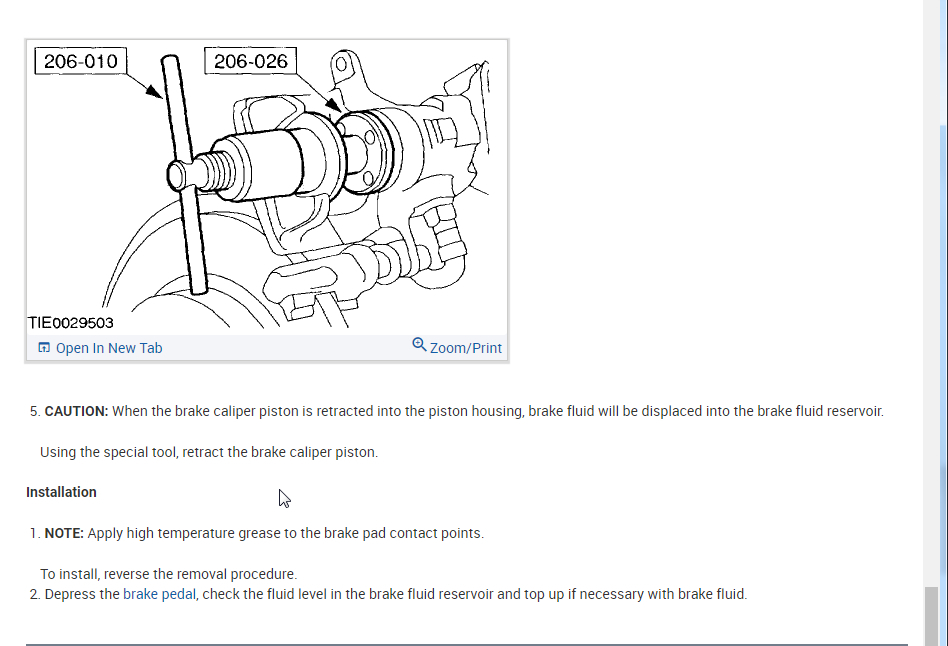
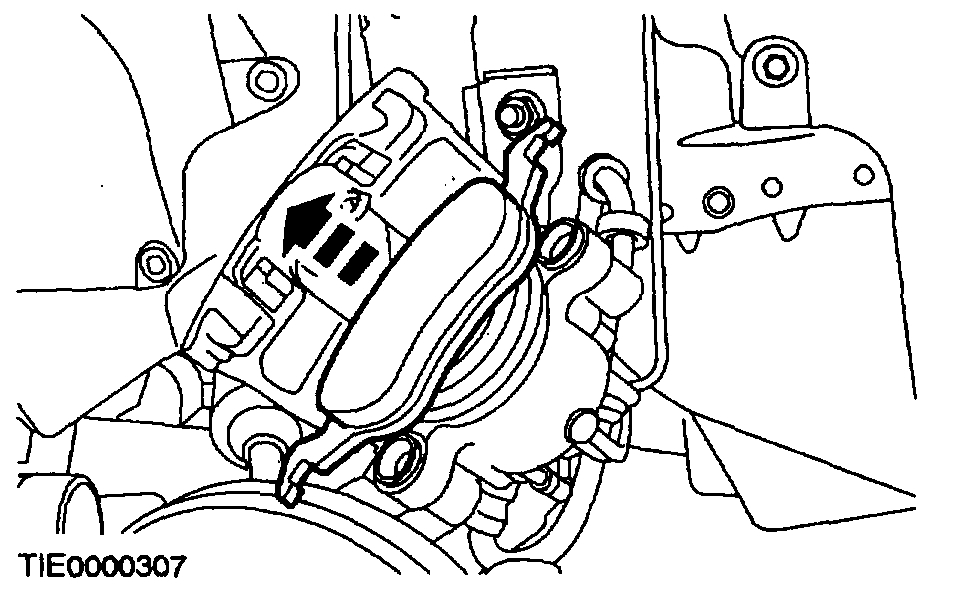
1. CAUTION: If the caliper piston is retracted into the housing, brake fluid will be displaced from the master cylinder.
Fully retract the caliper piston.
pic 9
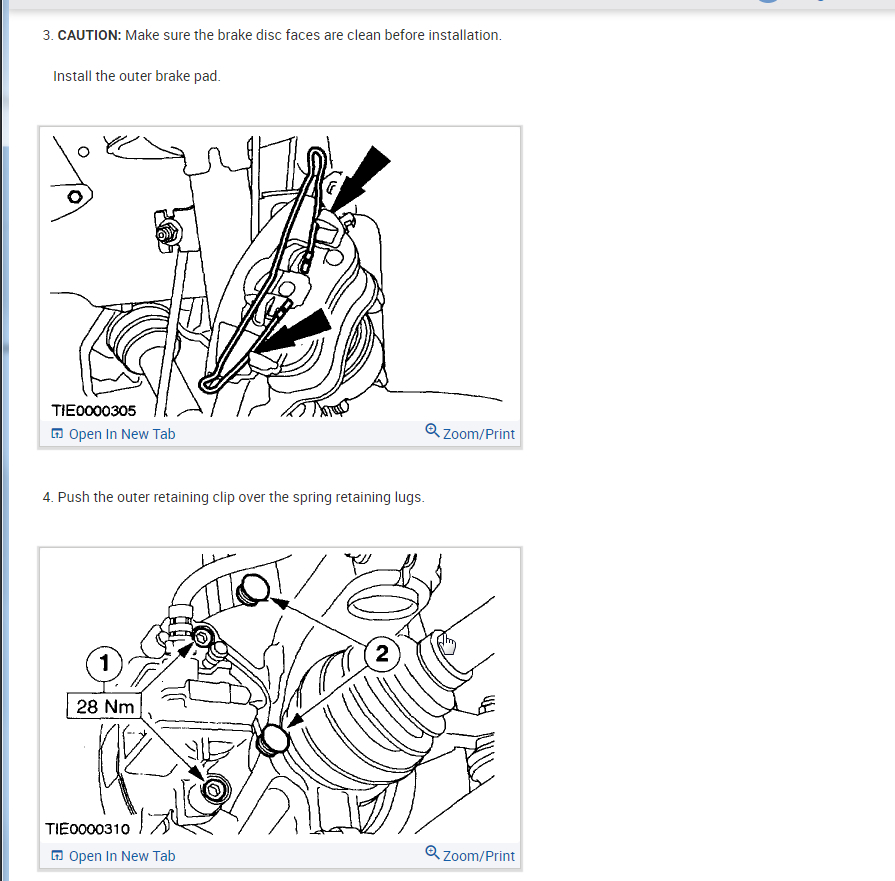
2. CAUTION: Make sure the brake disc faces are clean before installation.
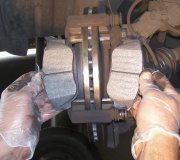
Install the inner brake pad.
pic 10
3. CAUTION: Make sure the brake disc faces are clean before installation.
Install the outer brake pad.
pic 11
4. Push the outer retaining clip over the spring retaining lugs.
pic 12
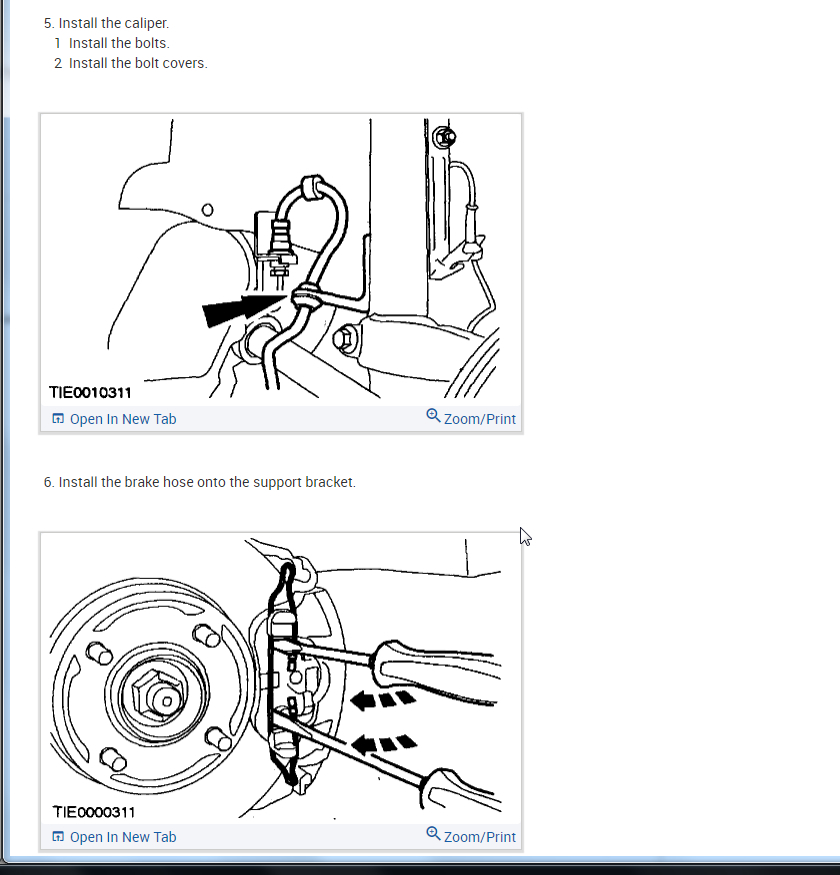
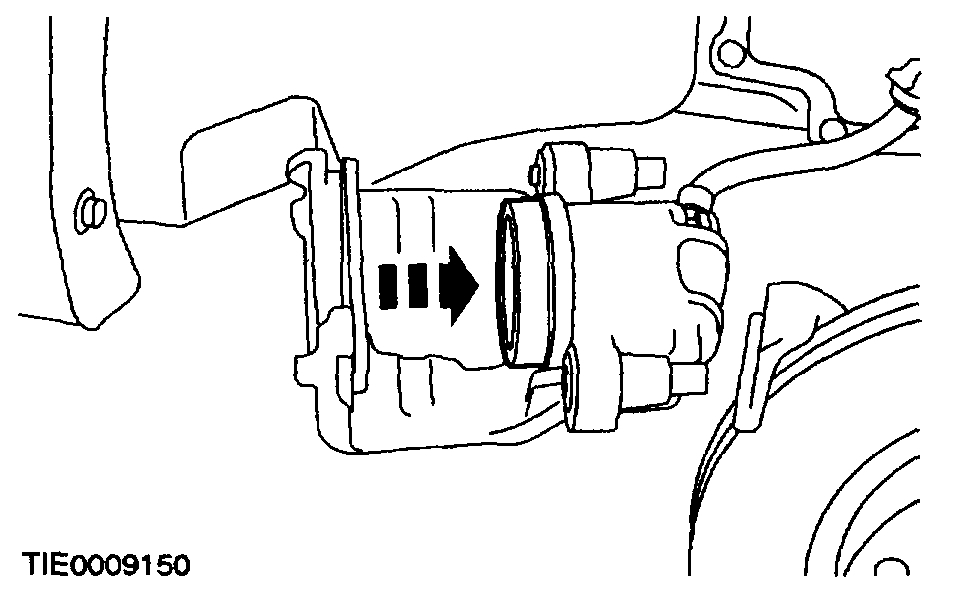
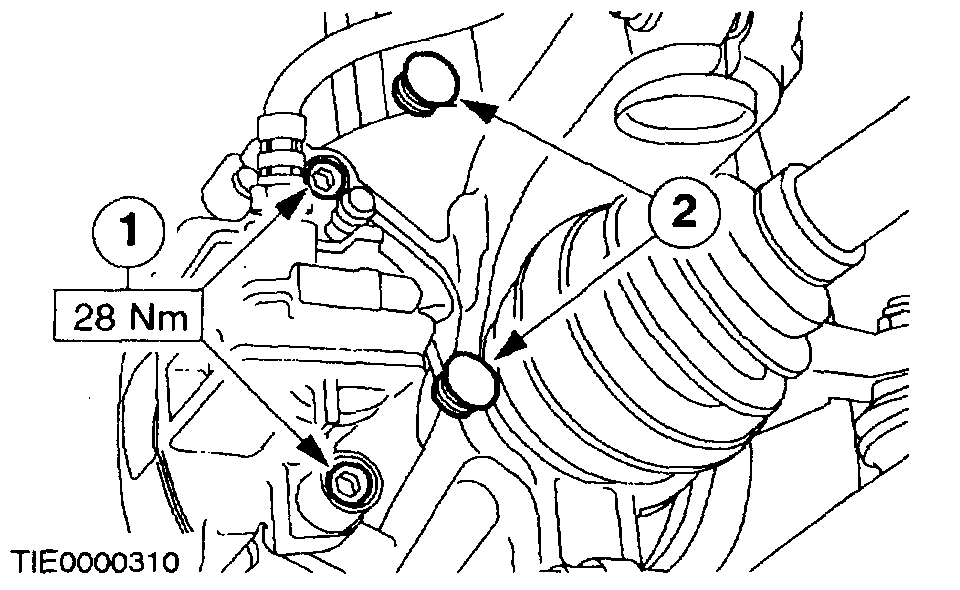
5. Install the caliper.
1 Install the bolts.
2 Install the bolt covers.
pic 13
6. Install the brake hose onto the support bracket.
pic 14
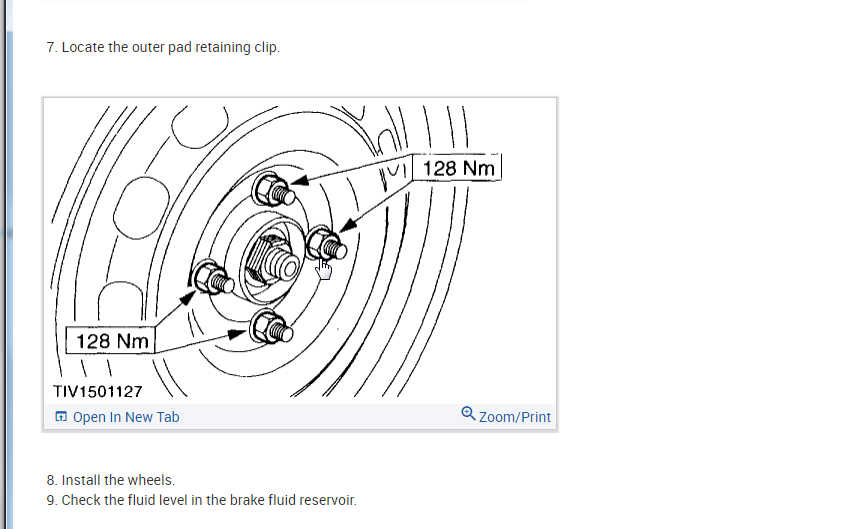
7. Locate the outer pad retaining clip.
pic 15
8. Install the wheels.
9. Check the fluid level in the brake fluid reservoir.
________________________________________________
I hope this helps. Let me know if you have other questions.
Take care and God Bless,
Joe
Images (Click to make bigger)
Monday, February 8th, 2021 AT 7:19 PM