Here you go.
WATER PUMP REMOVAL / INSTALLATION
1. Disconnect the negative battery cable.
2. Drain engine coolant.
3. Remove the air cleaner outlet tube.
4. Remove the cooling fan and fan shroud.
5. Disconnect coolant bypass tube.
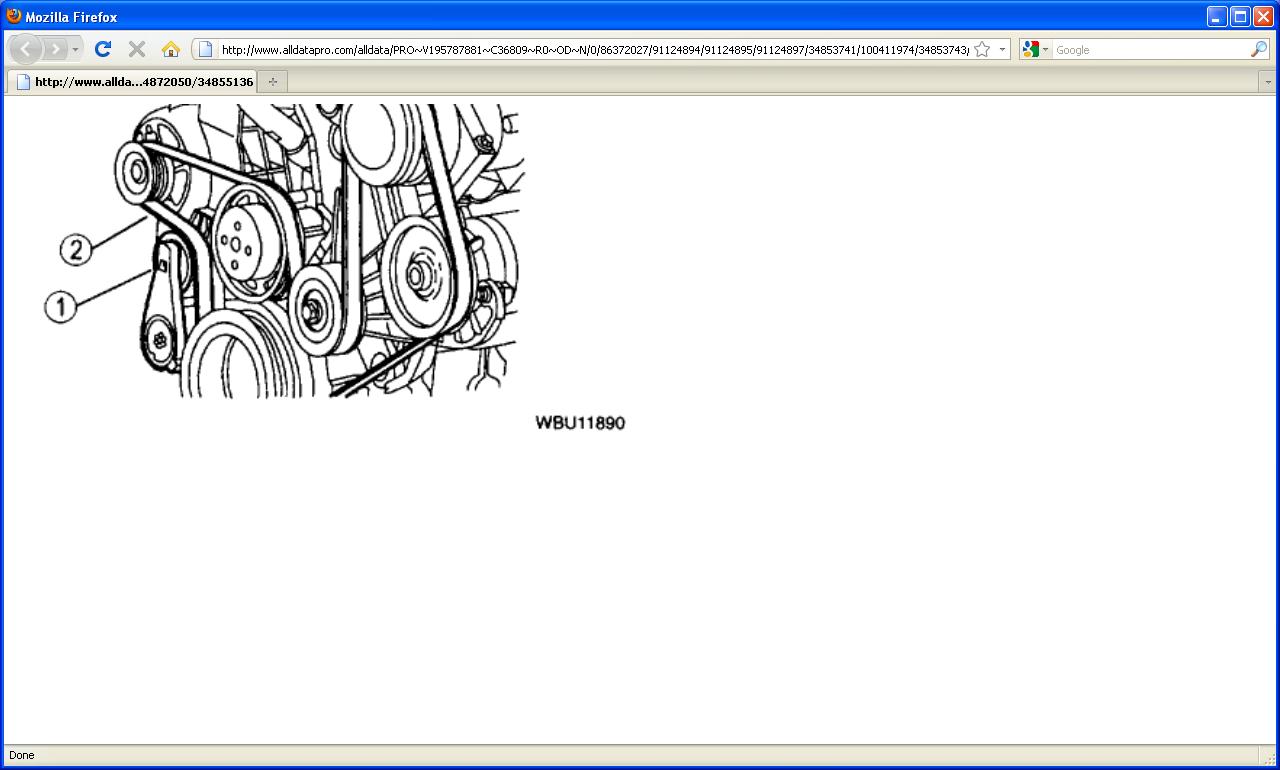
6. Remove the drive belt.
7. Remove the water pump pulley.
8. Remove the two bolts from the A/C compressor mounting bracket.
9. Disconnect the lower radiator hose.
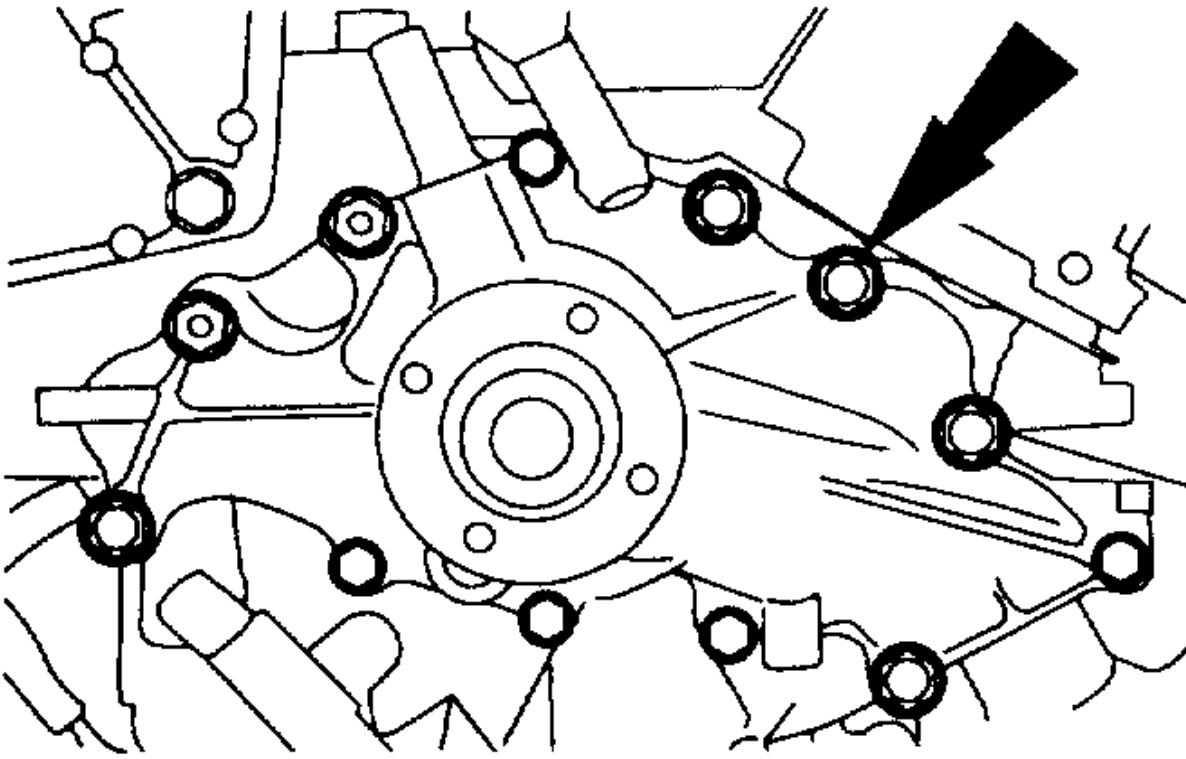
10. Remove the bolts and position the mounting bracket and A/C compressor aside.
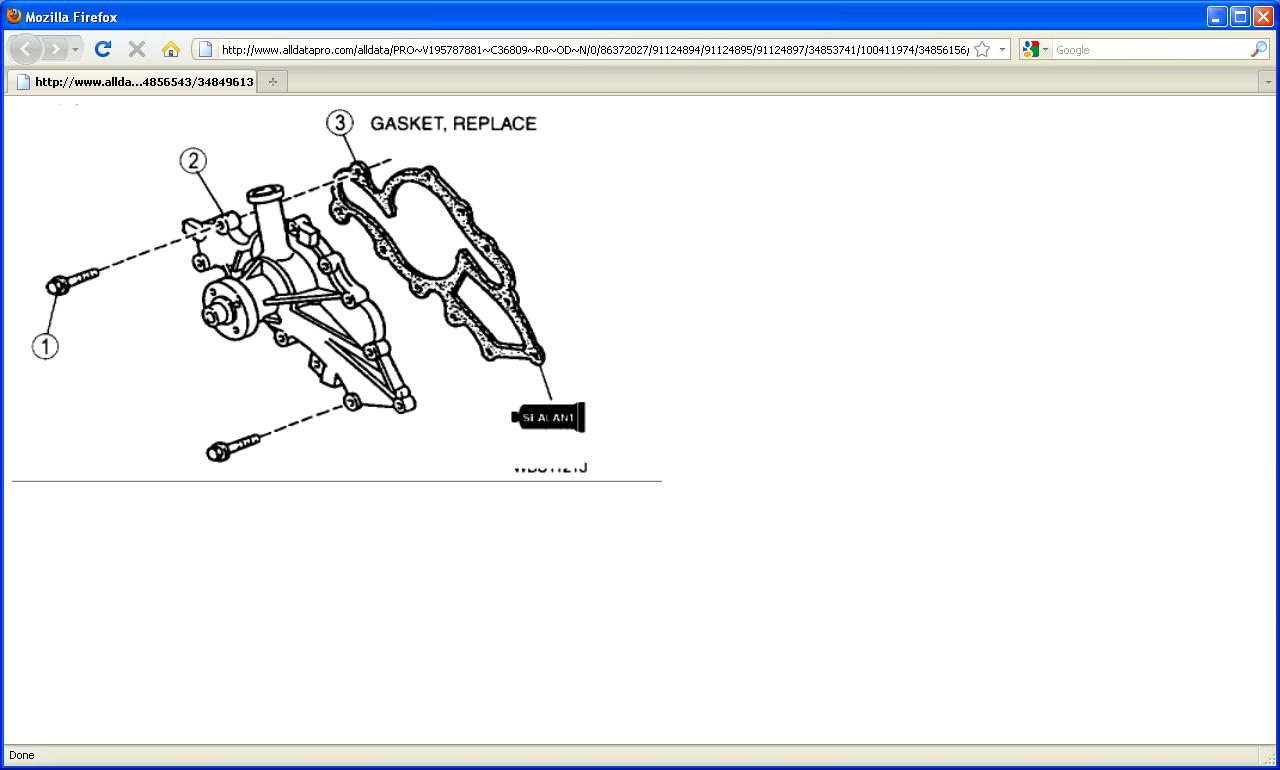
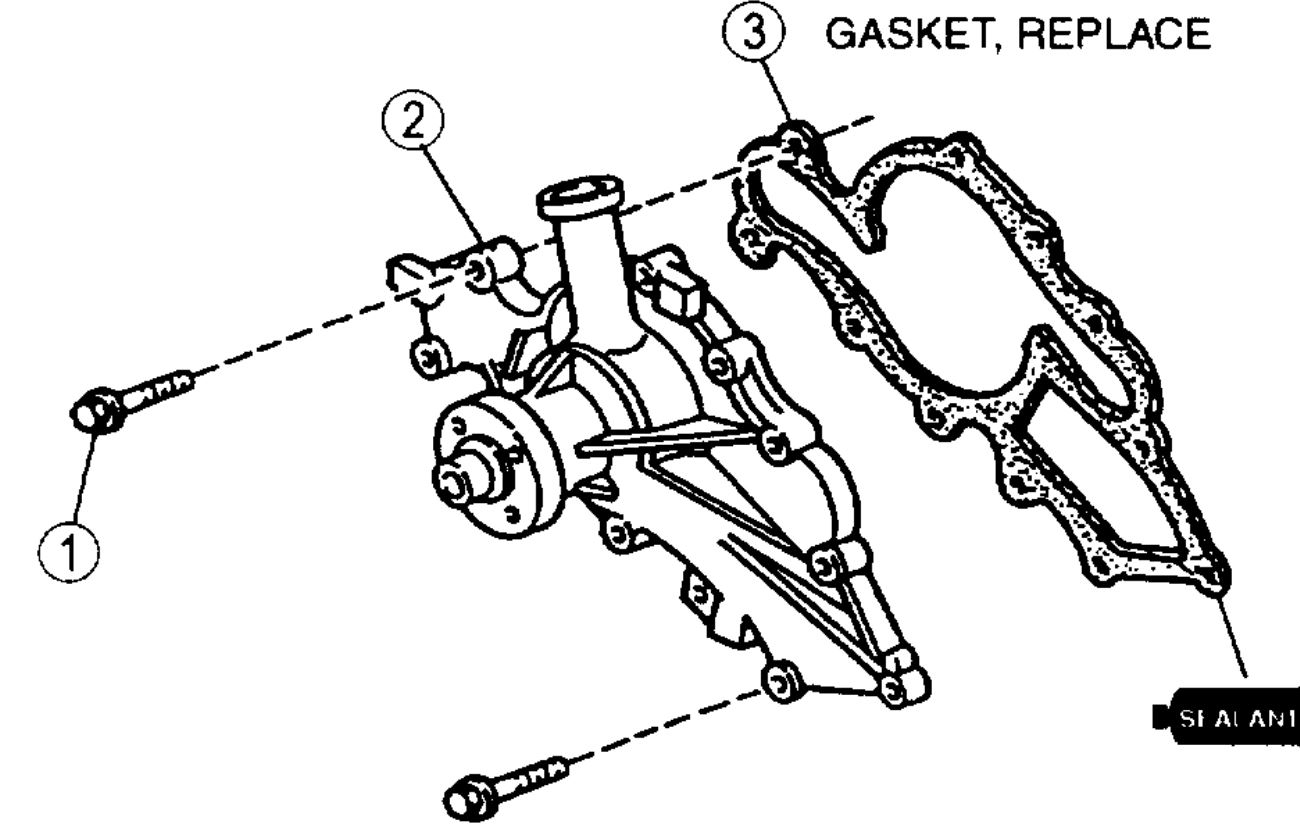
11. Remove in order shown in figure.
1. Bolt
2. Water Pump
3. Gasket
12. Inspect all parts and repair or replace as necessary.
13. Install in reverse order of removal.
Water Pump Gasket Installation Note
1. Clean the sealing surfaces.
Note: Use care when scraping aluminum surfaces because gouging could form leak paths.
2. Apply sealant to both sides of gasket and place it on water pump.
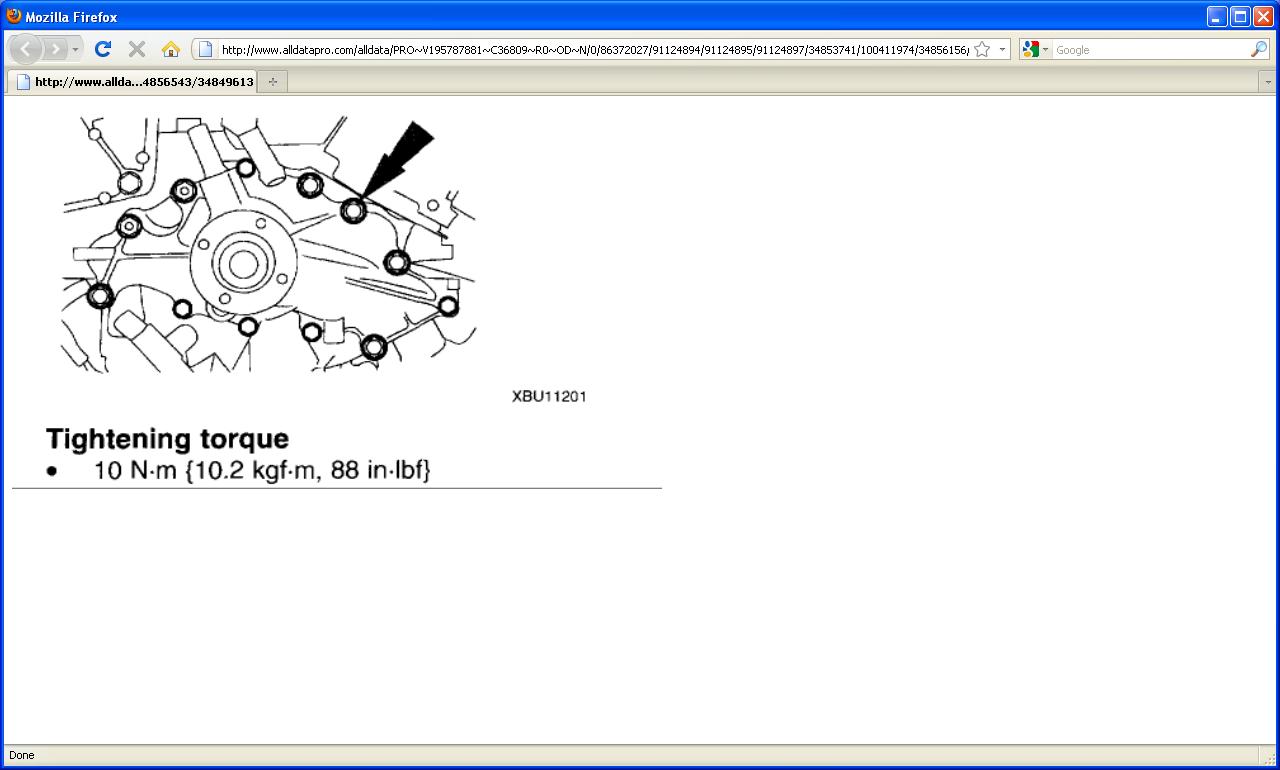
Water Pump Installation Note
1. Install the water pump bolts.
Steps After Procedure
1. Connect negative battery cable.
2. Fill the radiator with the specified amount and type of engine coolant and bleed the cooling system.
FAN SHROUD REMOVAL / INSTALLATION
1. Remove the air cleaner outlet tube.
2. Use the Holding Tool ST 303-239and Fan Clutch Nut Wrench ST 303-240 to loosen the fan blade.
3. Remove the bolts.
4. Lift the fan shroud out of the lower retaining clips.
5. Lift the fan shroud and the fan blade and clutch assembly together from the vehicle.
6. To install, reverse the removal procedure.
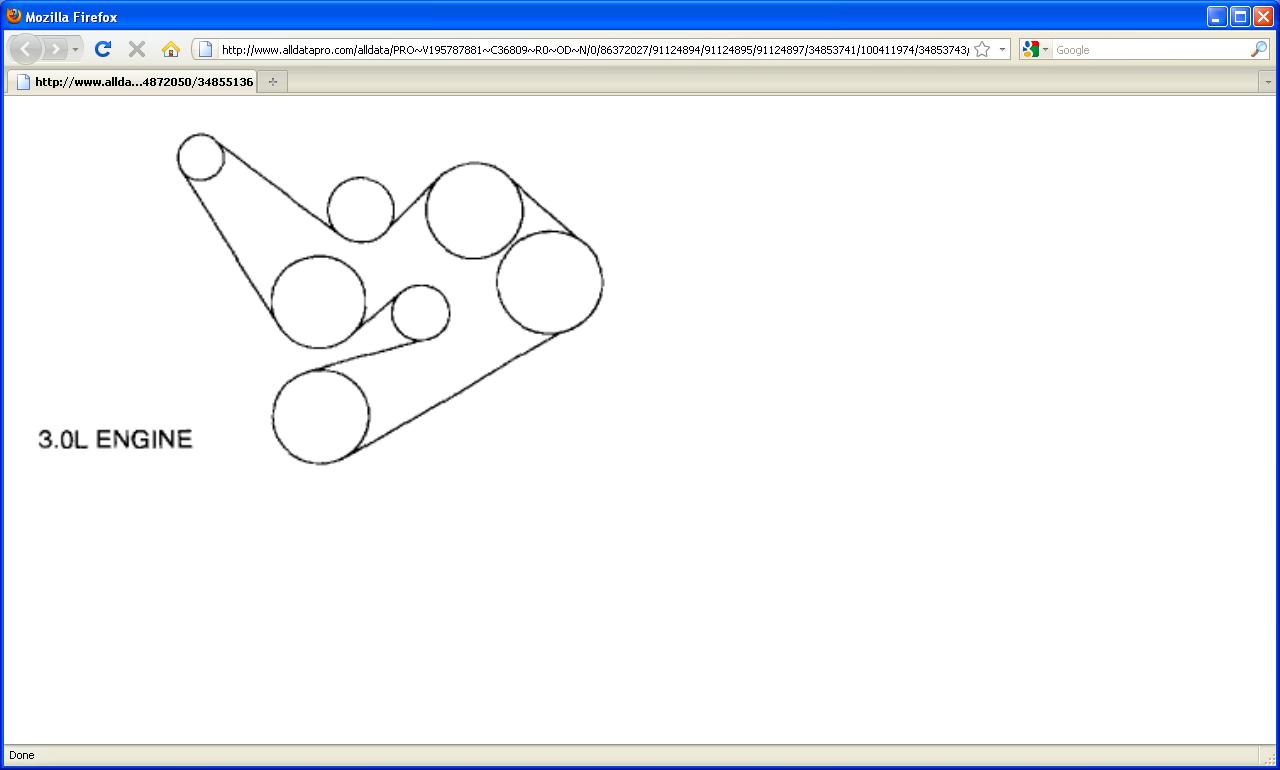
DRIVE BELT REMOVAL / INSTALLATION
Note: Conditions requiring replacement of the drive belt are excessive cracking or wear, severe glazing or frayed cords. Replace drive belts exhibiting any of these conditions. Minor cracks in the back of the drive belt are considered acceptable.
1. Remove the drive belt.
1. Rotate the belt tensioner.
2. Remove the drive belt.
2. Install in the reverse order of removal.
ENGINE COOLANT REPLACEMENT
Warning:
* Never remove the pressure relief cap while the engine is operating or when the cooling system is hot. Failure to follow these instructions can result in damage to the cooling system or engine or personal injury. To avoid having scalding hot coolant or steam blow out of the coolant reservoir when removing the pressure relief cap, wait until the engine has cooled, then wrap a thick cloth around the pressure relief cap and turn it slowly. Step back while the pressure is released from the cooling system. When you are sure all the pressure has been released, (still with a cloth) turn and remove the pressure relief cap. Failure to follow these instructions may result in personal injury.
Caution:
* The coolant must be recovered in a suitable, clean container for reuse. If the coolant is contaminated it must be recycled or disposed of properly.
Note:
* About 80% of the coolant capacity can be recovered with the engine in the vehicle. Dirty, rusty or contaminated coolant requires replacement.
Draining
1. Release the pressure in the cooling system by slowly turning the radiator cap one half to one turn counterclockwise to the first stop on the filler neck. When the pressure has been released, remove the radiator cap.
2. Place a suitable container below the radiator draincock. If equipped, disconnect the coolant return hose at the oil cooler.
3. Open the radiator draincock. If equipped, remove the cylinder drain plug to drain the coolant from the cylinder block.
4. When the coolant is drained, make sure the drain plugs are installed and tightened.
5. Close the radiator draincock when finished.
Filling
Caution:
* Engine coolant provides freeze protection, boil protection, cooling efficiency and corrosion protection to the engine and cooling components. In order to obtain these protections, the engine coolant must be maintained at the correct concentration and fluid level. When adding engine coolant, use a 50/50 mixture of engine coolant and clean drinkable water.
* To maintain the integrity of the coolant and the cooling system:
* Add only Premium engine coolant.
* Do not add orange-colored extended life coolant. Mixing coolants may degrade the coolant's corrosion protection.
* Do not add alcohol or methanol or any engine coolants mixed with alcohol or methanol antifreeze. These can cause engine damage from overheating or freezing.
* Do not mix recycled coolant unless it meets required specification. Not all coolant recycling processes meet proper specifications. Use of such coolant may harm the engine and cooling system components.
1. Refill the coolant recovery reservoir with the correct 50/50 mixture of water and Mazda Dexcool Extended Life Coolant.
2. Install the radiator cap.
3. Move the temperature blend switch to the full warm position.
4. Run the engine until it reaches operating temperature.
5. Add the proper coolant mixture to the coolant recovery reservoir until the coolant level is between the COOLANT FILL LEVEL marks.
6. Recheck the coolant level and fill as needed.
7. Turn off the engine and allow the cooling system to cool. Recheck the coolant level and fill the cooling system to the FULL mark on the coolant recovery reservoir.
8. Repeat steps 1 through 7 until the reservoir level is OK.
Bleeding
1. Bleed the cooling system as follows:
1. Select the maximum heater temperature and blower motor speed settings. Position the control to discharge air from the A/C vents to the instrument panel
2. Start the engine and allow it to idle. While the engine is idling, feel for hot air from the A/C vents.
Caution:
* If the air discharge remains cool and the engine coolant temperature gauge does not move, the engine coolant level is low in the engine and must be filled. Stop the engine, allow it to cool and fill the cooling system.
3. Start the engine and allow it to idle until the normal operating temperature is reached. Hot air should discharge from the A/C vents. The engine coolant temperature gauge should maintain a stabilized reading in the middle of the NORMAL range and the upper radiator hose should feel hot to the touch.
4. Shut the engine off and allow it to cool.
5. Check the engine for coolant leaks.
6. Check the engine coolant level in the coolant recovery reservoir and fill it as necessary.
Cleaning
Caution:
* Always remove the thermostat prior to pressure flushing.
1. To remove the rust, sludge and other foreign material from the cooling system, use products that are safe for use with aluminum radiators.
2. Cleaning restores cooling efficiency and helps prevent overheating. A pulsating or reversed direction of flushing water will loosen sediment more quickly than a steady flow in the normal coolant flow direction.
3. In severe cases, cleaning solvents may not properly clean the cooling system for efficient operation. It will be necessary to use the pressure flushing method.
4. Dispose of old coolant and flushing water contaminated with antifreeze and cleaning chemicals in accordance with local, state and federal laws.
Images (Click to enlarge)
Jan 19, 2011 at 5:12 PM