ON-VEHICLE REPAIR
1. REMOVE ENGINE UNDER COVER
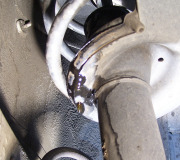
2. REMOVE DRAIN PLUG AND DRAIN ATF
3. REMOVE OIL PAN AND GASKET
NOTICE: Some fluid will remain in the oil pan.
Remove the 18 bolts, and carefully remove the oil pan assembly. Discard the gasket.
4. EXAMINE PARTICLES IN OIL PAN Remove the magnets and use them to collect any steel chips. Look carefully at the chips and particles in the pan and on the magnet to anticipate what type of wear you will find in the transaxle.
Steel (magnetic) bearing, gear and plate wear
Brass (non-magnetic) bushing wear
5. REMOVE OIL STRAINER
a. Remove the 3 bolts and oil strainer.
B. Remove the O-ring.
6. DISCONNECT 5 SHIFT SOLENOID VALVE CONNECTORS
7. REMOVE ATF TEMPERATURE SENSOR Remove the bolt and lock plate, and remove the ATF temperature sensor.
8. SEPARATE WIRE HARNESS FROM 2 CLAMPS
9. REMOVE VALVE BODY Remove the 17 bolts and valve body.
NOTICE: Be careful not to drop the check valve body, spring and accumulator piston.
10. REMOVE CHECK BALL BODY AND SPRING
11. REMOVE 3 APPLY GASKETS
12. REMOVE SHIFT SOLENOID VALVE Remove the 5 bolts and 5 shift solenoid valves.
13. INSTALL SHIFT SOLENOID VALVE Install the 5 shift solenoid valves with the 5 bolts.
Torque:
Bolt A: 6.6 Nm (67 kgf-cm, 58 inch lbs.)
Bolt B: 10.8 Nm (110 kgf-cm, 8 ft. Lbs.)
Bolt length:
Bolt A: 12 mm (0.47 inch)
Bolt B: 45 mm (1.77 inch)
14. INSTALL APPLY GASKET
a. Coat 3 new apply gaskets with ATF.
B. Install the gaskets to the transaxle case.
15. INSTALL CHECK VALVE AND SPRING
16. INSTALL VALVE BODY
a. Align the groove of the manual valve with the pin of the manual valve lever.
B. Temporarily install the valve body with the 17 bolts. Bolt length:
Bolt A: 25 mm (0.98 inch)
Bolt B: 41 mm (1.61 inch)
Bolt C: 45 mm (1.77 inch)
c. Check that the manual valve lever contacts the center of the roller at the tip of the detent spring.
D. Tighten the 17 bolts. Torque: 10.8 Nm (110 kgf-cm, 8 ft. Lbs.)
17. CLAMP WIRE HARNESS TO 2 CLAMPS
18. INSTALL ATF TEMPERATURE SENSOR Install the ATF temperature sensor with the lock plate and bolt.
Torque: 6.6 Nm (67 kgf-cm, 58 inch lbs.)
19. CONNECT 5 SHIFT SOLENOID VALVE CONNECTORS
20. INSTALL OIL STRAINER
a. Coat a new O-ring with ATF.
B. Install the O-ring to the oil strainer.
C. Install the oil strainer with the 3 bolts. Torque: 11 Nm (110 kgf-cm, 8 ft. Lbs.)
21. INSTALL MAGNET IN OIL PAN Install the 3 magnets in the oil pan.
22. INSTALL OIL PAN Install the oil pan and a new gasket with the 18 bolts.
Torque: 7.6 Nm (78 kgf-cm, 67 inch lbs.)
23. INSTALL DRAIN PLUG Install a new gasket and drain plug.
Torque: 47 Nm (480 kgf-cm, 35 ft. Lbs.)
24. FILL ATF AND CHECK ATF LEVEL
25. INSTALL ENGINE UNDER COVER
all solenoids are in the valve body.
What was the code? Codes never identify bad parts, just failed systems
Roy
Saturday, March 23rd, 2013 AT 9:06 PM