Hi,
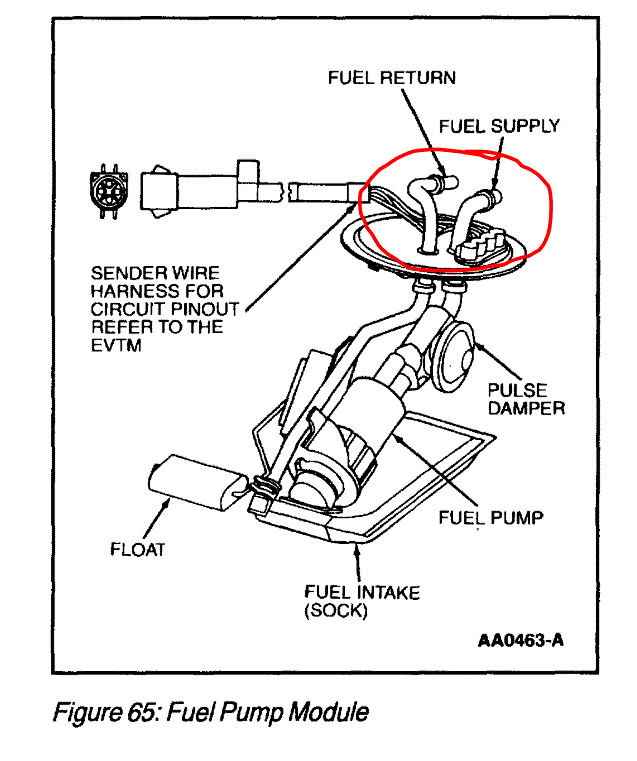
Chances are moving the lines around have either caused one of the hoses to leak or one of the metal supply / return lines on the module to start leaking due to rust. If you look at the first pic, it shows what the module looks like and I circled the two places hoses will connect.
The bad part is you need to remove the tank to access this part. I will provide the directions for removal and replacement of the tank along with module information. All attached pics correlate with the directions.
______________________________________
2001 Ford Focus L4-2.0L SOHC VIN P
Fuel Tank Draining
Warning:
do not smoke or carry lighted tobacco or open flame of any type when working on or near any fuel related components. Highly flammable vapors are always present and may ignite. Failure to follow these instructions may result in personal injury.
The fuel system remains pressurized for a long time after the ignition is switched off. The fuel pressure must be relieved before attempting any repairs. Failure to follow these instructions may result in personal injury.
1. Disconnect the battery ground cable.
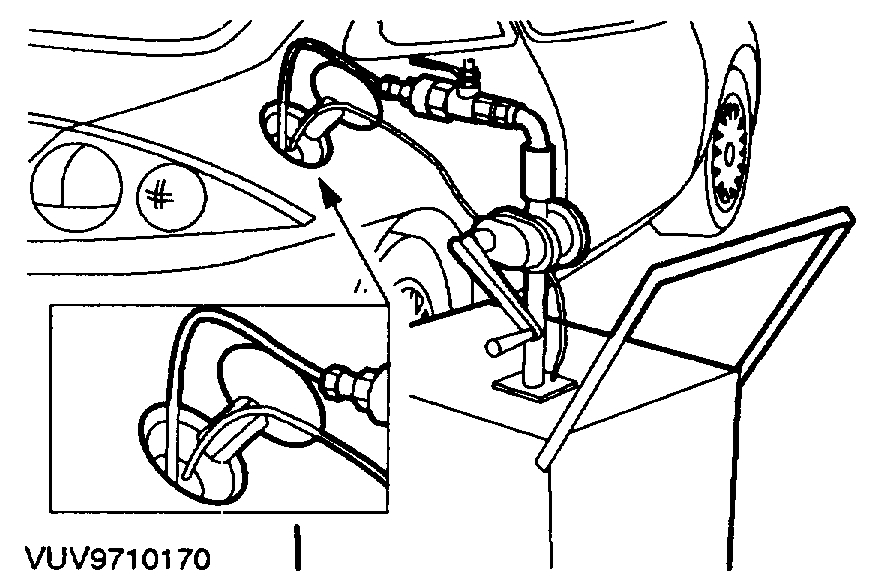
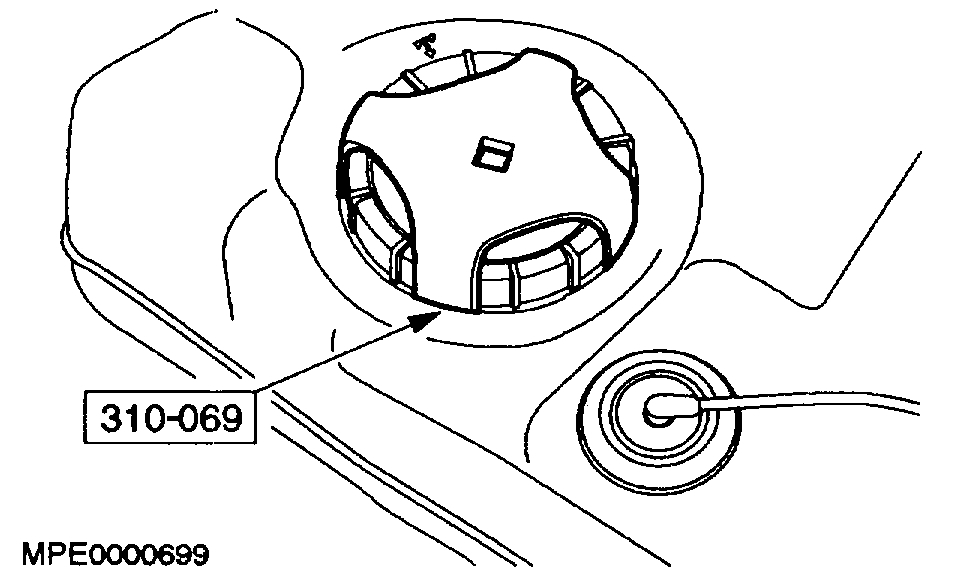
2. Remove the fuel filler cap.
Pic 2
3. Drain the fuel from the fuel tank using a 12.5 mm nylon drain tube with the approved ford fuel drain tank.
NOTE: To enable the hose to enter the fuel tank it is necessary to cut a 40 mm long taper at the end.
______________________________________________________________________________________
2001 Ford Focus L4-2.0L SOHC VIN P
Fuel Tank Removal and Installation
Vehicle Power-train Management Fuel Delivery and Air Induction Fuel Tank Service and Repair Procedures Fuel Tank Removal and Installation
Fuel tank removal and installation
Removal
Warning: do not smoke or carry lighted tobacco or open flame of any type when working on or near any fuel related components. Highly flammable vapors are always present and may ignite. Failure to follow these instructions may result in personal injury.
1. Release the fuel system pressure.
2. Drain the fuel tank.
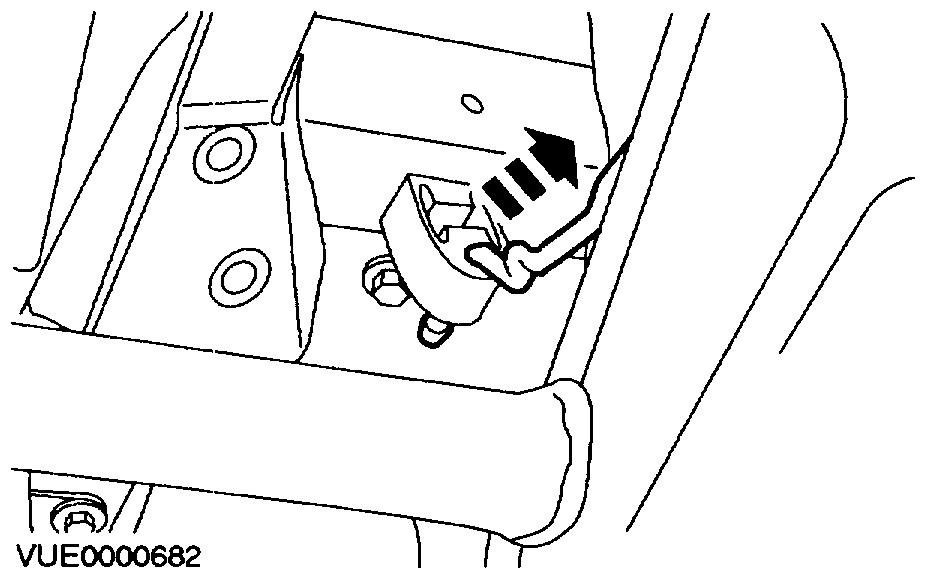
Pic 3
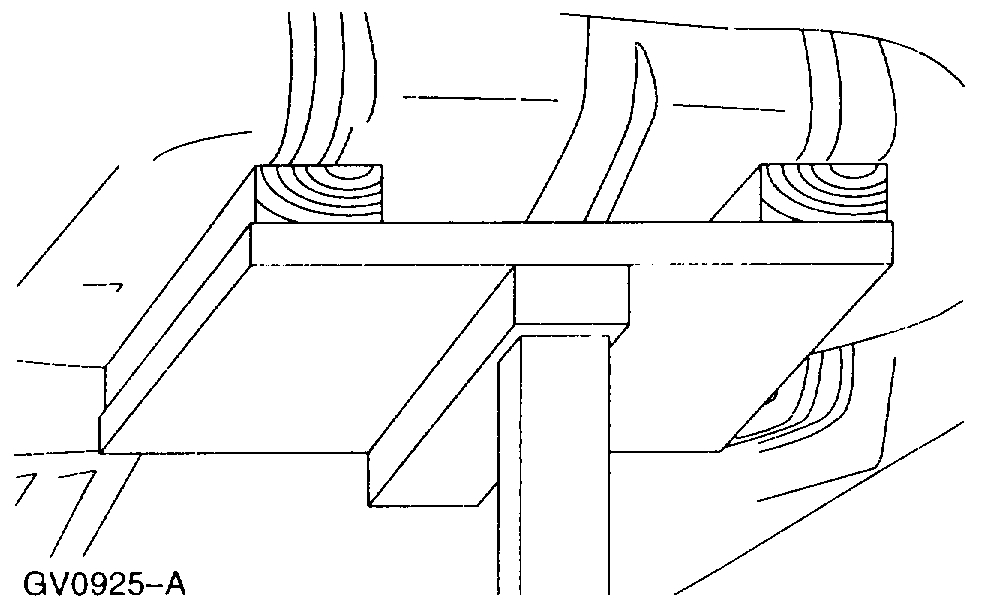
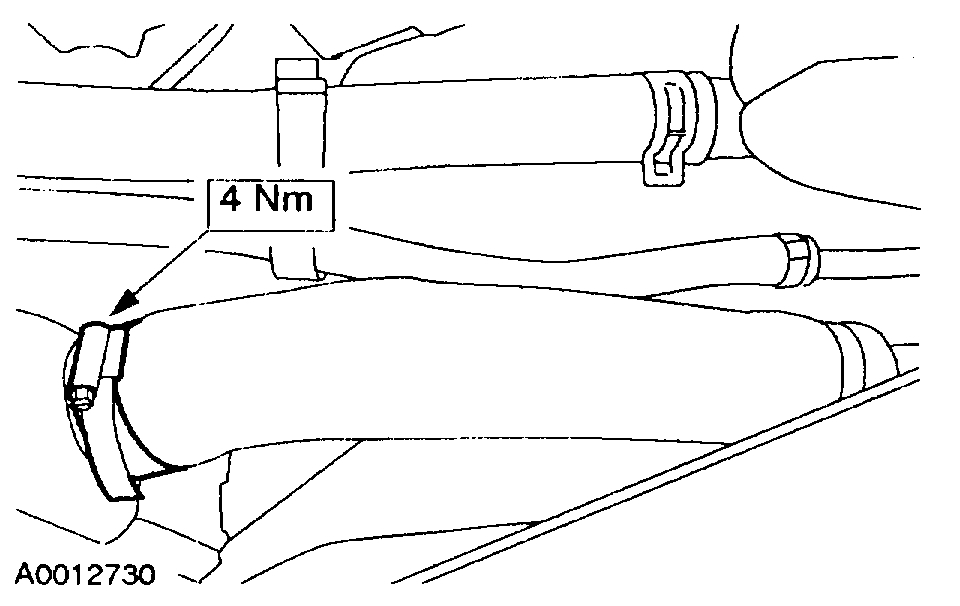
3. Detach the exhaust pipe from the rear hanger insulator.
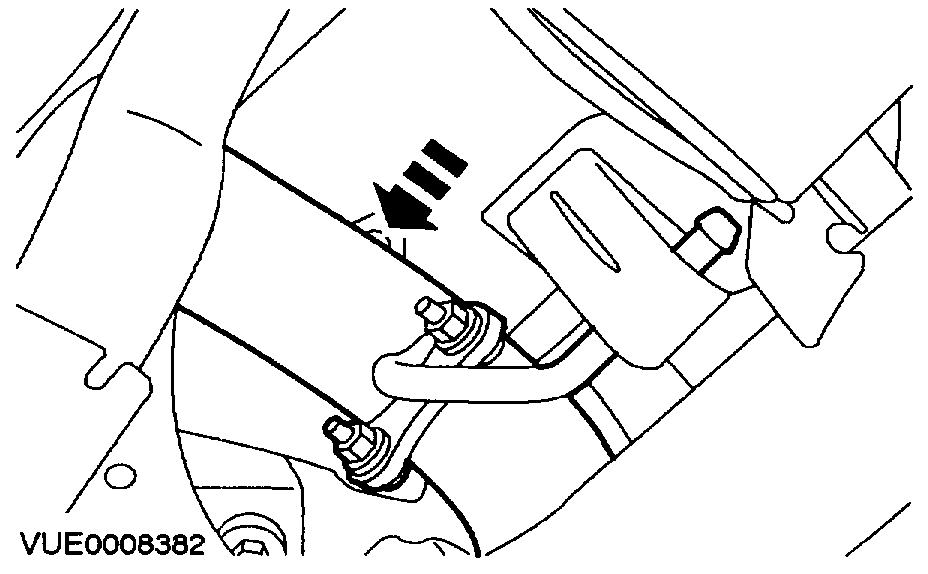
Pic 4
4. Detach the exhaust pipe from the hanger insulator.
Pic 5
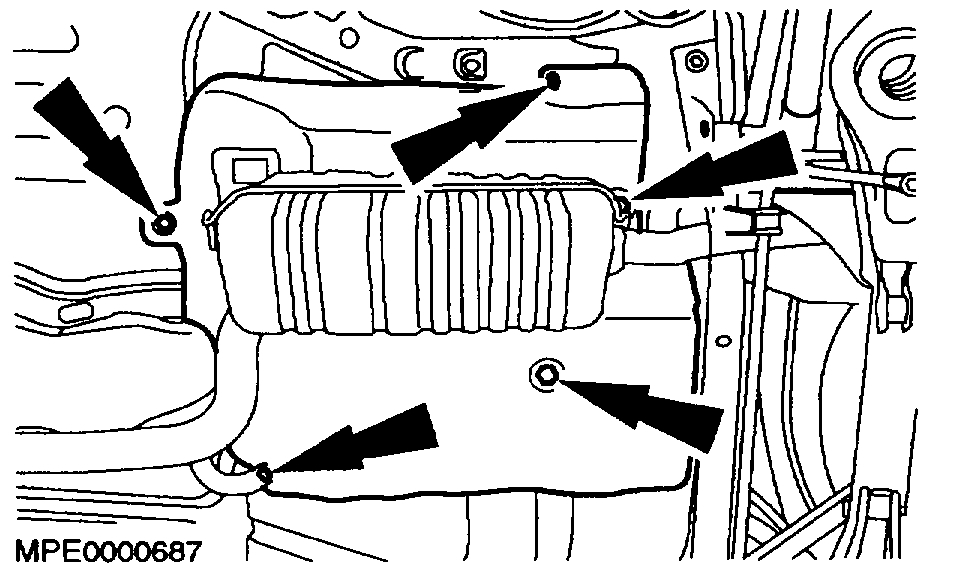
5. Detach the center muffler from the exhaust insulator.
Pic 6
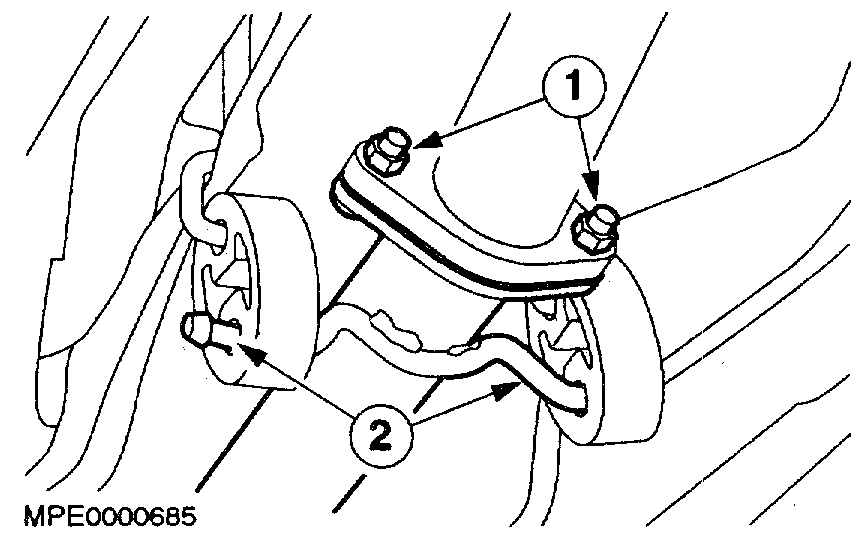
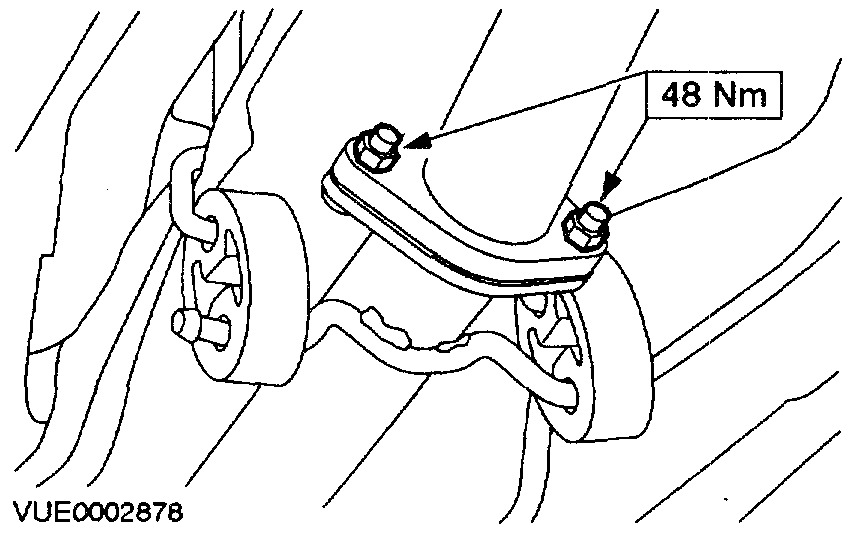
6. Disconnect the exhaust pipe.
1. Remove the nuts.
2. Detach the exhaust pipe from the two insulators
pic 7
7. Secure the exhaust pipe in a suitable position.
Pic 8
8. Remove the heat shield.
Pic 9
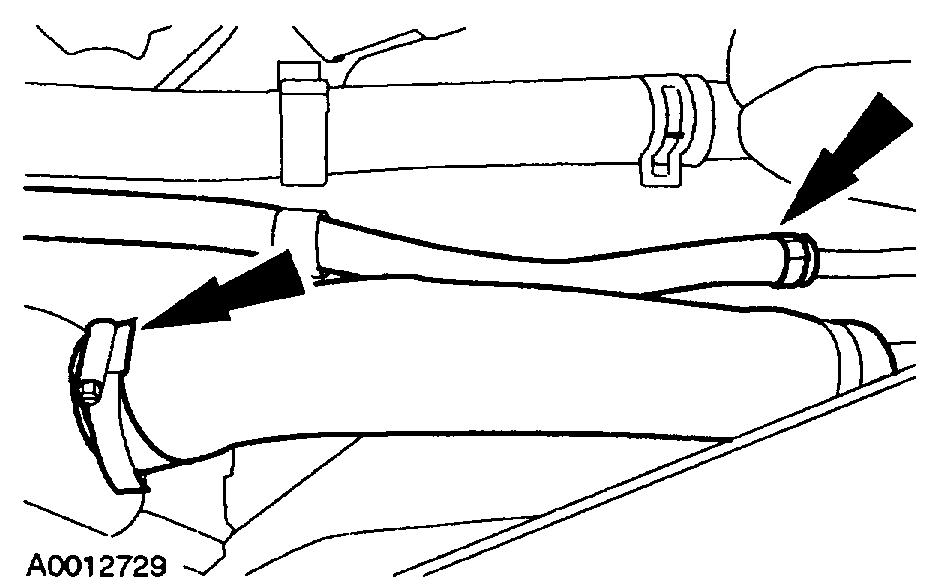
9. Disconnect the fuel tank vent pipes and filler pipe.
CAUTION: When removing the fuel tank vent and filler pipes, do not use any sharp edge tools to lever off the pipes. Failure to follow this instruction may result in damage to the filler pipes.
NOTE: Make a note of the position of the retaining clamp and clip to make sure that it is positioned in exactly the same position when installed.
Pic 10
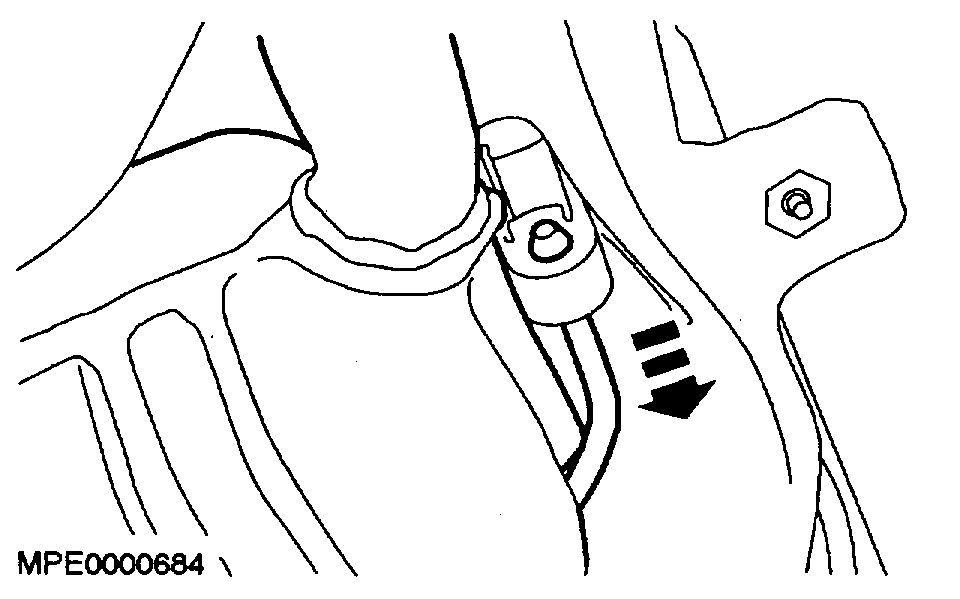
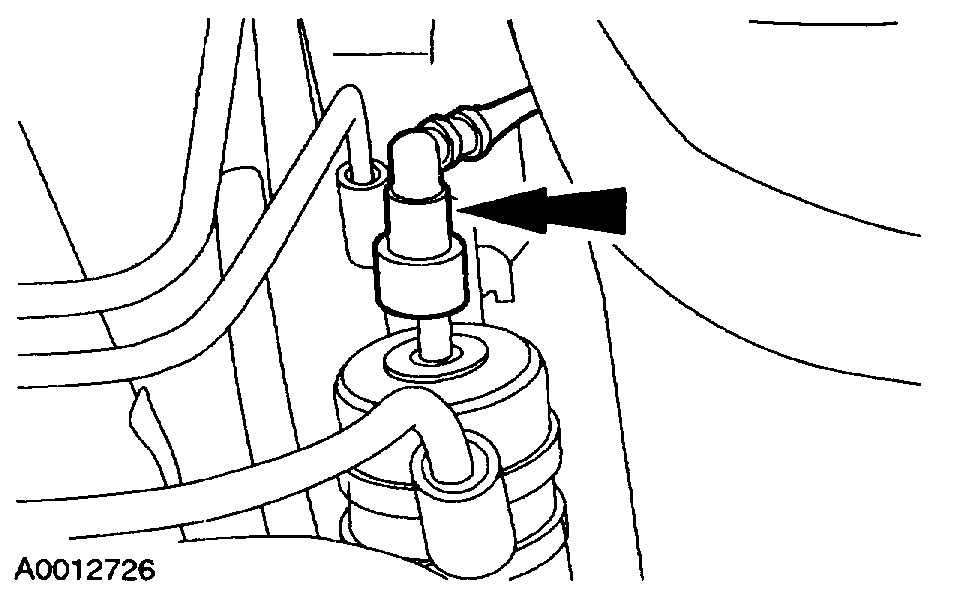
10. Disconnect the fuel line quick release coupling.
Pic 11
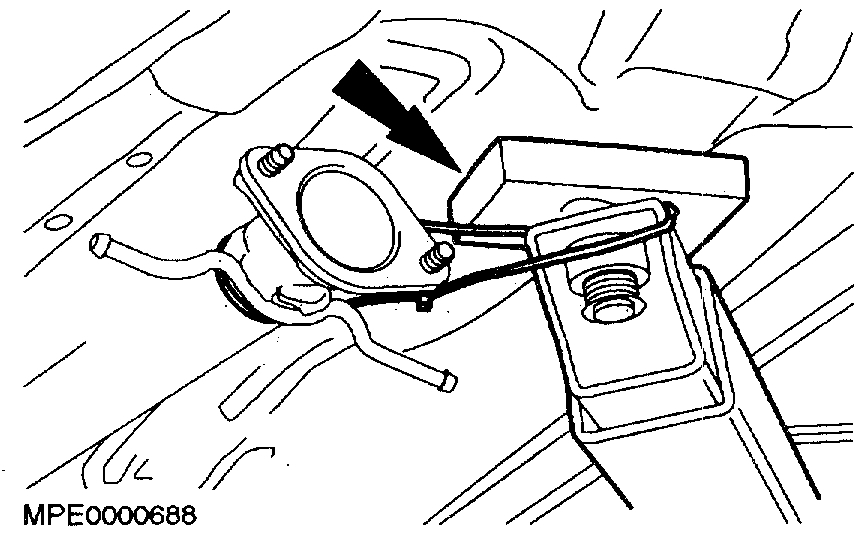
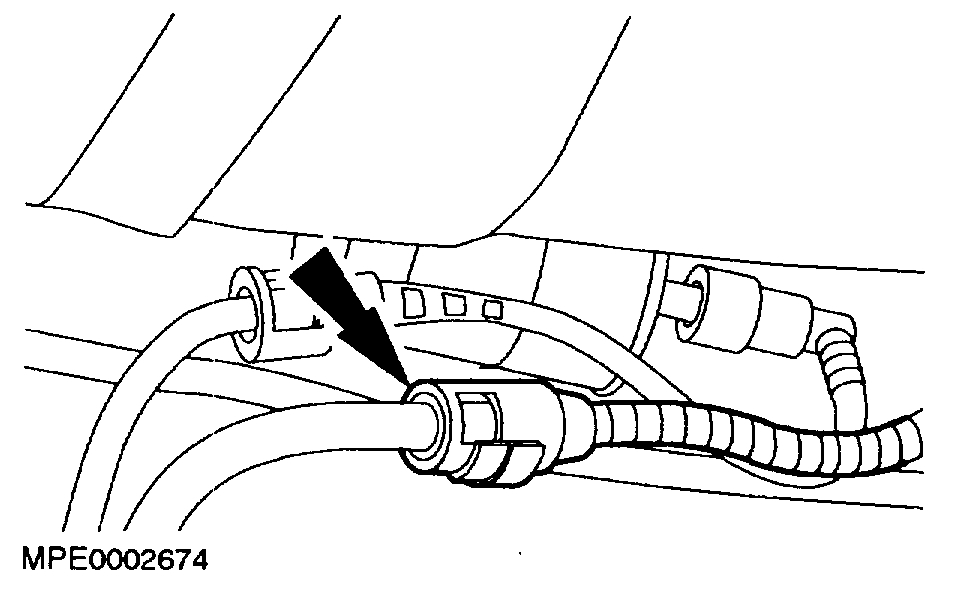
11. Disconnect the evaporative emission pipe.
Pic 12
12. Place a suitable high-lift jack under her fuel tank.
CAUTION: When supporting the fuel tank, use a suitable packing material to prevent damage to the underside of the fuel lank.
Pic 13
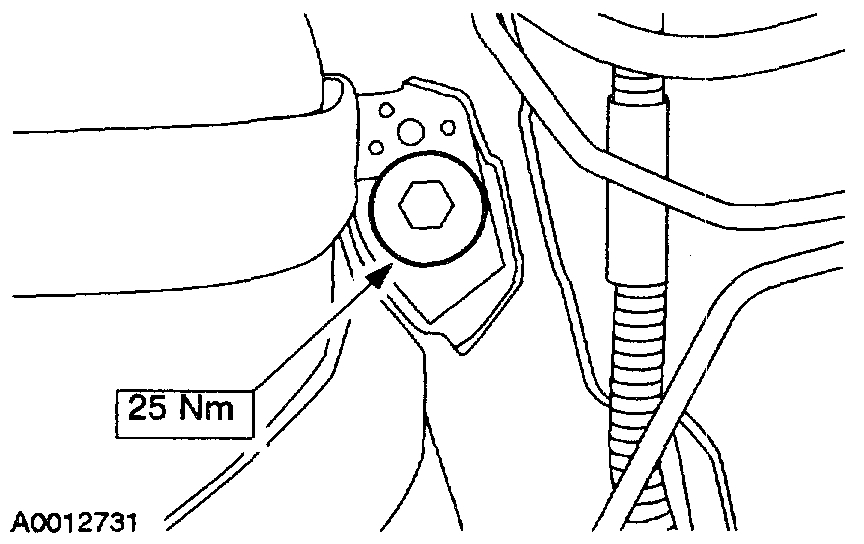
13. Remove the fuel tank support strap bolt.
Pic 14
14. Partially lower the fuel tank.
CAUTION: When lowering the fuel tank, make sure that excessive strain is not placed on the fuel lines and electrical connectors.
Pic 15
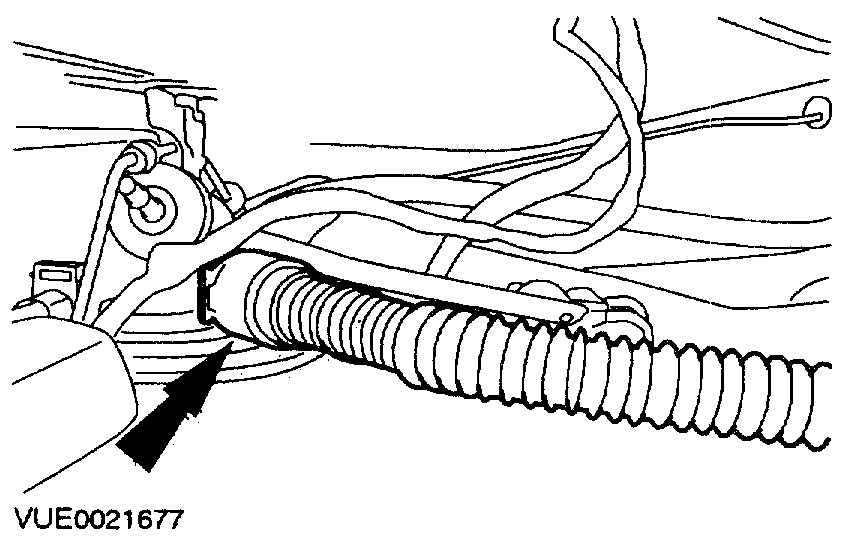
15. Disconnect the rollover valve hose.
Pic 16
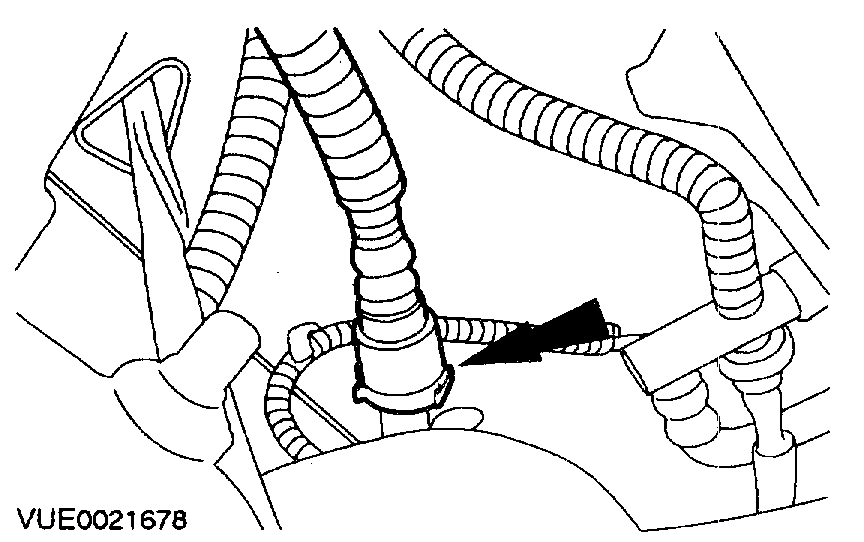
16. Disconnect the rollover valve hose.
Pic 17
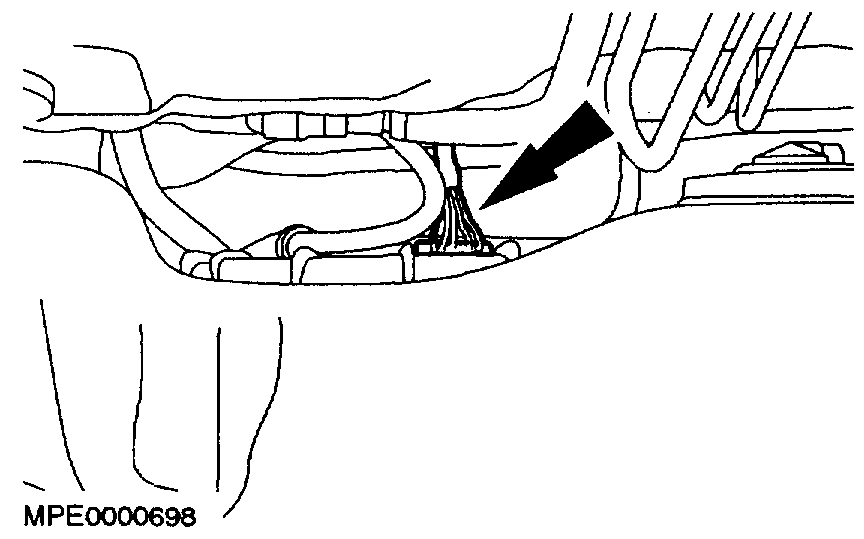
17. Disconnect the fuel pump electrical connector.
Pic 18
18. Disconnect the fuel tank pressure sensor electrical connector.
19. Remove the fuel tank.
INSTALLATION
CAUTION: Do not smoke or carry lighted tobacco or open flame of any type when working on or near any fuel related components. Highly flammable vapors are always present and may ignite. Failure to follow these instructions may result in personal injury.
Pic 19
pic 20
pic 21
1. To install, reverse the removal procedure.
NOTE: The fuel filler and vent pipe retaining clamp and clip must be installed in the same position as removed.
2. Carry out an evaporative emission system leak test. See: Evaporative Emissions System > Testing and Inspection
_____________________________________________
2001 Ford Focus L4-2.0L SOHC VIN P
Procedures
Vehicle Powertrain Management Fuel Delivery and Air Induction Fuel Pump Service and Repair Procedures
PROCEDURES
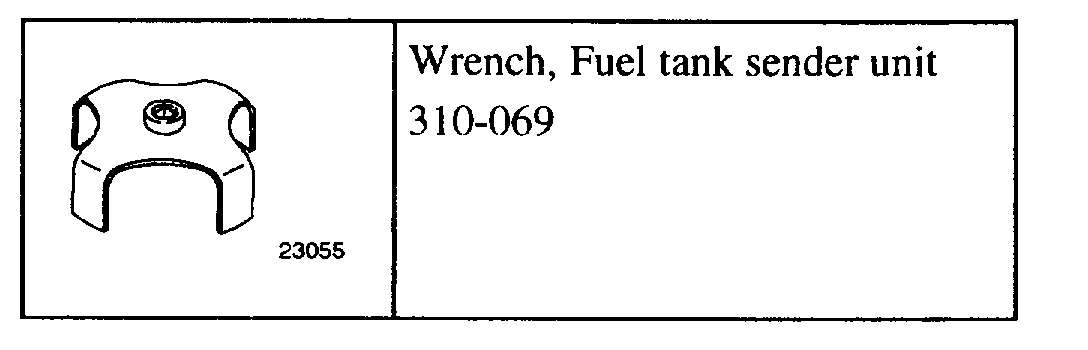
Wrench, Fuel Tank Sender Unit
imageOpen In New TabZoom/Print
Pic 22
SPECIAL TOOL(S)
REMOVAL
1. Remove the fuel tank.
Pic 23
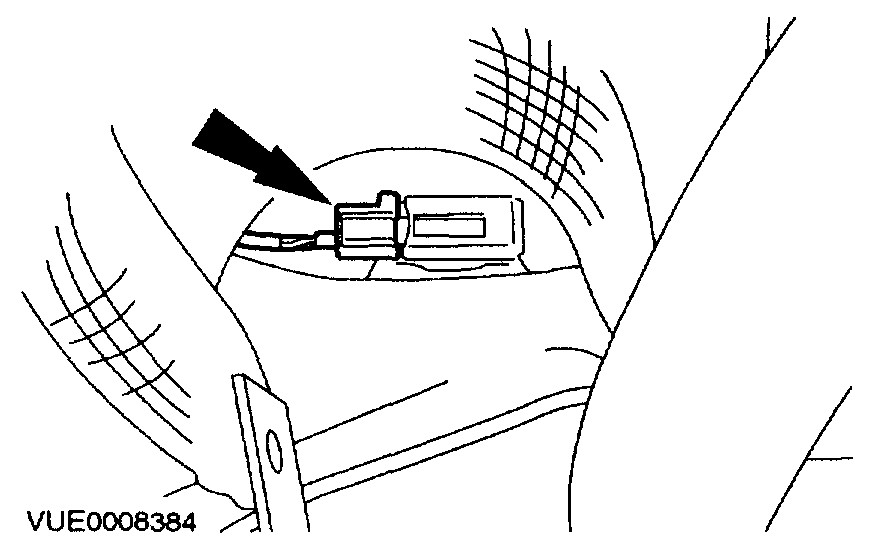
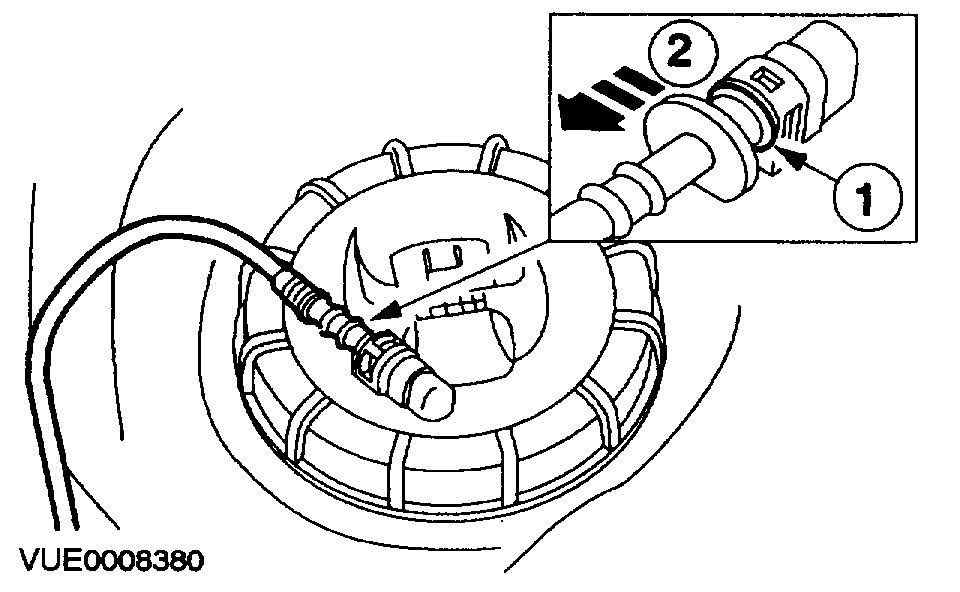
2. Disconnect the fuel supply line from the fuel pump module.
1. Hold the fuel pump connector.
2. Disconnect the fuel supply line from the fuel pump module.
Pic 24
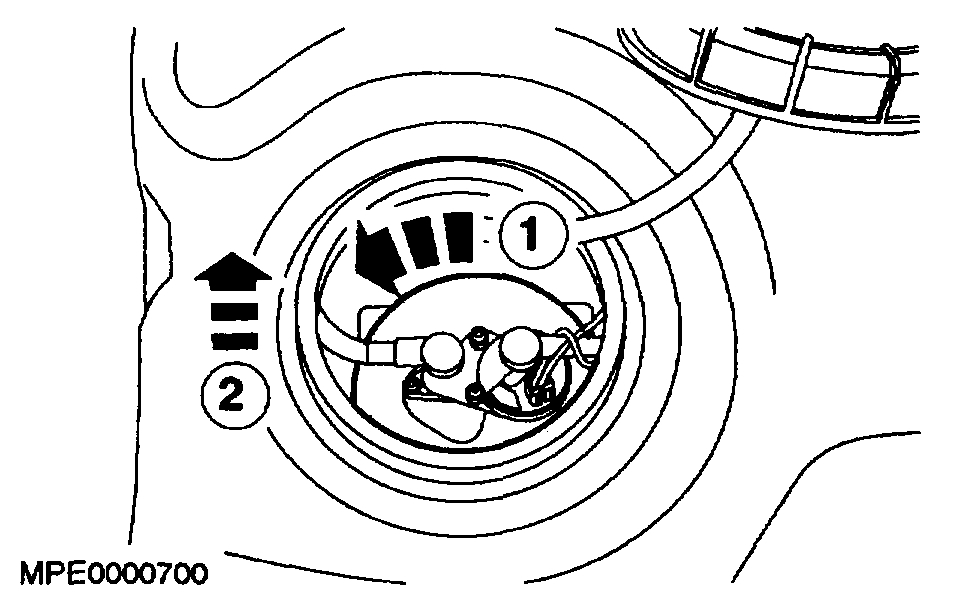
3. Using the special tool, remove the locking ring.
CAUTION: Make sure the float or arm are not damaged while removing the fuel pump module.
Pic 25
4. Remove the fuel pump module
1. Rotate the module counterclockwise.
2. Lift the module from the fuel tank.
INSTALLATION
NOTE: Install a new fuel pump module seal and make sure it is seated correctly on the fuel tank prior to tightening the locking ring.
Pic 26
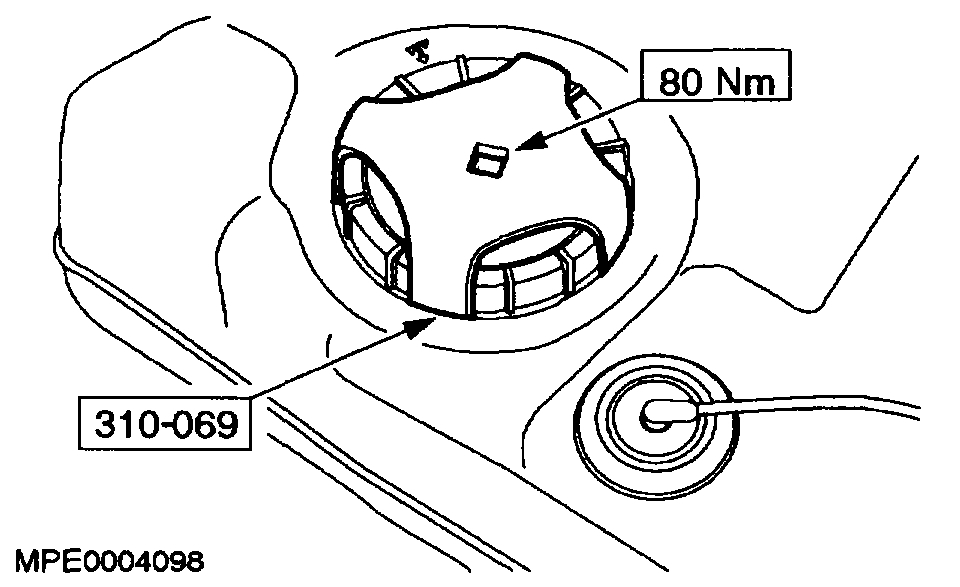
1. To install, reverse the removal procedure.
2. Carry out an evaporative emission system leak test. See: Evaporative Emissions System > Testing and Inspection
______________________________
I hope this helps. Let me know if you have other questions.
Take care,
Joe
Images (Click to make bigger)
Friday, April 10th, 2020 AT 7:51 PM