How to replace front seat belts 2001 Chevrolet Malibu

Tiny
FWAJDA
  • MEMBER
  • 2001 CHEVROLET MALIBU
  • 89,000 MILES
Our puppy chewed up our front seat belts and I bought replacements on eBay. I did not take the old ones out so I do not know where to start when it comes to replacing them. I read something about the bag sensors and I am afraid I will set them off replacing the belts. Do you have a step by step instruction for this process? There is no reference to the seat belts in my Chilton’s book.
Thursday, December 22nd, 2011 AT 1:54 PM

4 Replies

Tiny
FACTORYJACK
  • MECHANIC
  • 4,159 POSTS
There should be no influence from the airbag system. In a nutshell, unbolt the belts from the seat anchor point, then the upper shoulder attachment point at the upper b-pillar. From there, with the b-pillar trim out of the way, you can unbolt the retractors from the lower portion of the pillar. Reverse procedure to install, making sure that the belt is laying correctly, and not twisted.
Was this
answer
helpful?
Yes
No
Thursday, December 22nd, 2011 AT 3:59 PM
Tiny
FACTORYJACK
  • MECHANIC
  • 4,159 POSTS
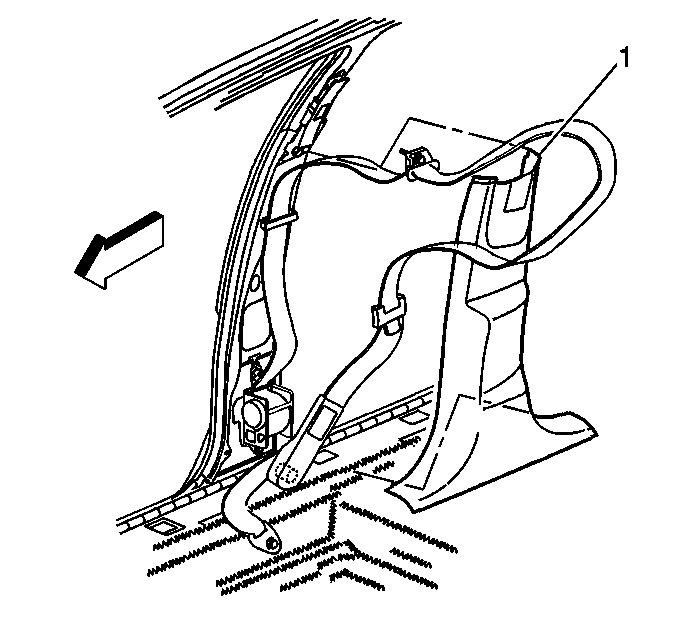
The previous was slightly incorrect, as it was for an Impala. The malibu belt is anchored at the lower b-pillar, not the seat. Below is the step by step for the left, sans illustrations. Right is similar.

Seat Belt Retractor Replacement - Left Front

Removal Procedure

1.

Remove the trim panel from the lower center pillar. Refer to Center Pillar Lower Trim Panel Replacement in Interior Trim.

2.

Remove the anchor bolt from the front seat belt.

3.

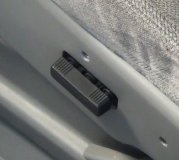
Remove the shoulder belt guide cover.

4.

Remove the shoulder belt guide bolt.

5.

Remove the shoulder belt guide.

6.

Remove the seat belt guide clip. Squeeze the guide clip from both sides in order to release the retainers.

7.

Remove the seat belt retractor bolt.

8.

Pull the retractor upward in order to disengage the retractor.

9.

Remove the seat belt retractor assembly.

Installation Procedure

Important: Remove any twists in the seat belt webbing before final assembly.

1.

Install the seat belt retractor assembly.

2.

Insert the top of the retractor into the mounting slots and pull downward.

Notice: Refer to Fastener Notice in Cautions and Notices.

3.

Install the seat belt retractor bolt.

Tighten
Tighten the bolt to 42?NÂ m (31?Lb?Ft).

4.

Install the seat belt guide clip. Ensure that the unit locks into position.

5.

Install the shoulder belt guide.

6.

Install the shoulder belt guide bolt.

Tighten
Tighten the bolt to 42?NÂ m (31?Lb?Ft).

7.

Install the seat belt anchor bolt.

Tighten
Tighten the bolt to 42?NÂ m (31?Lb?Ft).

8.

Install the shoulder belt guide cover.

9.

Inspect the seat belt assembly for proper operation. Refer to Seat Belt System Operational and Functional Checks.

10.

Install the trim panel to the lower center pillar. Refer to Center Pillar Lower Trim Panel Replacement in Interior Trim.
Was this
answer
helpful?
Yes
No
+1
Thursday, December 22nd, 2011 AT 4:04 PM
Tiny
FWAJDA
  • MEMBER
  • 2 POSTS
Thanks for the step by step and the quick response. Now I have no excuse to fix the wife’s belts. In your answer it says to refer to center pillar trim replacement, is there a manual, preferably with illustrations, that has this information that I can obtain?
Was this
answer
helpful?
Yes
No
Thursday, December 22nd, 2011 AT 4:21 PM
Tiny
FACTORYJACK
  • MECHANIC
  • 4,159 POSTS
This is what the procedure shows, and the only illustration included. It makes reference to a body lock pillar trim replacement. That may be a lot more than is necessary, is it requests removing the rear seat, and such. The body lock pillar trim, is the same as the rear door opening sill trim. If you can move it just enough, where it interlocks with the center pillar trim, I think you can accomplish what you are after. Same with the front sill plate.

Center Pillar Lower Trim Panel Replacement

Removal Procedure

1.

Remove the lock pillar lower trim panel. Refer to Body Lock Pillar Trim Replacement.

2.

Remove the carpet retainer. Refer to Carpet Retainer Replacement in Interior Trim.

3.

Remove the center pillar lower trim panel?(1).

Installation Procedure

1.

Install the center pillar lower trim panel?(1).

2.

Install the carpet retainer. Refer to Carpet Retainer Replacement in Interior Trim.

3.

Install the lock pillar lower trim panel. Refer to Body Lock Pillar Trim Replacement.
Was this
answer
helpful?
Yes
No
Thursday, December 22nd, 2011 AT 5:45 PM

Please login or register to post a reply.

Sponsored links