Here is a guide that will help you and some instructions to help you get the job done.
https://youtu.be/1Prs_coIuCg
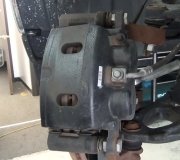
That bracket holds the metal fitting that is crimped to the end of the rubber hose. Don't unbolt that bracket unless the bolt head is in the way of your wrench. You need it to hold the hose while you unscrew the line nut.
Be sure to buy the hose for the proper side of the car. The left and right hoses look identical but are mirror images of each other. The fittings are different to insure there are no twists when you're done.
Use a flare nut wrench, also called a line wrench, to loosen the nut on the steel line. Do not use any type of penetrating oil because it could seep into the brake fluid. If the nut spins on the steel line, you got lucky. If the line wants to twist with the nut, stop there with it cracked loose. Pry the retaining clip off the hose fitting, then wiggle the hose until it breaks free and can be pulled down about 1/4". You'll be pulling the steel line down too through that bracket. Hold the line nut with the wrench and use a pliers to turn the hose to unscrew it from the nut.
You can install the new hose onto the nut the same way, but you'll see the new hose must be oriented properly. There will either be a locating notch or the fitting will look like a six-sided hex nut with one point rounded off. That is to insure the other end of the hose will bolt to the caliper so it won't have a twist or kink. Wiggle the fitting until it goes fully back into the bracket in the right orientation, tap the retainer clip into place, then finish tightening the line nut. If you have to turn that line nut more than about 1/8 turn, you run the risk of twisting or cracking the line, so stop, and follow this next procedure instead.
That line nut is very soft metal. A regular open end wrench will round it off causing you a lot more headaches. If the nut won't come loose with that line wrench, heat the connection with a propane torch. Wear eye protection because it IS going to "explode". The goal is to heat the fitting so it expands and lets the line nut come loose easier, but what happens is the rubber hose is going to melt and squish out of the strong crimp in the metal fitting. The loud "pop" is from that hose popping out of the crimp, not from any fluid pressure, but hot brake fluid will spray around and cause smoke. Once the excitement is over, try to turn the line nut. You can heat the metal fitting a little more if necessary. Once the nut turns a little, remove the retainer clip, then pull or tap the steel line down so the fitting comes out of the bracket and can be turned off. Now you can heat the line nut again and work it loose with the wrench. Once it spins freely, use some brake parts cleaner in a spray can to wash out the nut. The goal is to get it freed up enough to spin freely by hand.
If you absolutely can't get that nut to spin on the line, you will have to screw the new hose onto the nut as tightly as possible, then work it until the hose fitting goes into the bracket, install the clip, then tighten the nut a little more. If the line twists enough to crack, or is real rusty, it will need to be replaced.
If you previously pulled the steel line down through the bracket, leave it there to make starting the nut into the new hose easier. Thread the hose on until it's almost snug, then push everything up so you can orient the hose fitting and install the retainer clip. Now you can finish tightening the nut. If the line nut is above the bracket, install the hose and retainer clip first, then screw the line nut into the hose but be very careful it isn't cross-threaded. It's harder to do it that way because you have to push down on the steel line, which isn't easy, and be sure the nut goes in straight at the same time. If you can get it started a full turn by hand, it should be going in straight. From there you can use the wrench to tighten it.
Most mechanics use two new copper washers on both sides of the new hose where it bolts to the caliper. Reusing the old ones doesn't mean they will leak, but some people crack them off and flip them over. The soft copper will crush into the grooves on the caliper and hose to form a new seal.
There likely won't be brake fluid dripping while you're doing this repair. If there is, watch the fluid level in the reservoir so it doesn't run dry. A simple trick to stop fluid loss is to place a stick between the seat and brake pedal to hold the pedal down about an inch. That will prevent further fluid loss until the repair is completed. Remove that stick when you're ready to bleed the air out of the system.
Open the bleeder screw on the caliper, and crack open the cover on the master cylinder, other wise a vacuum will build up that prevents the fluid from running down. Unless the car or master cylinder is fairly new, never, never, EVER push the brake pedal more than half way to the floor. Crud and corrosion build up in the lower halves of the two bores where the pistons don't normally travel. Running the pedal to the floor, as many do-it-yourselfers and even some professionals believe is proper procedure, will run the lip seals over that crud and can rip them. That will result in a slowly sinking pedal and the need for a new master cylinder. Pretend there is a block of wood under the pedal and never push it over half way.
Gravity-bleeding is the only method I use. If brake fluid isn't running out of the bleeder screw after a couple of minutes, "irritate" the brake pedal by hand a little to convince the fluid to start flowing. Once fluid is flowing and there's no air bubbles coming out, snug the bleeder screw, then press the brake pedal slightly once. Open the bleeder screw once more to expel the few little bubbles that washed into the caliper, tighten the bleeder screw, and you're done.
If no fluid comes out of that caliper even when you press the brake pedal, you have to reset a valve in the master cylinder. That is strictly a GM thing on front-wheel-drive cars with four steel lines coming out of the master cylinder. That valve trips when there is an imbalance in the two hydraulic systems, as in when a hose pops a leak. Some people believe that valve will not trip if you follow a specific sequence when bleeding all four brakes, but what trips it is pushing the brake pedal too far to the floor when ANY one bleeder screw is open. The only way I have ever found to reset that valve is to give a quick short burst of compressed air into the bleeder screw, then let it gravity-bleed. Many confused people replace the entire master cylinder, then have the exact same problem when they push the pedal too far.
When that valve trips, it blocks fluid flow to one front wheel and to the opposite rear wheel. Due to changes in suspension geometry, losing one front brake is almost unnoticeable. You can't tell on Chrysler products. On other cars you might see a slight wiggle in the steering wheel when you apply the brakes.
Once repairs are completed, you can spray a protective coating onto the line nut to make it come loose easier next time. I use Mopar Spray White Lube because I'm very familiar with it, but I suspect other dealers have the same product with their name on it. It's a lithium-based grease that goes on very juicy. The liquid gets into tight places and takes the grease with it, then the liquid evaporates and leaves the grease behind. It will keep water out of the steel line nut.
It is very important to never get any kind of grease or oil in the brake fluid. Residue from your fingers is enough to cause rubber parts to swell. The only proper fix is to replace everything in the hydraulic system that has rubber parts in it.
Also don't open the cover on the reservoir more than necessary when bleeding the repaired circuit. Brake fluid loves to suck moisture out of the air. That moisture promotes corrosion of metal parts and lowers the fluid's boiling point. At the wheels the fluid regularly gets hot enough for water to vaporize leading to a mushy pedal and brake fade.
If the soft metal line nut is rusted to the steel line, that line is going to twist off when you try to unscrew it. Now you have another part to replace that must be carefully bent so it's oriented exactly like the old one. That often results in kinking it and blocking proper fluid flow to and from the caliper. A lawyer would have a field day with that even if the other guy ran the red light and caused the crash. And they WILL find those things.
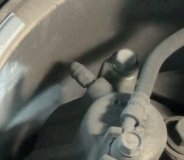
Chances are the bleeder screw on the caliper is going to be rusted tight. If you snap it off, you must replace the entire caliper. To maintain even braking, you must replace both calipers at the same time. Do you know what to clean and where to apply the special high-temperature brake grease? Professionals know at least two tricks to get bleeder screws open. They also know a lot of things they can do to prevent noises.
How do you plan on getting the air out of the system once the new hose is in place? One simple, common pedal-bleeding mistake can destroy the master cylinder. Now you need more parts. Another built-in problem affects only GM front-wheel-drive cars. That causes no brake fluid to flow to one front wheel. Other than the fact that no fluid comes out when you try to bleed the air out, you will never know this happened until the brake pads wear out real soon on one side and they look like new on the other side. Think lawyers don't know about this and how to check for it?
If you still want to tackle this job, have the new hose in hand and holler back. I'll type a long list of things to watch out for. In particular, do not get any type of petroleum product such as engine oil or power steering fluid anywhere near brake fluid. Even a little oil residue on your fingers that gets into brake fluid will result in a REAL expensive repair. That expense can exceed the value of the car if it has anti-lock brakes.
Please let me know if you need anything else to get the problem fixed.
Tuesday, January 17th, 2012 AT 3:21 AM


