Hi,
Here are the directions. Take a look through them and see if there is something you missed. The attached pics correlate with the directions.
________________________________________
2000 Honda Truck CR-V EX 4WD L4-1972cc 2.0L DOHC MFI
Removal and Installation
Vehicle Transmission and Drive-train Transfer Case Service and Repair Procedures Removal and Installation
REMOVAL AND INSTALLATION
Removal
WARNING: Make sure the lifts, jacks, and safety stands are placed properly.
1. Raise the front of the vehicle, and make sure it is supported securely.
2. Set the parking brake, and block both rear wheels securely.
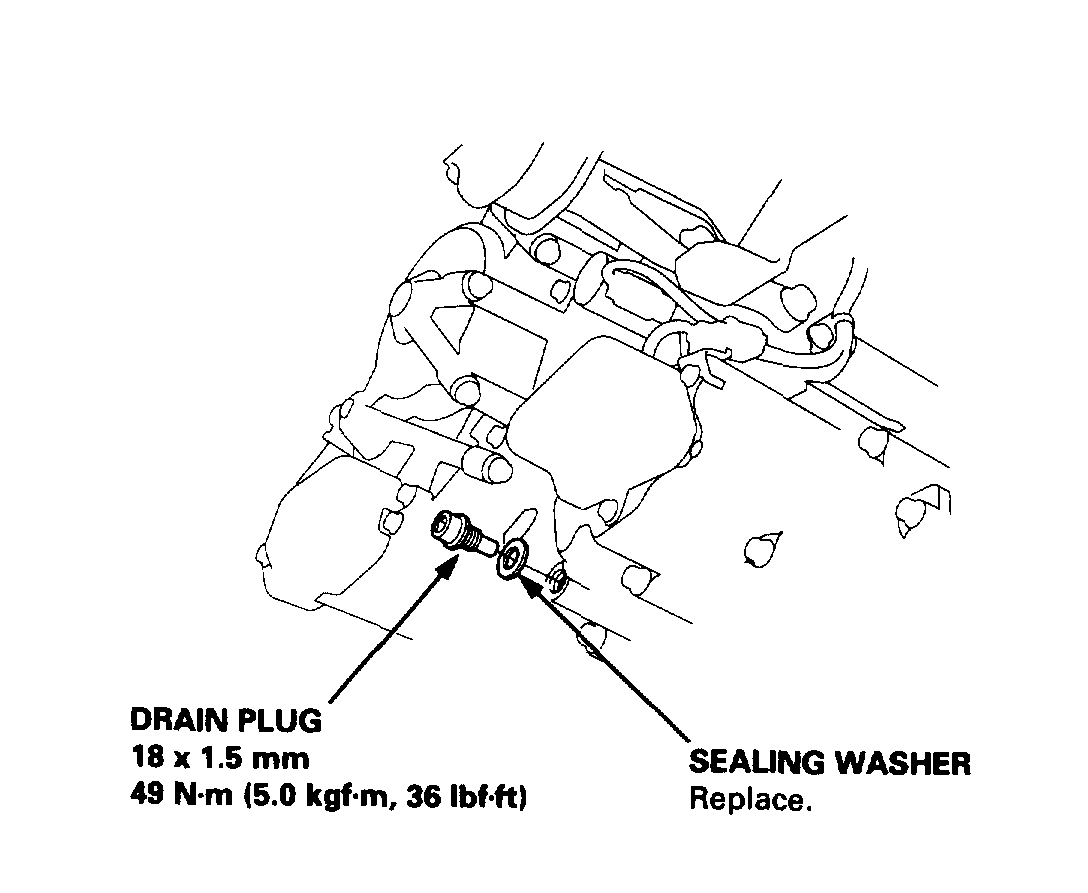
Pic 1
3. Drain the automatic transmission fluid (ATF). Reinstall the drain plug with a new sealing washer.
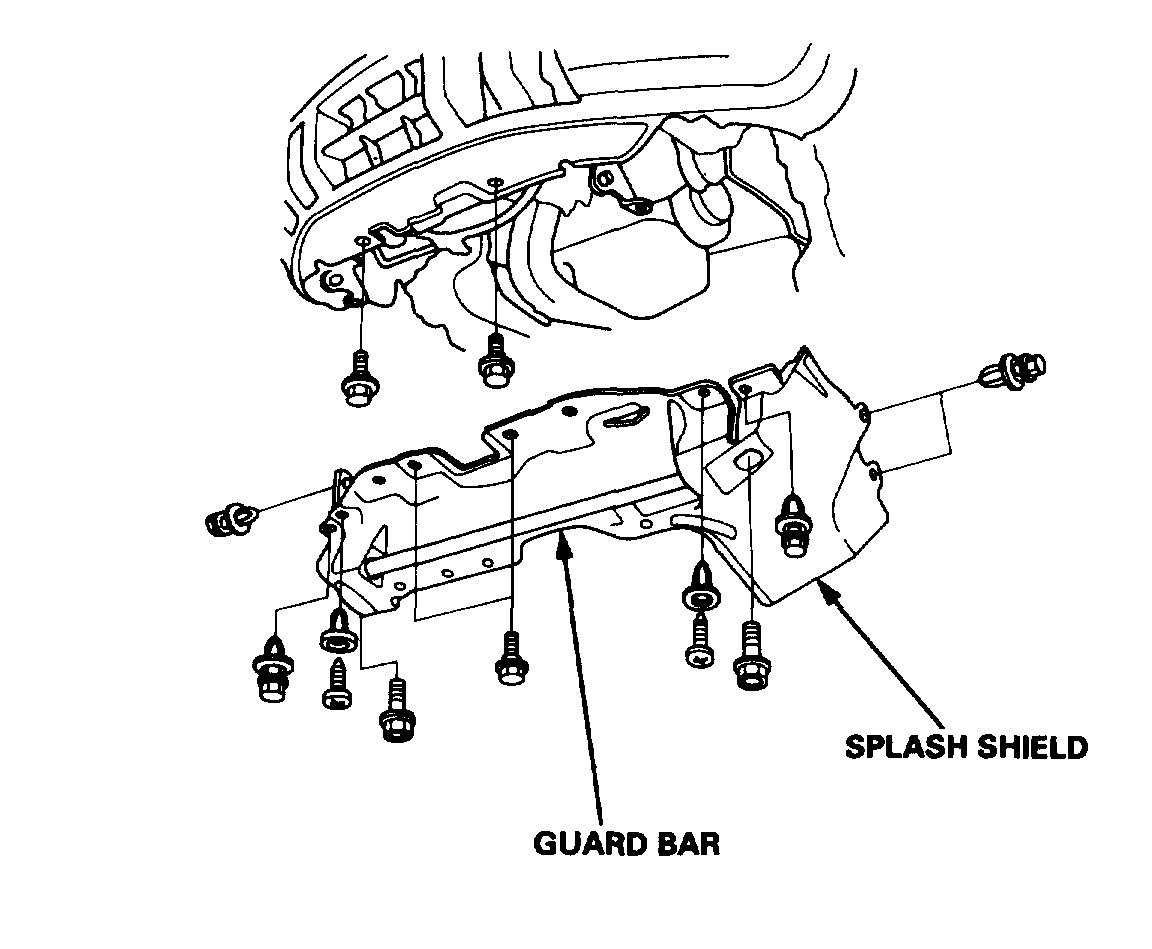
Pic 2
4. Remove the guard bar and the splash shield.
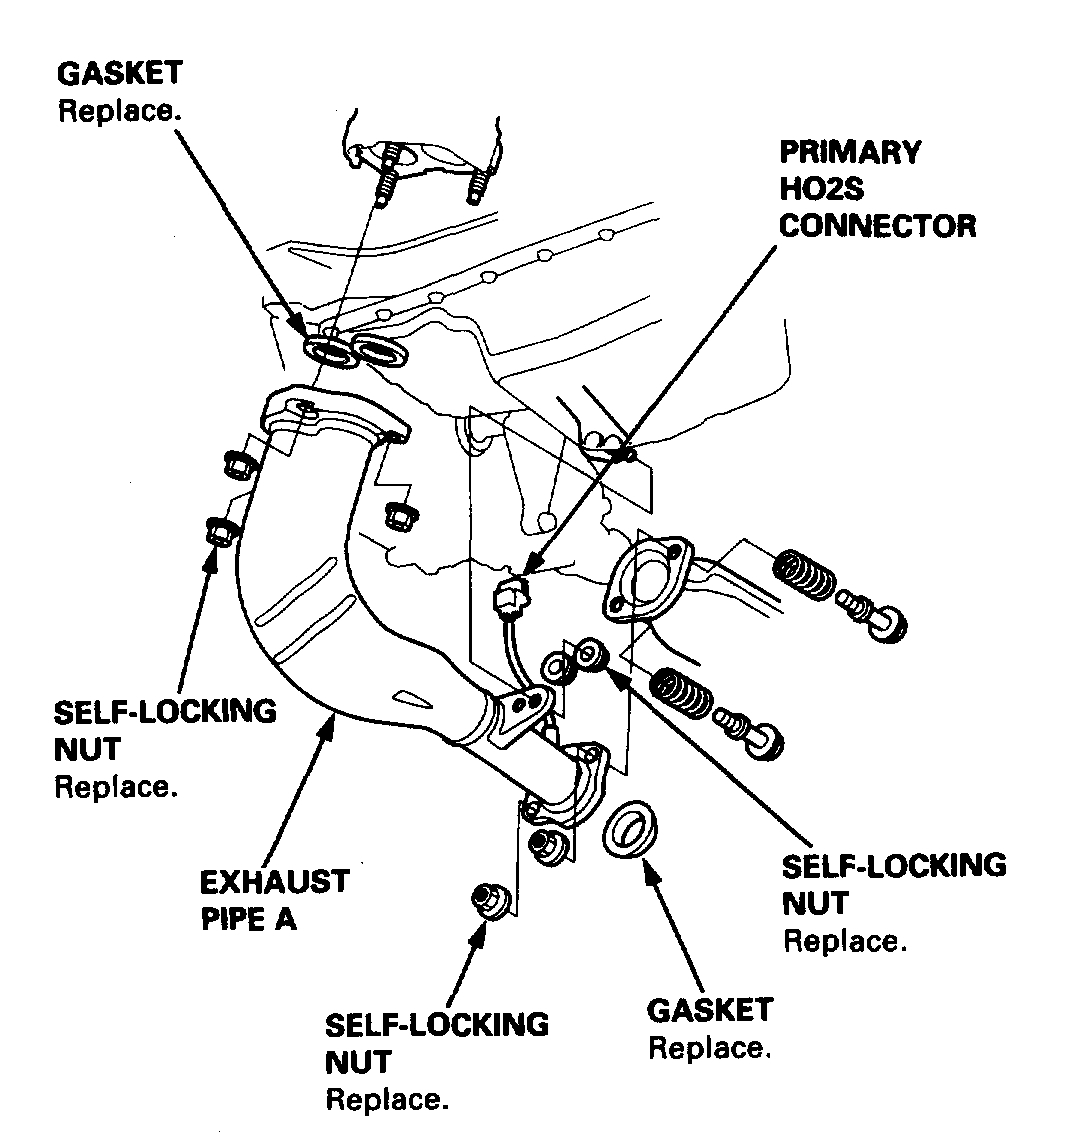
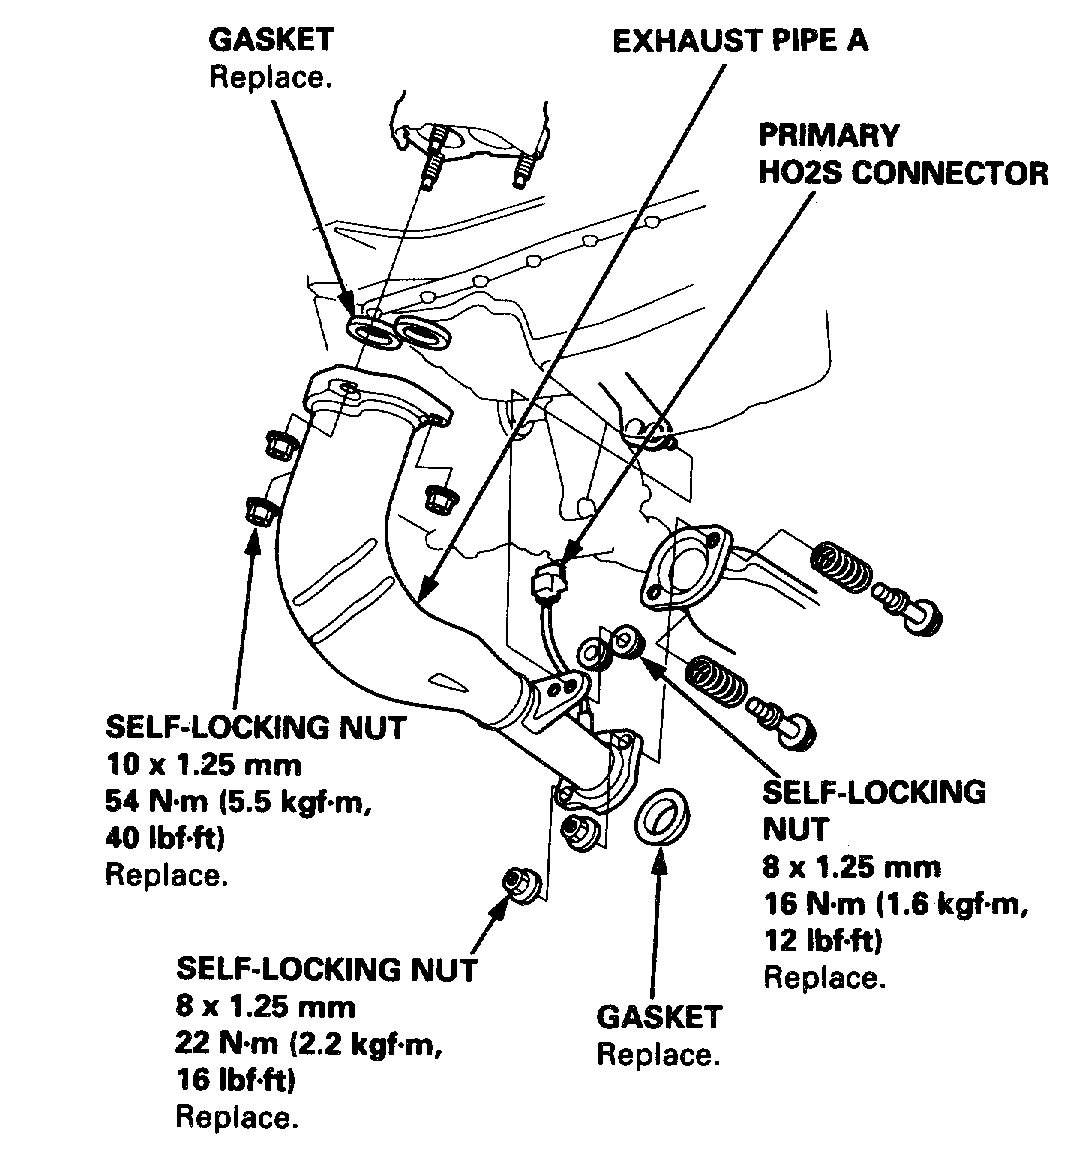
5. Disconnect the primary heated oxygen sensor (Primary H02S) connector.
Pic 3
6. Remove exhaust pipe A.
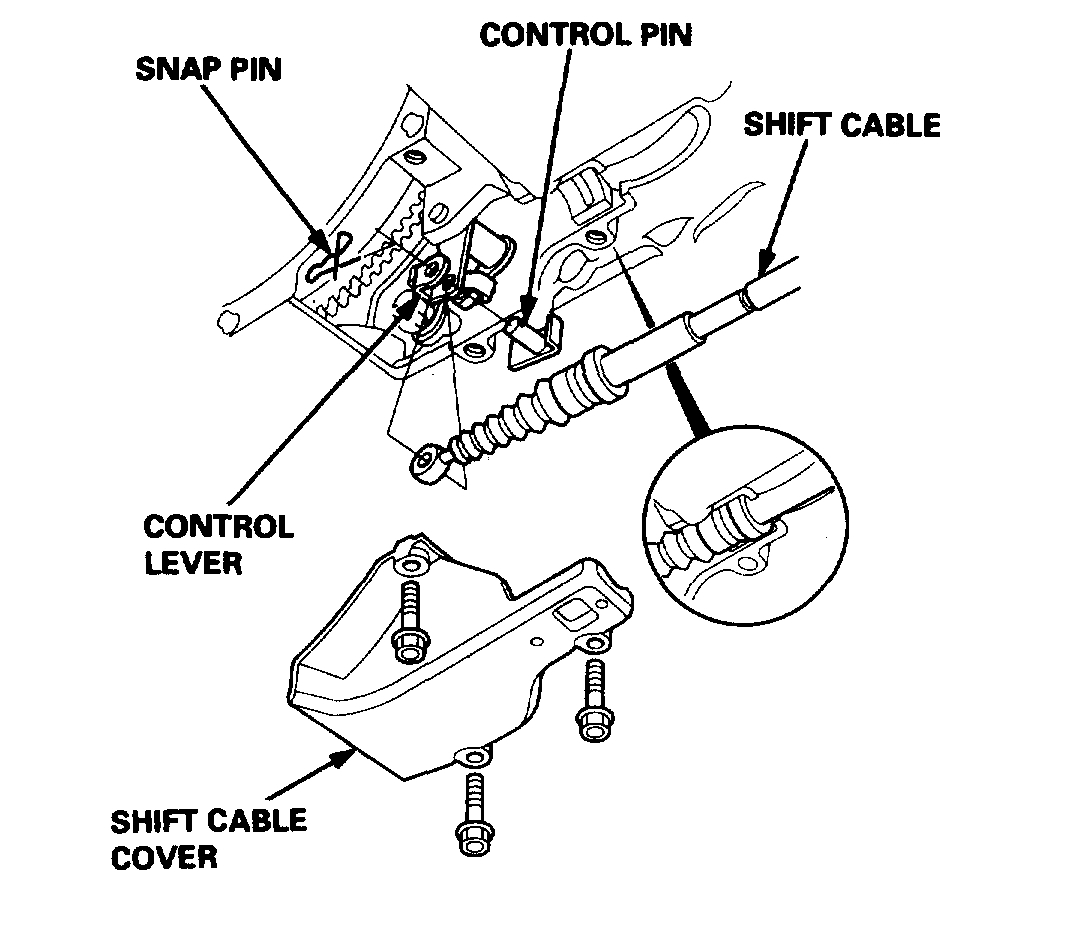
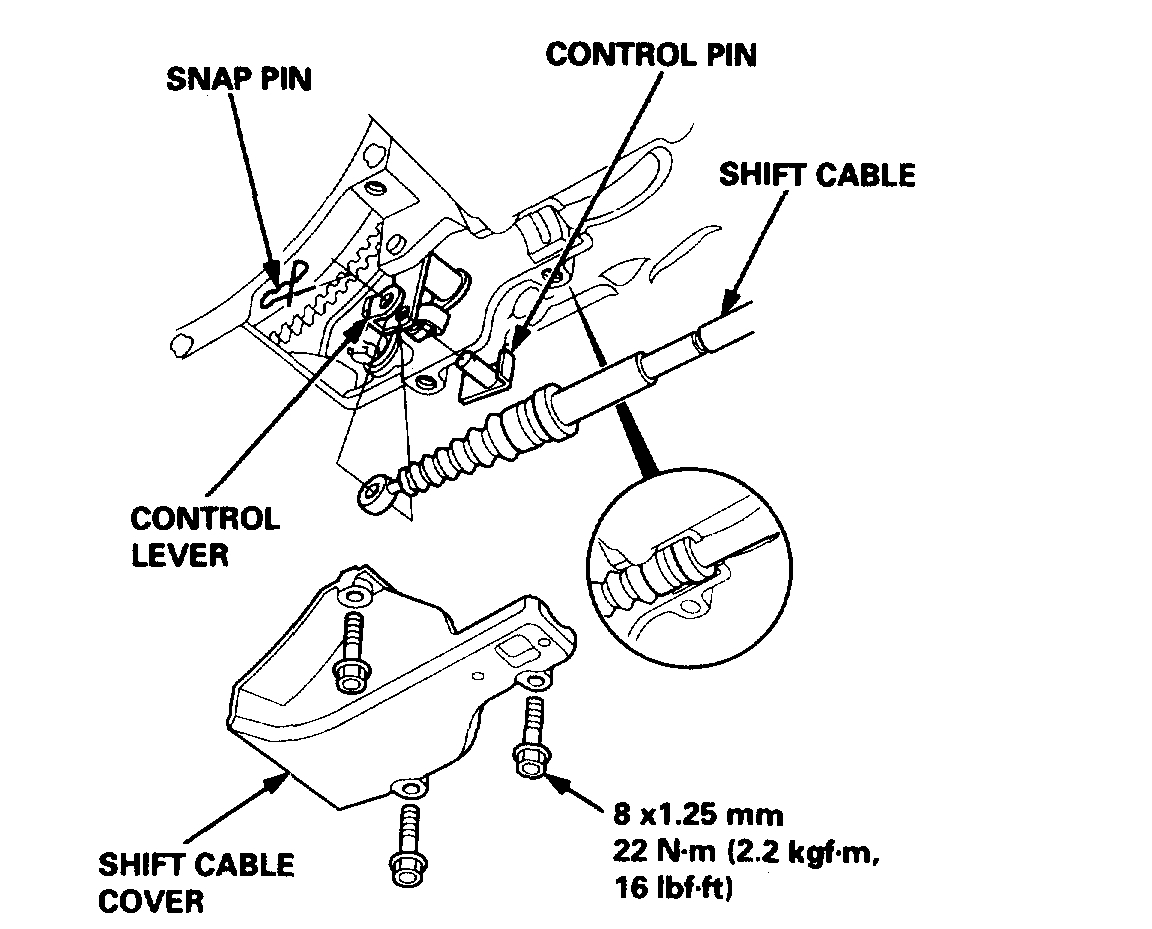
7. Remove the shift cable cover.
Pic 4
8. Remove the snap pin and control pin, then separate the shift cable from the control lever. Do not bend the shift cable excessively.
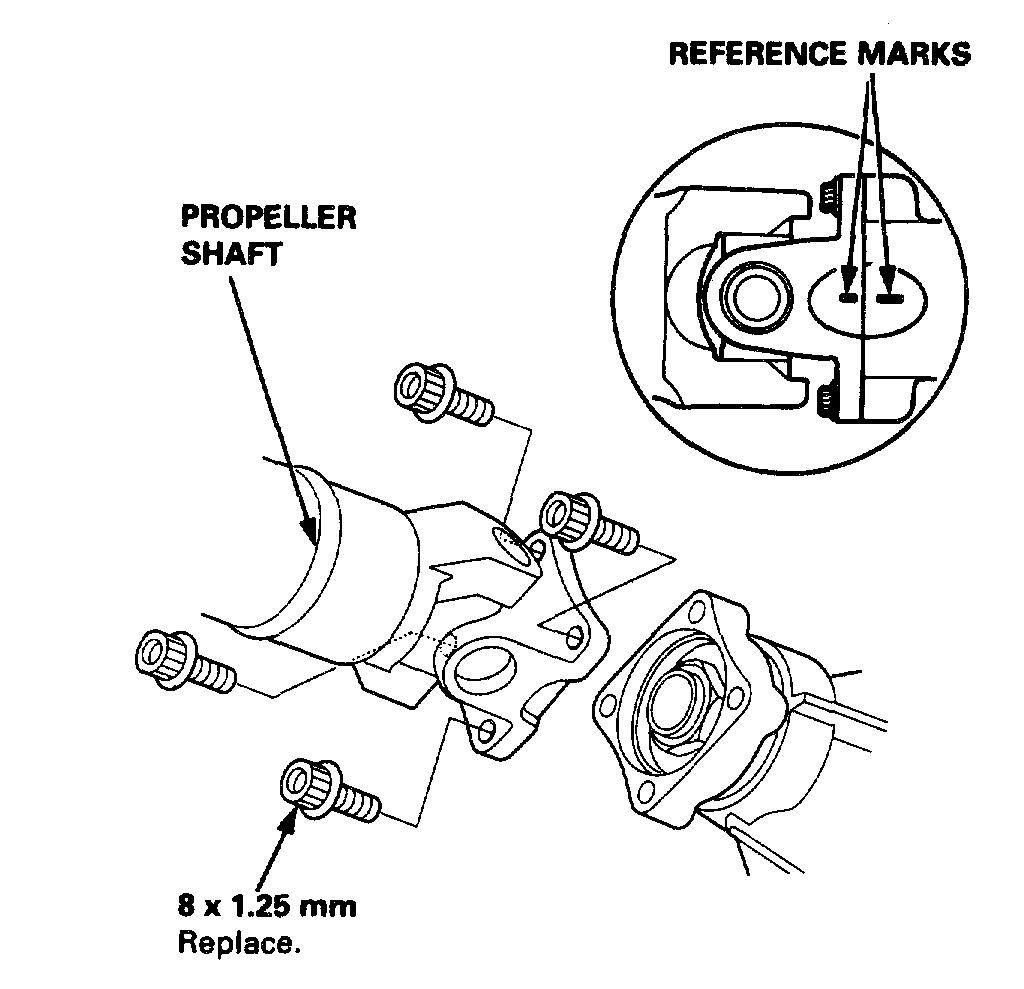
9. Make reference marks across the propeller shaft and the transfer assembly flanges.
Pic 5
10. Separate the propeller shaft from the transfer assembly flanges.
Pic 6
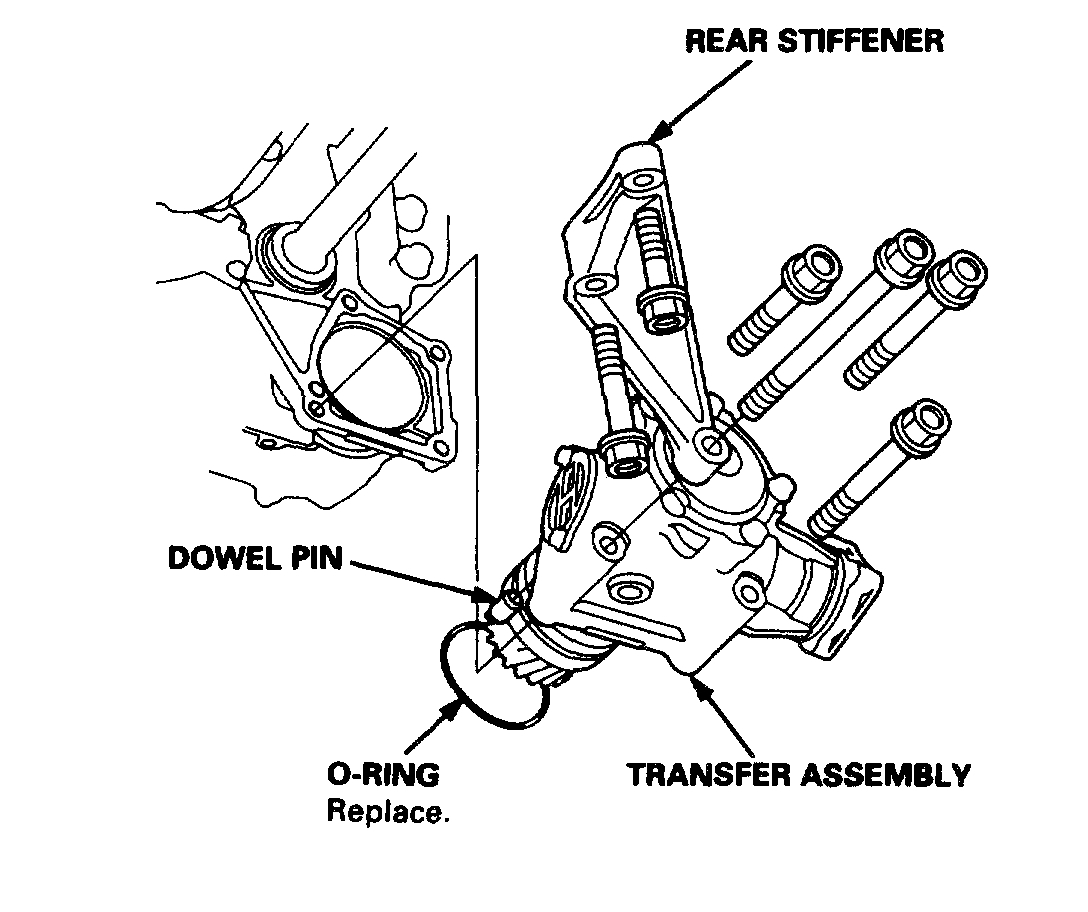
11. Remove the rear stiffener, then remove the transfer assembly.
NOTE: While servicing the transfer assembly, do not allow dust or other foreign particles to enter the transmission.
Installation
1. Install a new O-ring on the transfer assembly.
2. Clean the areas where the transfer assembly contacts the transmission with solvent or carburetor cleaner, and dry with compressed air. Then apply ATF to the contact areas.
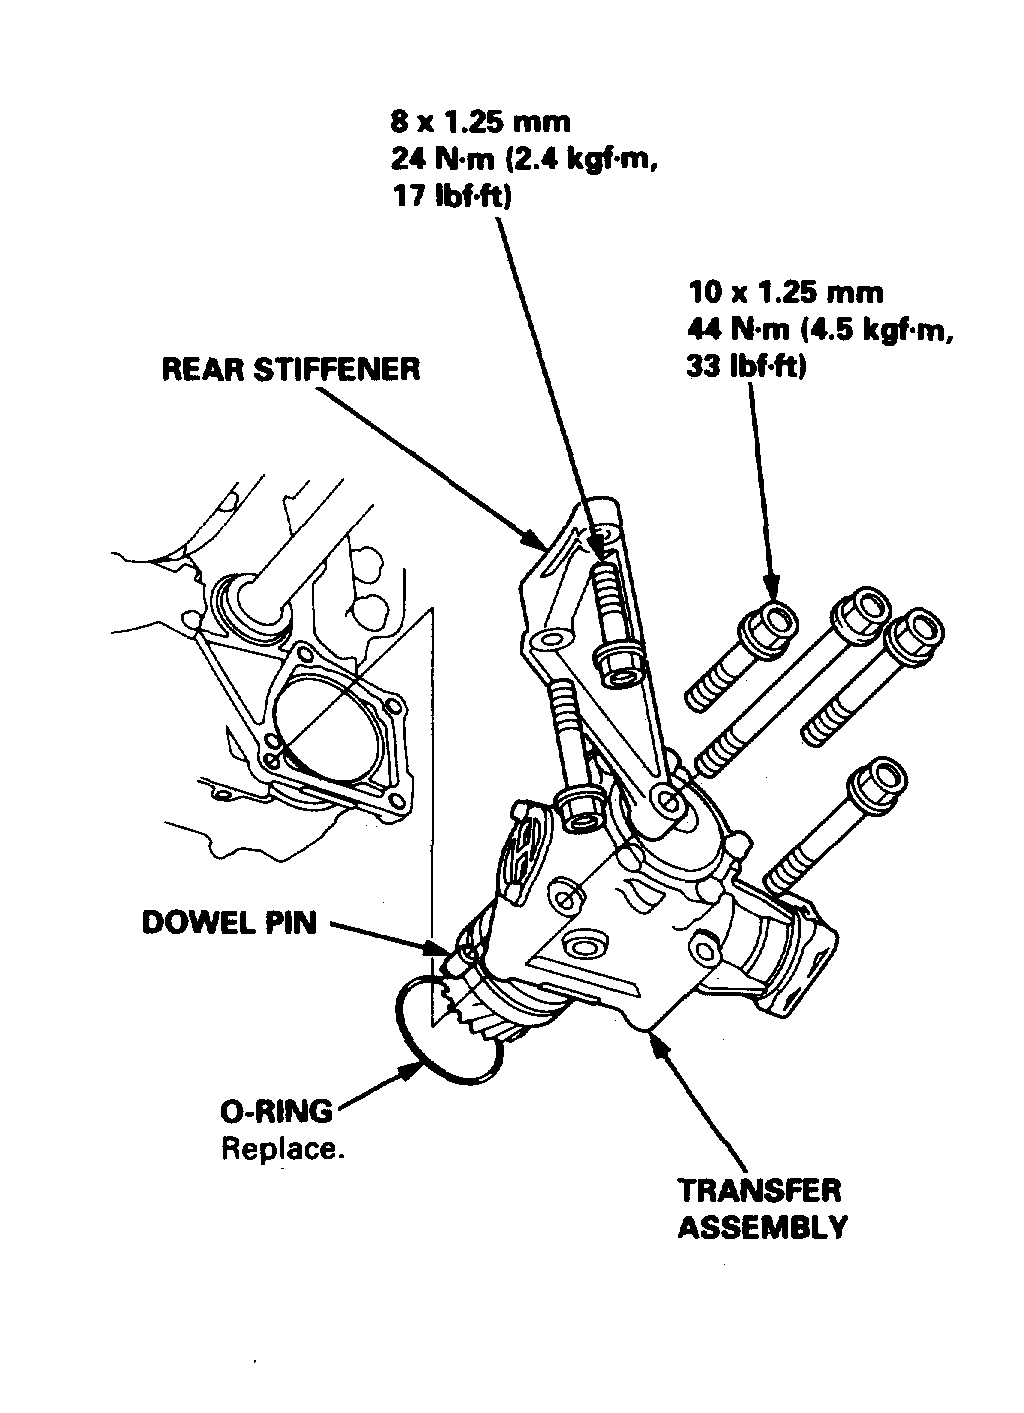
3. Install the transfer assembly on the transmission.
NOTE: While installing the transfer assembly, do not allow dust or other foreign particles to enter the transmission.
Pic 7
4. Install the rear stiffener.
Pic 8
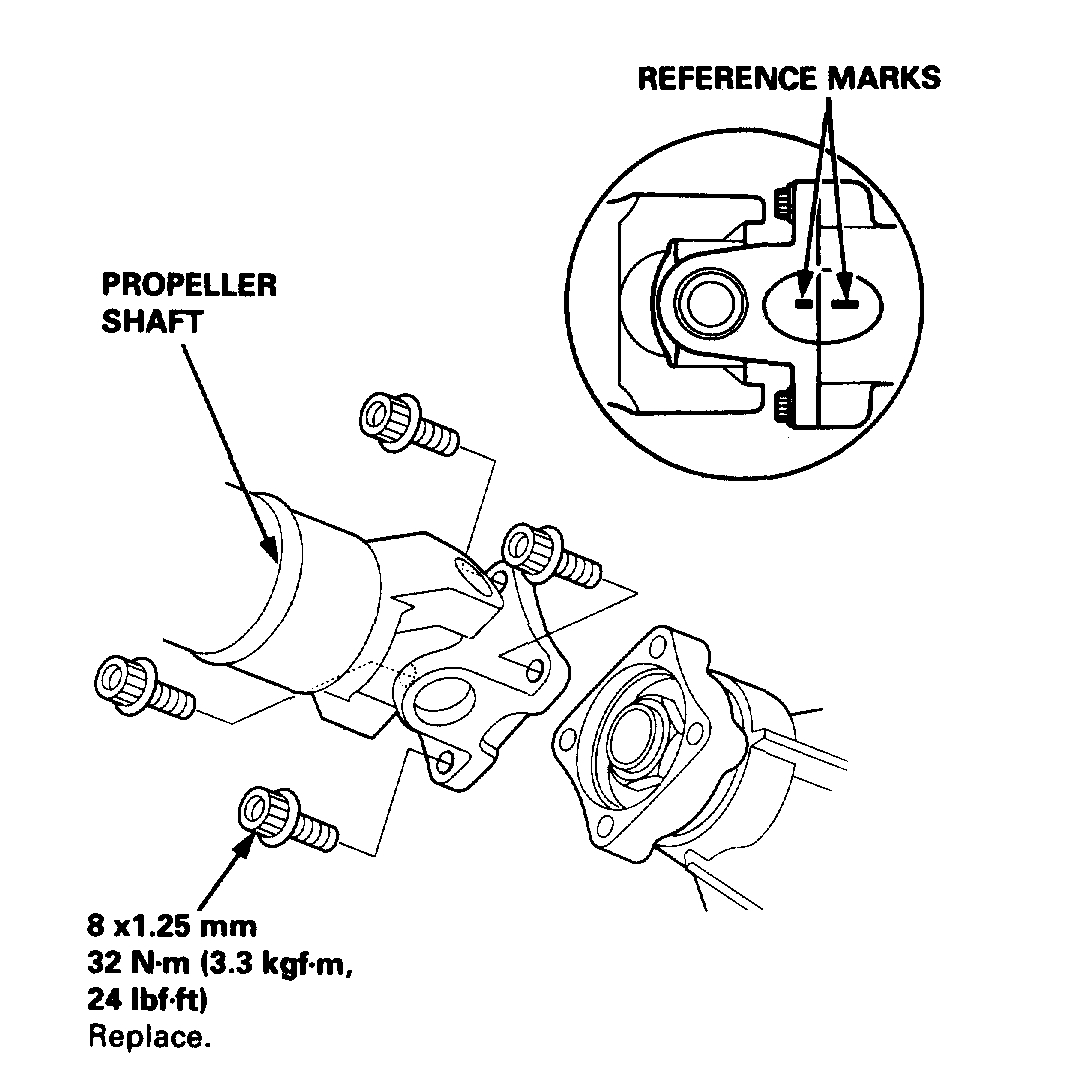
5. Install the propeller shaft to the transfer assembly by aligning the reference marks.
6. Install the shift cable with the control pin, then secure it with the snap pin. Do not bend the shift cable excessively.
Pic 9
7. Install the shift cable cover.
8. Install the exhaust pipe A.
Pic 10
9. Connect the primary heated oxygen sensor (Primary H02S) connector.
Pic 11
10. Install the splash shield and the guard bar.
11. Refill the transmission with ATF.
See: Fluid - A/T > Removal and Replacement > ATF Replacement
12. Start the engine, and run it to normal operating temperature (the radiator fan comes on). Turn the engine off and check ATF level.
_____________________________________
Let me know if this helps or if you have other questions.
Take care,
Joe
Images (Click to make bigger)
Saturday, March 21st, 2020 AT 9:14 PM