There was a TSB on the problem and here are the repair procedures.
Erratic Instrument Panel Operations.
OVERVIEW
This bulletin involves installing a repair harness containing a revised instrument cluster connector.
SYMPTOM/CONDITION
Some vehicles may exhibit an intermittent illumination of the air bag warning light or an intermittent tachometer or speedometer drop out. An Airbag Electronic Control Module (AECM) fault code -"No Cluster CCD BUS " message will be present.
DIAGNOSIS
Using the DRB III , read and record all active and stored fault codes in the AECM. This condition is caused by minor oxidation of the BUS circuit terminals at the instrument cluster connector. Electrical terminals will show signs of oxidation, which will appear as darkened lines or marks on the cluster male terminals. These often appear as gray or black marks rather than the appearance of oxidation or corrosion usually associated with higher current carrying circuits. This condition will set a "NO CLUSTER CCD BUS" message. The fault code will usually be stored and not active.
THIS TECHNICAL SERVICE BULLETIN WILL NOT
ADDRESS FUEL OR OIL PRESSURE GAUGE ISSUES. If this fault code is present, either active or stored perform the REPAIR PROCEDURE .
PARTS REQUIRED
PARTS INFORMATION
Qty.Part NumberPart Name
1 1 205016261AA 04856975 04778570 Cluster Connector Patch Harness Electric Contact Cleaner Heat Shrink Tubing
REPAIR PROCEDURE
This repair is compatible with DaimlerChrysler's Mobile Service Program and does not require hoist or other full service facility special equipment.
1. Disconnect the negative battery cable.
2. Remove the instrument cluster using the procedures outlined in the appropriate service manual.
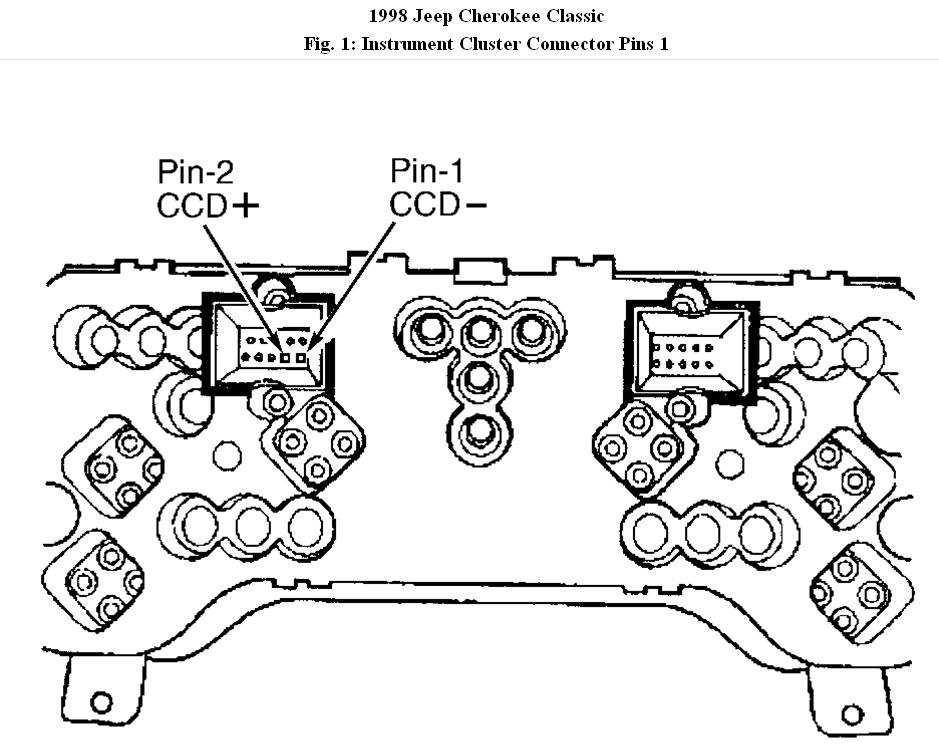
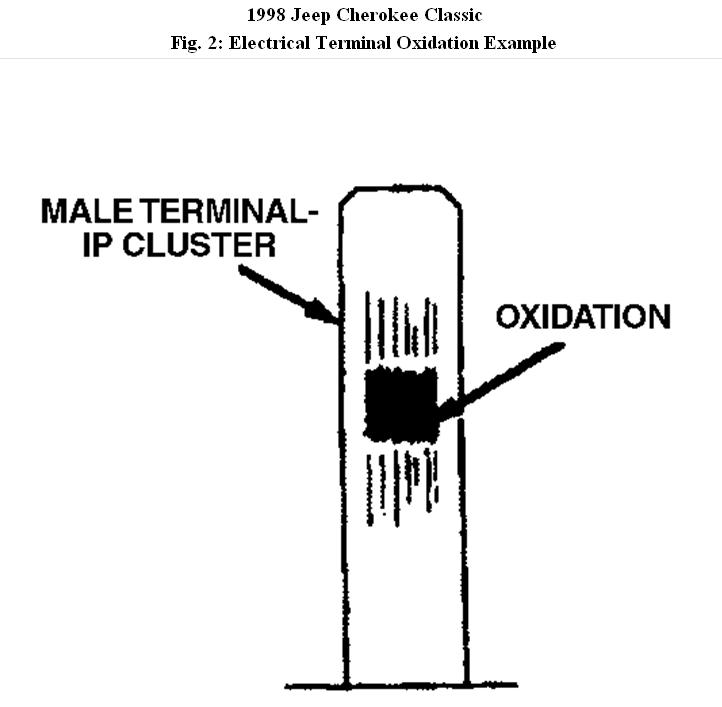
3. Inspect the male terminals of pins 1 & 2 on the instrument cluster connector labeled CNB (See Fig. 1 ). The oxidation will appear as gray or black lines or marks on the terminals. If any signs of oxidation are present, remove them by gently scraping the terminals with a small flat bladed screw driver until the oxidation is gone. Use of a
magnifying glass may be helpful (See Fig. 2 ). Use CAUTION when performing this operation. Do not apply excessive force to the terminals to avoid bending them or damaging the cluster or terminals. Do not use a sharp tool, knife or sand paper, which could remove the protective plating from the terminals. Do not use any cleaner other than p/n 04856975. Other chemical cleaners could damage the instrument cluster.
4. Clean the male terminals with Electrical Contact cleaner, p/n 04856975. Apply the cleaner sparingly holding the cluster with the connector facing down to avoid excessive amount of cleaner from entering the cluster.
5. Remove the green cluster connector from the bracket.
6. Using wire cutters, remove the instrument cluster harness connector from the harness. Remove only the connector containing the BUS circuit (See Fig. 1 ). This connector is labeled CBA on the cluster. Cut the wires as close to the insulator as possible.
7. The new connector must be soldered onto the harness. This operation requires a technician who is skilled at soldering to avoid a cold solder joint. Position the harness and align the wires with the patch harness, matching the color codes match the main wire colors.
NOTE:
The XJ instrument panel contains one more circuit in this connector than the TJ. Cut the unused wire close to the connector on TJ models.
8. Stagger cut the main harness and patch harness wires so that the solder joints will be 1/2 inch apart. Remove 1/2 inch of insulation from the wires. The new harness will have a dark blue with no tracer. This will mate with a dark blue wire with a green tracer on TJ and with a dark blue wire with a white tracer on XJ.
9. Slide a piece of heat shrink tubing over the wires and twist the wires together for each respective circuit.
10. Solder each circuit using rosin core solder. Be sure to heat the wire enough to allow the solder to melt when it comes in contact with wire. Do not use acid core solder.
11. Position the heat shrink tubing over the solder joints and shrink the tubing using a heat gun.
12. Install the connector to the bracket.
13. Install the instrument cluster.
14. Connect the battery cable.
15. Verify correct operation of the cluster.
© 2008 Mitchell Repair Information Co., LLC.
Images (Click to enlarge)
Dec 7, 2010 at 2:25 PM