Removal
1. Drain engine coolant.
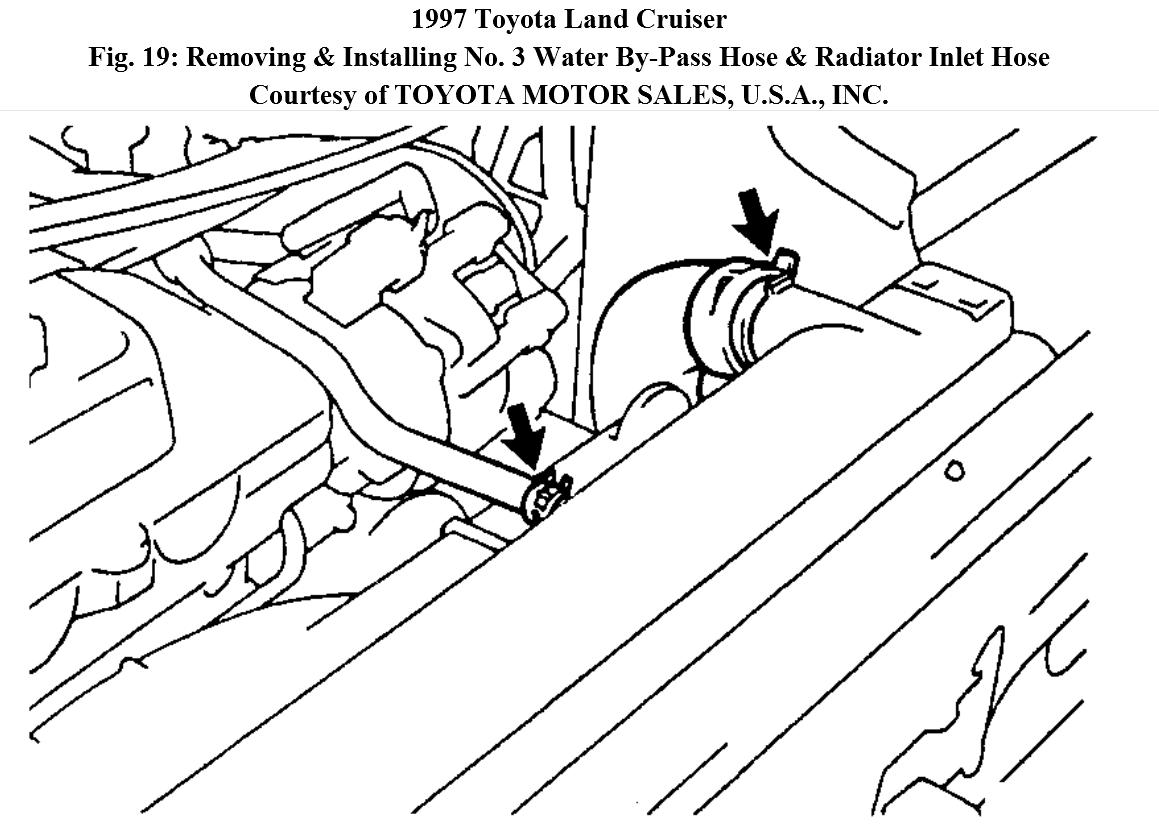
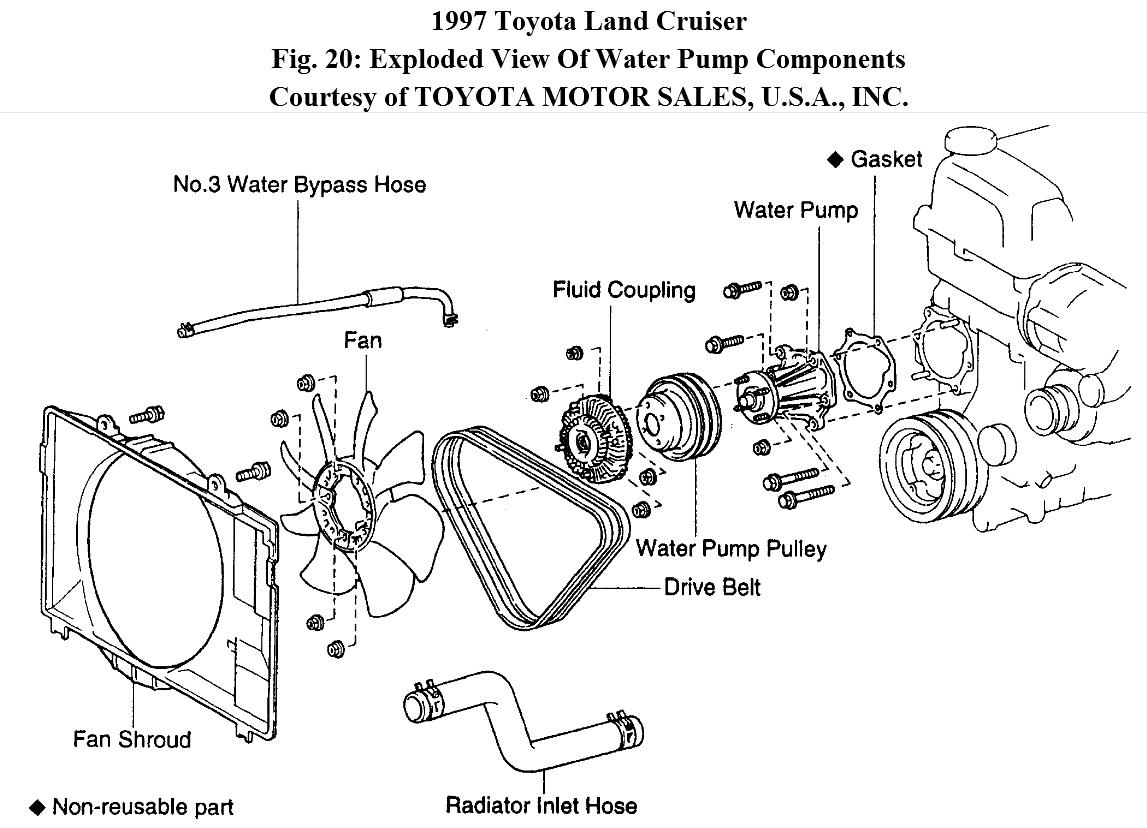
2. Disconnect No. 3 water by-pass hose. See Fig. 19 .
3. Disconnect radiator inlet hose. See Fig. 20 .
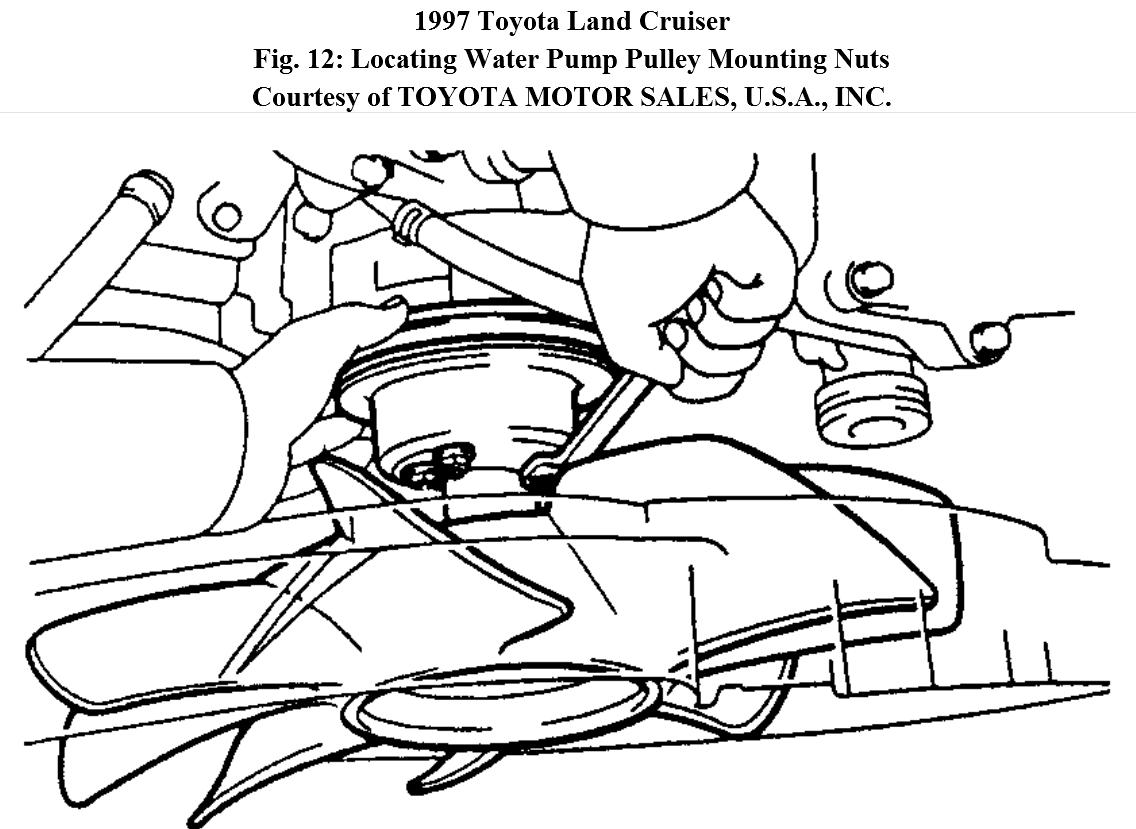
4. Stretch the belts and loosen the water pump pulley mounting nuts. See Fig. 12 .
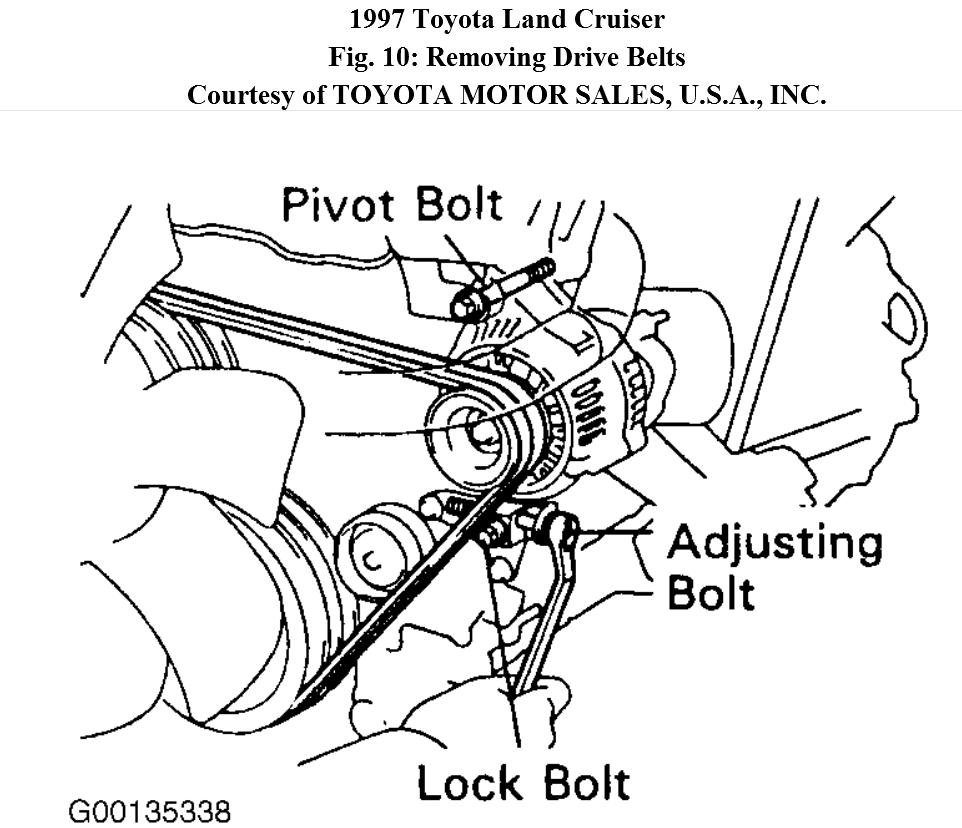
5. Loosen the lock, pivot and adjusting bolts of the generator, and remove the drive belts. See Fig. 10.
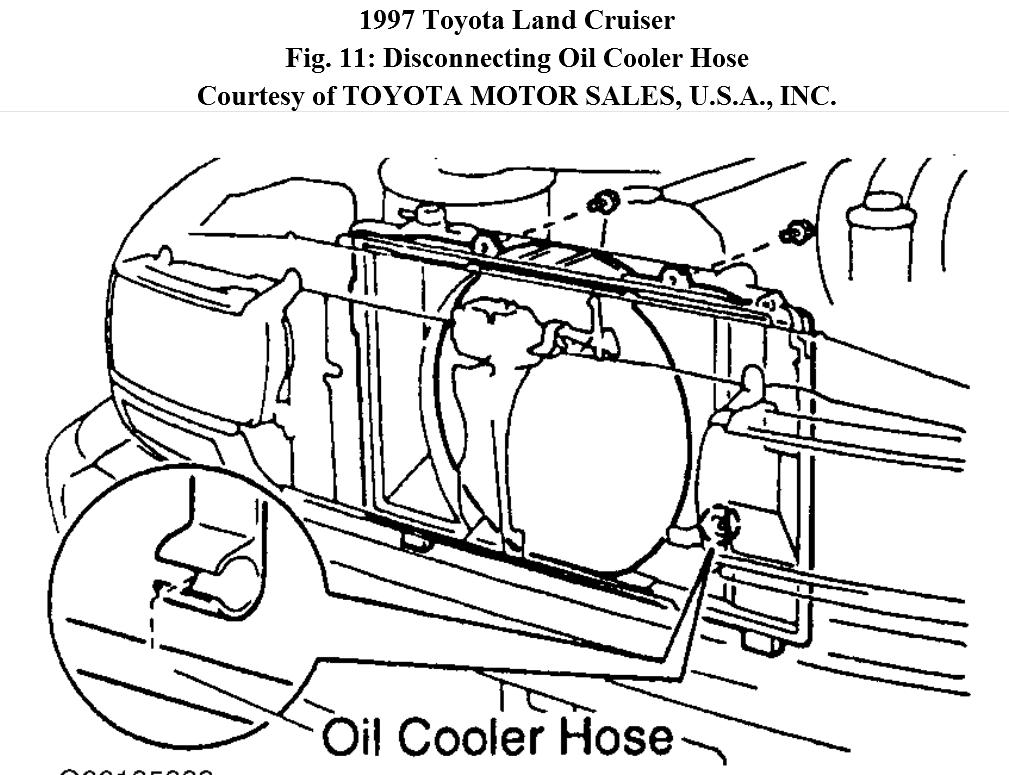
6. Disconnect the oil cooler hose from the clamp on the fan shroud. See Fig. 11 .
7. Remove the 2 bolts holding the fan shroud to the radiator. Remove the 4 water pump pulley mounting bolts. See Fig. 12 .
8. Pull out the fan with fluid coupling, water pump pulley and fan shroud.Remove the fan from the fluid coupling.
9. Remove the 4 bolts, 2 nuts, water pump and gasket.
Installation
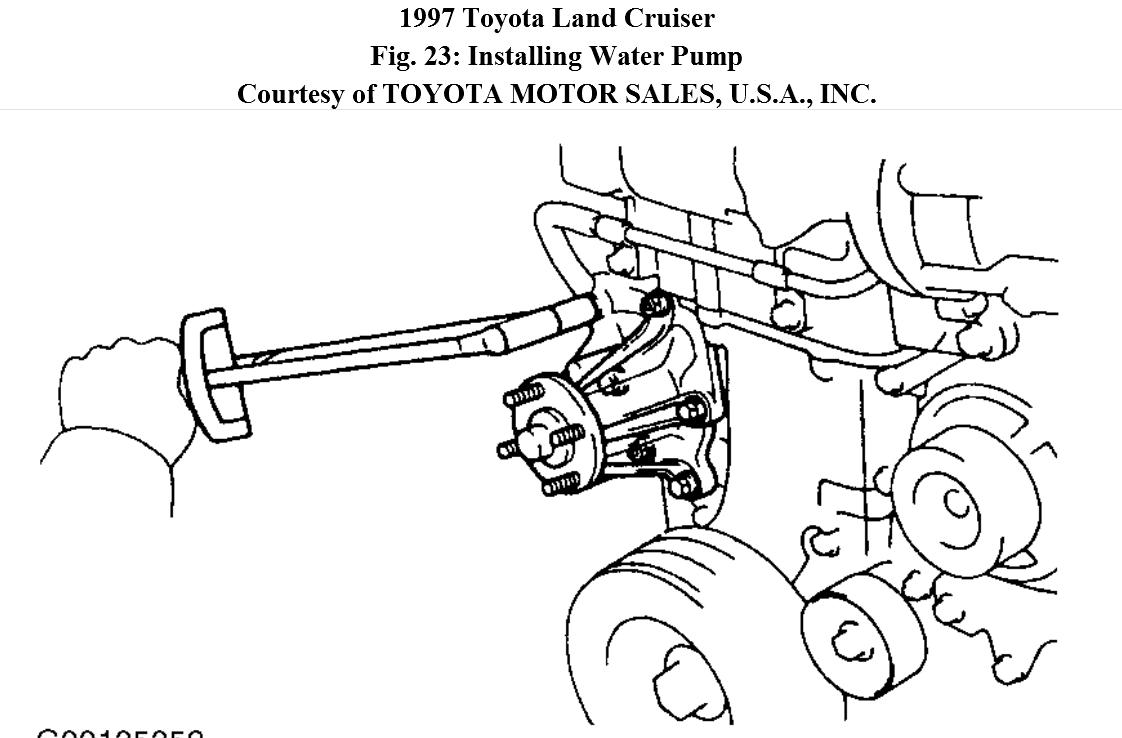
1. Install a new gasket and the water pump with the 4 bolts and 2 nuts. See Fig. 23 . Tighten nuts and bolts to specification.
2. Install fan to the fluid coupling. Place the fan with the fluid coupling, water pump pulley, and fan shroud in position. Temporarily install the fan pulley mounting nuts. See Fig. 12 .
3. Install the fan shroud with the 2 bolts, and tighten bolts to specification.
4. Connect the oil cooler hose to the clamp on the fan shroud. Install the drive belts with the adjusting bolt, lock bolt and pivot bolt. Stretch the belts tight and tighten the 4 water pump pulley mounting nuts.
5. Adjust the drive belts.
6. Connect No. 3 water by-pass hose. See Fig. 19 .
7. Connect radiator inlet hose.
8. Fill radiator with engine coolant.
9. Start engine and check for leaks.
Images (Click to enlarge)
Dec 18, 2012 at 6:57 PM