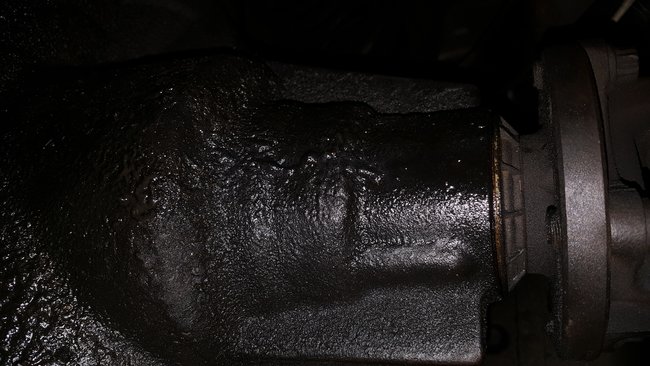
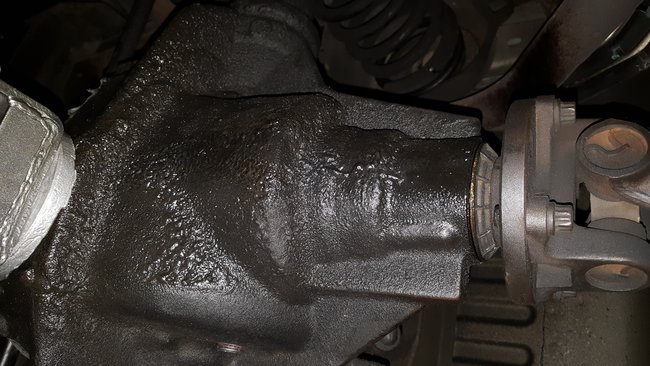
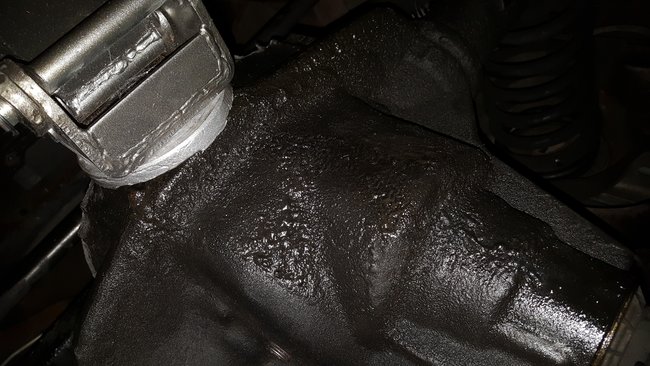
To replace the pinion bearing you will need to remove the ring gear and then set up the rear again using shims (maybe). Here is some diagrams and instructions on how to rebuild the rear end (differential) you can just take what you want from it and do just the pinion gear bearing or do all of them which is what I recommend. (below)
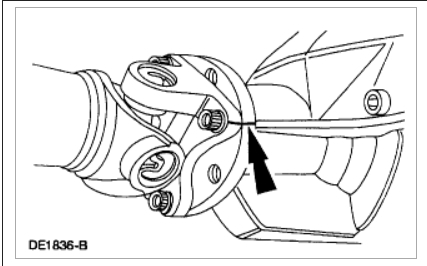
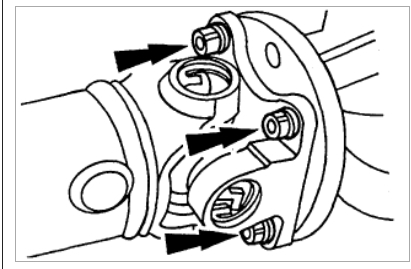
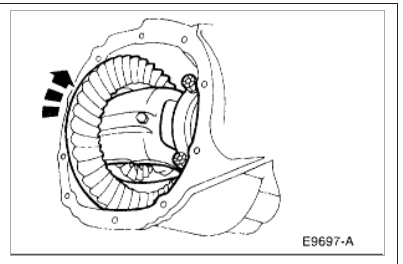
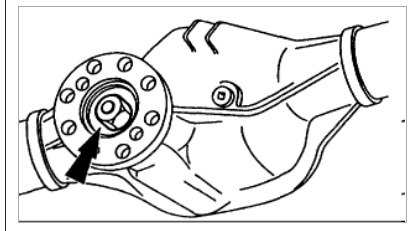
Remove the axle shafts. Mark the driveshaft flange and rear axle companion flange for correct alignment during installation. Remove the four driveshaft bolts and disconnect the driveshaft. Wire the driveshaft aside. Wipe the lubricant from the internal working parts and visually inspect the parts for wear or damage. Rotate the differential case to see if there is any roughness which would indicate damaged bearings or gears.
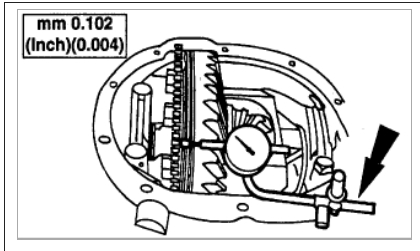
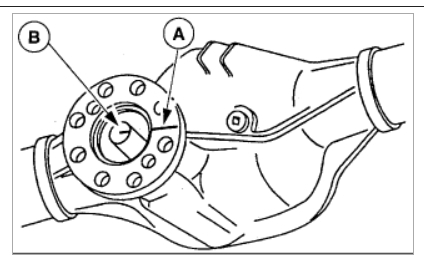
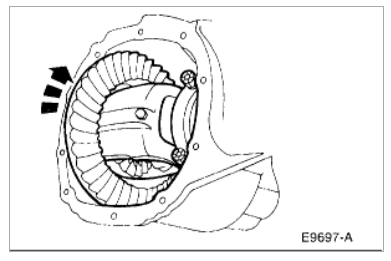
Position Dial Indicator with Bracketry and inspect ring gear backface runout.
NOTE:
- Specification shown is the maximum ring gear runout allowable.
- There is a space between the anti-lock speed sensor ring and the ring gear for measuring ring gear backface runout.
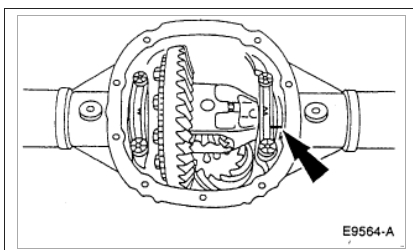
Mark one differential bearing cap and the differential case for correct alignment during installation.
CAUTION: The bearing caps must not be interchanged or rotated.
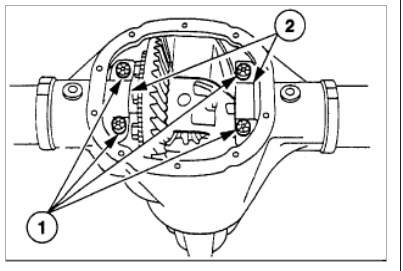
Loosen the differential case.
(1) Loosen the bolts.
(2) Loosen the bearing caps.
NOTE: The direction and location of the triangles on the bearing caps must remain consistent during installation.
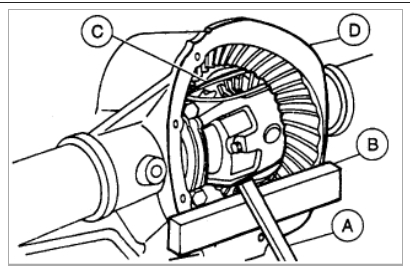
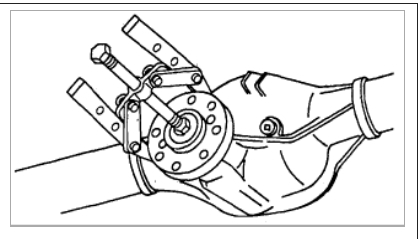
Use the (A) pry bar and (B) wood block to loosen the (C) differential case from the (D) axle housing.
CAUTION: Place a wood block between the pry bar and the axle housing to protect the machined surface from damage.
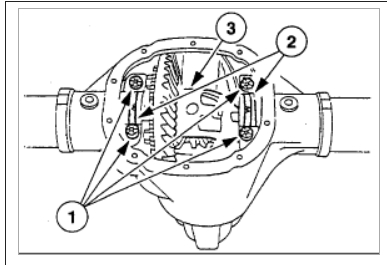
Remove the differential case.
(1) Remove the bolts.
(2) Remove the bearing caps.
(3) Remove the differential case.
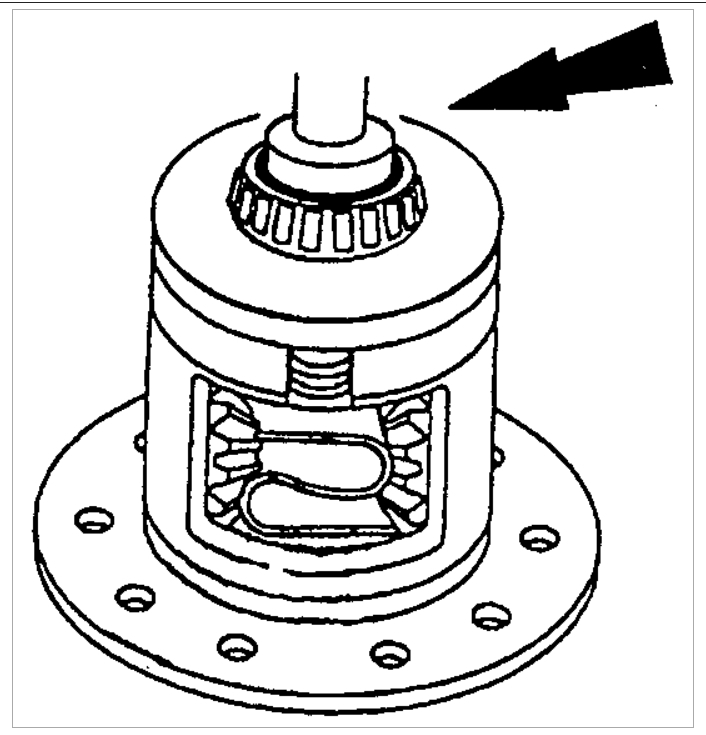
Install a Nm (Inch lbs) torque wrench on the pinion nut and record the torque required to maintain rotation of the pinion through several revolutions.
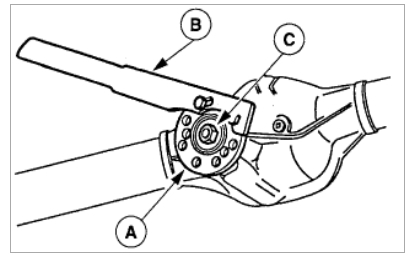
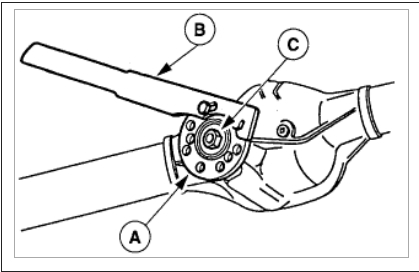
Use (B) Companion Flange Holding Tool to hold the (A) rear axle companion flange while removing the (C) pinion nut.
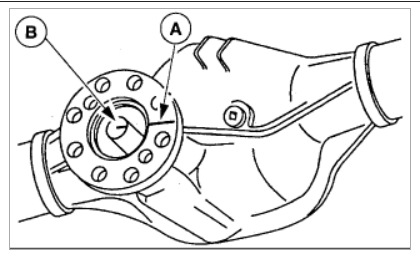
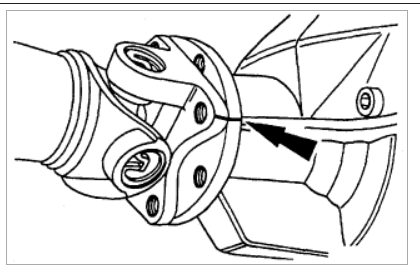
Mark the (A) rear axle companion flange in relation to the (B) drive pinion stem to ensure proper alignment during installation.
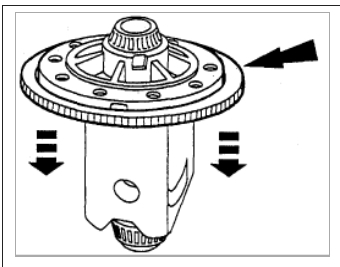
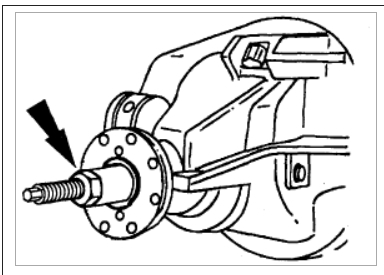
Use 2-Jaw Puller to remove the rear axle companion flange.
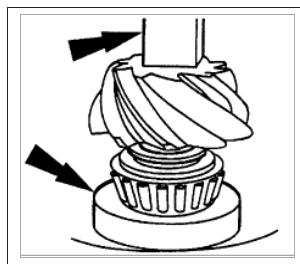
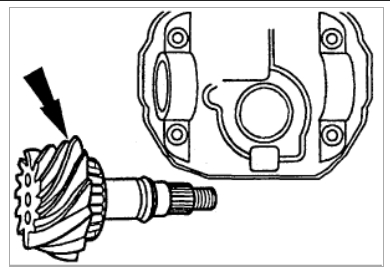
Remove the drive pinion.
Use a press and Pinion Bearing Cone Remover to remove the differential pinion bearing.
Remove the pinion seal.
Remove the oil slinger and the outer differential pinion bearing.
If the pinion bearing cups are damaged, use a suitable brass drift to remove the differential bearing cups.
NOTE:
- Tap alternately on opposite sides of the cups to prevent them from cocking in the bore.
- Do not remove the pinion bearing cups from the axle housing unless the pinion bearing cups are damaged.
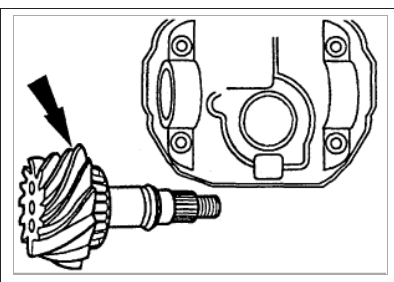
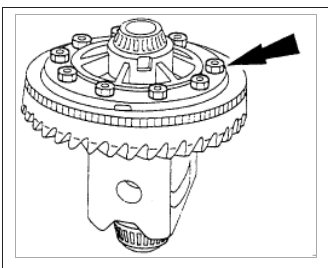
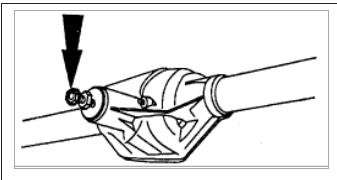
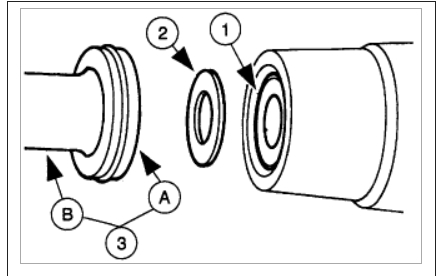
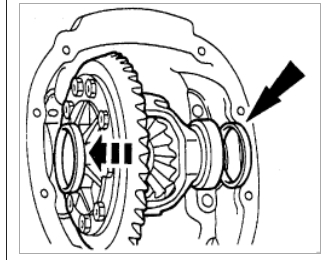
Remove the 10 ring gear bolts.
Remove the differential ring gear.
(1) Insert the drift into the bolt hole.
(2) Tapping from side to side, remove the differential ring gear.
NOTE: Use a drift that will bottom out in the ring gear bolt holes to separate the differential ring gear from the differential case.
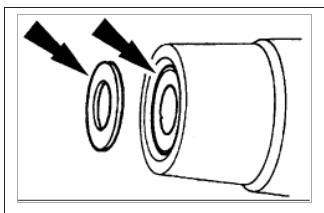
Remove the speed sensor ring.
NOTE: The speed sensor ring cannot be reused once removed.
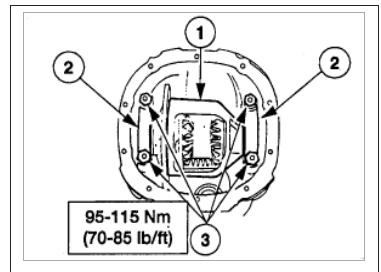
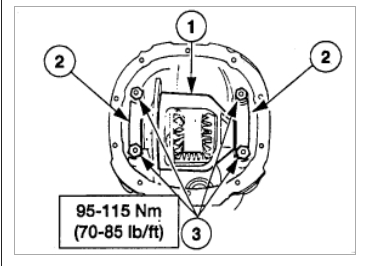
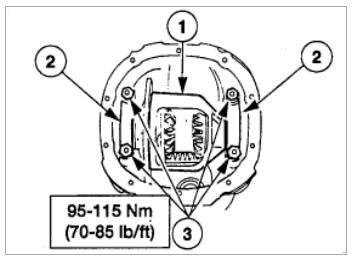
Install the differential case.
(1) Position the differential case assembly, including shims, in the axle housing.
(2) Install the differential bearing caps.
(3) Install the bolts.
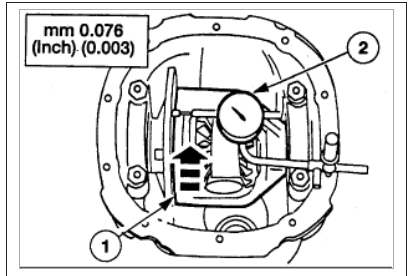
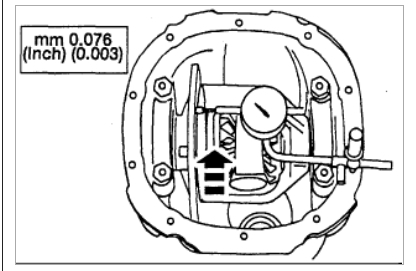
Position Dial Indicator with Bracketry.
(1) Rotate the differential case to ensure the differential bearings are properly seated.
(2) Position Dial Indicator with Bracketry.
Measure the differential case runout without the ring gear.
(1) Rotate the differential case.
(2) Check and note the differential case runout.
NOTE:
- Specification shown is the maximum differential case runout allowable.
- If runout is within specification, install a new ring gear and pinion. If runout exceeds specification, the ring gear is true and the concern is due to either a damaged differential case or differential bearings. Inspect the differential bearings. If the differential bearings are not damaged, replace both the differential case and the differential bearings.
Remove the differential case from the axle housing and remove the differential bearings using 2-Jaw Puller and Step Plate.
Use Differential Side Bearing Replacer to install the new differential bearings on the differential case.
Install the differential case.
(1) Position the differential case assembly, including shims, in the axle housing.
(2) Install the differential bearing caps.
(3) Install the bolts.
Measure the differential case runout without the ring gear.
- Check the case runout again with the new differential bearings. If the runout is now within 0.076 mm (0.003 in), use the new differential bearings for assembly. If the runout is still excessive, the differential case is damaged and should be replaced.
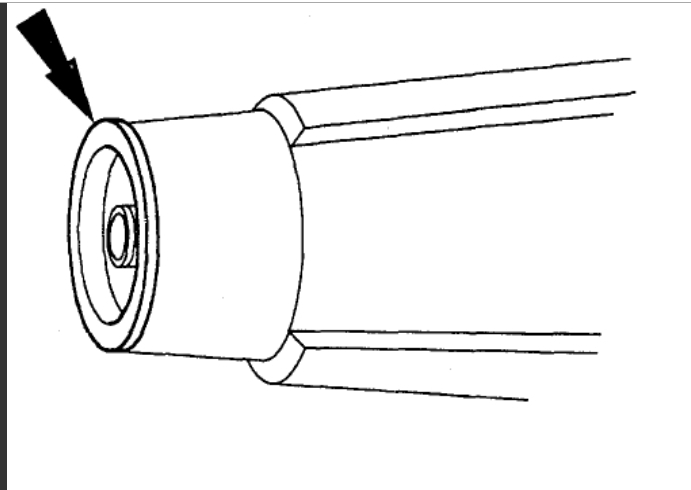
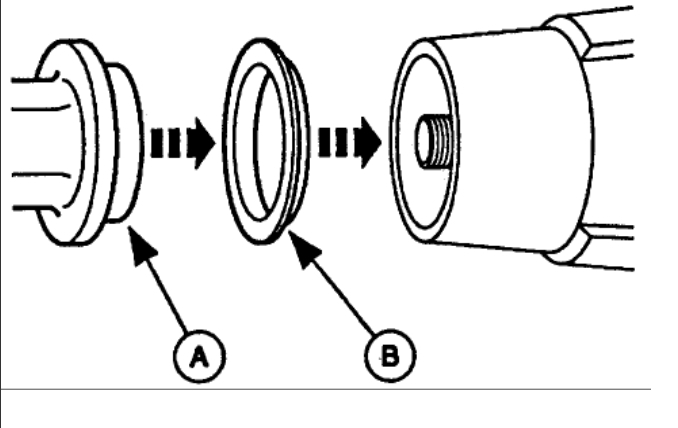
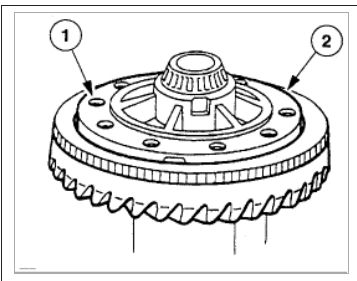
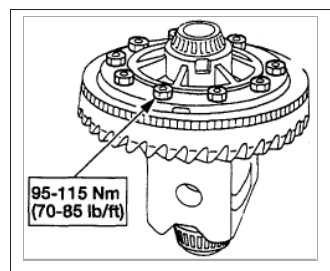
Press the new (A) anti-lock speed sensor ring and the (B) ring gear on the differential case.
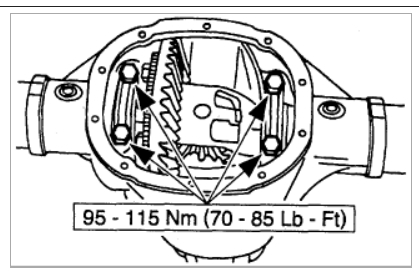
Install the ring gear bolts.
- Apply Stud and Bearing Mount EOAZ-19554-BA or equivalent meeting Ford specification WSK-M2G349-A1 to ring gear bolts.
If the pinion beating cups were removed, install the pinion bearing cups with Pinion Bearing Cup Replacer, ensuring the pinion bearing cups are fully seated.
NOTE: Differential pinion bearings and cups must be replaced in sets.
Select the proper pinion adjustment shim. See: SpecificationsMechanical
CAUTION: When selecting the pinion adjustment shim the correct shim must be installed or damage may occur.
Use a press and Inner Pinion Bearing Cone Replacer to press the differential pinion bearing until it is firmly seated on the pinion and pinion adjustment shim.
NOTE: The same pinion bearing used in this procedure must be used in the final axle assembly.
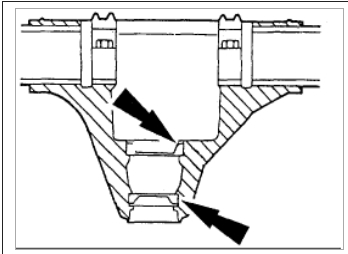
Place a new collapsible spacer on the pinion shaft.
Lubricate the lip of the pinion seal and the splines on the pinion shaft with Motorcraft Synthetic Rear Axle Lubricant F1TZ-19580-B or equivalent meeting Ford specification WSL-M2C192-A.
Install the pinion seal.
(1) Install the outer differential pinion bearing.
(2) Install the oil slinger in the axle housing.
(3) Install the (A) pinion seal with (B) Pinion Seal Replacer.
CAUTION: Installation without the proper tool may result in early seal failure. If the pinion seal becomes cocked during installation, remove it and install a new one.
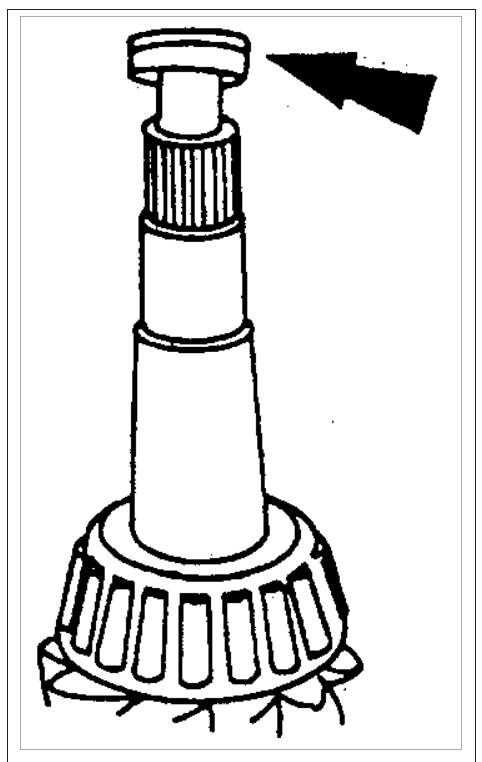
Position the pinion in the axle housing.
Align the (A) rear axle companion flange with the (B) drive pinion shaft.
NOTE: Disregard the scribe marks if a new rear axle companion flange is being installed.
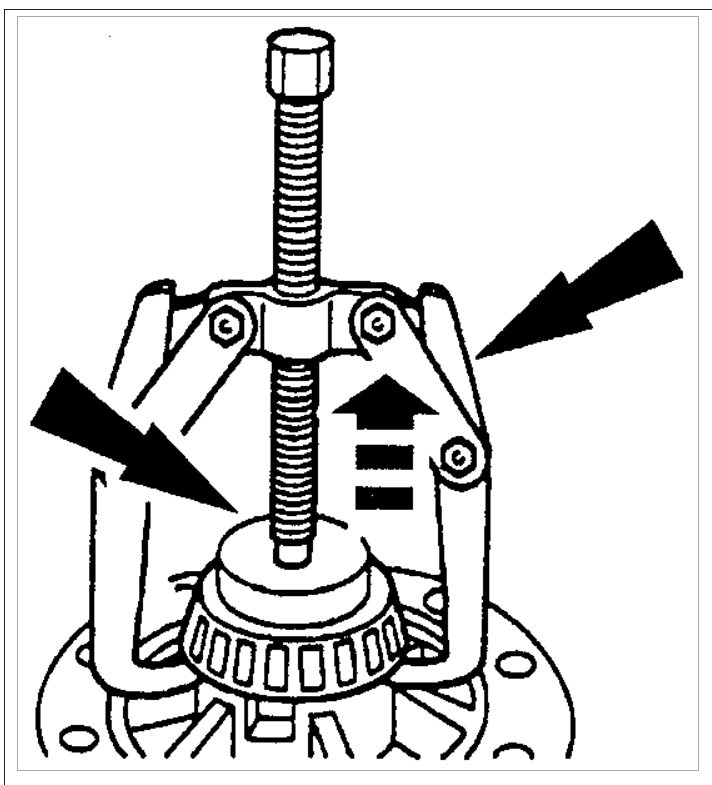
Use Companion Flange Replacer to install the rear axle companion flange.
Position the new pinion nut.
Use (B) Companion Flange Holding Tool to hold the (A) rear axle companion flange while tightening the (C) pinion nut.
- Tighten the pinion nut, rotating the pinion occasionally to make sure cone and roller bearings are seating properly. Take frequent cone and roller bearing torque preload readings until the original recorded preload readings are obtained by rotating the pinion with a Nm (inch.lbs) torque wrench.
- If the original recorded preload is lower than specification (original bearings 0.8-1.5 Nm [8-14 inch.lbs], new bearings 1.8-3.3 Nm [16-29 inch.lbs]), tighten to specification. If the preload is higher than specification, tighten to original reading as recorded.
Remove the Companion Flange Holding Tool.
Set up differential case.
CAUTION: When installing the differential case, the differential case adjustment must be performed or damage may occur.
Install differential case and shims into the axle housing.
Install the bearing caps and bolts.
Rotate the differential case to make sure it rotates freely.
Install the axle shafts.
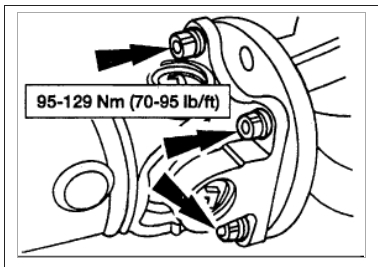
Position the rear driveshaft and align the marks on the rear axle companion flange.
Install the four driveshaft bolts.
(Check out the diagrams below)
You will need to use a press to do the job here is a video that can help.
https://youtu.be/_FzmmBoa4Tg
Let us know what happens and please upload pictures or videos of the problem.
Cheers, Ken
Images (Click to enlarge)
Nov 28, 2017 at 1:10 PM