Inspection & Disassembly
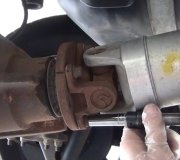
Check for any play or roughness in axle shaft assembly. Using 8 mm hexagon wrench, remove bolts attaching center shaft to axle shaft. Remove joint end cover gasket.
Install, but do not tighten, nuts to hold inboard joint together. Using a screwdriver, remove inboard and outboard CV joint boot clamps. Use paint to apply mating marks to inboard CV joint and axle shaft. Remove snap ring on end of axle shaft.
Using Adapter (SST09726-00031) press inboard CV joint from axle shaft.
. Using a screwdriver and hammer, remove inboard joint from inboard CV joint cover.
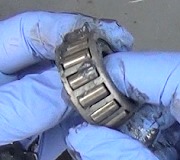
On left axle shaft, use screwdriver to remove dust cover. On right axle shaft, use press to remove transaxle side dust cover. On all axle shafts, remove snap ring. Use press to remove bearing.
Reassembly
On right axle shaft, install new snap ring on center axle shaft. Using a press, install bearing and dust cover on axle shaft. Ensure clearance between dust cover and bearing is.04-.08" (1-2 mm).
On left axle shaft assembly, use press to install dust cover. On all axle shafts, wrap axle shaft splines using vinyl tape to protect boot from damage during reassembly. Slide new boots and clamps onto axle shaft.
Apply grease supplied in overhaul kit. Outboard joint grease capacity is 4.8-5.5 ozs. (135-150 g). Assemble outboard boot onto outboard joint. Temporarily install 2 boot clamps and inboard CV joint.
Apply Sealant (08826-00801) to inboard CV joint cover.
. Align bolt holes and place cover on inboard CV joint. Using a star pattern, tap cover into place using a plastic-faced hammer.
Use bolts and nuts to hold inboard joint together. Tighten bolts by hand to prevent scratching flange surface. Align mating marks on axle shaft with inner CV joint. Using a brass bar and a hammer, tap inboard CV joint onto axle shaft.
Ensure brass bar is touching inner race, not cage. Remove bolts and nuts used to hold CV joint assembly together. Install a new snap ring onto end of axle shaft. Use care so outer race does not come off.
Assemble inboard CV joint. Apply grease supplied in overhaul kit. Grease capacity is 5.0-5.3 ozs. (142-150 g). Assemble boot clamps on both boots. DO NOT tighten boot clamps at this time. Ensure boots are on shaft groove.
Ensure boots are not stretched or contracted when axle shaft is at standard length.
Standard axle shaft length for left and right axle shaft is 17.73-17.89" (452.4-454.4 mm).
Installation
To install axle shaft, reverse removal procedure. If side gear shaft was removed, install NEW side gear shaft snap ring. Ensure axle shaft end play is same as measured during removal.
Check seals at both ends of axle shaft and if necessary replace prior to installation. Lubricate transaxle seal lip with transaxle oil. Install axle shaft into transaxle case.
To ensure proper engagement of snap ring, attempt to pull axle shaft out of differential by hand. Install axle shafts into wheel hub. Align reference marks made at removal and tighten nuts. Check wheel alignment
Tuesday, February 7th, 2012 AT 2:54 AM


