So,
We have figured out that we cannot deem the gauges good or bad if they are not connected up correctly!
I suggest that we assume the wires are there, somewhere in the rat's nest. We just need to find them and reconnect everything that is possible!
I understand that in 39 years time, someone may have changed some things like the oil gauge and the radio, etc.
I've had six CJ-5s and a Willy's throughout time since I was allowed on the asphalt in 1981, I've looked over those CJ-5 hood silhouettes as daily drivers the whole time. I feel uncomfortable when I'm riding or driving anything else!
Yes, I too have made modifications to mine also, I've tried to make them "user friendly" or easily reversible, sometimes just plain ole permanent!
I got the Willy's and this last (1977) CJ-5 in 1991, This particular "5" is a big assortment of modifications. Kind of starting out with changing over from Prestolite ignition to Motorcraft ignition (offered in CJs in 1979). I also swapped the bad 1977 heater unit out with the same type in a 1979, this gave me better defrost and the ability to have outside "vent air" blowing inside the cockpit from the cowl vent.
If you continue to look up CJ MEDEVAC stuff in here you will come across many other of my mods.
Please attempt your fix without chopping stuff up (like how I did my dash to install 2 other gauges, which you will see in a while) You can make it work! I hope your wires have not been chopped off, you will need to fix them!
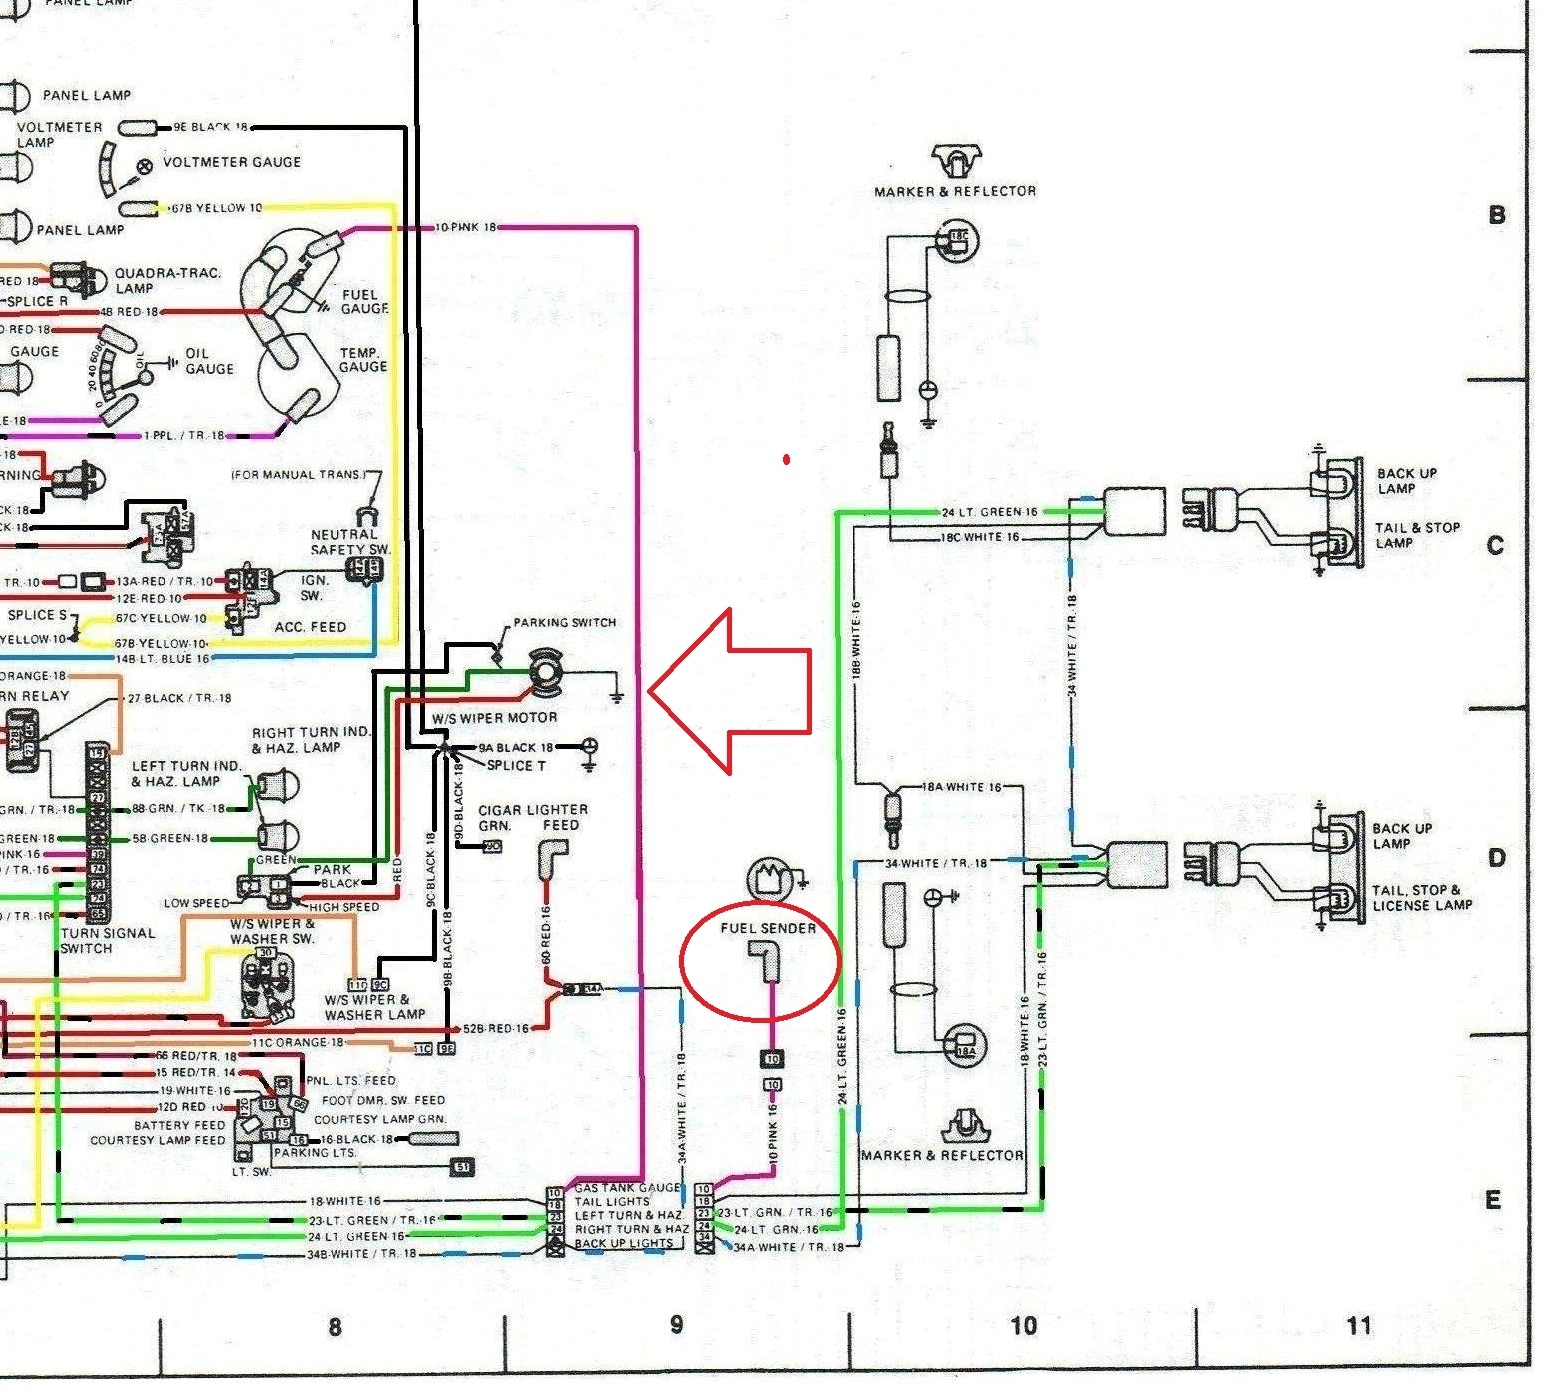
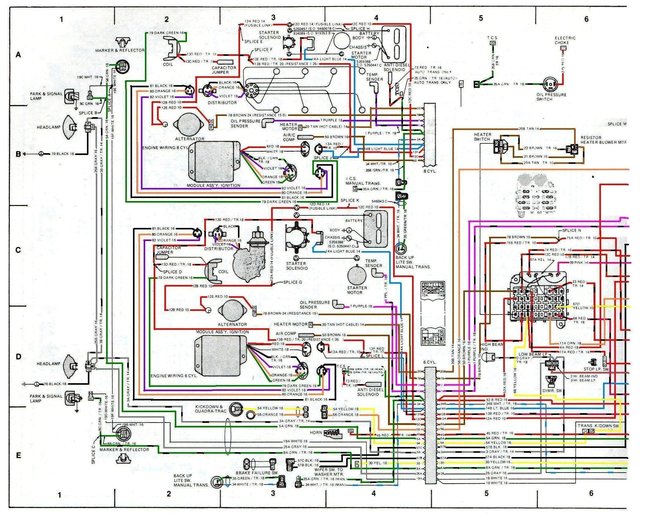
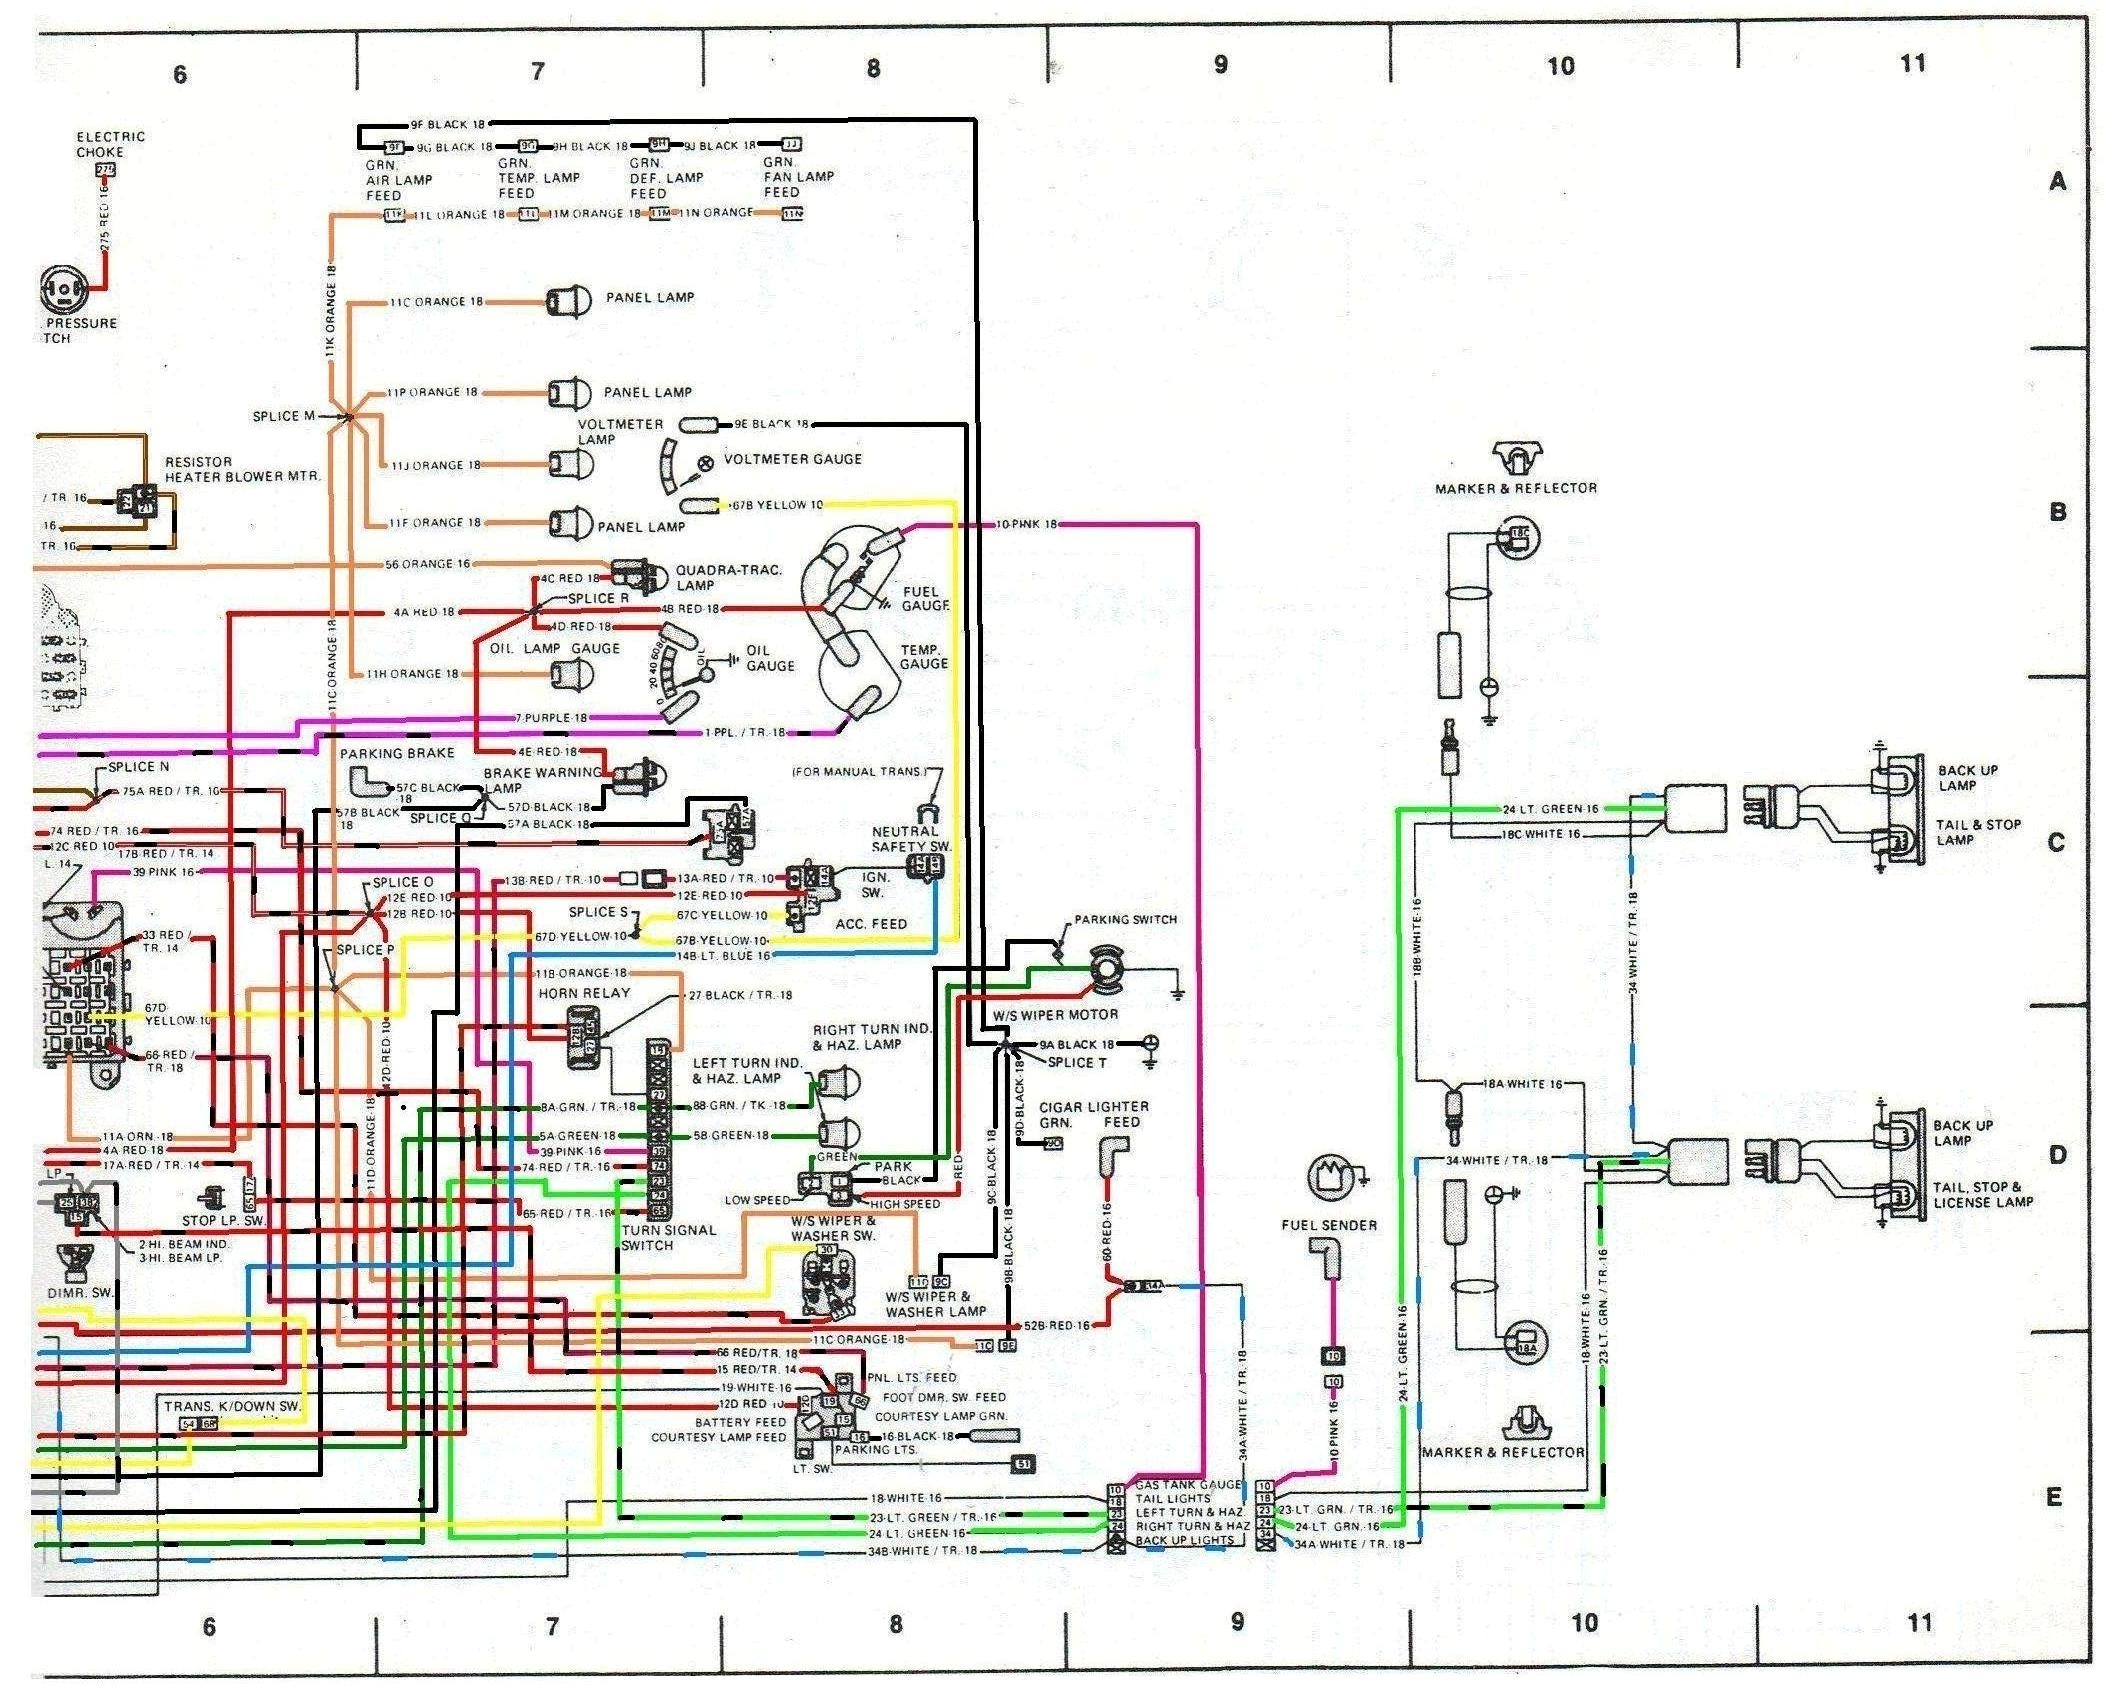
Here's some pics! 1979-1981 were nearly the same.
1) A screenshot of the instrument cluster wires, maybe to see them better. (sometimes originals get blurry when diagrams post).
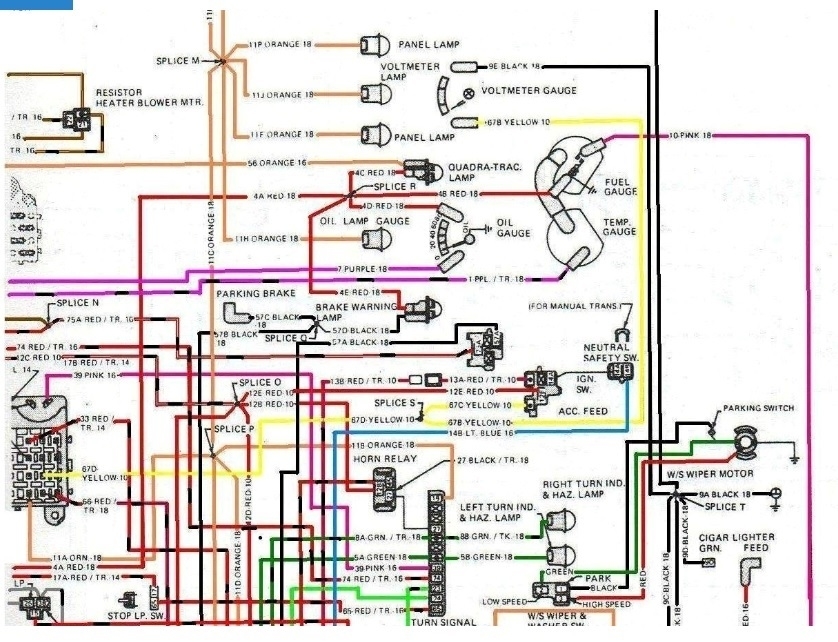
2) Left side of 1979 wire diagram that I scanned from a manual and colored the best I could .
3) Right side.
This next part may be confusing, but it will explain the way and why its colored "my way"!
Yep, I scanned a 2 piece diagram from a manual.
I took it to "Microsoft paint" and colored the wires the best that I could.
Here's things you must know to read it accurately:
A) Along each wire [maybe several places] is "wording" or a "label" with the size and color(s) for the wire.
B) A "white wire" will show up black!
C) A solid color wire will be labeled like this "12a red 10".
12a is a numerical reference # / red is the color / 10 is the gauge of the wire
Here's the part that will be sorta confusing
D) some wires have tracer stripes, the manual did not tell what color the stripe was (on any of the striped wires) they are labeled like this "8a grn / tr-18".
8a being a numerical reference number / green, meaning green wire / tr meaning it has a colored stripe down the wire (stripe color unknown ).
So so so so so to make it easy to know/ see there was a wire with a tracer stripe, I simply put black dashes along those wires (exception was on the white wires)
But still, the actual stripe color will not be known till you find the actual wire, where it starts or ends on the jeep (sorry! It does work for me!)
E) illusions! Sometimes it may look like a wire stops, an example might be 3 red wires going into a splice, well one of 'em has a "label" right at the splice (the red color does not go through the label)
So 2 "red wires" hit the splice along with a "label"- at a glance you only see 2 red wires when there are actually 3. Just be aware of the label "still being" a wire. You can see one example of this in one place where the ignition module gets it's power at "splice l"
My 2 diagrams overlap about on the line between "5 and 6" of the outer rim reference lines. To me it looks like the right side diagram fits better on top of the left side diagram at the overlap. You will notice the fuse box is the area of the overlap.
Pic 4) I sent my 2 parts to the office store via email, had 'em blown up, I taped them together at the overlap, then the office store laminated the one big diagram for me. It's so much easier to read it now!
Pic 5) My dash- Note, my "stickers" have been stuck on old magnetic calender's and such and trimmed off so they are movable/ removable.
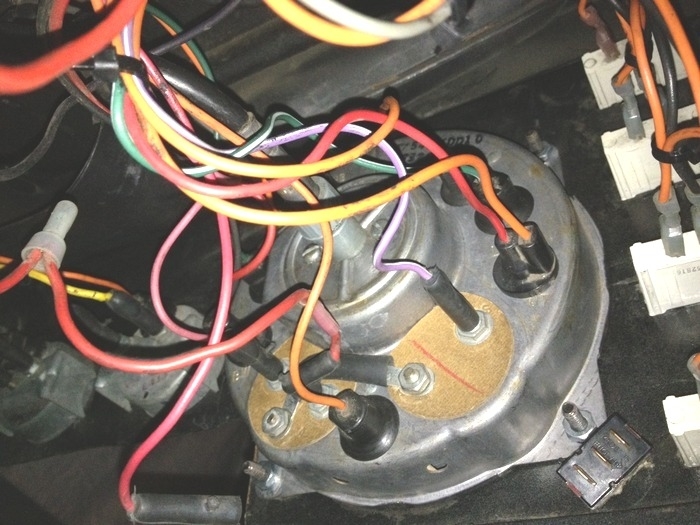
Pic 6) Back of my speedometer in place.
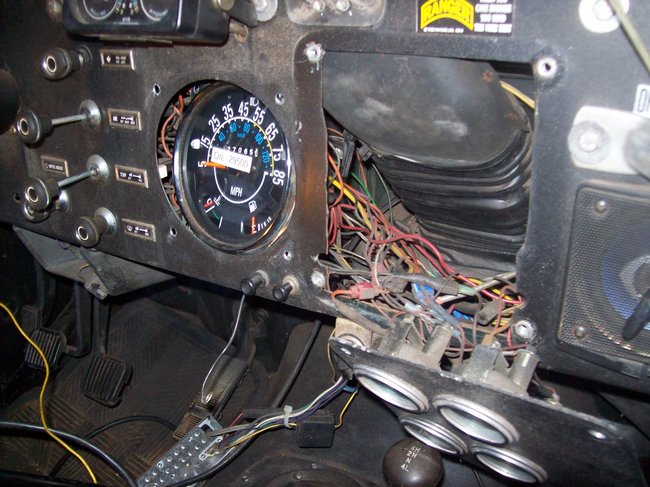
Pic 7) See that wire mess? and my chopping?
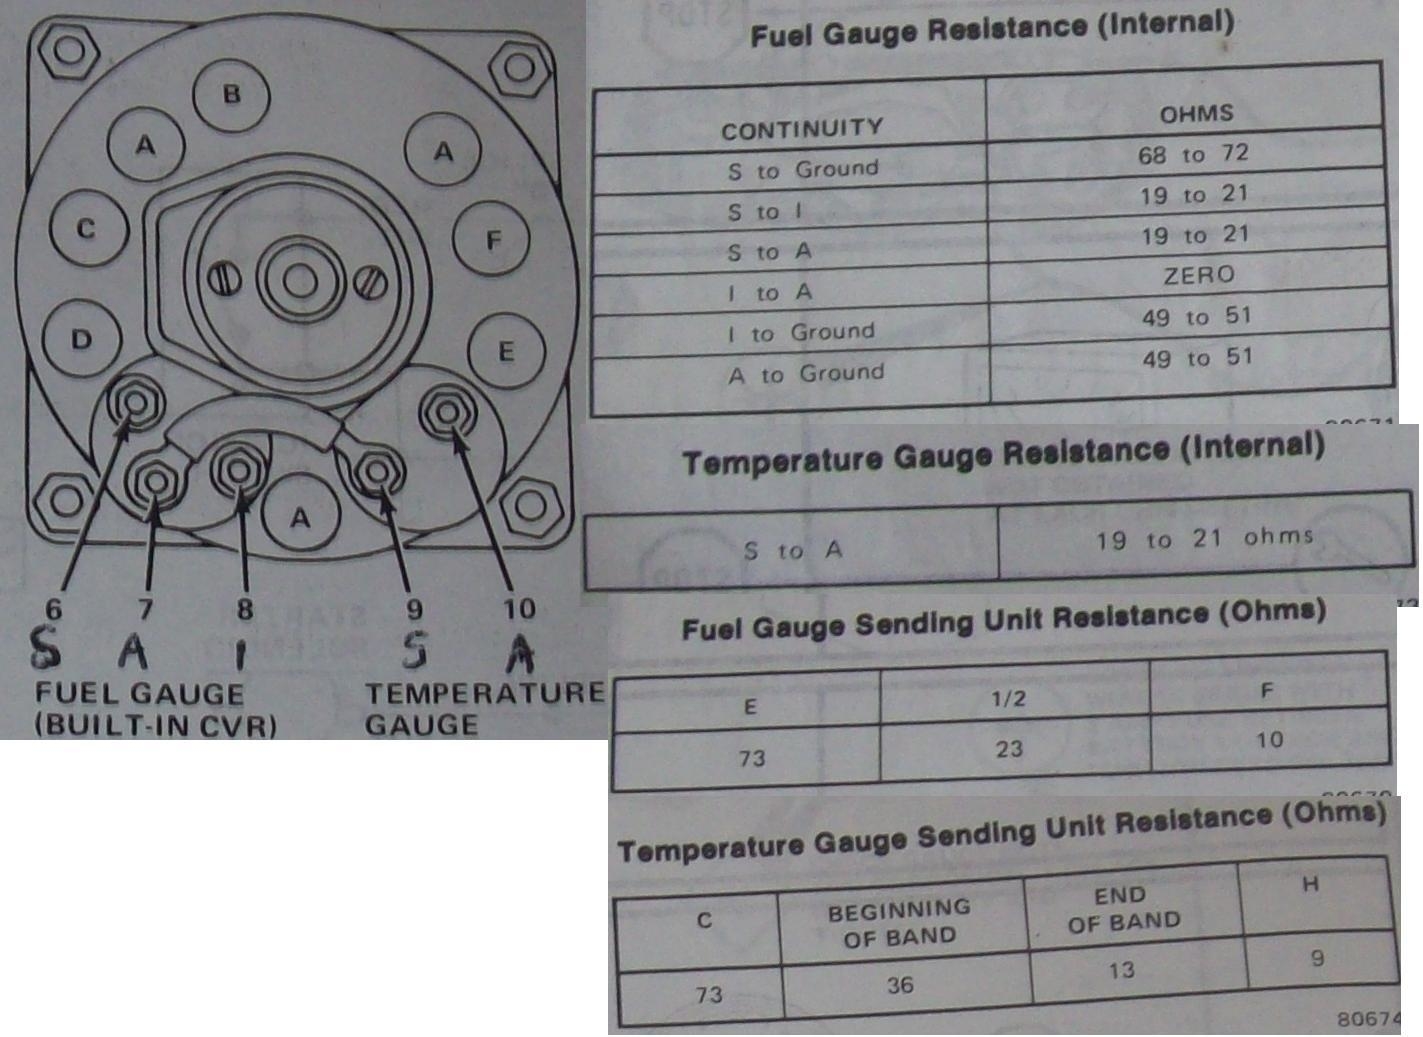
Pic 8) All wires off of gauges (lights above can stay in place) for this testing.
This will confirm whether the gauges are okay.
Regardless, you still have to have the correct wires going to them in the end!
Let me know how pic 8 goes, I have recently figured out a new fix for the fuel and temperature gauge if your pair is bad.
The Medic
Images (Click to enlarge)
Apr 12, 2020 at 7:55 AM