Changing the air filter for your car is easy to do and will save you money as well as help your engine last longer. This filter removes contamination from the air the engine ingests while running such as sand, dirt and dust while can cause accelerate engine wear and should be changed between 6,000 and 12,000 miles depending on roads conditions.
Tools and Supplies Needed
- Replacement Air Filter
- Screwdriver or Nut Driver
- Protective gloves and eyewear
- Vacuum cleaner w/hose
In most cases the air filter can be replaced in under 10 minutes. We recommend that you get a high quality air filter replacement which costs a little more, but its a great way to protect your investment.
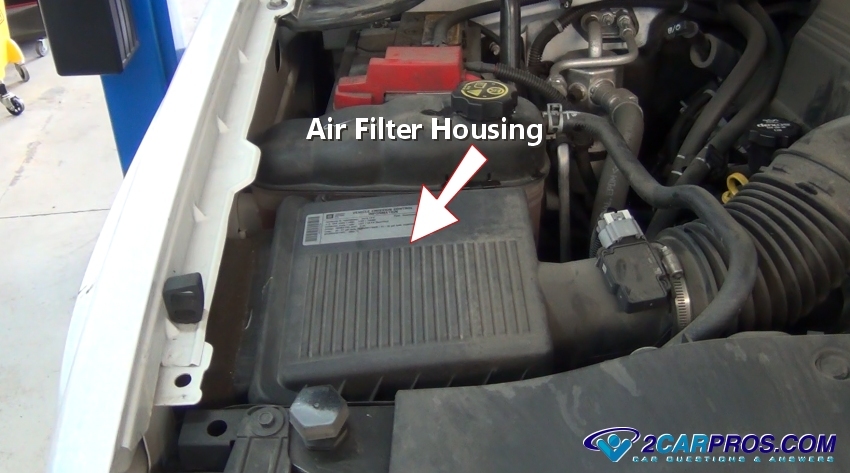
Step 1: Locate the Air Filter
Locate the air filter which is connected to the air intake tube that is attached to of the throttle actuator of the engine. Most of the time the air filter housing will be located either on the right or left side of the engine bay and mounted to the fender or on the engine itself.
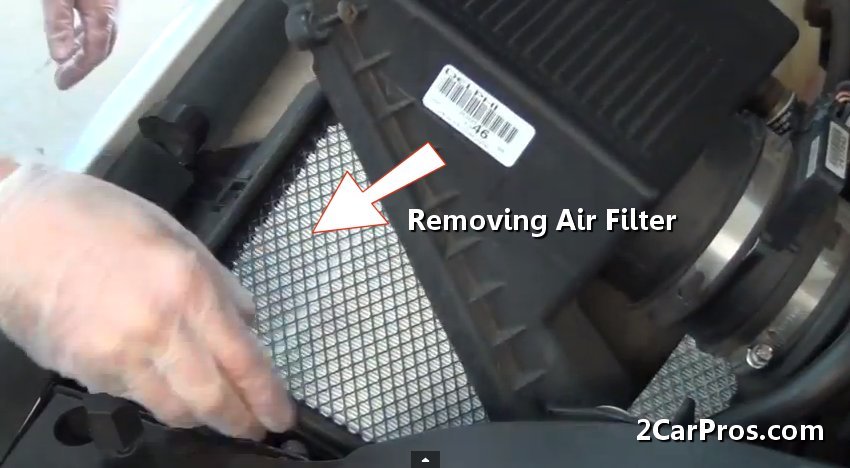
Step 2: Air Filter Removal
There are a series of screws or clips that holds the upper air filter housing lid to the lower half of the housing. The air intake boot may need to be removed or loosened to help in the removal of the filter housing lid.
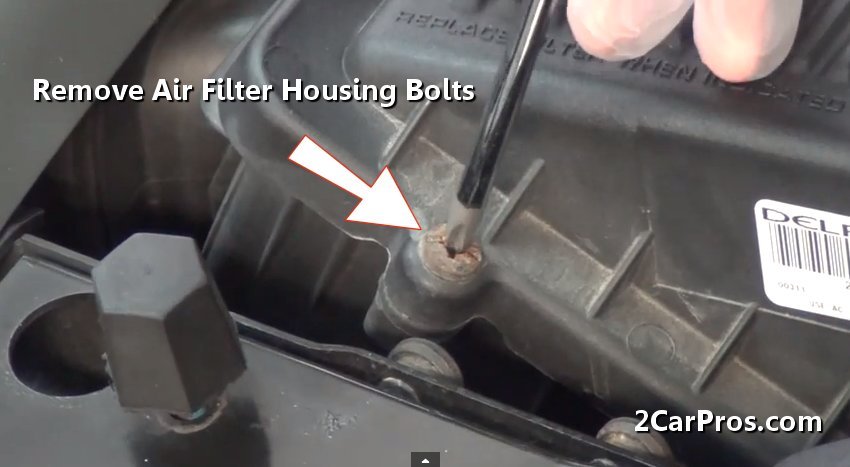
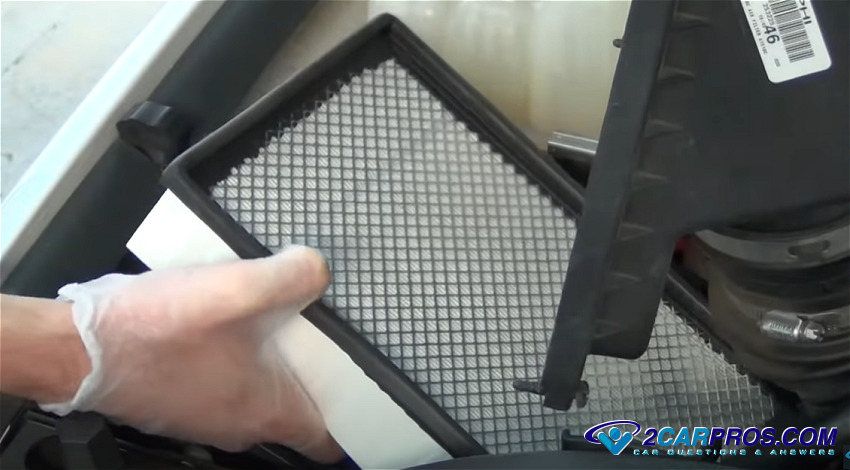
Once the hold down bolts or clips have been removed or released, gently pull up and remove the lid to expose the filter.
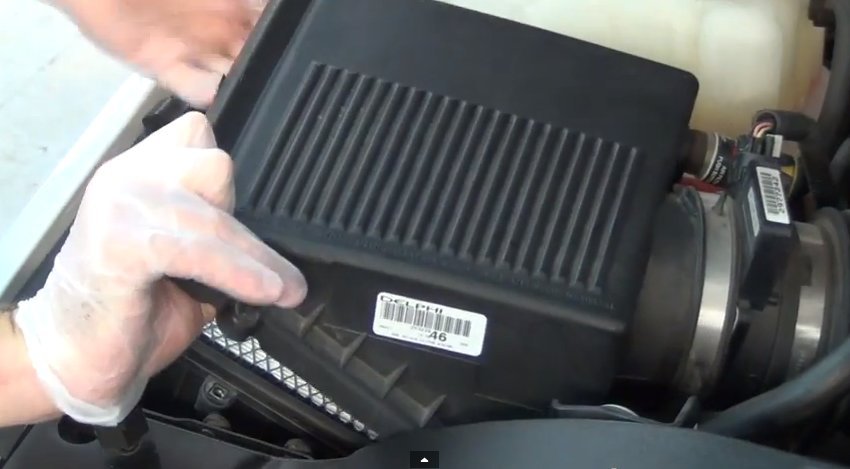
Reach into the housing and grasp it, sometimes it can be stuck in the housing due to the filter seal which is made of rubber and has been pressed into place by the housing lid. If the filter is stuck use a standard screwdriver it pry it loose.
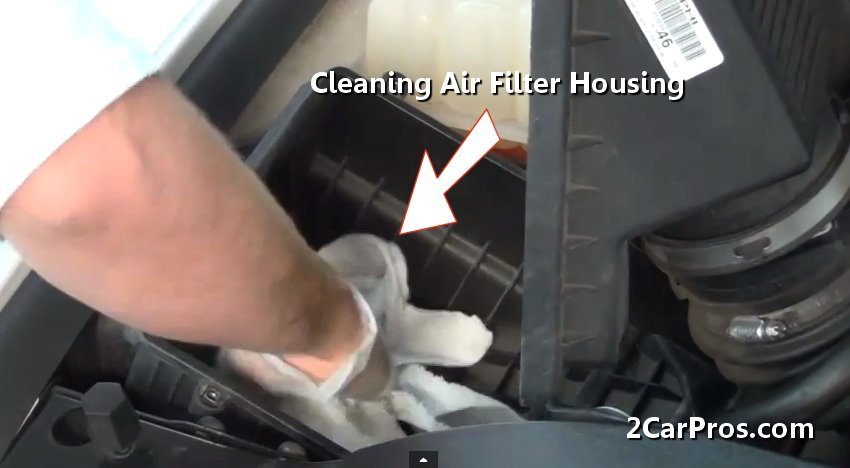
Step 3: Clean the Air Filter Housing
Clean the housing with a damp shop towel or vacuum cleaner, this is necessary to keep loose dirt from entering the engine intake. This ensures that any debris that has been knocked into the housing when the air filter was removed will be cleaned out before the new filter is installed.
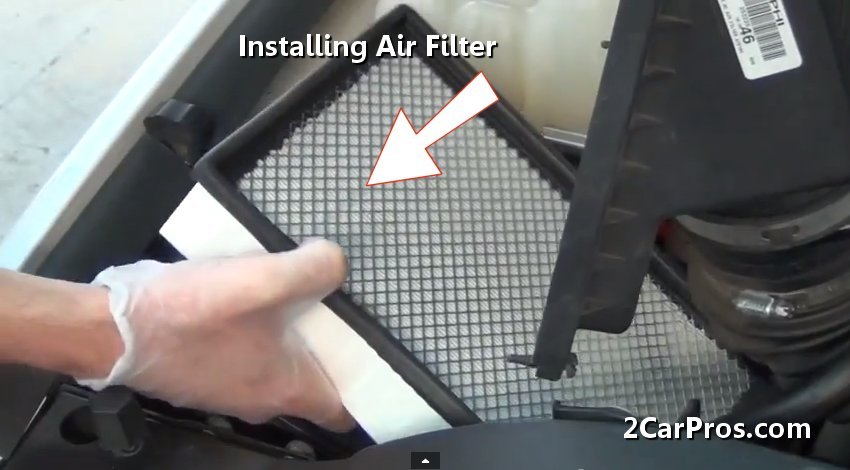
Step 4: New Air Filter Installation
Remove the new air filter from the box and match the old filter to the old unit they should be an identical in length, height and thickness.

When installing the new air filter use caution as not to bend or disfigure it in anyway, this could cause the filter to not seal completely within the housing. Make sure to hold the lid of the filter upward to aid in the installation.
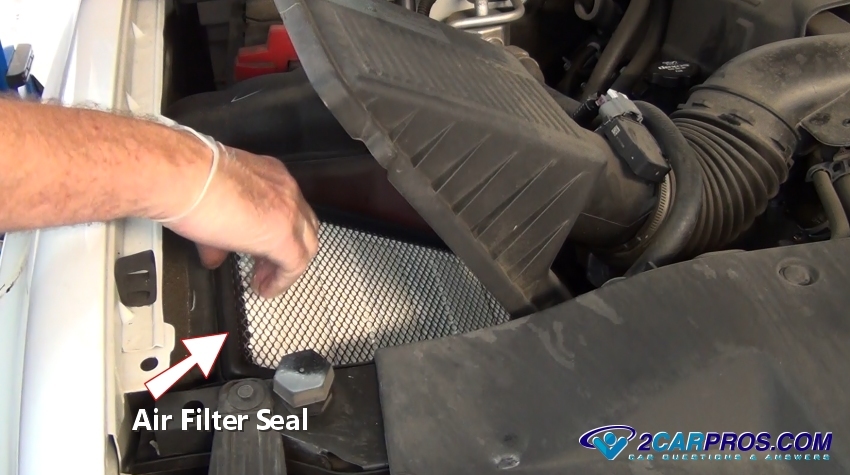
When installing the new filter confirm a positive placement by checking the seal point of the filter to the air filter housing, then install the lid or cover. It's important that the seal of the filter is not cut or crushed due to improper installation. It's worth taking an extra few seconds to do the job right or it will leak unfiltered air into the engine.
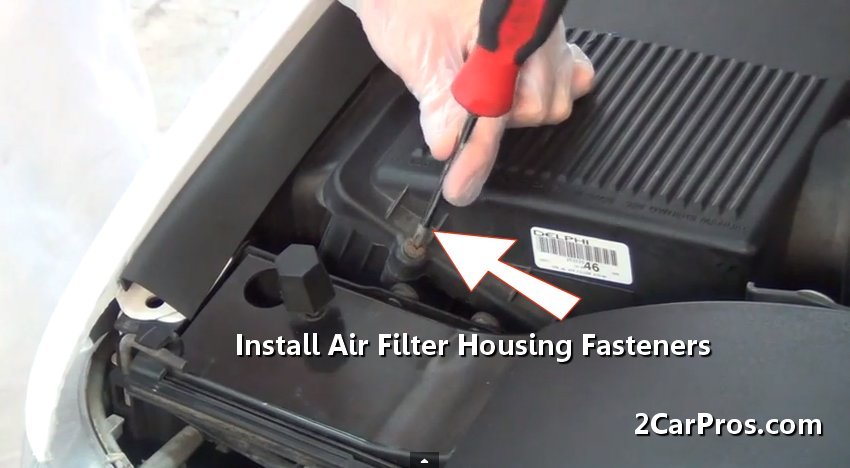
Lower the lid and start tightening the mounting screws or installing the clips, you want to do this in a cross pattern. This will help the lid seal squarely into the new filter, now you are all set. We always like to wipe the filter housing off with a shop towel when complete. This makes us feel that the job was done to the best of our ability.
Watch the Video!
Please watch this video of the job being done to glean additional helpful information.
Credits
This guide knowledge base was created by the 2CarPros Team, and by Ken Lavacot: Automobile repair shop owner and certified master automobile technician of over 30 years. If you have question or need help please ask one of our experts we are happy to help. Please visit our 2CarPros YouTube Channel.

Article published 2024-04-15