Hi,
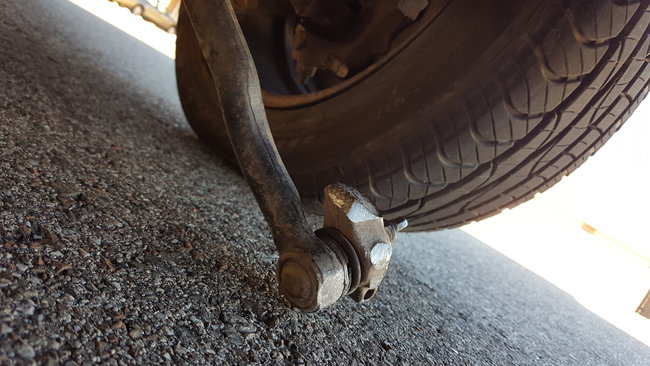
If you are not experienced, you may want to consider having it done. Anytime a suspension or steering component needs repaired there are safety issues to consider as was mentioned by bmdouble. I attached a picture of the steering knuckle and circled where it has broken. If it was my personal car, I would try to purchase the part from a salvage yard. Chances are it is a discontinued part from Ford.
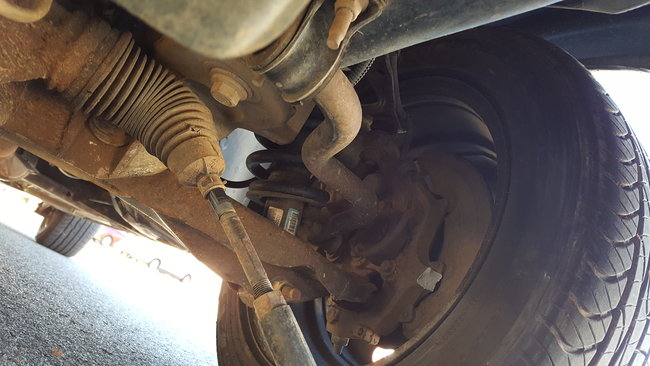
IF you want to replace it yourself, here are the directions. The attached pics also correlate with the directions. Keeping in mind, ball joint, brakes, stabilizer link and many other parts will need removed. Also, the vehicle will need realigned when the work is done and I do recommend replacing the tie rod as well and check all other components.
__________________________________
2006 Ford Crown Victoria V8-4.6L VIN W
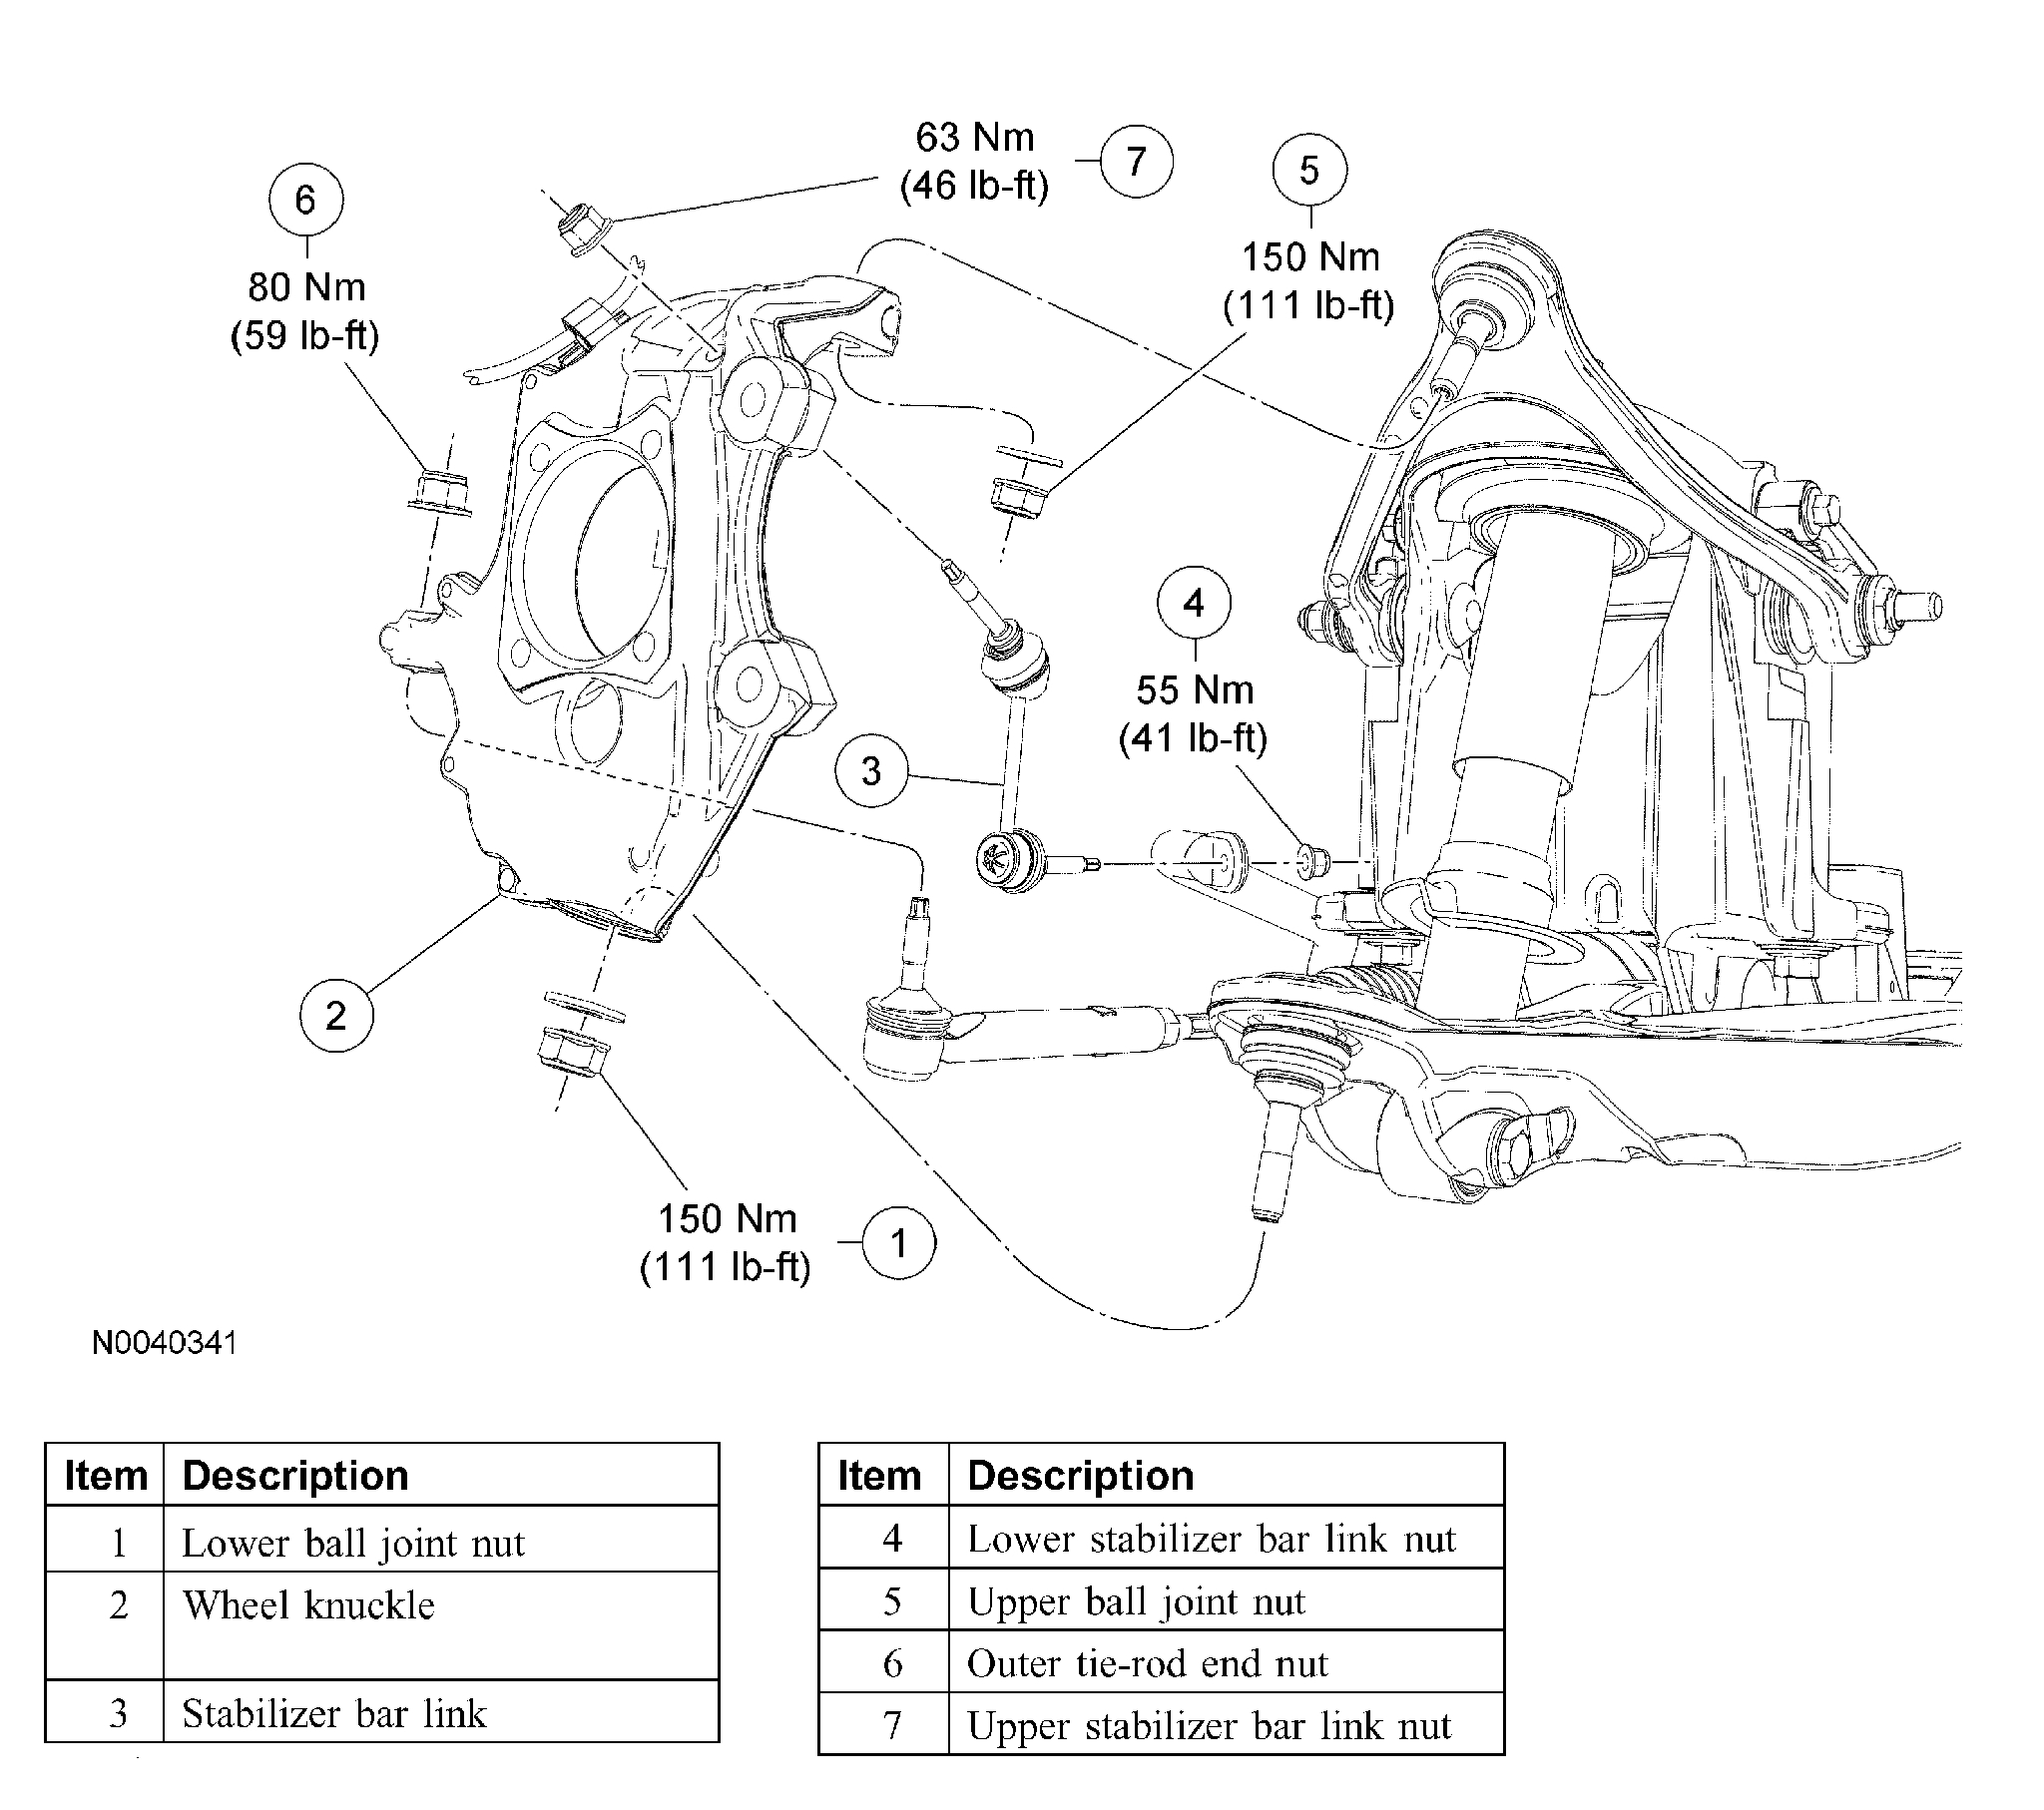
Wheel Knuckle
Vehicle Steering and Suspension Steering Front Steering Knuckle Service and Repair Procedures Front Wheel Knuckle
WHEEL KNUCKLE
Wheel Knuckle
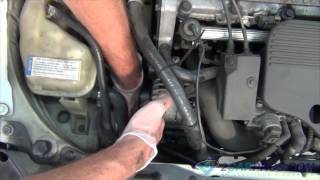
pic 2
Removal and Installation
CAUTION: Suspension fasteners are critical parts because they effect performance of vital components and systems and their failure can result in major service expense. A new part with the same part number or an equivalent part must be installed, if installation is necessary. Do not use a part of lesser quality or substitute design. Torque values must be used as specified during reassembly to make sure of correct retention of these parts.
1. WARNING: The electrical power to the air suspension system must be turned off prior to hoisting, jacking or towing an air suspension vehicle. Failure to do so can result in unexpected inflation or deflation of the air springs, which can result in shifting of the vehicle during these operations. Failure to follow these instructions may result in personal injury.
If equipped, turn the air suspension service switch to the OFF position.
2. WARNING: If equipped with fire suppression system, depower the system. For important safety warnings and procedures, refer to Fire Suppression System.
With the vehicle in NEUTRAL, position it on a hoist. For additional information, refer to Maintenance/Service and Repair.
3. Remove the wheel bearing and wheel hub.
4. NOTE: Use the holding feature to prevent the stud from turning while removing the nut.
Remove the nut and detach the tie-rod from the wheel knuckle.
To install, tighten to 80 Nm (59 ft. Lbs.).
5. NOTE: The stabilizer bar links are under pressure when the suspension is in the REBOUND position.
Using a suitable jack stand, raise the suspension arms until the pressure is released from the stabilizer bar links.
6. NOTE: Use the holding feature to prevent the stud from turning while removing the nut.
Remove and discard the upper stabilizer bar link nut.
To install, tighten to 63 Nm (46 ft. Lbs.).
7. NOTE: Use the holding feature to prevent the stud from turning while removing the nut.
Remove the lower stabilizer link nut and the stabilizer bar link.
Discard the nut.
To install, tighten to 55 Nm (41 ft. Lbs.).
Pic 3
8. Detach the wheel speed sensor wiring harness retainer from the steering knuckle.
9. NOTE: Use the holding feature to prevent the stud from turning while removing the nut.
Remove and discard the upper ball joint nut.
To install, tighten to 150 Nm (111 ft. Lbs.).
10. NOTE: Use the holding feature to prevent the stud from turning while removing the nut.
Remove the lower ball joint nut and then remove the wheel knuckle.
Discard the nut.
To install, tighten to 150 Nm (111 ft. Lbs.).
11. To install, reverse the removal procedure.
12. Check and, if necessary, align the front end.
13. WARNING: If equipped with fire suppression system, repower the system. For important safety warnings and procedures, refer to Fire Suppression System.
If equipped with fire suppression system, repower the system.
___________________
Let us know if you need help.
Joe
Images (Click to make bigger)
SPONSORED LINKS
Thursday, February 6th, 2020 AT 7:52 PM