Hi,
First, the codes are all related. I suspect the tuning valve needs replaced. However, we need to confirm it first.
The P0660 relates to the intake manifold tuning valve. An intake manifold tuning (IMT) valve is used to change the intake manifold plenum configuration. When the IMT valve is open, the intake manifold is configured to one large plenum. When the IMT valve is closed, the intake manifold is configured to 2 smaller plenums. The IMT valve improves engine performance at low and high engine speeds depending on the engine load.
As far as the P2070, it indicates the control module detects that the IMT valve is stuck open and the P2078 indicates high voltage to the control valve.
Both of these codes indicate to perform the diagnostics for code P0660 first before continuing. I suspect the tuning valve has shorted and needs replaced, but the test will confirm.
Here is everything related to that code. The two attached pics correlate with this information.
__________________________________________
2006 Pontiac G6 V6-3.9L VIN 1
P0660
Vehicle ALL Diagnostic Trouble Codes ( DTC ) Testing and Inspection P Code Charts P0660
P0660
DTC P0660
DTC DESCRIPTOR
DTC P0660
Intake Manifold Tuning (IMT) Valve Solenoid Control Circuit
DIAGNOSTIC FAULT INFORMATION
IMPORTANT: Always perform the Diagnostic System Check - Vehicle prior to using this diagnostic procedure. See: A L L Diagnostic Trouble Codes ( DTC ) > Testing and Inspection
pic 1
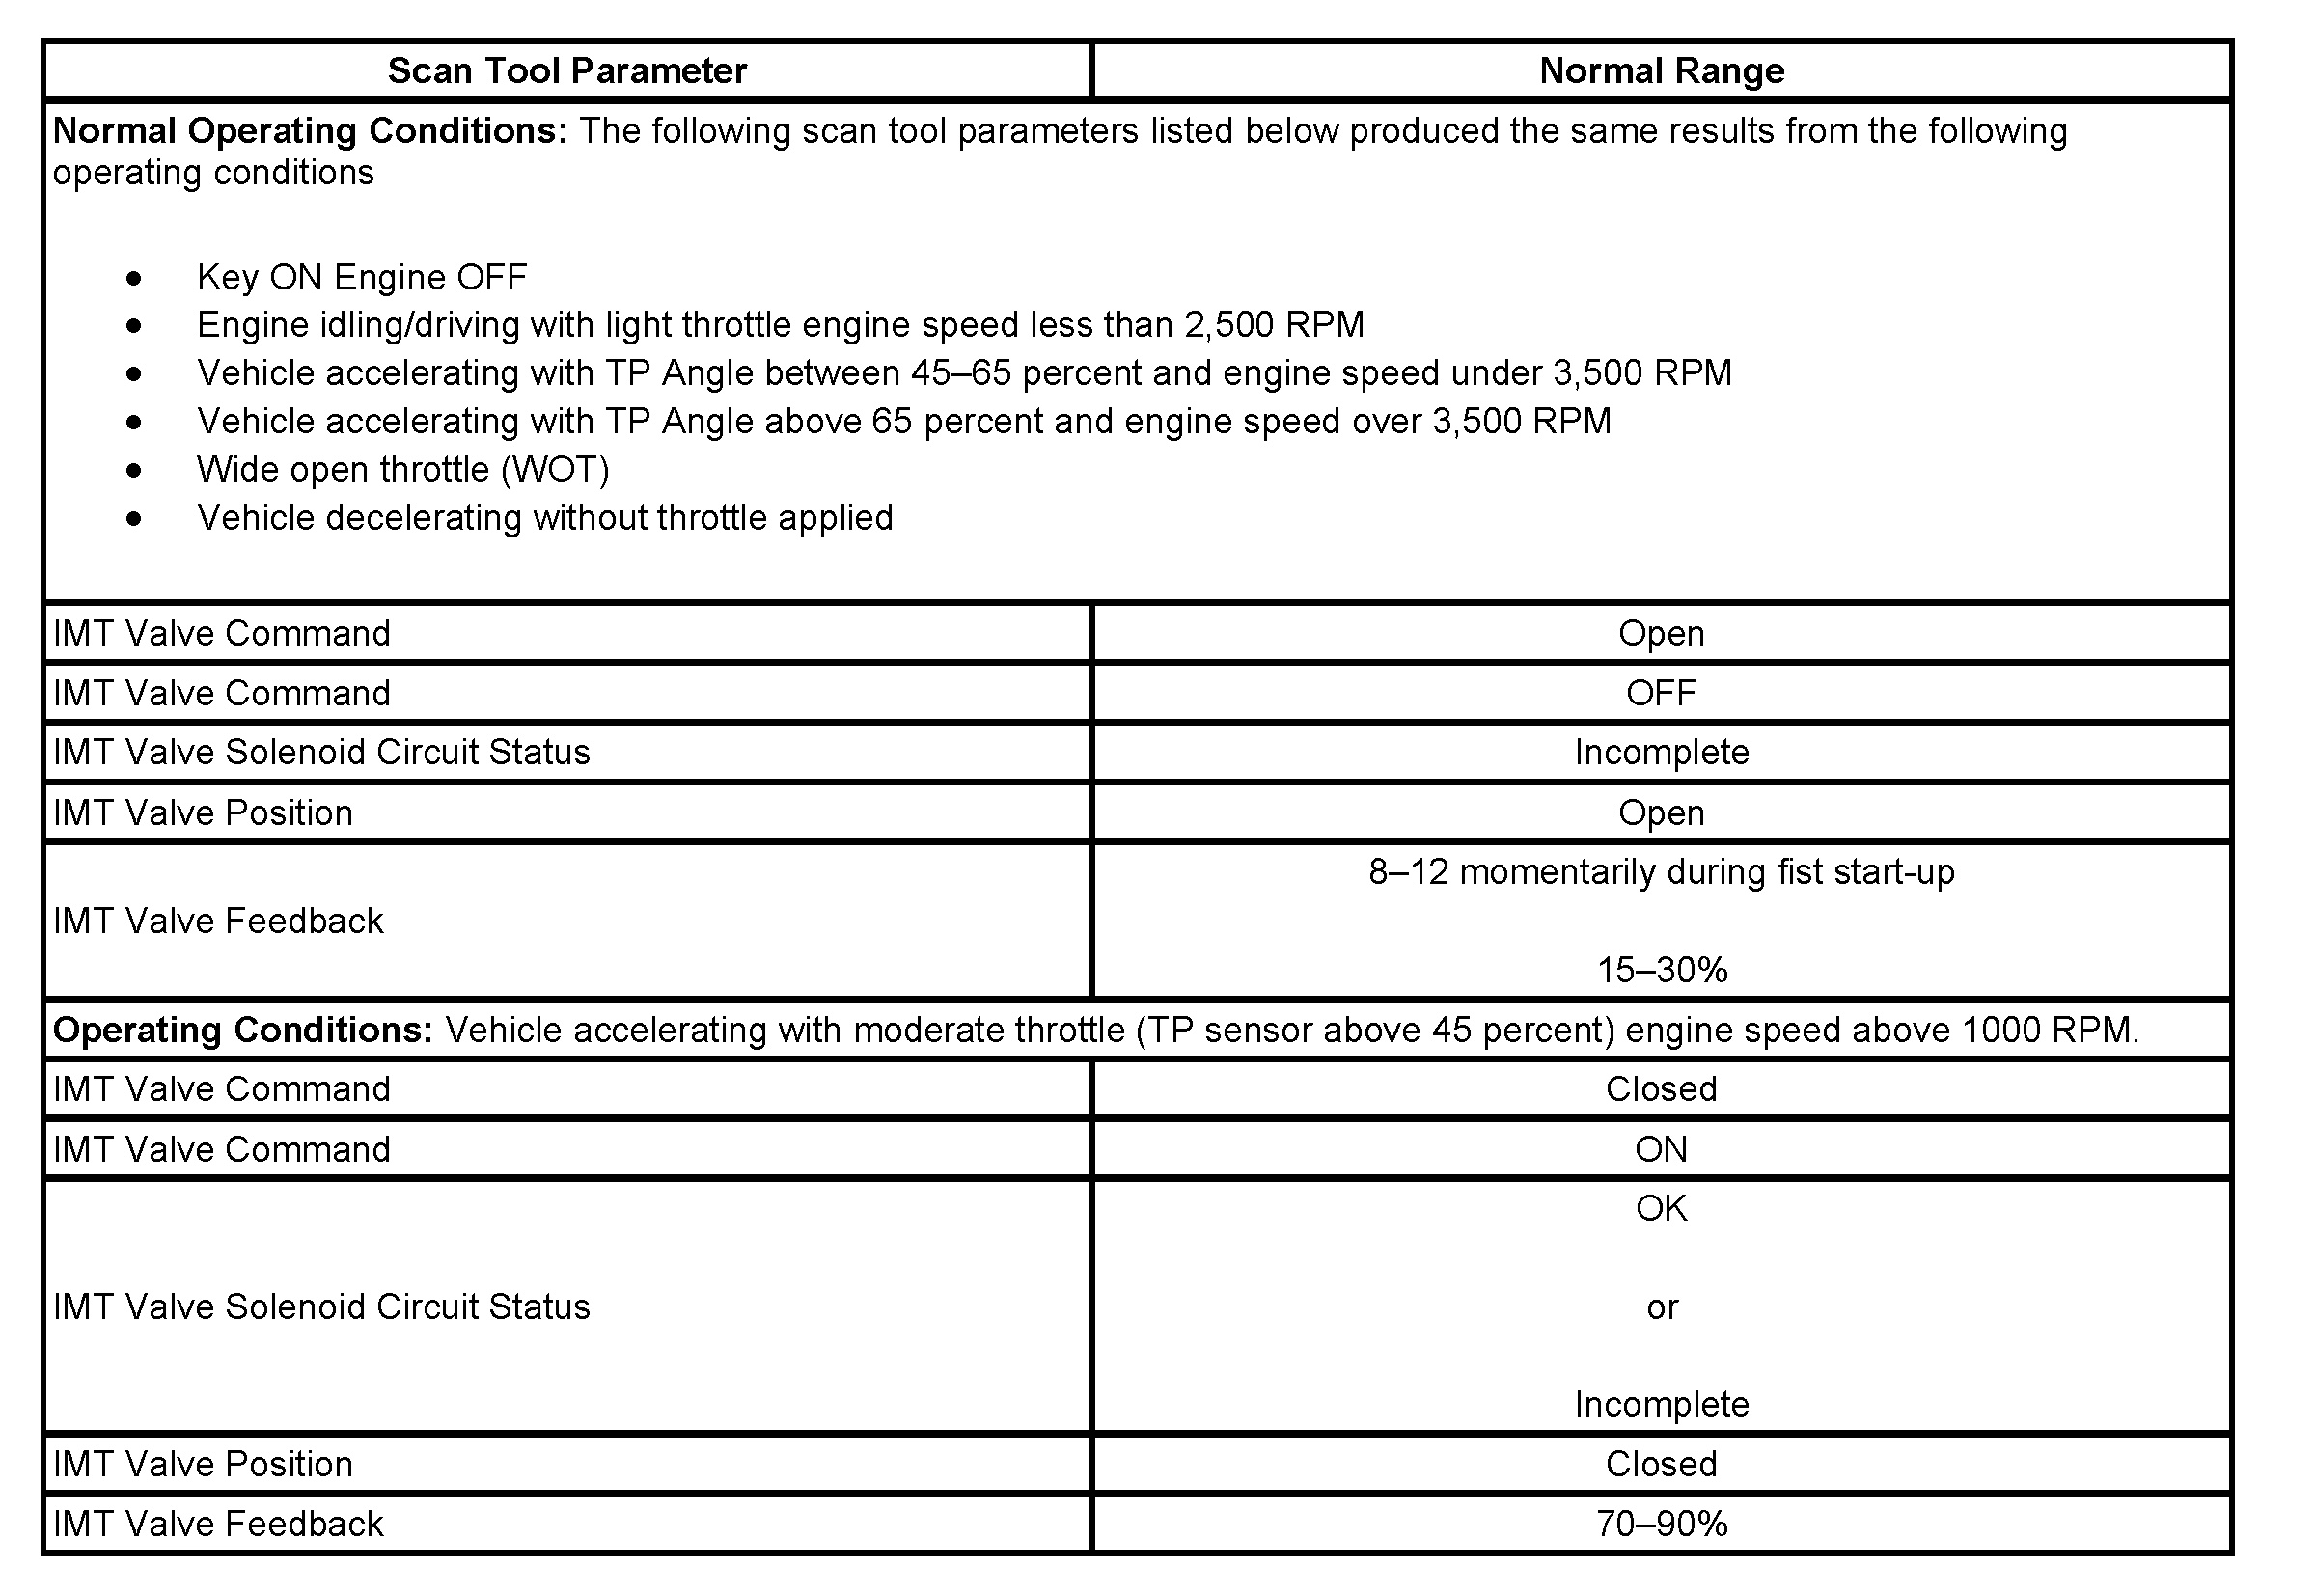
TYPICAL SCAN TOOL DATA
pic 2
CIRCUIT/SYSTEM DESCRIPTION
An intake manifold tuning (IMT) valve is used to change the intake manifold plenum configuration. When the IMT valve is open, the intake manifold is configured to one large plenum. When the IMT valve is closed, the intake manifold is configured to 2 smaller plenums. The IMT valve improves engine performance at low and high engine speeds depending on the engine load. The IMT valve assembly consists of the following:
- A tuning valve
- A microprocessor
- An electric motor
- A hall-effect sensor
- An ignition voltage circuit
- A ground circuit
- A variable tuning signal circuit
- An IMT fan position signal circuit
Ignition Voltage Circuit
An ignition voltage is supplied directly to the IMT valve assembly from the powertrain relay through a 10-amp fuse. The ignition voltage provides power to a microprocessor and to a motor that rotates the IMT valve within the intake manifold.
Ground Circuit
Ground circuit is supplied directly to the IMT valve assembly. This circuit provides ground for the micro-processor and the motor.
Variable Tuning Signal Circuit
During operation when the valve is open the control module applies ground to the variable tuning signal circuit which indicates to the microprocessor within the IMT valve to position the valve to the closed position which turns the motor ON and rotates the IMT valve within the intake manifold plenum.
IMT Fan Position Signal Circuit
When the IMT valve is rotated the hall-effect sensor is reporting the position of the valve to the ECM. The control module uses this feedback signal to determine the position of the IMT valve.
The control module compares the commanded state of the variable tuning signal circuit and compares it to the IMT Fan Position Signal Circuit for being stuck open, stuck closed.
CONDITIONS FOR RUNNING THE DTC
- The engine speed more than 425 RPM.
- The system voltage is between 9-18 volts.
CONDITIONS FOR SETTING THE DTC
The control module detects that the state of the driver and the state of the circuit do not match. The control module will detect an open, short to ground on the variable tuning valve signal or an open or a short to ground on the ignition voltage circuit of the IMT valve solenoid for more than 6.25 second
ACTION TAKEN WHEN THE DTC SETS
- The control module illuminates the malfunction indicator lamp (MIL) when the diagnostic runs and fails.
- The control module records the operating conditions at the time the diagnostic fails. The control module stores this information in the Freeze Frame and/or the Failure Records.
- The control module commands the TAC system to operate in the Reduced Engine Power mode.
- A message center or an indicator displays Reduced Engine Power.
- Under certain conditions the control module commands the engine OFF.
CONDITIONS FOR CLEARING THE MIL/DTC
- The control module turns OFF the malfunction indicator lamp (MIL) after 3 consecutive ignition cycles that the diagnostic runs and does not fail.
- A current DTC, Last Test Failed, clears when the diagnostic runs and passes.
- A history DTC clears after 40 consecutive warm-up cycles, if no failures are reported by this or any other emission related diagnostic.
- Clear the MIL and the DTC with a scan tool.
CIRCUIT/SYSTEM VERIFICATION
Command the IMT valve ON. The IMT Valve Command parameter should transition from open to closed and the IMT Valve Feedback parameter should transition from 15-30 percent to 70-90 percent.
CIRCUIT/SYSTEM TESTING
1. Ignition ON, measure for battery voltage between the IMT valve ignition voltage circuit and ground. Battery voltage should be measured.
- If less than battery voltage test the ignition voltage circuit for an open, high resistance or short to ground, if shorted to ground replace the fuse that supplies the voltage.
2. Connect a test lamp between the IMT valve ignition voltage circuit and ground circuit at the IMT valve harness connector. The test lamp should illuminate.
- If The test lamp does not illuminate, test the ground circuit for an open or high resistance.
3. Ignition ON, disconnect the IMT valve harness connector and measure for 0.5 volt on the variable tuning signal circuit and ground.
- If less than 0.5 volt test the variable tuning signal circuit for an open or high resistance, short to ground, or a faulty control module.
- If more than 0.5 volt test the variable tuning signal circuit for a short to voltage or a faulty control module.
4. Measure for 5.0 volts on the IMT fan position signal circuit at the IMT valve harness connector.
- If more than 5 volts, test the IMT fan position signal circuit for a short to voltage.
- If less than 5 volts, test the IMT fan position signal circuit for an open, high resistance, or short to ground.
- If all circuits test OK, replace the IMT valve.
REPAIR INSTRUCTIONS
- Control Module References
- Intake Manifold Tuning Valve Replacement
REPAIR VERIFICATION
IMPORTANT: Always perform the Diagnostic Repair Verification after completing the diagnostic procedure. See: A L L Diagnostic Trouble Codes ( DTC ) > Verification Tests
__________________________________________
If you determine it needs replaced, here are the directions.
_________________________________________
2006 Pontiac G6 V6-3.9L VIN 1
Intake Manifold Tuning Valve Replacement
REMOVAL PROCEDURE
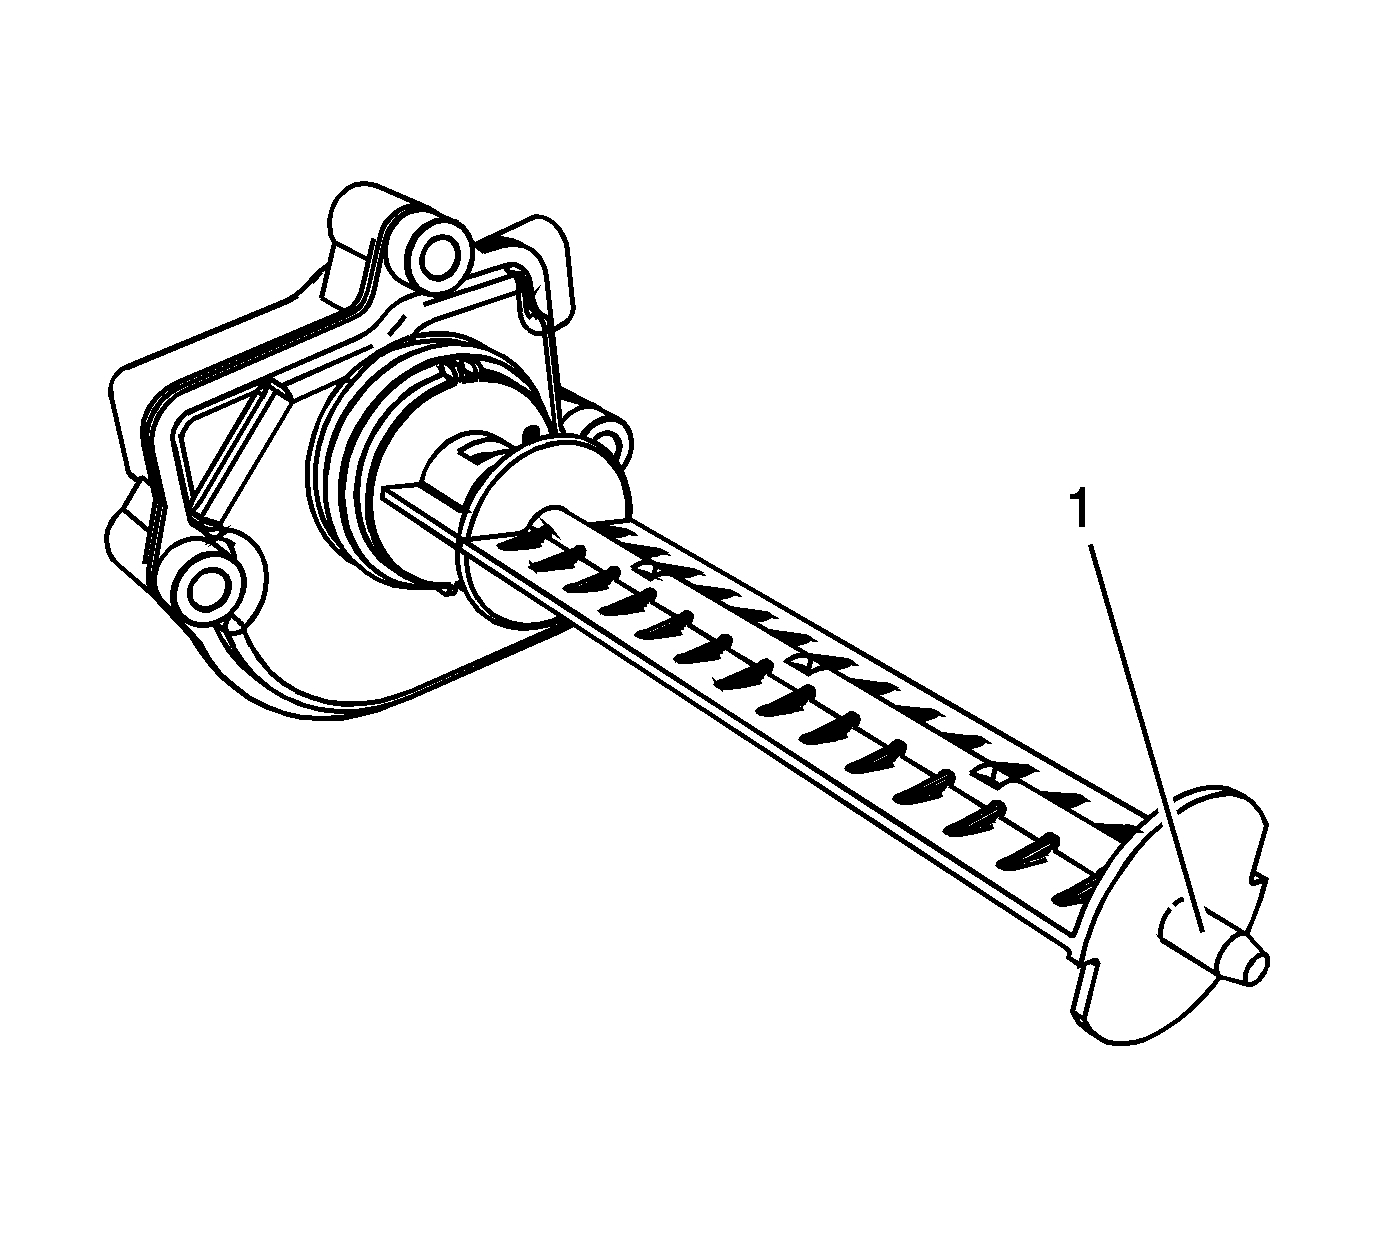
pic 3
1. Remove the intake manifold cover.
2. Disconnect the intake manifold tuning valve electrical connector (1).
3. Remove the engine harness clip from the power steering reservoir bracket.
4. Remove the power steering pump.
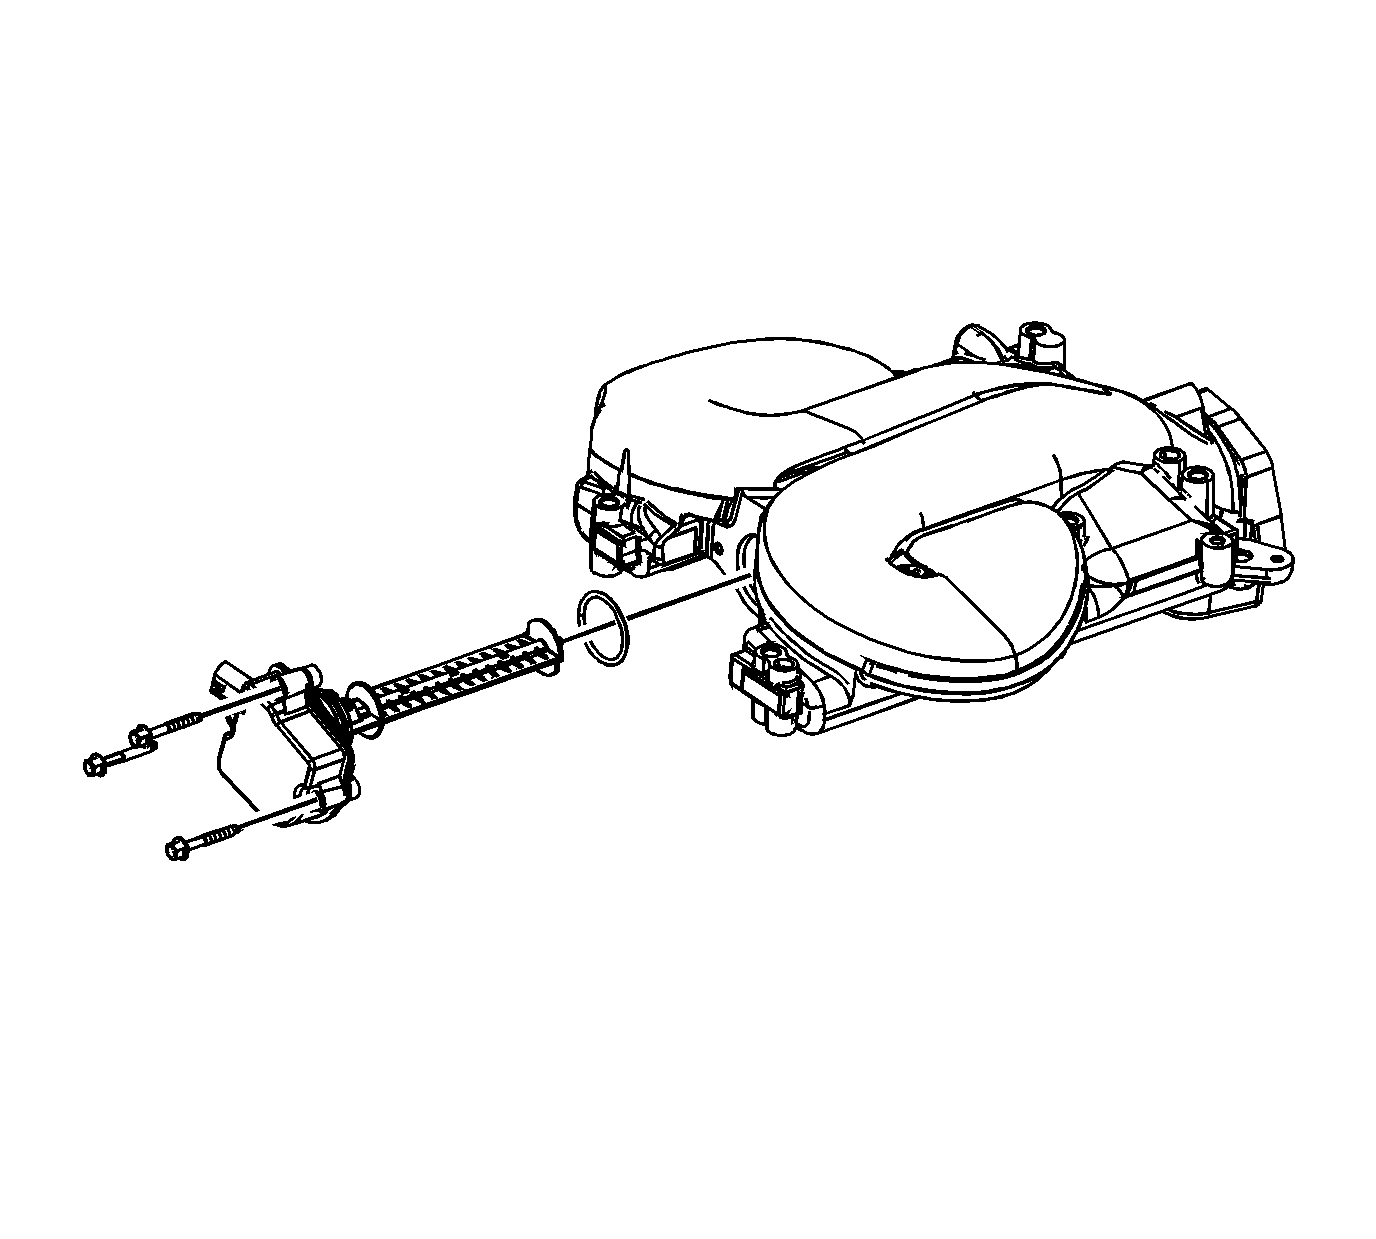
Pic 4
5. Remove the intake manifold tuning valve bolts.
6. Remove the intake manifold tuning valve.
INSTALLATION PROCEDURE
pic 5
1. Apply lubricate GM P/N 1051344 (Canadian P/N 993037) to the nose of the valve blade (1).
Pic 6
2. Install the intake manifold tuning valve.
NOTE: Refer to Fastener Notice.
3. Install the intake manifold tuning valve bolts.
Tighten the bolts to 10 N.M (89 lb in).
4. Install the power steering pump.
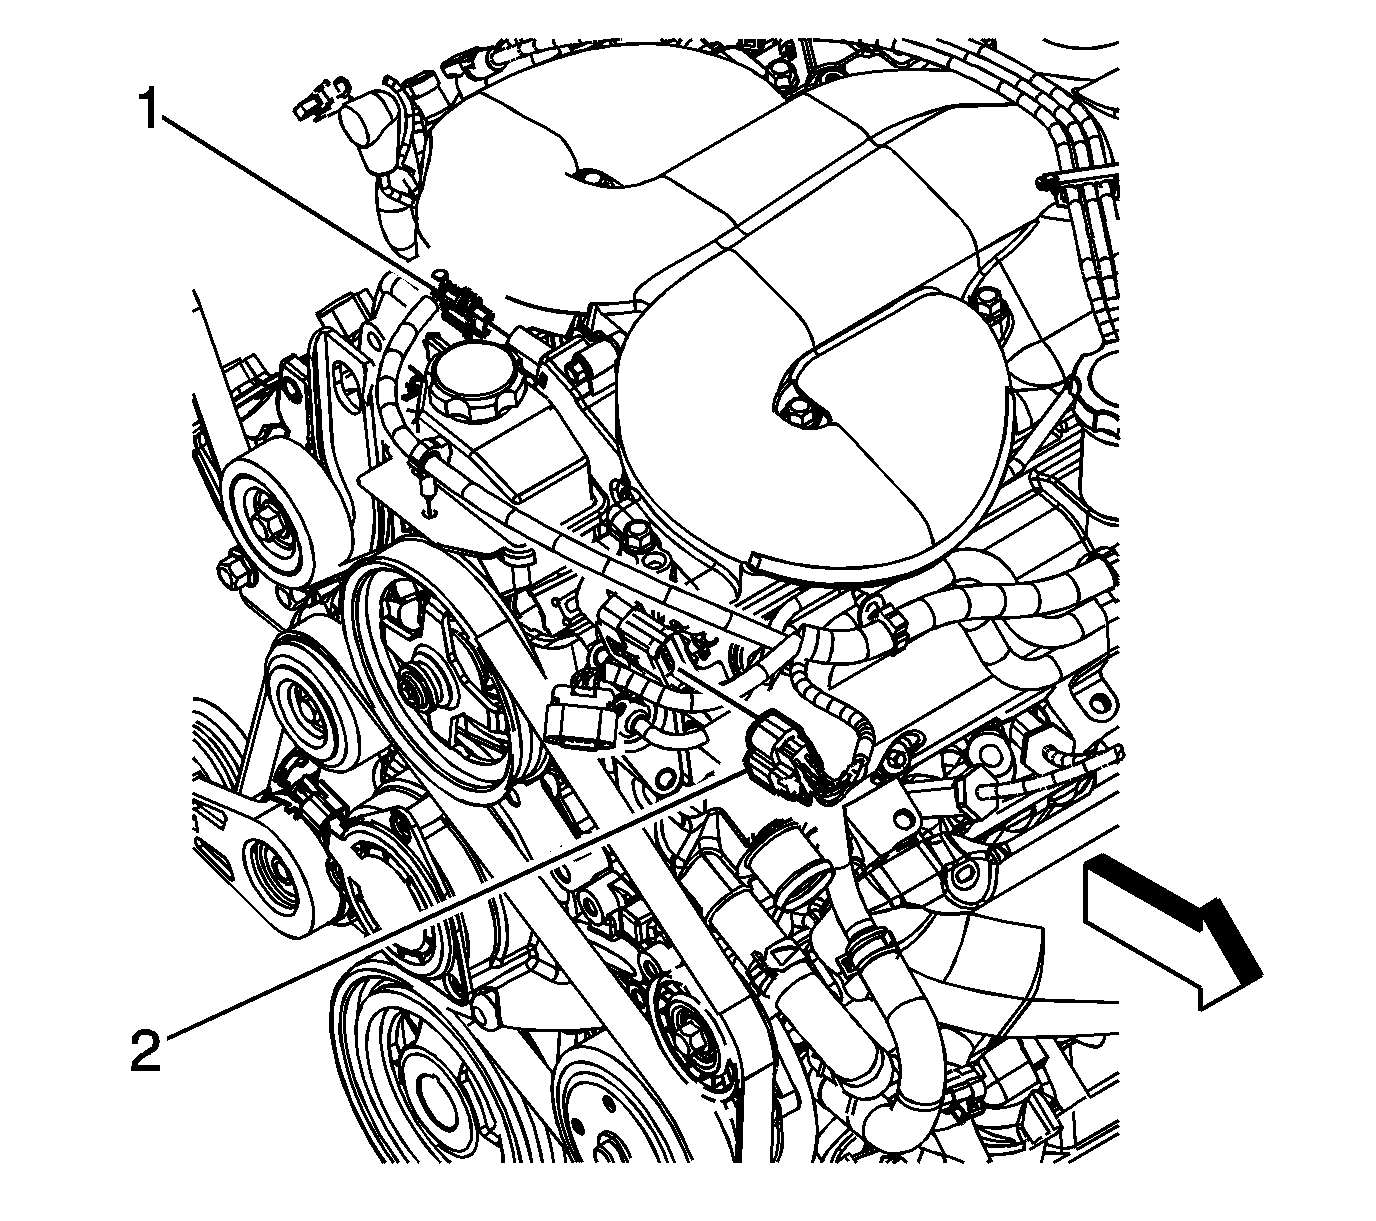
Pic 7
5. Install the engine harness clip to the power steering reservoir bracket.
6. Connect the intake manifold tuning valve electrical connector (1).
7. Install the intake manifold cover.
_______________________________
I hope this helps. If you have a chance, let me know what you find. Also, let me know if you have other questions or need help. However, I feel everything is related.
Take care,
Joe
Images (Click to make bigger)
Thursday, November 12th, 2020 AT 10:42 AM
(Merged)