Hi,
Replacing brakes isn't too hard to do. First, here is a link that explains in general how it's done. You can use these as a guide:
https://www.2carpros.com/articles/how-to-replace-front-brake-pads-and-rotors-fwd
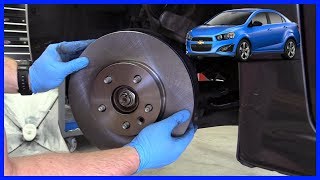
Here are the directions specific to your vehicle. The attached pics correlate with the directions.
__________________________________________________________________________________________
2006 Subaru Impreza WRX F4-2.5L DOHC Turbo
Front
Vehicle Brakes and Traction Control Disc Brake System Brake Pad Service and Repair Procedures Front
FRONT
Front Brake Pad
REMOVAL
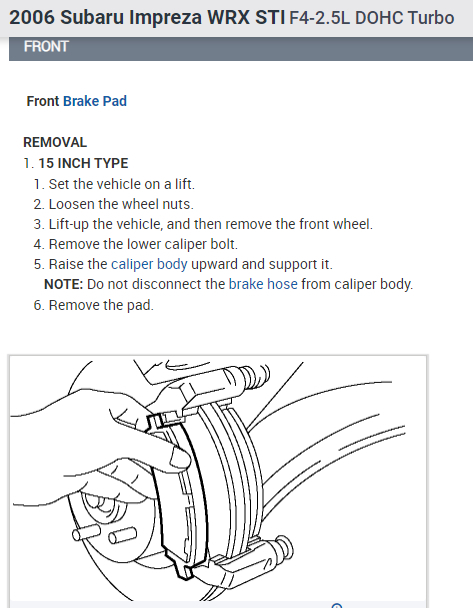
1. 15 INCH TYPE
1. Set the vehicle on a lift.
2. Loosen the wheel nuts.
3. Lift-up the vehicle, and then remove the front wheel.
4. Remove the lower caliper bolt.
5. Raise the caliper body upward and support it.
NOTE: Do not disconnect the brake hose from caliper body.
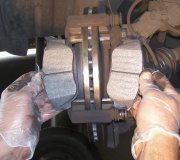
6. Remove the pad.
pic 1
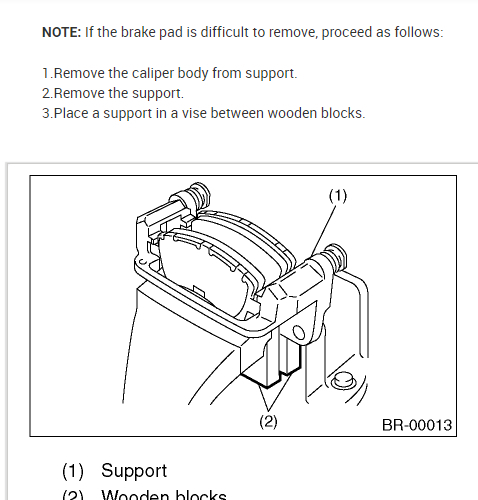
NOTE: If the brake pad is difficult to remove, proceed as follows:
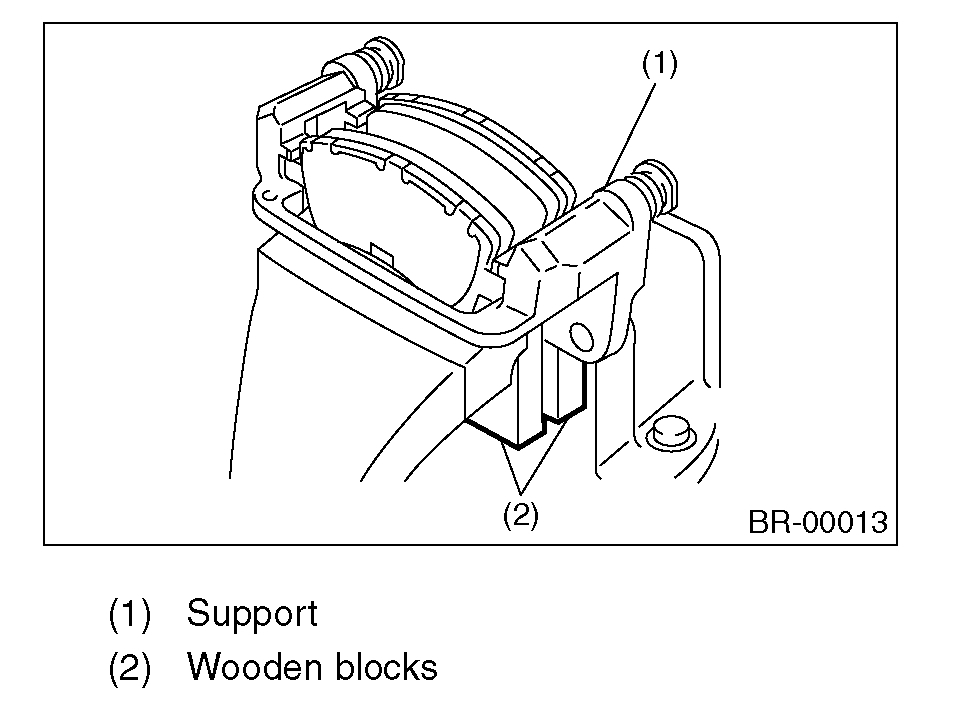
1.Remove the caliper body from support.
2.Remove the support.
3.Place a support in a vise between wooden blocks.
pic 2
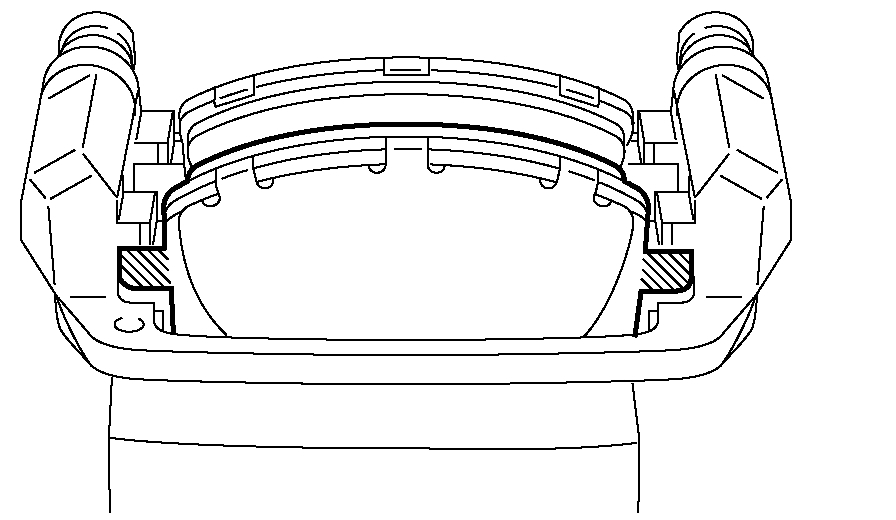
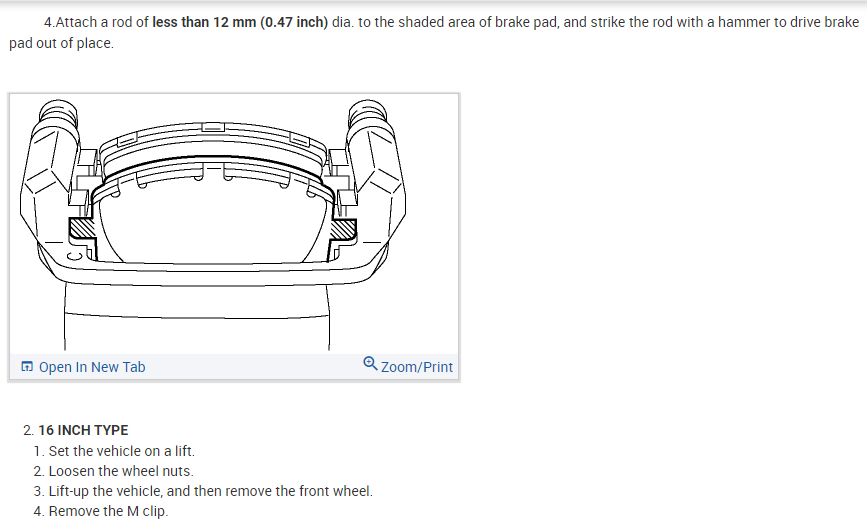
4.Attach a rod of less than 12 mm (0.47 inch) dia. to the shaded area of brake pad, and strike the rod with a hammer to drive brake pad out of place.
pic 3
2. 16 INCH TYPE
1. Set the vehicle on a lift.
2. Loosen the wheel nuts.
3. Lift-up the vehicle, and then remove the front wheel.
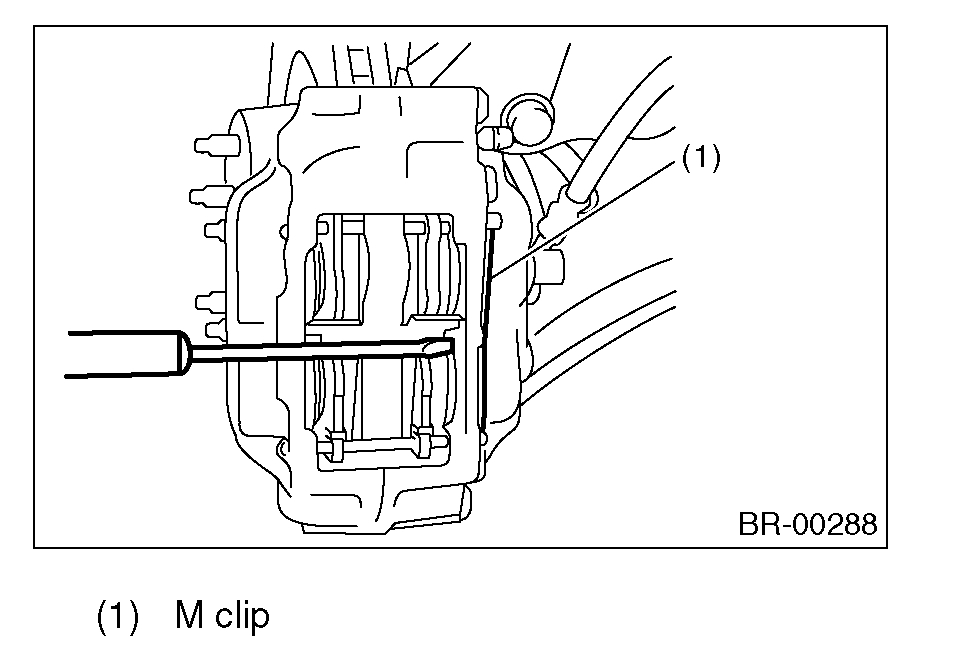
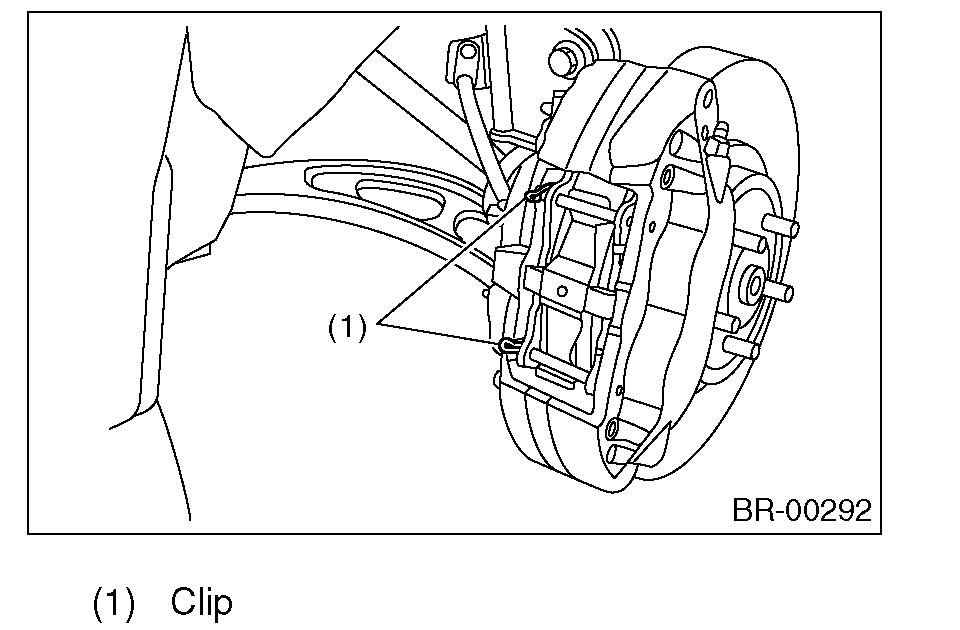
4. Remove the M clip.
pic 4
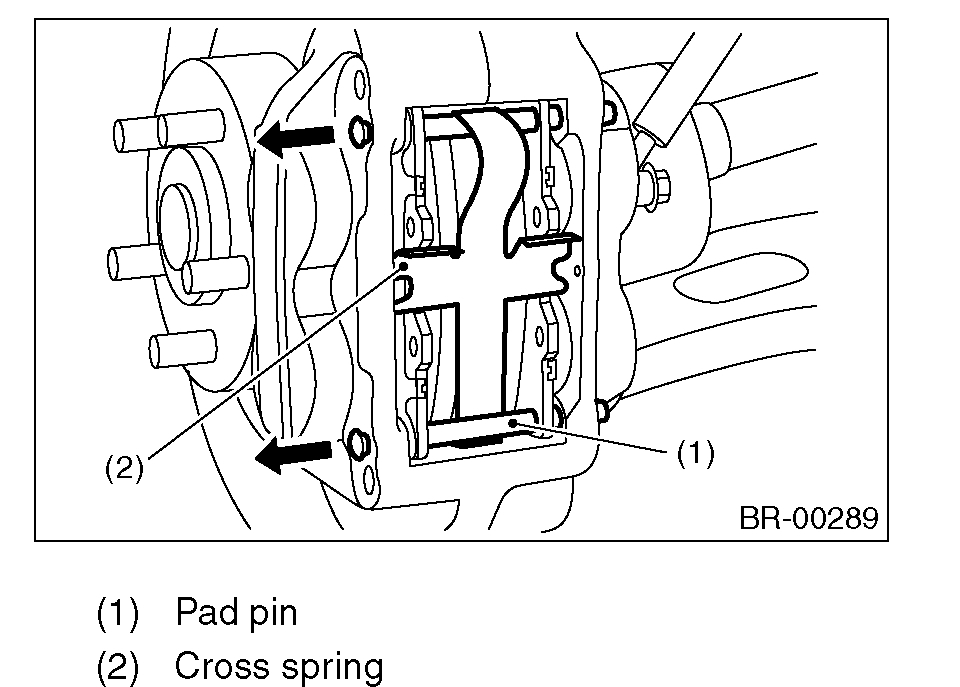
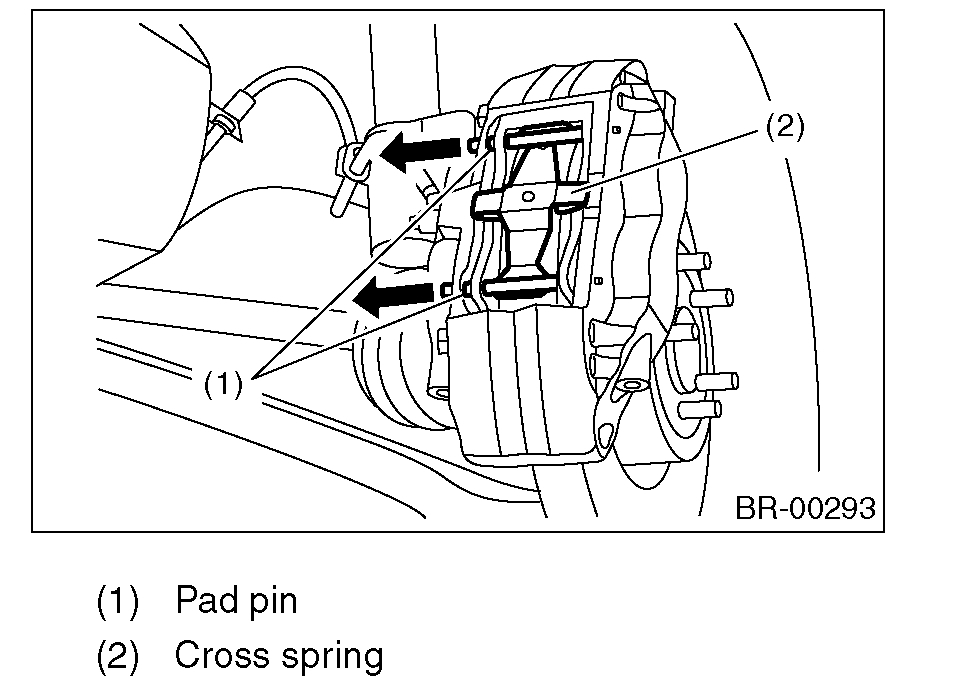
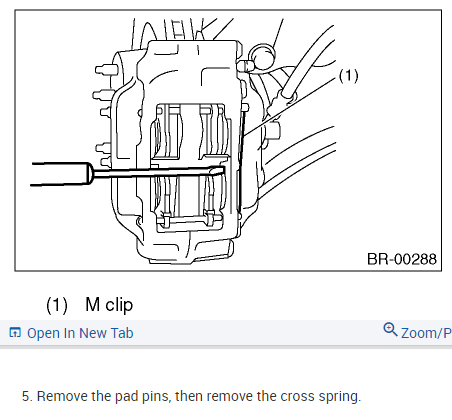
5. Remove the pad pins, then remove the cross spring.
pic 5
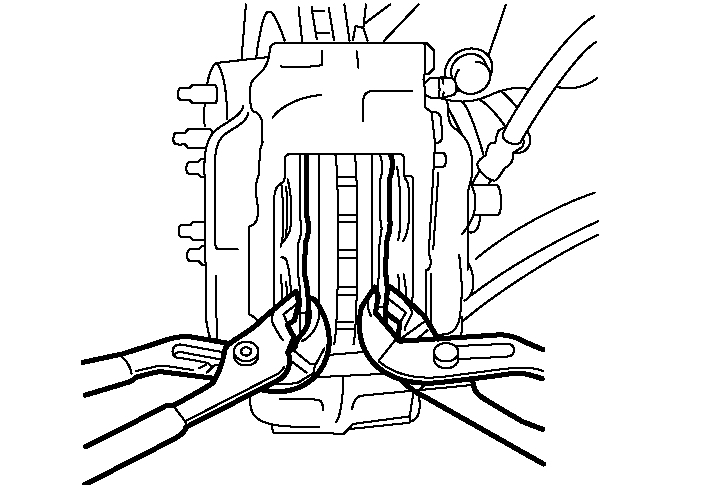
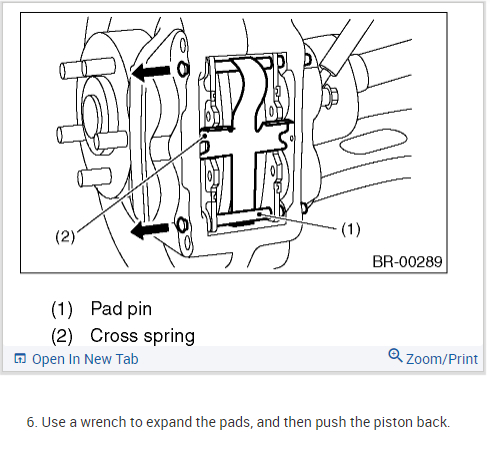
6. Use a wrench to expand the pads, and then push the piston back.
pic 6
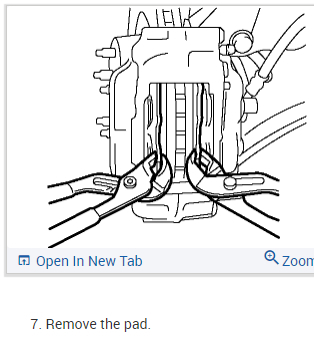
7. Remove the pad.
pic 7
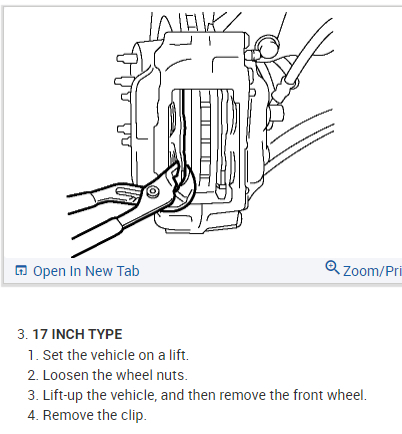
3. 17 INCH TYPE
1. Set the vehicle on a lift.
2. Loosen the wheel nuts.
3. Lift-up the vehicle, and then remove the front wheel.
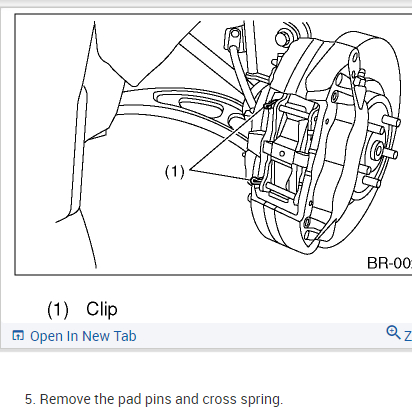
4. Remove the clip.
pic 8
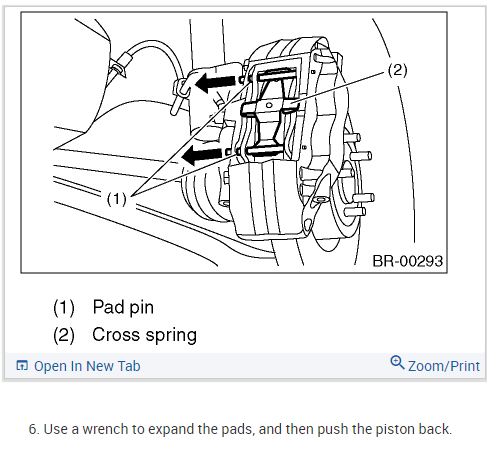
5. Remove the pad pins and cross spring.
pic 9
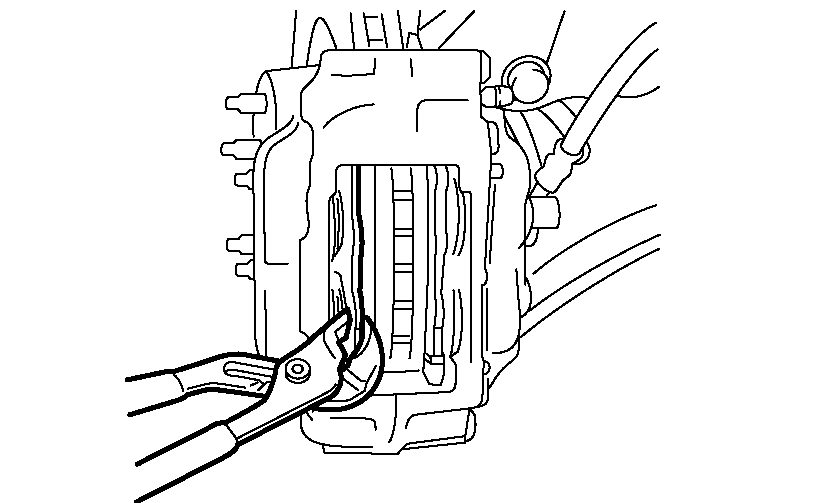
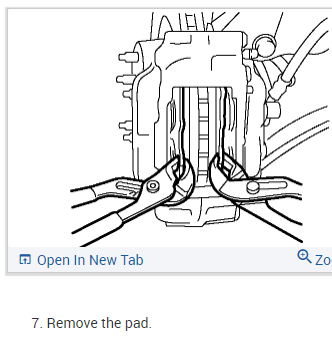
6. Use a wrench to expand the pads, and then push the piston back.
pic 10
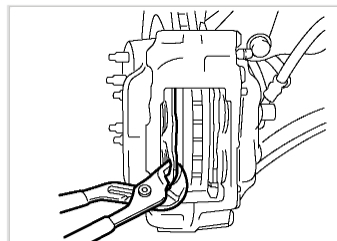
7. Remove the pad.
pic 11
INSTALLATION
1. 15 INCH TYPE
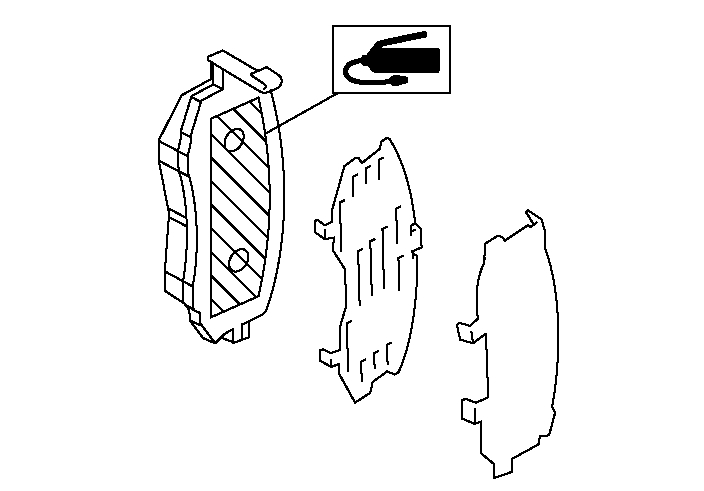
1. Apply thin coat of Molykote AS-880N (Part No. K0777YA010) to the frictional portion between pad and pad clip.
2. Apply thin coat of Molykote AS-880N (Part No. K0777YA010) to the frictional portion between pad and pad inner shim.
pic 12
3. Install the pads on support.
4. Install the caliper body on support.
Tightening torque: 26.5 Nm (2.7 kgf-m, 19.5 ft. lbs.)
NOTE: If it is difficult to push the piston during pad replacement, loosen the air bleeder screw to facilitate work.
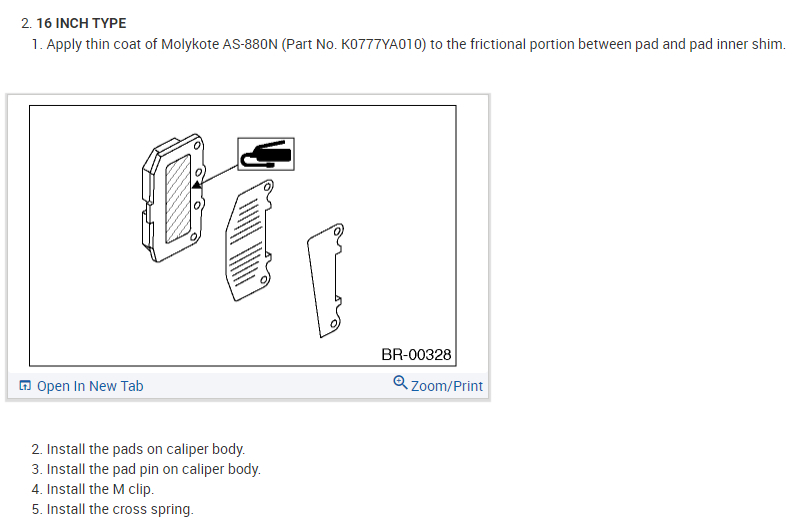
2. 16 INCH TYPE
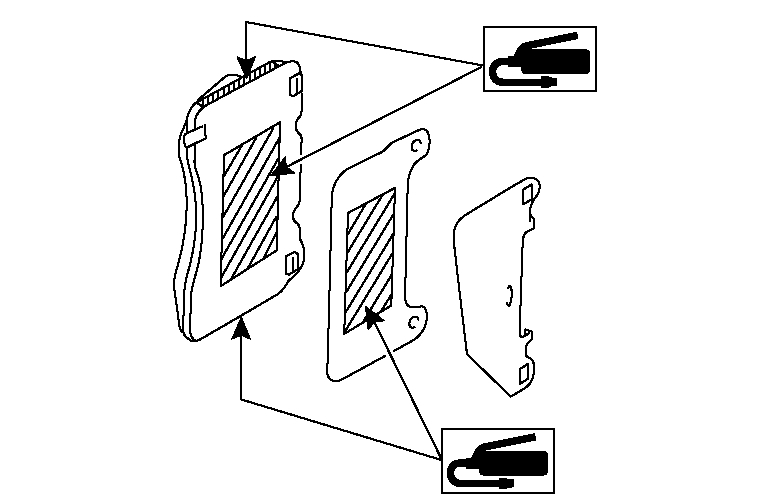
1. Apply thin coat of Molykote AS-880N (Part No. K0777YA010) to the frictional portion between pad and pad inner shim.
pic 13
2. Install the pads on caliper body.
3. Install the pad pin on caliper body.
4. Install the M clip.
5. Install the cross spring.
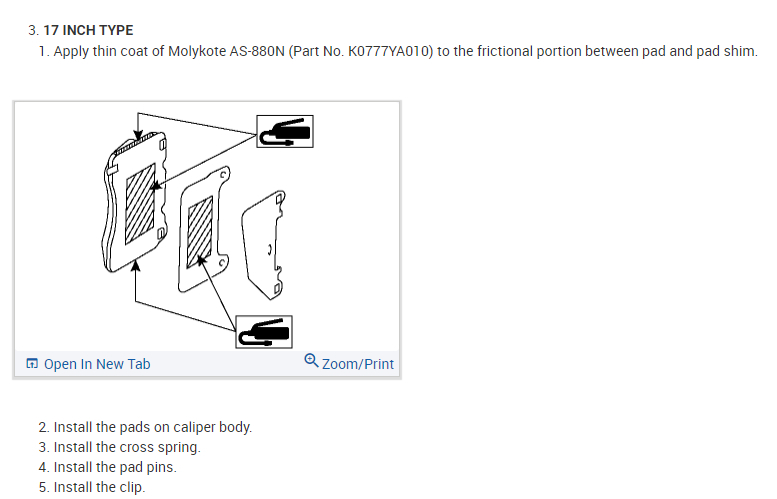
3. 17 INCH TYPE
1. Apply thin coat of Molykote AS-880N (Part No. K0777YA010) to the frictional portion between pad and pad shim.
pic 14
2. Install the pads on caliper body.
3. Install the cross spring.
4. Install the pad pins.
5. Install the clip.
INSPECTION
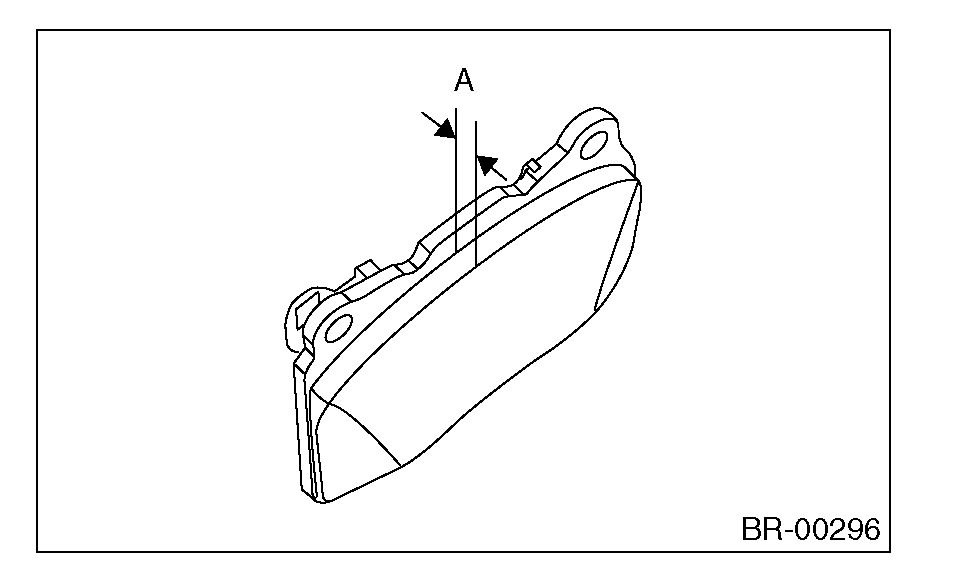
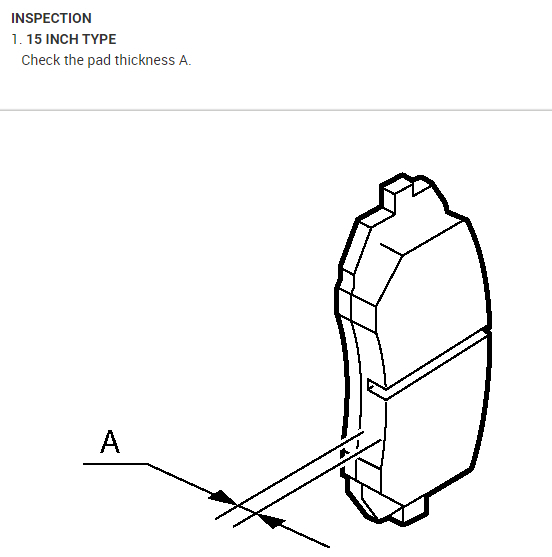
1. 15 INCH TYPE
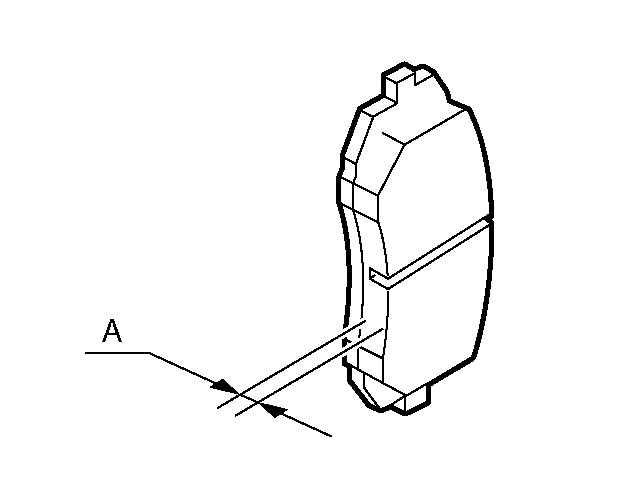
Check the pad thickness A.
pic 15
pic 16
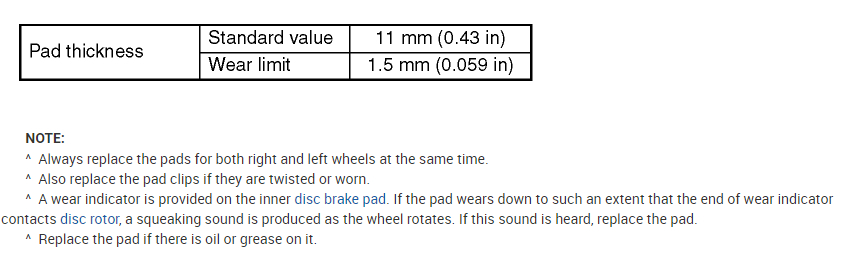
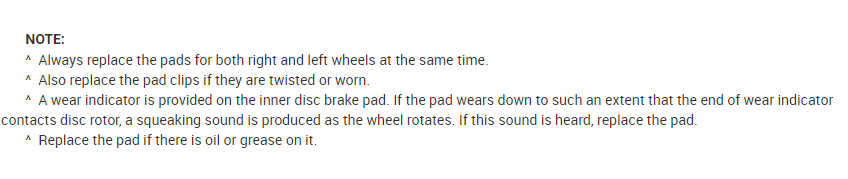
NOTE:
Always replace the pads for both right and left wheels at the same time.
Also replace the pad clips if they are twisted or worn.
A wear indicator is provided on the inner disc brake pad. If the pad wears down to such an extent that the end of wear indicator contacts disc rotor, a squeaking sound is produced as the wheel rotates. If this sound is heard, replace the pad.
Replace the pad if there is oil or grease on it.
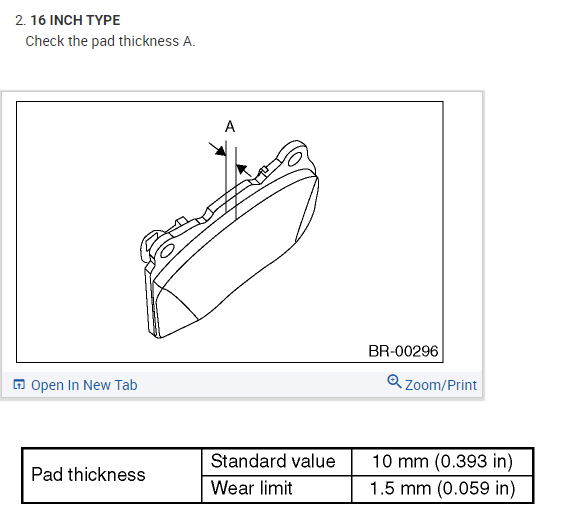
2. 16 INCH TYPE
Check the pad thickness A.
pic 17
pic 18
NOTE:
Always replace the pads for both right and left wheels at the same time.
Also replace the pad clips if they are twisted or worn.
A wear indicator is provided on the inner disc brake pad. If the pad wears down to such an extent that the end of wear indicator contacts disc rotor, a squeaking sound is produced as the wheel rotates. If this sound is heard, replace the pad.
Replace the pad if there is oil or grease on it.
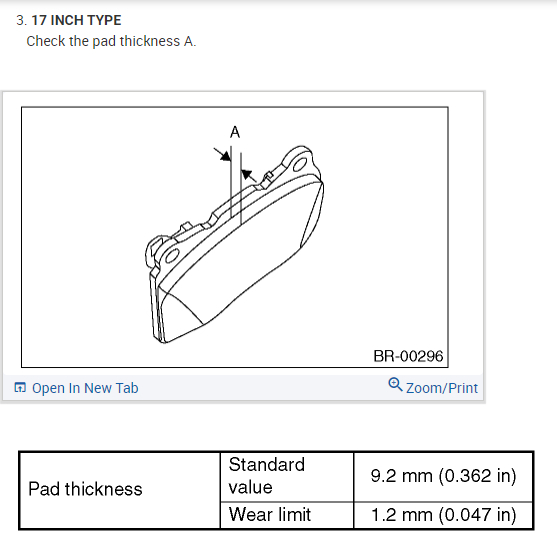
3. 17 INCH TYPE
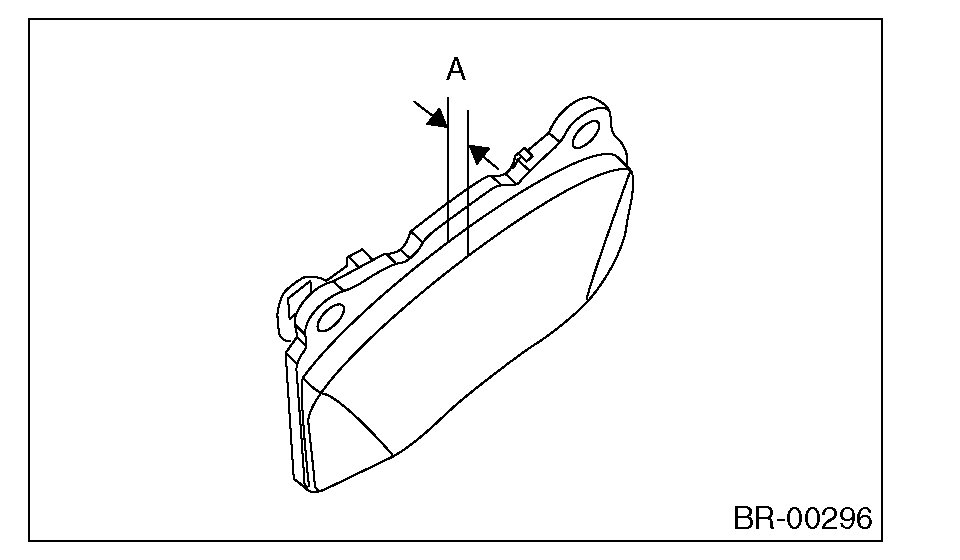
Check the pad thickness A.
pic 19
pic 20
NOTE:
Always replace the pads for both right and left wheels at the same time.
Also replace the pad clips if they are twisted or worn.
A wear indicator is provided on the inner disc brake pad. If the pad wears down to such an extent that the end of wear indicator contacts disc rotor, a squeaking sound is produced as the wheel rotates. If this sound is heard, replace the pad.
Replace the pad if there is oil or grease on it.
__________________________________________________
I hope this helps. Let me know if you have other questions.
Take care and God Bless,
Joe
Images (Click to make bigger)
SPONSORED LINKS
Sunday, February 7th, 2021 AT 6:49 PM