Hi and thanks for using 2CarPros.
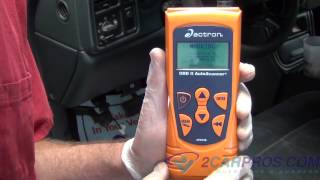
As far as the problem, it sounds like it may be related to fuel pump pressure. What I suggest first is to test fuel pump pressure. If it is too high due to a faulty fuel pressure regulator, it can cause a rich mixture.
Here is a link that shows in general how pressure is checked:
https://www.2carpros.com/articles/how-to-check-fuel-system-pressure-and-regulator
Here are the directions specific to your vehicle including pressure specifications. The attached pictures correlate with these directions. Also, most parts stores will lend or rent a fuel pressure gauge to you.
FUEL SYSTEM PRESSURE, CHECKING
Fuel system pressure, checking
Note! Some variation in the illustrations may occur, but the essential information is always correct.
Check the fuel pressure see: Diagnostics, Vehicle communication, ECM, Parameters, Fuel pressure.
Absolute pressure: Fuel pressure in fuel system + air pressure.
Relative pressure: Fuel pressure in fuel system.
The air pressure is approx. 100 kPa at sea level. VIDA measures the fuel pressure in absolute pressure. External pressure gauge (pressure gauge) measures the fuel pressure in relative pressure.
Fuel line pressure. Refer to: Specifications, mechanical See: Engine > Mechanical > Specifications, Mechanical
The following method must be used when reading the fuel line pressure on the fuel rail:
Connecting fuel pressure gauge.
Supplement the pressure gauge with adapter and nipple before use.
- 999 5011 MANOMETER See: Vehicle > Electrical / Mechanical Repair > 999 5011 Manometer
- 998 9725 Adapter See: Vehicle > Electrical / Mechanical Repair > 998 9725 Adapter
- 999 5479 ADAPTER See: Vehicle > Electrical / Mechanical Repair > 999 5479 Adapter
Connect the adapter to the valve on the fuel rail in the locked position (image 1, valve closed).
Turn the tap on the pressure gauge in the direction of nipple.
999 5479 ADAPTER See: Vehicle > Electrical / Mechanical Repair > 999 5479 Adapter
Connect the pressure gauge's other connection to the fuel drain equipment.
- 981 2270 PUMP TROLLEY See: Vehicle > Electrical / Mechanical Repair > 981 2270 Pump Trolley
- 981 2273 PUMP See: Vehicle > Electrical / Mechanical Repair > 981 2273 Pump
- 981 2282 Tank See: Vehicle > Electrical / Mechanical Repair > 981 2282 Tank
Unlock the adapter (illustration 2, valve open).
Start the engine.
Read off the relative pressure.
Disconnecting fuel pressure gauge.
Ignition off.
Start the draining unit.
Set the cock on the pressure gauge to the central position.
Lock the adapter (valve closed as in illustration 1).
Remove the adapter from the valve.
Stop the draining unit.
Reset the equipment.
________________________________________________
As far as the fuel filter, if it was plugged, it could cause a lean fuel mixture and not a rich one. Also, the fuel filter is integrated with the Fuel Pump Unit. However, some models continue to incorporate an external fuel filter. If the external fuel filter is not found it should be assumed that the fuel filter can only be replaced by renewing the fuel pump. If you want to replace it, here are the directions. First, the external one if that is what you have. Picture 4 correlate with these directions.
Note! The illustrations in this service information are used for different model years and/or models. Some variation may occur. However, the essential information in the illustrations is always correct.
Preparatory work
Drain the fuel injection system. See Fuel system pressure release See: Fuel Pressure Release > Procedures > Fuel System Pressure Release.
Hint: Place a tray or similar under the filter to capture any spillage.
Removal
Removing the fuel filter
Caution! Extreme cleanliness must be exercised when handling these components.
Remove:
- the screw for the clamp around the filter
- the quick-release connectors for the pipes
- the filter.
Installation
Note! For tightening torques, see Specifications. See: Engine > Mechanical > Tightening Torque
Installing the fuel filter
Install:
- the filter
- the pipes
- the M8 screw for the clamp around the filter (M8)
- the fuel pump fuse. See: Fuel system pressure release See: Fuel Pressure Release > Procedures > Fuel System Pressure Release.
___________________
If the external filter isn't on the vehicle, then you have to replace the pump. Here are the directions. I will start with removing the fuel tank. Pictures 6 - 10 correlate with this portion of the process.
__________________
REMOVAL AND REPLACEMENT
Fuel tank
Special tools:
999 5972 FIXTURE See: Vehicle > Electrical / Mechanical Repair > 999 5972 Fixture
Note! The illustrations in this service information are used for different model years and/or models. Some variation may occur. However, the essential information in the illustrations is always correct.
Preparatory work
Drain the fuel system. See: Fuel system pressure release See: Fuel Pressure Release > Procedures > Fuel System Pressure Release.
Drain the fuel tank. See: Fuel tank draining See: Fuel Delivery and Air Induction > Procedures > Fuel Tank Draining.
Removal
Removing the exhaust system
Detach the exhaust system at the three-way catalytic converter (TWC) and at the rubber mountings.
Hang the exhaust system to one side.
Note! Support the front section of the exhaust pipe so as not to put strain on the exhaust manifold.
Removing the heat deflector plate
Remove:
- the 7 plastic nuts
- the heat deflector plate.
Detaching the hose connections
Remove:
- the hose clamp for the evacuation pipe at the fuel tank
- the hose clamp for the hose to the fuel filler pipe.
Note! Carefully detach the hose from the fuel filler pipe, there may be fuel left in the tank.
Removing the carbon filter container
Remove:
- the hose (1)
- the 2 pipes, secured using quick-release connectors (2).
Removing the fuel tank
Install a mobile jack with fixture 999 5972 FIXTURE See: Vehicle > Electrical / Mechanical Repair > 999 5972 Fixture under the fuel tank.
Disconnect the fuel connection (1).
Remove the screws for the fuel tank straps, x 3.
Remove the tank retaining straps. Lower the tank slightly.
Disconnect the level sensor connector.
Lower the tank.
Removing the fuel pump (FP)
Remove:
- the fuel connection for the fuel pump (FP)
- the fuel pump (FP). See: Fuel pump and level sensor unit See: Fuel Pump > Removal and Replacement.
Installation
Installing the fuel pump (FP)
Install:
- the fuel pump (FP). See: Fuel pump and level sensor unit See: Fuel Pump > Removal and Replacement.
- the fuel connection for the fuel pump (FP).
Installing the fuel tank
Place the tank on the mobile jack together with fixture: 999 5972 FIXTURE See: Vehicle > Electrical / Mechanical Repair > 999 5972 Fixture.
Raise the tank so that it is 30 cm from the top.
Connect the connector for the level sensor.
Lift up the fuel tank.
Install:
- the tank retaining straps. Use the 3 x M8 screws
- the fuel connection.
Installing the hose connectors
Install:
- the hose clamp for the evacuation pipe at the fuel tank
- the hose clamp on the hose for the fuel filler pipe.
Installing the carbon filter container
Install:
- the hose
- the 2 pipes, secured using quick-release connectors.
Installing the heat deflector plate
Install:
- the 7 plastic nuts
- the heat deflector plate.
Installing the exhaust system
Note! To ensure that there is no exhaust leakage, see: Flanged joint, assembling See: Exhaust Pipe > Removal and Replacement > Flanged Joint, Assembling
Install:
- the exhaust system. Use the 2 x M10 nuts
- the rubber mountings.
Finishing
Top up the fuel.
Install the fuse for the fuel pump (FP).
_____________________________________________
Here are the directions for pump replacement. Also, the remaining pics correlate with these directions.
_________________________________
Fuel pump and level sensor unit
Note! Some variation may occur. However, the essential information in the illustrations is always correct.
Removing
Remove the fuel tank. See: Fuel Tank > Removal and Replacement
imageOpen In New TabZoom/Print
Note! Ensure that the lever on the level sensor is not damaged when removing the pump.
Remove:
- the large plastic nut, 1 pc. Use: 999 7111 Spanner See: Vehicle > Electrical / Mechanical Repair > 999 7111 Spanner
- the pump.
Transfer of suction line (for vehicles equipped with auxiliary heater)
imageOpen In New TabZoom/Print
Remove the plug for the suction line from the underside of the level sensor, use a 9 mm socket.
Transfer the suction line to the new fuel pump.
Installing
Note! For tightening torques, see Specifications. See: Engine > Mechanical > Tightening Torque
imageOpen In New TabZoom/Print
Note! Ensure that the lever on the level sensor is not damaged when installing the pump.
Install:
- new O-ring
- the level sensor
Note! The marking on the level sensor must be aligned with the marking on the fuel tank.
- the 1 large plastic nut. Use: 999 7111 Spanner See: Vehicle > Electrical / Mechanical Repair > 999 7111 Spanner.
Install the fuel tank. See: Fuel Tank > Removal and Replacement
________________________________________________
Before going to the to all this trouble, I recommend testing fuel pressure.
Let me know if you have questions or need help.
Take care,
Joe
Images (Click to make bigger)
SPONSORED LINKS
Sunday, January 6th, 2019 AT 9:13 PM