Positive cable needs replacing, wires exposed near the terminal

Tiny
TOMSCP
  • MEMBER
  • 1991 PLYMOUTH ACCLAIM
  • 2.5L
  • 4 CYL
  • 2WD
  • AUTOMATIC
  • 132,000 MILES
Hi, replacing the orange positive cable. See picture the cable seems to have a black cap on it going what looks like another cable, maybe just an extension heading into the engine. Does that black cap just pull up and off an then the new cable will have the same black cap on it? Any suggestion would be great. Thanks
Tuesday, July 6th, 2021 AT 2:27 PM

15 Replies

Tiny
CARADIODOC
  • MECHANIC
  • 33,752 POSTS
Yes, if you get an original replacement cable, it will be the same. What you're describing is the "IOD" connector. That's "ignition-off draw". That has a bullet connector with just one fat wire. It is unplugged any time the car is going to be in storage, such as when it sits at the factory until it's sold to a dealer. The engine will start and run without connecting that cable, but most of the safety systems such as power mirrors and air bags will be dead. There's just enough things working to allow the delivery driver to get the car on and off the hauler. Once that cable is connected, Chrysler says with a good, fully-charged battery, it will still have enough charge to start the engine after sitting for three weeks. I've made it as long as six weeks with my '93 Dynasty. The drain on the battery is due to the multiple memory circuits in the various computers.

Universal replacement cables will also have a second smaller wire, but they most likely won't have the same connector. What I would suggest is to cut the old one off and splice it to the new wire. If your current connector is in poor condition, you can find one on any car of this era at any salvage yard. You can probably find the entire cable assembly too. These were horribly expensive to buy new.
Was this
answer
helpful?
Yes
No
Tuesday, July 6th, 2021 AT 3:05 PM
Tiny
TOMSCP
  • MEMBER
  • 64 POSTS
CARADIODOC, Thank you for the info, although My car does not have power windows except hand power!LOL!
Does that black plug at the end of the orange (red) cable plug directly into the engine? The reason I asked is, because I don't want to open a new can of beans if you know what I mean, I just want to replace the cable. Thanks again.
Was this
answer
helpful?
Yes
No
Thursday, July 8th, 2021 AT 4:55 AM
Tiny
TOMSCP
  • MEMBER
  • 64 POSTS
Okay, I was just at Pep Boys and they were out of the cable for the 1991 Plymouth Acclaim, said they would have it in next week. It was $12.00 not sure if it is considered a universal replacement or not, I asked them how much to put it on my car, they $87.00 plus tax and that's not counting the cable itself. No way do I want to pay that just for a battery cable installation.
Anyone have a hold of instructions to put one on? I would appreciate it very much, as I am a low income senior! Thank you
Was this
answer
helpful?
Yes
No
Friday, July 9th, 2021 AT 7:44 AM
Tiny
CARADIODOC
  • MECHANIC
  • 33,752 POSTS
Terribly sorry for being gone so long. I was at the Iola Old Car Show for the weekend. They had internet access in the past, but not this year. "Frog fuzz".

$12.00 sounds too inexpensive for a battery cable. I'm suspicious they're looking at just the smaller pigtail wire. If this is going to be a new experience for you, let me suggest you look for a salvage yard where you go in and pick your own parts, and harvest a cable there. Do a search for "Pull-A-Part" and see if they have a yard near you. They used to be between southern Georgia and up to Ohio and the closest to me, Indianapolis. Lately they've been expanding in the southwest. Their yards are very clean and well-organized. Parts are inexpensive, and employees and customers have always been very friendly. You pay your buck, throw your tool box in a wheelbarrow, and you can spend all day there. I've been to 16 of their yards. A lot of similar yards are popping up all over. One helpful feature at Pull-A-Part yards is the cars are sitting on wheels welded together for safety, so they're up high enough that it's easy to crawl underneath if you have to. These are dandy places to practice removing the treasure you need, and if you break it, you just move on to the next car and try again.

Depending on the engine size and options the car came with, there were one or two of those "bullet" connectors near or right behind the battery. One was pretty substantial, as in the wire was about 3/8" diameter wire. The connector could be black or cream-colored and had a catch, or tab that had to be lifted slightly so it could be disconnected. That wire went to the alternator, so if you knew about it and had to replace the alternator, you could just disconnect that instead of the battery cable, and have no radio clock or presets to re-enter for the customer.

The second bullet connector had a smaller diameter wire, as I recall, and fed some of the fuse link wires. If you look under the hood at the left strut tower close the outside mirror, or the left hood hinge, you'll see a nest of dull-colored wires running around the front of that strut tower. Those are the fuse link wires, or "fuse links". They have a slightly smaller diameter than the wires they protect, making them the weak link in the chain, and their insulation is designed to not burn or melt. These were used instead of regular fuses because they take some time to burn open, making them a slow-blow fuse.

The cars arrived at the dealership with that second bullet connector disconnected. Part of the "New Vehicle Prep" was to pound on the wheel covers, install the antenna, remove plastic covers, and connect that IOD connector. The delivery driver had enough functions to move the car, and in some cases, safety systems like power locks and windows would work, but only with the engine running. Later on that IOD function was done with a pair of fuses in a special yellow holder with a handle for easy disconnecting. Those were labeled, "Air Bag".

I remember seeing these cables online for around $150.00, but today I was pleasantly surprised to find them for as low as $19.00, so maybe what you were quoted is correct. If it is, it probably doesn't pay to rummage around a salvage yard. I did notice these aftermarket cables I found do not have the bullet connectors to match your original one(s). They want you to cut the mating connectors off and use their supplied crimp splices. My grump with those is they don't seal out moisture, but the original bullet connectors didn't either, and they had very little trouble with them. Regardless, having those unpluggable connectors is a dandy feature, and I'd like to keep that on my cars. On a good day, the alternator may have to supply upwards of 50 - 80 amps to the electrical system. It all passes through that wire, and that's a lot to ask of a flimsy crimp connector.

They don't show a step-by-step set of instructions for the battery cable, probably because it's considered a basic job for the professionals these online service manuals are meant for. I did find the system diagram, and I added some arrows for you. The cable assembly you'll be getting includes the wires pointed out by the red, blue, and pink arrows. In this diagram, they show the large bullet connector on its own wire, going to the alternator on a different page. Instead of the second bullet connector, they do show that second wire going right to a ten-pin connector. You have to buy all of those additional wires in the harness when you get it new from Chrysler. That's why they were so expensive. Manufacturers don't allow cutting and splicing any wires for any reason when it's a warranty repair. I know from experience Chrysler insists the finished warranty repair must leave the vehicle exactly as it came from the factory, partly for liability, and partly for reliability. When out-of-warranty, there are plenty of acceptable shortcuts and modifications that lower the cost of the repair.

One of those concessions is that "A15 14BK" wire, (blue arrow). You'll have a better chance of completing a successful repair if you cut that wire and use the supplied crimp connector to splice it to the new cable assembly. The designation means it's circuit "A15", and it's a 14-gauge black wire. !4-gauge wire is good for up to 15 amps. A crimp connector can handle that easily.

The place to start is by disconnecting the negative battery cable. That is always done first because if the wrench accidentally touches the body or battery hold-down at the same time, there won't be any sparks or undue excitement. The first part of this article shows that:

https://www.2carpros.com/articles/how-to-replace-a-car-battery

Now it's safe to work on anything in the electrical system. The hardest part of the job is going to be unbolting the cable from the starter. The second diagram lists the starter as being on the back of the engine. You'll want the car supported safely on jack stands for this part of the job. There's the fat battery cable and the smaller solenoid wire, and they're molded together. You'll need to remove both nuts to remove the cable, then, since you're not replacing the brown solenoid wire, use a side cutter, (wire cutter), to cut that molded bridge. That's another one of those things we couldn't do under warranty. You can bolt the smaller one back on now or after the big cable is on, whichever is easier.

Pull the cable up from on top, then fish the new one down. Look for any clips or molded fasteners that held the old cable in place. You can do that with the new cable with nylon tie straps or anything else, but the cable should be anchored in the same places to prevent it from shifting and touching moving or hot parts. It was also anchored in such a way as to reduce flexing or twisting as the engine rocks. You can bolt the cable clamp to the battery's positive post now or later.

Cut the A15 14BK wire long enough to reach the crimp connector on the new cable assembly. I prefer to crimp and solder them, but a solid crimp should do the job. Connect the A00 8BK wire with a connector or a crimp terminal as necessary. Reattach the negative battery cable as the last step after the positive one is bolted tight, and you're done. Fire it up and buzz off into the sunset.

This job is listed as taking 0.8 hours out-of-warranty, which is the realistic time, and only 0.5 hours if it's being done under warranty. Someone who has done this a few times will get it done quicker. For someone who takes their time, and everything is new to them, I suspect could still have it done in an hour when you don't have a hoist. Please be sure the car is stable and solidly supported on jack stands before you crawl underneath. Take a peek at this article:

https://www.2carpros.com/articles/jack-up-and-lift-your-car-safely

Was this
answer
helpful?
Yes
No
Sunday, July 11th, 2021 AT 3:50 PM
Tiny
TOMSCP
  • MEMBER
  • 64 POSTS
Quote:

if you get an original replacement cable, it will be the same. What you're describing is the "IOD" connector. That's "ignition-off draw". That has a bullet connector with just one fat wire. It is unplugged any time the car is going to be in storage

Thanks for the info. What I really like to do is quickly replace the red positive wire, Please look at the earlier picture and let me know if I can just pull out that black plug and will the new plug have it on there to just plug it back in?

Also I put a new terminal on the battery and then the car started up strongly and quickly, but when I park it, it will not start up again unless I pound my fist on the top of the positive terminal, then it starts quickly and strongly once again. What is making it do this, any ideal's, also please don't forget to answer about pulling out that black plug, for I still may have to change the positive cable. Depends on what you say here! Thank you again, especially for your patience.
Was this
answer
helpful?
Yes
No
Tuesday, July 13th, 2021 AT 4:55 AM
Tiny
TOMSCP
  • MEMBER
  • 64 POSTS
Forgot to mention this, would changing the negative terminal help, it's pretty old?
Was this
answer
helpful?
Yes
No
Tuesday, July 13th, 2021 AT 4:56 AM
Tiny
TOMSCP
  • MEMBER
  • 64 POSTS
I could use a detailed diagram on exactly how the red positive cable is connected from the battery to down and inside the engine. Thanks
Was this
answer
helpful?
Yes
No
Tuesday, July 13th, 2021 AT 2:06 PM
Tiny
CARADIODOC
  • MECHANIC
  • 33,752 POSTS
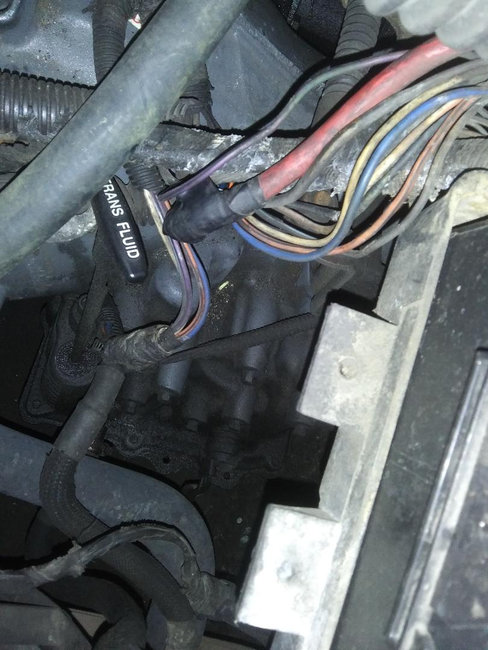
I couldn't find a drawing of the cable routing. You'll learn that as you remove the old one. Remember, there's that cable and a smaller wire molded together at the starter. You'll want to cut them apart so you only have to replace the larger one.

The black connector is only going to be on an original cable assembly, whether you find one at a salvage yard or you find one at a dealership. It's much more common to see an aftermarket cable installed like the one you posted a photo of. Instead of the connector, it has a crimp-type splice joint. As far as operation of the car, it doesn't matter which you use. The advantage to the aftermarket replacement / universal cable is it will fit all kinds of brands, models, and years. The other advantage used to be it was considerably less expensive, but that doesn't seem to be the case today. The minor disadvantage is you have to splice that smaller wire after you cut off the connector on the car's part of that wire, then you lose the ability to unplug that wire. Big deal. You only have to unplug it if the car is going to be in storage a long time or when working on the electrical system. You can do the same thing by simply unbolting the negative battery cable.

The biggest use of that connector was on the assembly line and when the car was delivered to the dealership. Other brands of cars don't even come with that connector that you're going to be eliminating.

Your description of having to hit a battery cable is a common problem, but most people just poke and prod until something works. The smarter approach is to be careful to keep it not working so you can test to see where the broken connection is, then you know what the permanent fix is. I'll describe that in a minute.

I'm not a fan of the crimp-type splice that comes on the universal replacement cable, but they do work. When I do use them, after crimping the joint tightly, I also solder the wires on both sides to insure a solid connection. Otherwise, with dirt, moisture, and vibration, those are three of the four things electrical parts fear. Adding solder insures the joint will last a lot longer. If you're not good at soldering, the connection is likely to still work just fine, then after a few weeks to insure all is well, you might ask a mechanic to check that joint and / or solder it for you. A light film of corrosion is going to form over time that makes soldering just about impossible, so don't wait real long to have that done.

There's three common places to look when the electrical system is dead. The first are the two battery cable clamps. That applies to all cars. The third might not apply yet to a '91 model, but on newer cars, that smaller positive wire goes to the under-hood fuse box, not that bullet connector you have. Where that wire is bolted to the fuse box has caused a real lot of trouble on all brands of cars. The most common symptom is the dome light and dash light up, but everything goes dead the instant you try to crank the engine. The immediate solution is to tighten that nut at the fuse box just a little. The proper repair is to unbolt that wire, sand the terminals clean and shiny, then bolt the wire back on.

From your description, it sounds like one of the battery cable clamps has a bad connection. Next time this happens, be gentle as you open the hood and touch things as to not disturb anything. If you move something around and the electrical system comes back to life, there's no defect to be found at that time, so testing is pointless. Now, even though the system is dead, turn the headlight switch on so current is supposed to be flowing. That will help keep it in the defective state.

Here's a link to an article on how to use a digital voltmeter, if you need it:

https://www.2carpros.com/articles/how-to-use-a-voltmeter

They show using an expensive meter that picks the range for you automatically. That is a feature you don't need and won't find on the less-expensive meters. If you don't have one already, Harbor Freight Tools has a perfectly fine one for around seven dollars. It's a small red voltmeter that comes with the leads and the battery is already installed. Those are all I take with me on the road now. Walmart and hardware stores have similar voltmeters too.

For this test, turn the switch to the "20 Volt DC" position. Here it will read any voltage up to 19.99 volts, and it will simply read a negative voltage if you connect the test probes reversed. We don't care about the negative sign, just the voltage. The nice thing about these meters is if you select a lower range, and the voltage it's reading is too high, the meter won't be damaged. It will just give some type of "over-range" indication to tell you you need to switch it to a higher range.

This drawing is part of a "Notes" page I handed out to my students. The battery post and the cable clamp attached to it are the same place in the circuit, so they should have the same voltage. To say that a different way, the difference in voltage at those two points is supposed to be 0.00 volts, but that's only when there's a good, solid, clean connection. We're looking for a dirty / corroded / loose connection that needs to be fixed. That will only show up with the voltmeter connected as shown, but only when current is trying to flow through that connection. That's why something has to be turned on, and the most convenient thing is the head light switch.

Seems the positive cable causes the most trouble, so start with that one. The two voltmeter probes are going to be only 1/2" apart, one on top of the battery's post, and one on the cable clamp bolted to that post. In a perfect world, you will find 0.00 volts, and everything would be working. Since every electrical connection has some resistance, it causes a small "voltage drop", but only as a result of that current trying to flow through it. That is what we're looking for with the voltmeter.

The 0.2 volts shown in the drawing is the industry-accepted maximum allowed which will only show up during real high current demand, which is from the starter motor. Under normal operation, you might find perhaps as much as 0.01 volt with the head lights and heater fan on. What I expect you to find is going to be as high as 12 volts. If not on the positive battery post and cable, then on the negative post and cable. The one with any appreciable voltage is the connection that is causing the electrical system to be dead and the one to clean and tighten. Test the negative cable the same way.

Automotive students typically learn best by handling and manipulating things. They learn worst by visualizing things, which is required for electrical. I had real good results comparing everything electrical to a counterpart with water, which we're all familiar with. In this case, imagine you have a garden hose hooked to a faucet outside your house. There's a partial blockage in the middle of the hose. That equates to the blockage, or bad connection, in the electrical circuit. If you start with 50 psi at the faucet, as long as the nozzle is closed, (no water flow), you'll have 50 psi everywhere in the hose. Once you open the nozzle to try to get water flow, (turn on the head light switch to try to get current flow), the water pressure will be substantially lower everywhere after the blockage. Lets say you have only 10 psi after the blockage, but 50 psi up to it. You needed two pressure readings to find that blockage. If you could put a pressure gauge on both sides of the blockage and read one in relation to the other, the gauge would directly read the difference of 40 psi with just one quick reading. That is what you're doing with the voltmeter during this test.

The higher the voltage you find, the worse that connection is. In the rare event you find real close to 0.00 volts on both battery cables, the same test can be done on the smaller positive wire with the bullet connector. Getting to some useful test points is a lot more cumbersome, so we often rely on a different clue. If you wiggle or poke whatever has the bad connection, you may see sparking from the current trying to flow through it. That sparking is never a good thing in any electrical circuit, but it is an excellent indicator of where a connection needs to be tightened or cleaned.

If you cut that bullet connector off and use the crimp-type splice, you'll need to strip off about a half inch of insulation from the car's wire. Expect the copper wire to be shiny. If the insulation was deteriorated in that area for some time, the copper wire is going to be oxidized and dark brown. Solder will not adhere to that. In fact, even that crimp connector won't make a solid connection. Sometimes I've been able to cut off a few inches of wire to reach an area where it's still shiny, but most often the moisture has wicked its way down too far. This is a real big problem with Mitsubishi products and their wiring. If you run into that, there's only two good solutions. One is to splice in a much longer section of new wire to reach shiny wire on the car, or to sand the many strands to make them shiny so the solder will stick. Sanding those strands is a real tedious and time-consuming job. I've had just enough luck doing that to make a soldered splice that gets the job done, but certainly nothing to be proud of. While you may get a good connection with that splice, always keep in mind if you run into a similar problem ten years down the road, that splice is the first thing to look at.

If you have to clean a cable clamp / battery post, either take the negative cable off first and reconnect it last, or, if you're only going to do the positive cable, be very careful with metal tools that they never contact the positive post and anything else metal on the car at the same time. Doing so can instantly weld the tool in place, then turn it red hot. I've witnessed that twice. Better to be careful and be aware of the potential danger.
Was this
answer
helpful?
Yes
No
Tuesday, July 13th, 2021 AT 7:59 PM
Tiny
TOMSCP
  • MEMBER
  • 64 POSTS
CARADIODOC: Thank you for all the expert info, I am saving it for future use! But before I go any further, I thought I would just change the positive terminal, as you mentioned after taking off the negative first, I put a new positive terminal on and here is what is happening now,
If I turn the key suddenly and fast, it seems to catch on and start up strongly. But if I try to turn the key slowly it wont start and seems dead.

Any ideas' as to this strange behavior? At least I seem to be able to start it if done quickly. What is stopping it from starting if I turn the key slowly? Any ideas' would be appreciated before I go into it more? Thanks
Was this
answer
helpful?
Yes
No
Thursday, July 15th, 2021 AT 1:25 PM
Tiny
CARADIODOC
  • MECHANIC
  • 33,752 POSTS
The goal is to keep it dead so there's something to diagnose, then do the voltage reading tests I described. That can be done in lots of places on any vehicle to find a bad connection, but for the symptoms you have, 99 percent chance it is going to be one of those battery cable clamps that has the bad connection.

I forgot to mention earlier, if you installed one of those universal cable clamps with a strap across the top, and you slide the cable under it and tighten it down, those are meant only to be a temporary repair to get you back on the road until the entire cable can be replaced. In actual practice, they work well enough that most of us don't go any further and finish the repair properly. Where that cable is squished under the strap is another mechanical connection, and as such, is another dandy place to find a bad connection. You test that one the same way. When the electrical system is dead, turn the head lights on as before, then in addition to taking voltage readings between each battery post and its cable clamp, also place one voltmeter probe on the cable clamp again, and the other one on a bare / exposed spot on the wire. As with the other tests, the two probes will only be a fraction of an inch apart, and being both points are the same point in the circuit, the voltage difference is supposed to be 0.0 volts. Basically, any voltage higher than 0.0 volts is unacceptable, but remember, something has to be turned on for that to occur. Head lights are the easiest thing to turn on.
Was this
answer
helpful?
Yes
No
Thursday, July 15th, 2021 AT 6:35 PM
Tiny
TOMSCP
  • MEMBER
  • 64 POSTS
Thanks for all the replies, but what happened was; the reverse in the new transmission I had installed 4 years ago went, so I had to put it in the shop for over a week. When they fixed the transmission they also put new battery cables on. Now I don't know what to say except I guess it was a bad cable after all, it's working just fine now. Thanks again for all your help, very much appreciate it!
Was this
answer
helpful?
Yes
No
Tuesday, August 10th, 2021 AT 5:11 AM
Tiny
CARADIODOC
  • MECHANIC
  • 33,752 POSTS
Dandy. Happy to hear you're back on the road again. Please come back to see us with your next problem.
Was this
answer
helpful?
Yes
No
Tuesday, August 10th, 2021 AT 6:07 PM
Tiny
TOMSCP
  • MEMBER
  • 64 POSTS
Danny, thanks I will. I will probably have to post this new problem with a different thread?
My speedometer works but the odometer stopped working, I have the two little new gears for it, but need instructions on how to take out the odometer gauge and put the gears in. I have seen how to do it with newer cars, but need how to do it with my car listed above.
Was this
answer
helpful?
Yes
No
-1
Wednesday, August 11th, 2021 AT 1:26 PM
Tiny
CARADIODOC
  • MECHANIC
  • 33,752 POSTS
I did that repair once, many years ago, on a LeBaron. It was too long ago to remember all the details. I can tell you the cluster comes out the front after removing the trim plate.

I looked up the procedure for your car, and it seems way too involved. I had the cluster out of my '93 Dynasty, which is similar in design, and I know I didn't have to go through what they're showing for your model. If you can't figure it out, it would indeed be best to start a new question. That will give the other experts a chance to see it and reply. It also helps when organizing questions into a format suitable for others researching the same problem. If no one else answers, I'll put the instructions into a format that can be uploaded, then you can decide if they're correct for your car.
Was this
answer
helpful?
Yes
No
Wednesday, August 11th, 2021 AT 7:16 PM
Tiny
TOMSCP
  • MEMBER
  • 64 POSTS
Okay, I will make another post as you instructed. I am not worried about doing this right away for I have to have cataracts removed on 8-31-21. Please keep a look out for my new post. Thanks
Was this
answer
helpful?
Yes
No
Thursday, August 12th, 2021 AT 7:59 AM

Please login or register to post a reply.

Sponsored links