Hi,
I think that is a good plan. I don't know if you want the directions for replacing the air spring / bags, but figured I would add them in case you do. The attached pics correlate with the directions.
___________________________________________
2012 BMW X5 xDrive 35i (E70) L6-3.0L Turbo (N55)
Removing and Installing/Replacing Left or Right Air Spring [REP-REP-RAE7037-3712155]
Vehicle Steering and Suspension Suspension Suspension Control ( Automatic - Electronic ) Air Spring Service and Repair Removal and Replacement Removing and Installing/Replacing Left or Right Air Spring [REP-REP-RAE7037-3712155]
REMOVING AND INSTALLING/REPLACING LEFT OR RIGHT AIR SPRING [REP-REP-RAE7037-3712155]
Removing and installing/replacing left or right air spring
REP-REP-RAE7037-3712155
37 12 155 Removing and installing/replacing left or right air spring
Warning!
Danger of injury!
Drain the air spring system before any repair work on the air supply system, pipes and air springs!
Danger of injury if this instruction is not complied with!
Risk of damage!
Extreme cleanliness must be ensured at the connection face of the pipes during dismantling and installation. Even the smallest of dirt particles can cause leakage in the air suspension system.
Note:
Read and comply with notes on air suspension system.
In a warranty case, you must always provide a fault memory printout with the defective component, even where there is no fault entry.
Necessary preliminary tasks:
Deactivate and drain air spring/suspension system
Note:
Repeat the brake bleeding procedure (drain the air spring system) if applicable.
Remove rear wheel
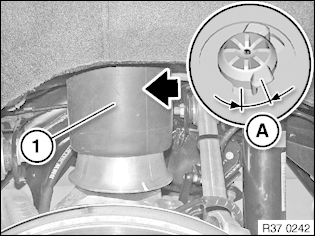
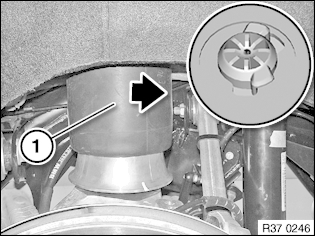
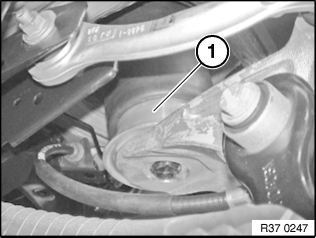
Pic 1
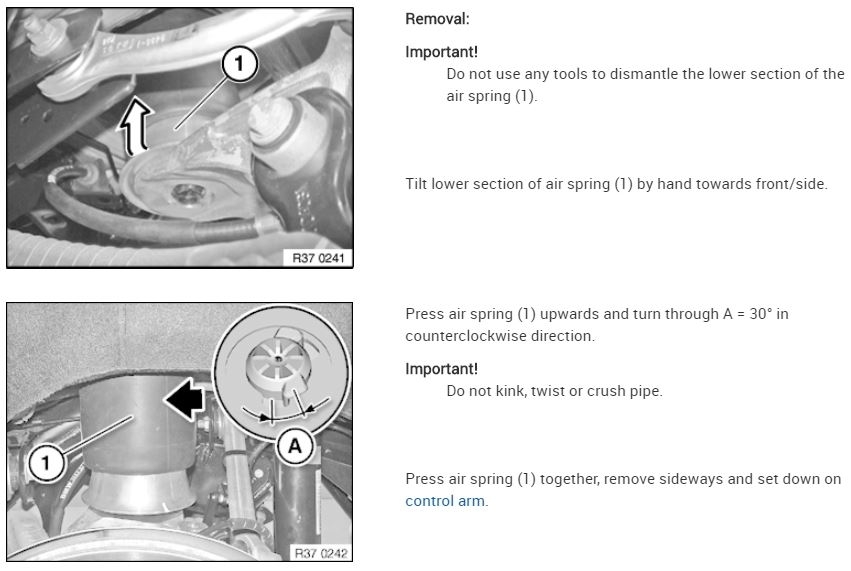
Removal:
Important!
Do not use any tools to dismantle the lower section of the air spring (1).
Tilt lower section of air spring (1) by hand towards front/side.
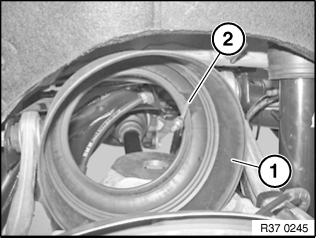
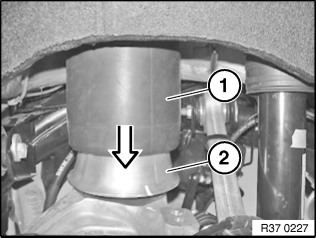
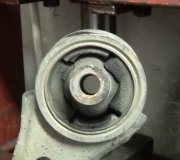
Pic 2
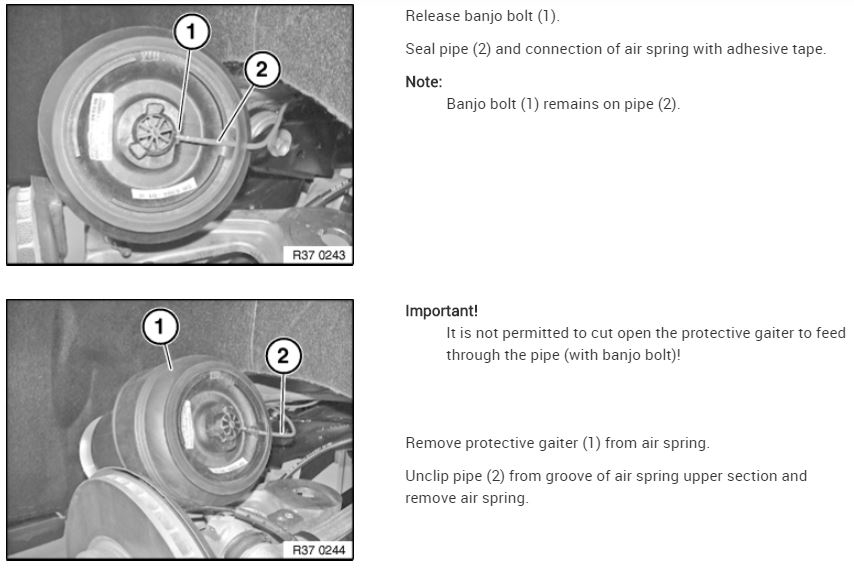
Press air spring (1) upwards and turn through A = 30° in counterclockwise direction.
Important!
Do not kink, twist or crush pipe.
Press air spring (1) together, remove sideways and set down on control arm.
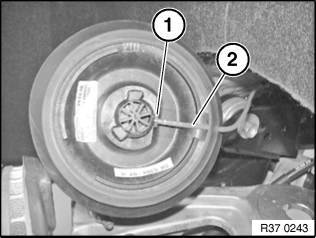
Pic 3
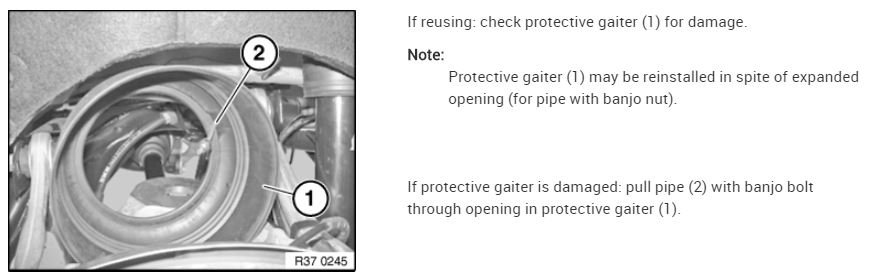
Release banjo bolt (1).
Seal pipe (2) and connection of air spring with adhesive tape.
Note:
Banjo bolt (1) remains on pipe (2).
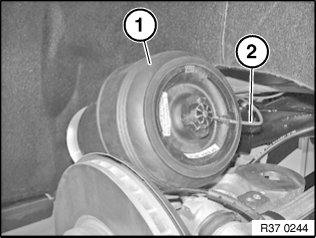
Pic 4
Important!
It is not permitted to cut open the protective gaiter to feed through the pipe (with banjo bolt)!
Remove protective gaiter (1) from air spring.
Unclip pipe (2) from groove of air spring upper section and remove air spring.
Pic 5
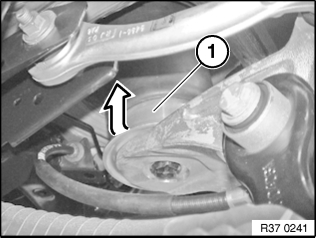
If reusing: check protective gaiter (1) for damage.
Note:
Protective gaiter (1) may be reinstalled in spite of expanded opening (for pipe with banjo nut).
If protective gaiter is damaged: pull pipe (2) with banjo bolt through opening in protective gaiter (1).
Pic 6
Installation:
Check air spring for damage, replace if necessary.
Check pipe for damage, replace if necessary.
Note:
Observe notes on installing a new pipe.
Pic 7
When replacing air spring:
Important!
Replace protective gaiter only if damaged.
It is not permitted to cut open the protective gaiter to feed through the pipe (with banjo bolt)!
Moisten protective gaiter (1) at pipe opening with water/soapy solution.
Insert pipe (2) with banjo bolt through opening in protective gaiter (1).
Pic 8
Important!
Replacement only: Remove and dispose of banjo bolt on air spring connection.
Check banjo bolt (1) for dirt contamination, clean if necessary. Then carefully screw in by hand to avoid damaging the plastic thread and with it the air spring.
Tightening torque:
37 12 1AZ Type Thread Tightening specification Measure
1AZ
Screwed connection, air line
E70, E70M / E71, E71M / E72 Dia. = 4 mm 2 Nm
Clip pipe (2) into groove of air spring upper section.
Pic 9
Align protective gaiter (1) by way of opening for pipe (2) to upper section of air spring and install.
Pic 10
Important!
Do not kink, twist or crush pipe.
Insert air spring (1) into locator or frame side member and turn clockwise to the limit position.
Check air spring (1) for correct installation in locator or frame side member; correct if necessary.
Pic 11
Important!
Do not use any tools to install the lower section of the air spring (1).
Press lower section of air spring (1) by hand into wheel carrier until it can be seen and heard to snap into place.
Note:
In so doing, make sure that orientation lug is correctly aligned to groove in wheel carrier.
Check air spring for uniform formation of rolling lobe (1).
If necessary, slide rolling lobe (1) by hand downwards and shape on lower section of air spring (2).
Important!
Risk of damage to air springs!
Do not set down vehicles with empty air springs on the wheels.
Wheels must be freely suspended.
They may be damaged by the load of the empty air springs!
After installation:
Activate and fill air spring system
Note:
The sequence for activating and filling the air spring system must be followed.
_____________________
Here are the directions for draining and reactivating the air spring system
2012 BMW X5 xDrive 35i (E70) L6-3.0L Turbo (N55)
Draining/Filling Air Spring System [REP-REP-RAE7037-3700100]
Draining/Filling Air Spring System [REP-REP-RAE7037-3700100]
DRAINING/FILLING AIR SPRING SYSTEM [REP-REP-RAE7037-3700100]
Draining/filling air spring system
REP-REP-RAE7037-3700100
37 00 100 Draining/filling air spring system
Warning!
Danger of injury!
The air spring system must be drained before carrying out any repair work on the air supply system, pipes and air springs!
Danger of injury if this instruction is not complied with!
Important!
Risk of damage!
To fill the air springs, raise the vehicle until the wheels are freely suspended.
Note:
Read and comply with notes on air suspension system.
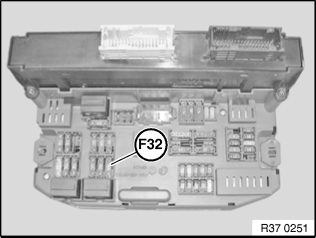
Pic 12
Deactivating air suspension system:
Fold down power distribution box in passenger compartment
Pull out fuse (F32) for air supply system
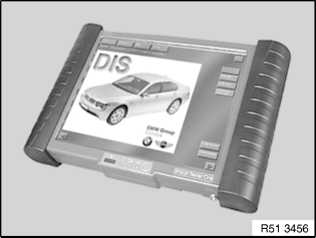
Pic 13
Draining air spring system:
Connect BMW diagnosis system
Switch on ignition.
Drain air springs with the aid of the BMW diagnosis system (control unit function, menu item ”Bleeding procedure for air springs”)
Note:
Depending on the output pressure in the air spring, it may be necessary to repeat the service function "Bleeding procedure for air springs."
(See functional description of the "brake bleeding procedure - air spring" in the BMW diagnosis system.)
Raise vehicle until wheels are freely suspended
Remove ignition key
Pic 14
Activating and filling air spring system:
Important!
Risk of damage to air springs!
Do not set down a vehicle on its wheels if it has empty air springs.
Wheels must be freely suspended.
They may be damaged by the load of the empty air springs!
Check air spring lower section (1) for correct latching in wheel carrier and correct if necessary
Jack up the vehicle until the wheels are freely suspended by at least 30 cm.
Failure to comply may result in damage to the air springs!
Pic 15
Insert fuse (F32) into the corresponding slot in the power distribution box.
Connect BMW diagnosis system.
Switch the ignition on.
Fill air springs using BMW diagnosis system (control unit functions).
Lower vehicle.
Clear diagnostic fault entries from fault memory.
____________________________________
I hope this helps.
Joe
Images (Click to make bigger)
Friday, August 21st, 2020 AT 8:50 PM