Replacing the fuel tank in your 1991 Honda Civic DX requires some careful steps. Here's a general outline of the process:
Safety precautions: Ensure you have a well-ventilated area to work in and take precautions against fuel spills. Have a fire extinguisher nearby and avoid smoking or open flames.
Preparation: Park the vehicle on a level surface and disconnect the negative terminal of the battery to prevent accidental electrical shorts. Relieve the fuel system pressure by removing the fuel pump fuse or relay and starting the engine until it stalls.
Accessing the fuel tank: Raise the rear of the vehicle using a jack and secure it with jack stands. Locate the fuel tank, which is typically positioned beneath the rear of the vehicle. Remove any underbody covers or protective shields that may be obstructing access to the tank.
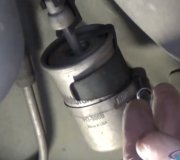
Disconnecting fuel lines and components: Start by disconnecting the fuel filler neck from the fuel tank. Loosen the clamps and slide them back, then carefully detach the hose from the tank. Next, disconnect the fuel supply and return lines from the tank. Use caution as there may still be residual fuel in the lines.
Removing the fuel tank: Support the fuel tank with a jack or have an assistant assist you. Remove the mounting bolts or straps securing the tank to the vehicle's frame. Slowly lower the tank using the jack or by hand, ensuring you have clearance to remove it entirely.
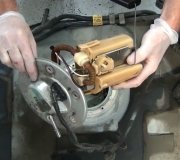
Transferring components: If your new fuel tank does not include certain components, you'll need to transfer them from the old tank. This may include the fuel pump, fuel level sending unit, and other components specific to your vehicle.
Installing the new fuel tank: Lift the new fuel tank into position using a jack or with the help of an assistant. Align it with the mounting points and secure it in place with the appropriate bolts or straps. Reconnect the fuel supply and return lines, as well as the fuel filler neck.
Finalizing the installation: Double-check all connections and ensure everything is properly tightened. Replace any underbody covers or shields that were removed earlier. Reinstall the fuel pump fuse or relay and reconnect the negative battery terminal.
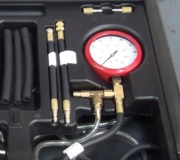
Testing: Before starting the engine, turn the ignition to the "On" position (without starting) to allow the fuel pump to pressurize the system. Inspect for any leaks around the fuel tank and lines. If no leaks are found, start the engine and monitor for proper fuel system operation.
Please note that these steps provide a general overview, and the specific details and components involved in your 1991 Honda Civic DX may vary slightly. It's always recommended to consult the vehicle's service manual for detailed instructions and to ensure a proper and safe fuel tank replacement.
SPONSORED LINKS
Tuesday, June 6th, 2006 AT 9:14 AM