Hi,
Replacing a brake master cylinder takes a little time, but really isn't too hard to do. I recommend getting a lifetime replacement part so you never have to pay for a new one in the future.
First, here is a link that shows in general how it is done. You can use this as a guide.
https://www.2carpros.com/articles/how-to-replace-a-brake-master-cylinder
Here are the directions specific to your vehicle. The pics attached below correlate with the directions.
____________________________
First, you will need to bleed the new master cylinder. Here are the directions.
2004 Dodge Neon L4-2.0L VIN C
Master Cylinder Bleeding Procedure
Vehicle Brakes and Traction Control Hydraulic System Brake Master Cylinder Service and Repair Procedures Master Cylinder Bleeding Procedure
MASTER CYLINDER BLEEDING PROCEDURE
STANDARD PROCEDURE - MASTER CYLINDER BLEEDING
1. Clamp the master cylinder in a vise.
2. Refer to one of the following depending on whether the master cylinder is a non-ABS unit Step a: or an ABS unit Step b:
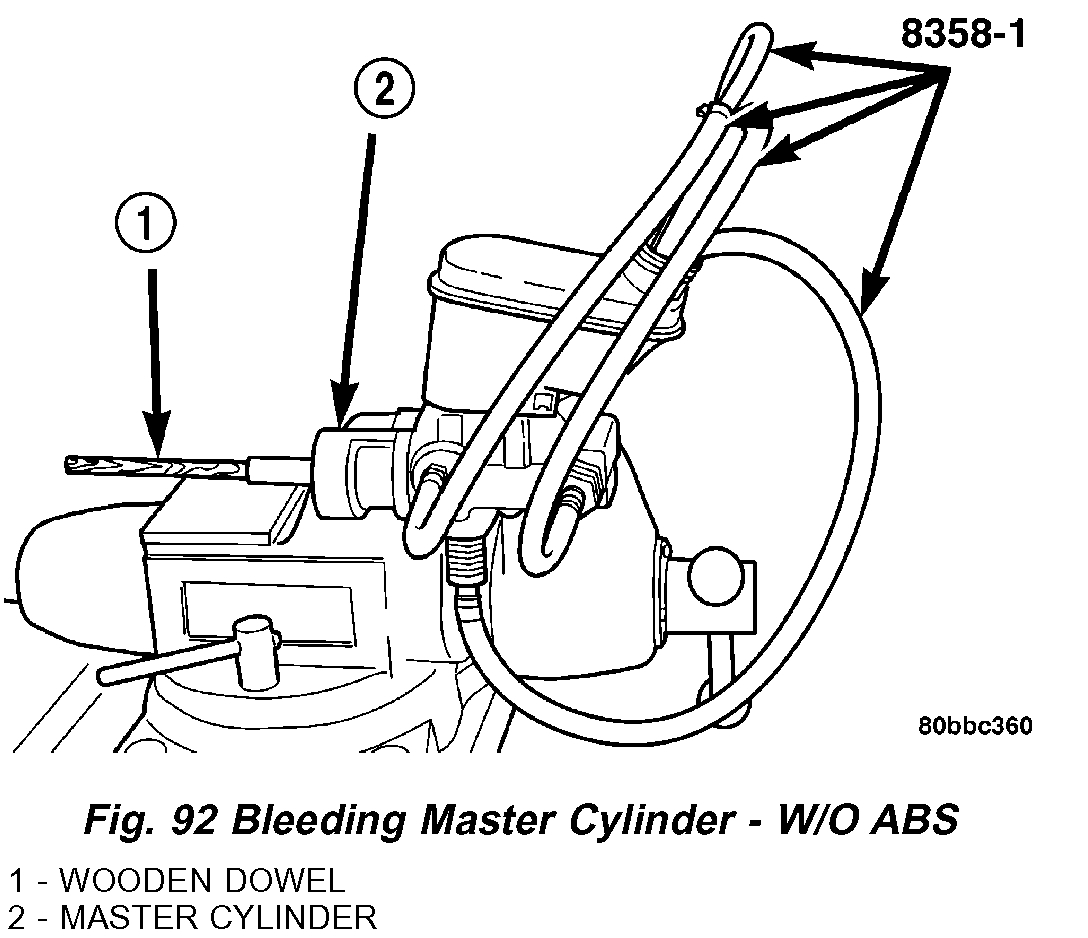
pic 1
a. Attach four Master Cylinder Bleed Tubes, Special Tool 8358-1, to the four ports of the master cylinder and tighten each in place (Fig. 92). The bleed tubes for the ports pertaining to the rear brakes are made to attach to the proportioning valves screwed into the master cylinder. Position the other end of the tubes into the master cylinder reservoir so their outlets are below the surface of the brake fluid in the reservoir when filled.
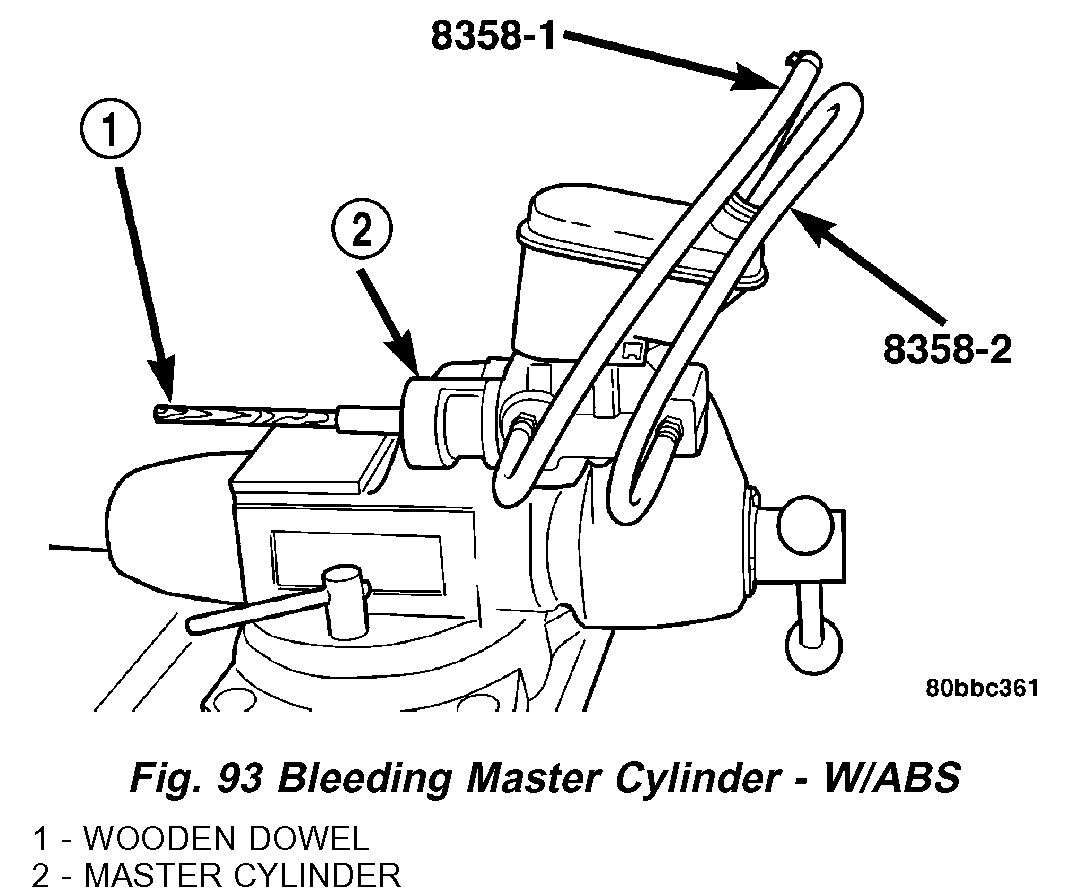
pic 2
b. Attach Master Cylinder Bleed Tube, Special Tool 8358-1, to the primary port of the master cylinder and tighten in place (Fig. 93). Attach Master Cylinder Bleed Tube, Special Tool 8358-2, to the secondary port of the master cylinder and tighten in place. Position the other end of the tubes into the master cylinder reservoir so their outlets are below the surface of the brake fluid in the reservoir when filled.
3. Fill the brake fluid reservoir with fresh Mopar brake fluid, or equivalent conforming to DOT 3 specifications.
4. Using a wooden dowel as a pushrod (Fig. 92) (Fig. 93), press the pistons inward slowly applying brake pressure, then release the pressure, allowing the pistons to return to the released position. Repeat this several times until all air bubbles are expelled out of the tubes and master cylinder bore.
5. Remove the bleed tubes from the master cylinder and plug the outlet ports.
6. Install the fill cap on the reservoir.
7. Remove the master cylinder from the vise.
Part Replacement
2004 Dodge Neon L4-2.0L VIN C
Lhd Without ABS
Vehicle Brakes and Traction Control Hydraulic System Brake Master Cylinder Service and Repair Procedures Master Cylinder Removal and Installation Installation Lhd Without ABS
LHD WITHOUT ABS
INSTALLATION - LHD WITHOUT ABS
NOTE: The master cylinder must be bled before installing it on the vehicle.
1. If removed, install the proportioning valves in their master cylinder ports. The valves are identical, so they can be installed in either master cylinder port going to the rear brakes. Make sure the O-rings on the proportioning valves are new.
2. Bleed the master cylinder before installing it on the vehicle.
3. Inspect and wipe clean the O-ring vacuum seal on the master cylinder rear mounting flange to ensure a good vacuum seal once installation is complete. Replace as necessary.
4. Wipe the face of the power brake booster clean where the master cylinder seal comes in contact when it's installed. Do not get any cleaner or debris inside the booster.
5. Position the master cylinder on the studs of the power brake booster, aligning the push rod of the power brake booster with master cylinder piston push rod. Carefully push the master cylinder onto the studs until it contacts the face of the booster.
6. Install the two master cylinder mounting nuts and tighten each to a torque of 18 Nm (160 inch lbs.).
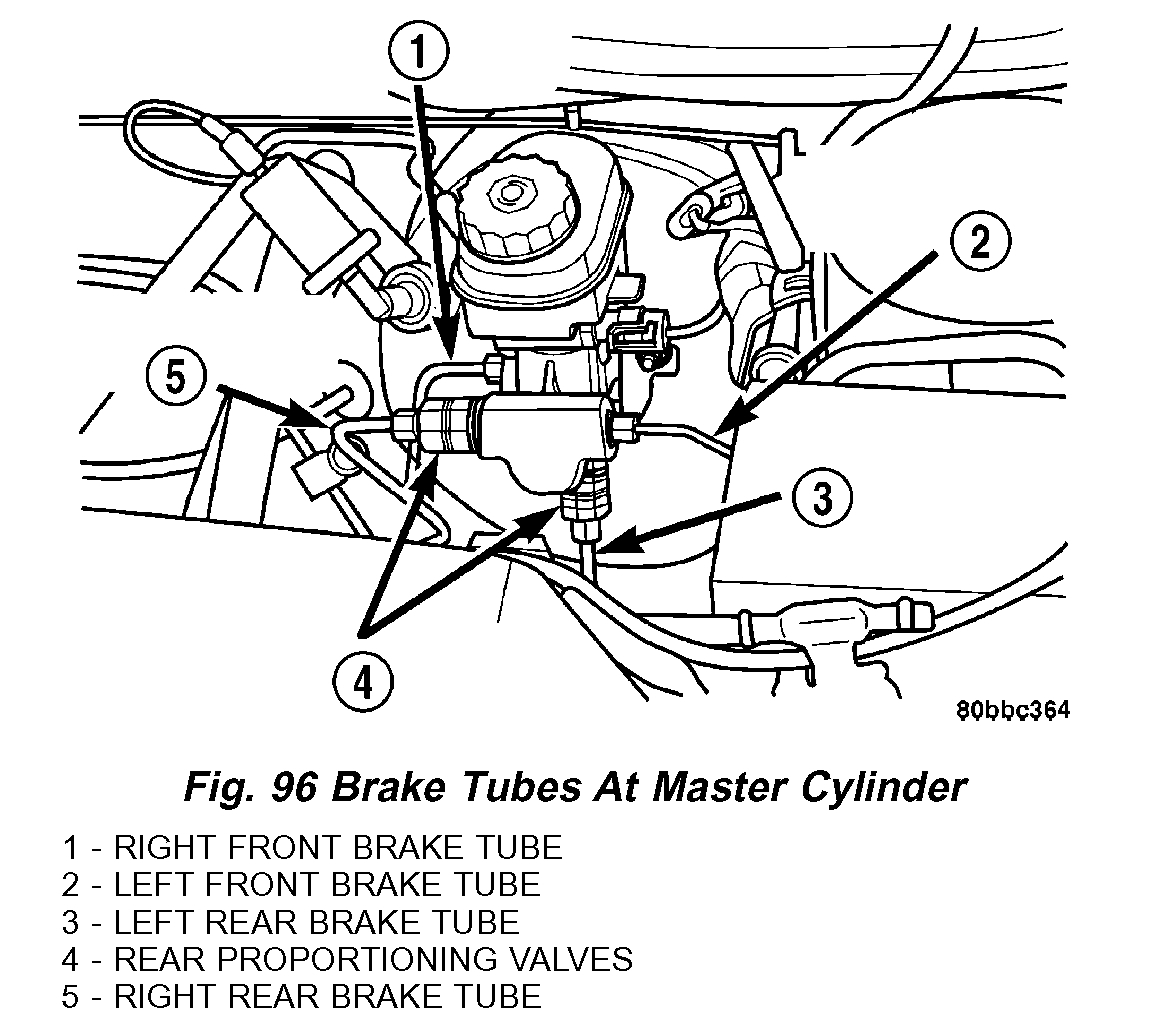
pic 3
7. Connect the four brake tubes to the master cylinder and proportioning valve ports (Fig. 96). Tighten all tube nuts to a torque of 17 Nm (145 inch lbs.).
8. Connect the brake fluid level switch wiring connector.
9. Install the battery and clamp it in place.
10. Connect the positive, then the negative (ground) cable on the battery.
11. Fill the master cylinder to the proper level.
12. Pump the brake pedal several times, then check brake fluid level in master cylinder reservoir. Adjust brake fluid level as necessary.
CAUTION: It will be necessary to bleed the entire base hydraulic system if the brake system has been open to air for an excessive amount of time or air is present in the lines.
13. Check for leaks.
14. Road test the vehicle to ensure proper operation of the brakes.
_______________________
I hope this helps. Let me know if you have other questions.
Take care and God Bless,
Joe
Images (Click to make bigger)
SPONSORED LINKS
Friday, March 5th, 2021 AT 11:08 PM