The following procedure requires the use of a torsional damper puller/installer tool such as GM tool no. J-23523-E (1985-92 models), J-39046 (1993-95 models) or an equivalent, and the GM Seal Installer tool No. J-35468 or equivalent.
Disconnect the negative battery cable for safety.
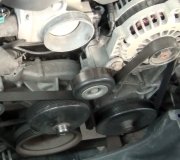
Remove the water pump assembly from the engine.
Remove the crankshaft pulley and damper.
The manufacturer recommends that the oil pan be removed.
Remove the timing cover-to-engine bolts, then carefully remove the cover from the engine. If the oil pan was not removed, be careful not to damage the oil pan-to-front cover seal or sealing surfaces.
Using a plastic scraper, clean the gasket mounting surfaces. Using solvent and a rag, clean the oil and grease from the gasket mounting surfaces.
If the front cover seal is to be replaced, it may be pried front the front cover using a suitable prytool. Take care not to score and damage the seal bore, and take even greater care NOT TO distort the cover metal.
Inspect the timing cover for distortion and damage, if necessary, replace it.
To install:
Beginning in 1992, the manufacturer began suggesting you wait until the front cover is mounted to the engine before you install the replacement crankshaft oil seal. This may be to assure the cover is properly supported. On earlier vehicles, the manufacturer allowed for installation with the cover removed or installed, so waiting would be acceptable for all years of the 4.3L engine.
If desired on early-model engines, install a new seal to the cover using a suitable installation driver, such as J-35468 or equivalent. Be sure to support the back of the seal cover area during installation to prevent the cover from becoming distorted or damaged. Lightly coat the lips of the new seal with clean engine oil.
The oil seal is installed with the open end of the seal lips facing toward the inside of the engine.
Position a new front cover gasket to the engine or cover using a high-tack gasket cement to hold it in position. If the oil pan was not removed, lubricate the front of the oil pan seal with clean engine oil to aid in reassembly.
Install the front cover to the engine. If the oil pan is still in place, take care while engaging the front of the oil pan seal with the bottom of the cover.
Install front cover retaining bolts and tighten to 124 inch lbs. (14 Nm).
Tighten the timing cover bolts alternately and evenly, while gently pressing on the cover.
If removed and not installed earlier, use the seal installation driver to install the new crankshaft seal at this time.
Install the oil pan
Install the crankshaft damper and pulley.
Install the water pump assembly.
Connect the negative battery cable, then properly refill and bleed the engine cooling system.
Run the engine and check for leaks.
SPONSORED LINKS
Monday, January 25th, 2010 AT 9:24 PM