Brakes locking up after replacing the Master cylinder?

Tiny
HONDAJIM
  • MEMBER
  • 2012 HONDA PILOT
  • 3.4L
  • 6 CYL
  • 4WD
  • AUTOMATIC
  • 230,000 MILES
Changed mc drive wheels lock up. Loosen mc bolts from booster and pressure releases. So is the rod too long. Never changed the length just changed mc.
Friday, October 28th, 2022 AT 6:05 PM

10 Replies

Tiny
CARADIODOC
  • MECHANIC
  • 33,752 POSTS
Did you replace the master cylinder in an attempt to solve the locking brakes, or did the locking problem just show up after it was replaced?

Loosening the master cylinder from the booster is a valid test. It proves the rubber flex hoses aren't constricted, typically from rust forming under a bracket crimped around the hose, and it proves the brake fluid is not contaminated with a petroleum product. That causes rubber parts to swell. The rubber lip seals in the master cylinder will grow past the fluid return ports and block them, keeping the brakes applied.

It's usually only imports that have adjustable power booster push rods. If it is extended too long, the brake pedal will be too high and hard, but before you make an adjustment, check the adjustment of the brake light switch. If that got out of adjustment, it can hold the brake pedal down a little. You can usually identify that by pulling up on the brake pedal with your foot when the dragging brakes occur.

Let me know what you find.
Was this
answer
helpful?
Yes
No
Friday, October 28th, 2022 AT 8:14 PM
Tiny
HONDAJIM
  • MEMBER
  • 9 POSTS
When the dragging happens now soon after. The pressure is too much, and the car will not move pedal stuck in the up position.
Was this
answer
helpful?
Yes
No
Saturday, October 29th, 2022 AT 1:39 AM
Tiny
CARADIODOC
  • MECHANIC
  • 33,752 POSTS
Did you replace the master cylinder in an attempt to solve the locking brakes, or did the locking problem just show up after it was replaced? Please answer this as it makes a difference in the diagnostic steps.

Did you check the brake light switch adjustment?

The next step, when the locking occurs, is to loosen the soft metal line nuts for the steel lines at the master cylinder. If brake fluid spurts out and the brakes release, we can rule out everything beyond that point, including constricted hoses. The only possible cause is the fluid return ports in the master cylinder are blocked. If that just started with the new master cylinder, the length of the power booster's push rod is suspect. If this problem occurred with the old master cylinder, contaminated brake fluid is the better suspect.

Any petroleum product that gets introduced into the brake fluid reservoir will cause locking brakes after a few days to as much as a week. This includes engine oil, transmission fluid, power steering fluid, penetrating oil used to loosen rusted brake line fittings, and axle grease, commonly from residue on our hands after repacking wheel bearings. First affected will be the rubber lip seals in the master cylinder. You'll also find the rubber bladder seal under the reservoir cap is blown up and mushy. You usually won't be able to pop it back into the cap. Replacing the master cylinder will appear to solve the problem at first, but it will come back within a few days. The only proper repair is to remove all parts that contain rubber parts that contact the brake fluid, flush and dry the steel lines, then install new rubber parts. That will include the master cylinder again, the calipers, rear calipers or wheel cylinders, all the rubber flex hoses, the combination valve under or near the master cylinder, and the height-sensing proportioning valve, if used, (that's mainly a minivan and pickup truck thing). It also includes the hydraulic controller if the vehicle has anti-lock brakes as it has rubber o-rings and seals. If any contaminated rubber part is not replaced, the contamination will leach out of it and recontaminate the new brake fluid. That will recontaminate all the new rubber parts. This gets to be a very expensive repair and can easily render an older vehicle not worth repair.

Based on your observation that pulling the master cylinder forward a little on its mounting studs let the brakes release, we shouldn't have to go any further, but for the benefit of others researching this topic, if the brakes remain locked when doing this, the pressurized brake fluid is being trapped further down the line. This is where the rubber flex hoses are by far, the most common cause. Two things typically happen to them. First, on designs that include a metal mounting bracket crimped around the middle of the hose, as shown in this photo, rust can build up and squeeze the hose closed. You can force brake fluid through that restriction with normal foot pressure, but then that fluid can't return freely to the reservoir. Being trapped under pressure keeps that brake applied, the heat builds up very quickly. That heat migrates through the caliper, into the brake fluid, causing it to expand and apply that brake even harder. On Chrysler front hoses, that crimped mounting bracket can be opened up with a large flat-blade screwdriver or a large pair of pliers in a few seconds. On most imports, that fitting is a barrel the hose goes through. It has no gap to spread open, so the hose must be replaced.

One potential clue to a constricted hose is it usually causes only one front brake to lock up first. The other one develops that problem months or years later. When you have both front brakes locking at the same time, look for what they have in common. That's the master cylinder and brake pedal.

One thing to be aware of that can confuse this issue is almost all front-wheel-drive vehicles, and minivans in particular, use a "split-diagonal" hydraulic system. That pairs one front brake with the opposite rear brake on one hydraulic circuit. That insures that with a failure in one circuit, you'll always still have one working front brake. This is important because front-wheel-drive cars and minivans have as much as 80 percent of their weight on the front. With the standard front / rear systems used on older rear-wheel-drive vehicles, if the front system developed a leak and only the rear brakes were working, those would lock up too easily, the tires would skid, and you'd just keep on going.

A lot of car models still use drum brakes in the rear. Those are much less susceptible to remaining applied due to trapped brake fluid. With each front brake running off a different section of the master cylinder, it can be possible for only one front brake to lock up due to push rod misadjustment or brake fluid contamination, but since you won't see that in the opposite rear wheel, it can falsely look like just one front brake hose is the culprit. The same first step applies. Loosen the lines at the master cylinder. If the front brake is still locked, crawl underneath and open that caliper's bleeder screw. You could instead, follow the brake line from the master cylinder to the combination valve or ABS controller and loosen the line there, if they're easier to get to. The point is we're looking for the first place you can find that lets the trapped pressurized brake fluid release. If a constricted hose is the cause of the problem, opening the bleeder screw on the caliper is the only thing that will release the trapped fluid.

The second thing that can happen to a rubber flex hose is a tear in the inner liner that forms a flap, then a check valve. This occurs when a do-it-yourselfer slaps on new brake pads and during the service, lets the caliper hang by that hose. Even worse is when the caliper was set off to the side, then accidentally fell down, tugging on the hose. This damage is harder to identify, especially when you don't know the vehicle's history that led up to the locking brake problem. To prevent this, hang the caliper with a piece of wire or a rubber strap to keep its weight off the hose.
Was this
answer
helpful?
Yes
No
Saturday, October 29th, 2022 AT 5:29 PM
Tiny
HONDAJIM
  • MEMBER
  • 9 POSTS
Cars got 230,000 on it and the pedal was soft and close to the floor. So, I put a new master cylinder on that’s the only thing I did bleeder the system air out. Driving fine then the brakes started to drag then locked up. Took pedal switch out, no change. Loosing up bolts on master cylinder pressure released.
Was this
answer
helpful?
Yes
No
Sunday, October 30th, 2022 AT 3:09 AM
Tiny
HONDAJIM
  • MEMBER
  • 9 POSTS
What I can’t get is I never changed the rod length just changed master cylinder unless master cylinder plunger length is different?
Was this
answer
helpful?
Yes
No
Sunday, October 30th, 2022 AT 3:12 AM
Tiny
CARADIODOC
  • MECHANIC
  • 33,752 POSTS
Do you still have the old master cylinder to compare the back end to the new one? Since removing the brake light switch didn't change anything, it sounds like this has to have something to do with the push rod. Check if the diameter of the hole in the booster is the same. If it's for a different vehicle, the push rod might be too fat to go in all the way.

This isn't a common complaint, so look for something unusual.

I'm still a little nervous about potential brake fluid contamination. Normally that will cause the high and hard brake pedal, but if allowed to sit for weeks or months with that contamination, the lip seals in the old master cylinder could deteriorate so badly as to allow internal leakage past them. That would cause your initial low and mushy brake pedal. After that, once the new master cylinder was installed, it would take about a week for its seals to grow past the fluid return ports and cause the locking brakes along with the high and hard brake pedal. The clue is you'll see the rubber seal under the reservoir cap blow up. It will feel slimy and mushy, and you won't be able to poke it back into the cap.
Was this
answer
helpful?
Yes
No
Monday, October 31st, 2022 AT 3:58 PM
Tiny
HONDAJIM
  • MEMBER
  • 9 POSTS
I got the company to send me a new master cylinder, it will be here tomorrow, going to try a new one to see if the other is bad. Before messing with anything else.
Was this
answer
helpful?
Yes
No
Monday, October 31st, 2022 AT 4:07 PM
Tiny
CARADIODOC
  • MECHANIC
  • 33,752 POSTS
I have my fingers crossed.
Was this
answer
helpful?
Yes
No
Tuesday, November 1st, 2022 AT 6:38 PM
Tiny
HONDAJIM
  • MEMBER
  • 9 POSTS
I replaced it works but got low pedal, going to change brakes today.
Was this
answer
helpful?
Yes
No
Wednesday, November 2nd, 2022 AT 2:45 AM
Tiny
CARADIODOC
  • MECHANIC
  • 33,752 POSTS
New pads won't solve a low brake pedal. Well, actually it might, but not in the way you would think.

I assume you bench-bled the new master cylinder, (and the previous one). Once installed on the vehicle, there will still some air in the lines right where they were unbolted from the master cylinder. Most people then bleed at the wheels to get that air out, but that is not necessary. If you do nothing, and the brake pedal is good enough to drive the car, that air is going to work its way out on its own very quickly When you apply the brakes for a period of time, such as when waiting and waiting and waiting for the red light to turn green, you pushed the air down the lines along with the brake fluid. With the car vibrating, that air will start to float back up. When you release the brake pedal, the fluid rushing back up into the master cylinder will wash the air bubbles along with it, into the reservoir.

Most competent do-it-yourselfers run into more trouble when they try to bleed at the wheels, especially if the vehicle has anti-lock brakes. There are chambers inside the hydraulic controller where that air can become trapped and cause a mushy brake pedal. The only way to expel that air is to activate the solenoids to open the valves to those chambers while a caliper bleeder screw is open. A scanner is needed to perform that function. Once connected, it takes just a few seconds to do both halves of the system, then you finish up by bleeding at the wheels if necessary to get the air out the rest of the way. For trucks that have the older rear-wheel-anti-lock, (RWAL) brakes, no special procedures are needed. The rear circuit is open to fluid flow all the time, so air can pass freely to the rear wheel cylinders.

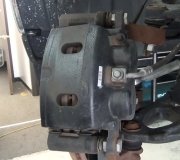
Let me finish my comment about new brake pads. Back in the '80s it was standard practice to rebuild calipers at every brake job. In later years those calipers don't cause much trouble, so we just slap a new set of pads on. To do that, you have to push the pistons back into the caliper housings to make room for the new, thicker pads. I do that with a flat-blade screwdriver before unbolting the caliper. By pushing the piston in, you push all the brake fluid behind it back up to the reservoir, including any air bubbles that got caught in the lines. You don't actually have to install new pads to push that air out. Just pry the two front pistons in, then run them back out with the brake pedal.

Another note to be aware of. This doesn't apply to your new master cylinder, but when running pistons out of the calipers to adjust them, never push the brake pedal more than halfway to the floor. Over time crud and corrosion build up in the lower halves of the bores in the master cylinder where the pistons don't normally travel. By pushing the brake pedal all the way to the floor, as even some service manuals tell you to do, you run the rubber lip seals over that crud. That can rip them, resulting in a low brake pedal. That commonly takes two or three days to show up. Instead, pretend there's a block of wood under the brake pedal and never push it over halfway to the floor. New or rebuilt master cylinders less than about a year old don't have that buildup yet.

Here's a hint for the next time you need to replace a master cylinder to prevent the need to bleed at the wheels. Loosen the two line nuts at the master cylinder just a little, THEN unbolt it from the power booster. Pay very close attention to the steel lines as you turn the nuts to be sure they're not twisting. If the nuts don't spin freely, the lines will twist and snap off. Then you have another repair to do that involves new fittings and making double flares. Double flares are hard enough for a professional. They're harder to do in the confines of the engine compartment. Pull the master cylinder forward off the mounting bolts, then use it as a handle to bend the two lines upward just enough so those first two inches are not parallel to the ground. Then you can remove the lines. This will prevent the brake fluid from running out of them. Be careful to not drip brake fluid on the car's paint.

After bench bleeding the new master cylinder, leave the reservoir at least half full of fluid. When you install it, you will have to tilt it to line up the ports with the line nuts. Remove one plastic bench-bleeding fitting, then install the steel line nut hand tight. While you do this, fluid will be dripping out, keeping the line and port full. If the nut doesn't thread in easily by hand, it's cross-threaded. Start over and try again until the nut goes in by hand, typically four or five revolutions. If you damage the threads in the aluminum ports, there will be no warranty and you will have to buy another master cylinder.

Once the first line is connected hand tight, do the same thing with the second line. When both fittings are hand tight, bend the master cylinder and lines back down to their normal position, and bolt it to the booster. You'll need a helper for the next step. There will be a little air in the ports and tops of the lines. Tighten the front nut, then loosen the REAR nut about a quarter turn, then have your helper push the brake pedal down very slowly. It should take him about 15 seconds to push it halfway to the floor. Any faster, and the air might still get forced down the lines. While the pedal is moving down, you will see air bubbles coming out around the nut's threads. When the bubbles stop appearing, tighten the nut. Tell your helper to not allow the pedal to move back up until you tell him the nut is tight. Raising the pedal too soon will allow air to be drawn back in through the nut's threads.

When the nut is tight, tell your helper to allow the pedal to come back up QUICKLY. The brake fluid rushing back to the reservoir will wash any air bubbles back too. Do this procedure a second or third time until you don't see any air bubbles, then do the same thing to the front brake line.

As long as the brake pedal is pushed down very slowly, no air will be pushed down the steel lines. The fluid will go down, and the air bubbles will float back up. When the pedal is released quickly, any air bubbles that stick to the lines will be drawn back up to the reservoir.

Fill the reservoir with clean brake fluid from a sealed container to the same level as was found in the old master cylinder. If the level was fairly low, that's what happens when the front brake pads are worn close to the end of their life. Installing new pads results in the fluid returning to the reservoir and the level will go back up to "full". If you fill it before that, the fluid will spill over and make a mess when new pads are installed. That's why we never top off brake fluid during other services such as oil changes. If we see the brake fluid is low, we know to recommend a brake system inspection. The pads are either worn or there's a leak in the system that must be addressed.

Too bad you had to do the job twice, but I'm happy this appears to be the solution.
Was this
answer
helpful?
Yes
No
Wednesday, November 2nd, 2022 AT 6:55 PM

Please login or register to post a reply.

Sponsored links