Good morning,
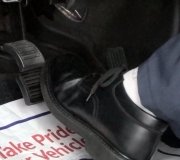
You may have a bad master cylinder as it is not building any pressure.
https://www.2carpros.com/articles/how-to-replace-a-brake-master-cylinder
It sounds like you need to replace the master cylinder and bleed the system again.
https://www.2carpros.com/articles/how-to-bleed-or-flush-a-car-brake-system
The brake bleeding procedure will require a scan tool to bleed the ABS system. I attached the procedure below.
Roy
CAUTION: Vacuum in the power brake booster must be pumped down (removed) before removing master cylinder from power brake booster. This is necessary to prevent the power brake booster from sucking in any contamination as the master cylinder is removed. This can be done simply by pumping the brake pedal, with the vehicle's engine not running, until a firm feeling brake pedal is achieved.
1. With engine not running, pump brake pedal until a firm pedal is achieved (4-5 strokes).
2. Disconnect negative battery terminal.
3. Disconnect positive battery terminal.
4. Remove battery shield.
5. Remove nut and clamp securing battery to tray, remove battery.
6. Thoroughly clean all surfaces of the brake fluid reservoir and master cylinder. Use only solvent such as Mopar Brake Parts Cleaner or equivalent.
Fig. 48 MASTER CYLINDER AND BOOSTER
imageOpen In New TabZoom/Print
7. Remove wiring harness connector from brake fluid level switch in master cylinder brake fluid reservoir (Fig. 48).
8. Disconnect primary and secondary brake tubes from master cylinder housing (Fig. 48). Install sealing plugs in the now open brake tube outlet ports.
CAUTION: Before removing the master cylinder from the power brake vacuum booster, the master cylinder and vacuum booster must be thoroughly cleaned. This must be done to prevent dirt particles from failing into the power brake vacuum booster.
9. Clean area where master cylinder assembly attaches to power brake booster. Use only a solvent such as Mopar Brake Parts Cleaner or equivalent.
Fig. 49 MASTER CYLINDER MOUNTING
imageOpen In New TabZoom/Print
10. Remove two nuts attaching master cylinder to power brake booster (Fig. 49).
11. Slide master cylinder straight out of power brake booster.
CAUTION: A seal on the rear of the master cylinder is used to create the seal for holding vacuum in the power brake vacuum booster. The vacuum seal on the master cylinder MUST be replaced whenever the master cylinder is removed from the power brake vacuum booster.
12. Remove vacuum seal located on the mounting flange of the master cylinder. The vacuum seal is removed from master cylinder by carefully pulling it off the rear of master cylinder. Do not attempt to pry the seal off the master cylinder by inserting a sharp tool between seal and master cylinder casting.
INSTALLATION
CAUTION: Different types of master cylinders are used on this vehicle depending on brake options. If a new master cylinder is being installed, be sure it is the correct master cylinder for the type of brake system the vehicle is equipped with.
CAUTION: When replacing the master cylinder on a vehicle, a NEW vacuum seal MUST be installed on the master cylinder.
1. Install a NEW vacuum seal on master cylinder making sure seal fits squarely in groove of master cylinder casting.
2. Position master cylinder on studs of power brake booster, aligning booster push rod with master cylinder piston.
3. Install the two master cylinder mounting nuts (Fig. 49). Tighten both mounting nuts to a torque of 25 Nm (225 inch lbs.).
CAUTION: When tightening the primary and secondary brake tube nuts at master cylinder, be sure brake tubes do not contact any other components within the vehicle and that there is slack in the flexible sections of the tubes. This is required due to the movement between the ABS ICU and the master cylinder while the vehicle is in motion.
4. Connect primary and secondary brake tubes to master cylinder primary and secondary ports (Fig. 48). Brake tubes must be held securely when tightened to control orientation of flex section. Tighten tube nuts to a torque of 17 Nm (145 inch lbs.).
5. Install wiring harness connector to brake fluid level switch mounted in brake fluid reservoir (Fig. 48).
6. Install battery, clamp and nut.
7. Install battery shield.
8. Connect positive battery terminal.
9. Connect negative battery terminal.
10. Fill master cylinder with clean, fresh Mopar Brake Fluid or equivalent.
11. Road test vehicle to ensure proper operation of brakes.
Images (Click to make bigger)
SPONSORED LINKS
Sunday, February 21st, 2021 AT 11:07 AM


