Bleeding the ABS

Tiny
RASCALEGF
  • MEMBER
  • 2001 FORD F-150
  • 5.4L
  • V8
  • 4WD
  • AUTOMATIC
  • 256,500 MILES
I recently purchased this vehicle as a work truck. When I bought it I had to pump the brakes one and half times for them to work properly. The master cylinder (MC) level was good. I assumed I just needed to bleed the brakes. After looking at the (four) disc brake calipers I determined that I should just go ahead and replace them all and put new pads in. So I did that and bled them (properly). I still needed to pump them.

A friend suggested that master cylinder was bad and since they are inexpensive I decided to replace it. I bench bled it first and then installed it. I then bled the brakes again, this time I used my wife to help (my big mistake). After listening to her complain about her leg getting tired by the time I got to the third wheel I did what any panicked husband might do and I stopped paying attention to what I was doing and I ran the master cylinder dry.

So I filled the master cylinder back up and bled it on the vehicle by loosening the master cylinder outlet lines and then bled my brakes again. Now I have to pump the brakes a few times to get pressure. Then as soon as I let off the pedal and let it return fully to the up position and wait three seconds, the brake goes all the way to the floor again and I have to pump them a few more times to build pressure.

I do notice that when the brake pedal is being pushed in, more times than not I will see fluid splash around in the master cylinder. On occasion I will see fluid splash in the master cylinder when the brake pedal is released as well.

My ABS light is on and I believe that it was on when I purchased it, but I am not sure.

From what I can figure out is that once I screwed up and bled the master cylinder dry, I introduced air into my ABS valves. That even though I bled the brakes again, half of my ABS valves remain closed and not accessible to bleeding without an NSG Scan tool.

My questions are:

01. Does this sound correct?
02. Is there a way for me to do this without the expensive scan tool?
03. If not, then is that scan tool something that most mechanic shops would possess?
04. Do you have any suggestions/advice or recommendations for me (other than advising me to not let my wife help me again or that I need to man up and not let my wife panic me)?
Thursday, October 20th, 2016 AT 5:39 PM

4 Replies

Tiny
CARADIODOC
  • MECHANIC
  • 33,750 POSTS
You have a pretty good handle on this, but let me add some tidbits. First of all, you mentioned four brake calipers, so can I assume you have rear disc brakes? Your original description of the symptoms fits exactly what happens when rear shoes are badly out of adjustment. A common cause of that on Ford trucks is a rusted / broken adjuster cable.

Second, understand that when you run the reservoir empty to the point there is air in the master cylinder, you are not going to pump any more air into the lines. Air compresses so it wont push the much heavier brake fluid. The only way to get air into the ABS hydraulic controller is if you let the fluid run out from gravity. If you catch it before air gets to the controller, all you have to do is add to the reservoir, then pump the brake pedal a few times. Push it very slowly so it takes about fifteen seconds to go half way to the floor. Wait a few seconds, then let the pedal pop back quickly. Pushing it slowly pushes brake fluid down into the lines while allowing the air to float back up. Releasing it quickly washes any air bubbles back into the reservoir as the fluid rushes back. Also be aware that most trucks around this time had rear-wheel anti-lock brakes, (RWAL). That system has just two valves, and they do not need to be opened with a scanner. That small valve assembly sits on the frame rail under the driver's seat. If you have four-wheel ABS, then yes, most systems require a scanner to command the valves to open so the air can be expelled from some of the chambers. All independent repair shops that do brake work will have at least one scanner.

There are a couple of problems with your bleeding method. It is critical with any vehicle over about a year old that you never push the brake pedal over about half way to the floor, including during bleeding with a helper. Crud and corrosion build up in the lower halves of the bores where the pistons do not normally travel. Pushing the pedal over half way runs the rubber lip seals over that crud and can rip them. That will cause a slowly-sinking brake pedal, and that often does not how up until two or three days later.

It has been well over twenty five years since I used a helper to bleed a brake system. I drive old rusty stuff and leave my new cars and trucks sit, so I am always replacing steel lines, and even with those, I rarely bleed at the wheels. The only method I use is gravity-bleeding. Loosen the cap on the reservoir so vacuum does not build up and impede fluid flow. Open the system where the air is, or open the bleeder screws, then wait for the fluid to start flowing. If no fluid flows anywhere after ten minutes, "irritate" the brake pedal a little by hand, then wait another few minutes. If you are rebuilding all four wheels, when fluid starts dribbling from one of them, close that bleeder screw, then wait for the next one to start flowing. When all four bleeders are closed, stroke the brake pedal a few times. If you retracted the pistons into the calipers to make room for new pads, you will need to run them back out, and this is another place where you can accidentally push the pedal over half way and damage the master cylinder. By stroking the pedal, even just a couple of inches, any remaining air bubbles will wash into the calipers and wheel cylinders. Open each bleeder screw once more and watch those few tiny bubbles spurt out.

When I replace a steel line, I leave the cap tight on the reservoir. That restricts fluid flow for enough time for me to get the new line on. If you find fluid is flowing real fast and is going to run the reservoir empty, place a stick from the seat to the brake pedal to hold the pedal down about an inch. That will place the lip seals past the fluid return ports, then gravity wont be strong enough to pull the brake fluid down. In my experience, joints and connections in the hydraulic system have always been on the bottom or on the top of a section of line, never mid way where air would float up away from that joint. Leave that joint loose and wait for the fluid to show up. Tighten the joint, and you are done. There have been a few instances where I have had to tap the brake pedal a little to get the fluid to understand that I did not want to wait all day, but keep in mind that every time you do that, it is fairly certain air will get sucked back in at the joint when you release the pedal. Tapping the pedal works best when the air is a long way from the joint, (as in a foot or two). Sometimes air bubbles will stick to the inside of the line and fluid will run past them. A little tap on the pedal can be enough to convince those air bubbles to move along.

By the way, when you press the brake pedal, the lip seals push brake fluid through the return ports and into the reservoir first, then once those seals have moved past those ports, the fluid ahead of them is trapped, and gets pushed to the wheels. Those spurts of fluid you are seeing coming out of the reservoir are that which got pushed through the return ports, and is normal. That is actually a clue, when you have a reservoir design that lends itself to this, that the lip seals are okay.
Was this
answer
helpful?
Yes
No
+1
Wednesday, March 10th, 2021 AT 12:51 PM
Tiny
RENEE L
  • ADMIN
  • 1,257 POSTS
Great information CARADIODOC!
Was this
answer
helpful?
Yes
No
Wednesday, March 10th, 2021 AT 12:51 PM
Tiny
RASCALEGF
  • MEMBER
  • 2 POSTS
Thank you for all the info CARADIODOC. I truly appreciate all the time you took to help me. I will go out tonight or tomorrow and gravity bleed the brakes (ensuring I monitor the MC fluid level). If I may ask, what do you think is the issue? Before I put my hands on the vehicle I needed 1 and a half pumps to pressure the brakes. After I installed the 4 new disc brake calipers and then the MC, I now need to pump the brakes a few times. I do not have any leaks that I can see. To me it sounds like I simply have a lot of air in the system but I always connected a 1/4" tube to the bleeder, ensured the hose arched upwards and the other end of the hose was in a bottle with fluid in it. So when the pedal was released then it would not take air in. I have used over 2 quarts of brake fluid in the bleed process, so I know I was bleeding them plenty.

Though I am particularly good with attention to detail and was careful to install my calipers correctly. I will verify that I didn't have a cranial meltdown and install a left on a right and a right on a left and have my bleeders at the bottom instead of the top. Lord knows I have done dumber things before (and yes! Asking my wife to help me bleed the brakes does count as one of those dumber things ;)
Was this
answer
helpful?
Yes
No
Wednesday, March 10th, 2021 AT 12:51 PM
Tiny
CARADIODOC
  • MECHANIC
  • 33,750 POSTS
As I mentioned, having to pump the brake pedal multiple times is common when rear drum brakes are out of adjustment. The first pump pushes the shoes out part way to the drums, then they retract relatively slowly compared to how fast the brake pedal comes back. The master cylinder takes a new bite of fluid, then you push that additional fluid out and it makes the shoes travel the rest of the way to the drums. Once they make contact, pressure builds up quickly as you push the pedal further. The clue is the pedal will remain high and hard as long as you hold pressure on it, and once you release the pedal for at least five seconds, the shoes will fully retract which pushes all that fluid back into the reservoir, then the next time you push the pedal it is low again.

Since you have rear calipers, we have to look for the next most common cause of low pedal, and that is air in the system. You will not be the first person to switch left and right calipers, but the problem started before you replaced them, so that can't be it.

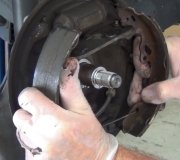
By the way, we used to rebuild calipers and wheel cylinders with every brake job. Today most schools don't teach that valuable skill, and we just replace them with professionally-rebuilt units, Cost has come down a lot too, so it makes economic sense to just buy rebuilt calipers. What do you do if the auto parts store only has a left caliper in stock, and you need a right one for a customer who is from out-of-town and on vacation, and it's late Friday afternoon? In the case of many Ford and Chrysler products, to save money, the caliper castings are all the same, and only the location of the bleeder screw is different. It is not unheard of to put a left caliper on the right side, but to do that, you simply need to crack lose the hose connection and hold the caliper with that as the high spot to bleed the air through that. Once the air is bled out, tighten the connection and install the caliper on its mount.

Another thing to consider is the effect of a lose wheel bearing. This doesn't apply to front-wheel-drive cars because for a bearing to be this bad, there would have been much more serious symptoms before it got that bad. Rear-wheel-drive cars with tapered front wheel bearings, and four-wheel-drive trucks with tapered bearings can develop a low brake pedal if there is too much play in them. While driving over bumps and turning corners, the brake rotor will wobble and push the piston back into the caliper. You need to push the brake pedal once to run the piston out until the pads contact the rotor, then you usually need to release the pedal, then take another stab at it to apply pressure to the pads.

Now that I've described that, consider that a warped brake rotor, front or rear, will do the same thing. Sometimes you can get a clue by observing how long it takes to act up again. With lose wheel bearings you typically have to drive a considerable distance, as in a half mile or more, before the piston gets pushed into the caliper housing. With a warped rotor, on a Chrysler product you only have to drive a few yards, basically one wheel revolution, but it has to be at a substantial speed. The mounting system on Chryslers allows the calipers to slide left and right fairly easily so at low speeds one will just move with the warp in the rotor instead of pushing the piston into the caliper. At faster speeds the momentum needed to get the caliper sliding is too high and it's easier for the piston to get pushed in.

On Ford trucks the calipers used to be mounted very tightly and were only expected to slide a very tiny amount under hard braking pressure to adjust for outer pad wear. That's why you would always find the inner pads worn down to metal while the outer pads were in good shape yet. A warped rotor is not going to force a caliper to slide, so the piston will get pushed in instead. One wheel revolution is all that's needed to push the piston in and cause a low brake pedal the next time it's pushed.

The clinker here is you will not always feel a warped brake rotor. "Thickness variation" will be felt as the brake pedal pulsing up and down once per wheel revolution. That will cause the piston to retract too, but it's the pulsing pedal that is the common complaint. A rotor can also have "lateral run out". The thickness is the same all the way around, but both plates are moving left and right as the rotor rotates. That almost always will not be felt in the brake pedal unless it's very bad, but it can cause a shimmy sensation in the seat and armrest.

Thickness variation is found by measuring the rotor in four to eight places around its friction surface, with a micrometer. There is surely some spec. But if there is any variation, a light cut on the brake lathe will take care of it. Lateral run out is found with a dial indicator. This happens most commonly to new rotors, and again, a light cut on the lathe will solve it. It is also real common with new Chinese rotors. There's nothing wrong with their quality, but when we make parts from cast iron, we set them aside to "age" for 90 days before they get their final machining. The Chinese cast 'em, machine 'em, pack 'em, and ship 'em, then they age on your vehicle. Minor warping is common. The proper fix is to take a light cut, typically after about three months. Cranky customers who insist on new rotors under warranty can expect to have the same problem in another three months.

Now that I've described that, it will be easier to understand where a lot of do-it-yourselfers run into trouble. This does not apply to rotors that sit on tapered bearings, like all cars had in the '60s and '70s. I'm pretty sure it also doesn't apply to your truck, but please allow me to explain the problem so you watch out for it. It applies to rotors that have a large center hole and slide onto a hub that is part of the wheel bearing. I had to use a photo from Rock Auto for a '92 Chevy Cavalier to make my wondrous point. If you look at my nifty red arrow, it is pointing to one of three access holes used to get at the bearing mounting bolts. Water can splash up there and cause three corresponding circles of rust to form on the backside of the rotor. If that rotor is removed, rotated one-fifth of a revolution, then reinstalled, those rust spots will be trapped between the rotor and hub surfaces, and that will cause lateral run out. The rotor will wobble and can push the piston into the caliper housing. There's your low brake pedal again the next time you apply the brakes. Worse yet, when a rotor is machined, those rust spots must be scraped off, AND the ring of rust corresponding to my pretty blue arrow must be scraped off. The mounting cones for the lathe sit against those areas, and if the rust isn't cleaned off, those high spots will make the rotor sit not squarely on the lathe, and a lateral warp will be machined into it. Many do-it-yourselfers who replace their own wheel bearing don't realize those rust spots are there, and they end up with a pulsing brake pedal. The rotor not sitting squarely on the hub causes the wheel to wobble too, so you'll have a shimmy in the steering wheel.

Now that I've pointed that out, be aware also that rust chunks and scale can break off while you're reinstalling a rotor and get stuck between the hub and rotor and cause a pulsing pedal or a low pedal like you have. Stuff can also get stuck between the rotor and wheel. The brakes won't be affected, but the wheel and tire will wobble. That is more common with heavily-corroded cast wheels.

As a general rule, if you can pump the brake pedal up slowly so it's high and hard, and it doesn't slowly sink away, air in the hydraulic system is not a suspect. Any air expands quickly when you release the pedal, so it can easily compress again the next time you push the pedal. When air is the culprit, the pedal will always be low except if it's trapped somewhere where fluid moves in and out very slowly, as in ABS controller chambers.

One thing I have never tried that you might consider is driving the truck and forcing an ABS stop to actuate the valves in the controller. That might release some trapped air, but it will still need time to work it's way up to the reservoir. Another trick that might work after that is to use a large flat blade screwdriver to retract both front pistons. That will push a lot of brake fluid up to the reservoir, and hopefully, any air that got released from the chambers. Remember though that you'll need to work the brake pedal multiple times to run the pistons back out, and don't push it over half way to the floor when you do that. I always retract pistons that way before I remove a caliper to install new pads. It works real easily on Chrysler and GM products. You'll have to work really hard on Ford trucks. You should never need a c-clamp to retract a piston. If you do, there's crud built up in it. Replace the caliper or rebuild it for that.
Was this
answer
helpful?
Yes
No
Wednesday, March 10th, 2021 AT 12:51 PM

Please login or register to post a reply.

Sponsored links