Hi,
Replacing brakes isn't too hard of a job. Here are the directions specific to this vehicle. Note that brake pads will normally last about 25,000 miles, but on this vehicle, it will be based on usage.
The attached pics will correlate with the directions.
_______________________________
2008 Ford Truck F 350 2WD Super Duty V8-5.4L
Front
Vehicle Brakes and Traction Control Disc Brake System Brake Pad Service and Repair Removal and Replacement Front
FRONT
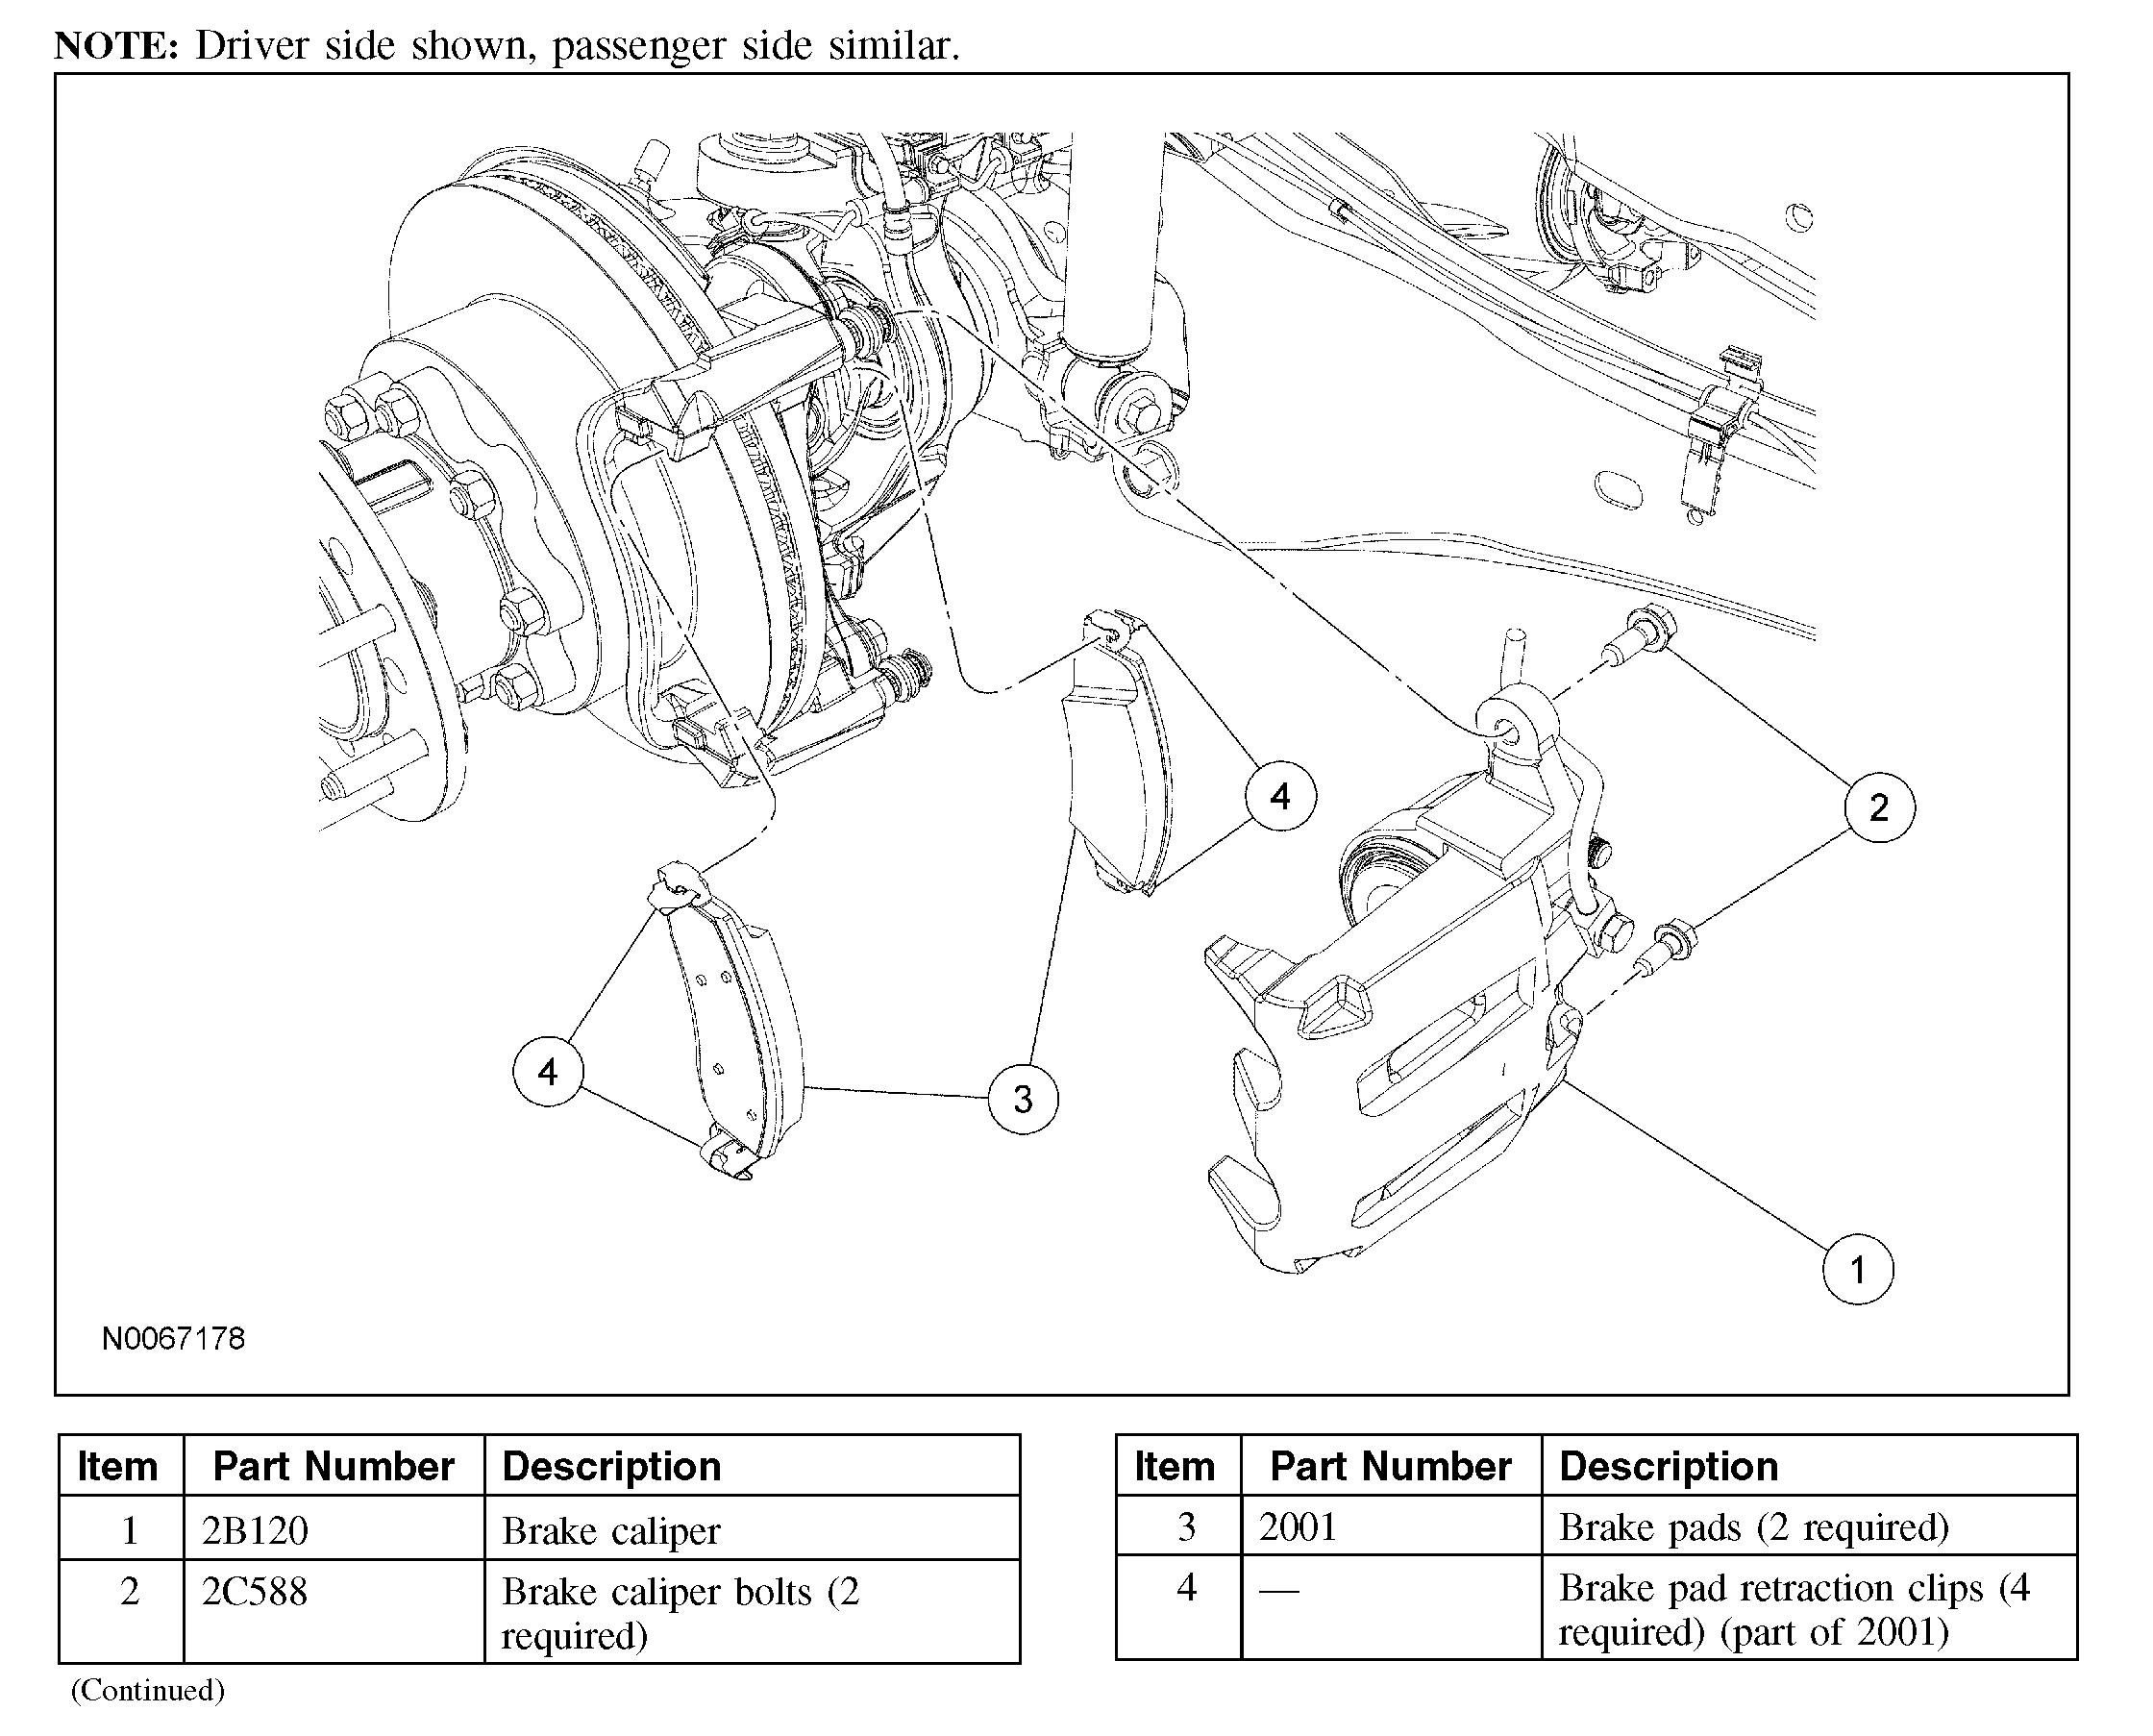
Brake Pads
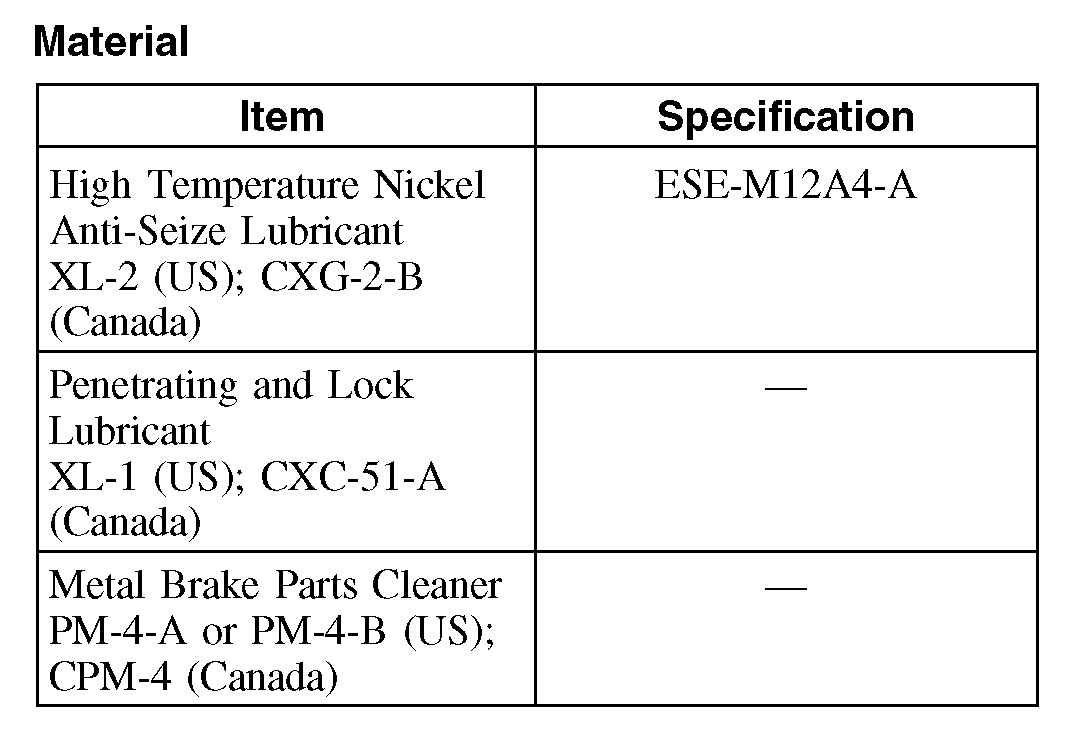
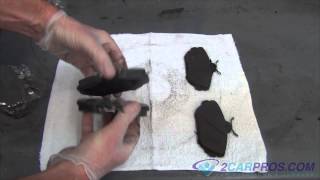
Material
pic 1
pic 2
Removal
WARNING: Do not use any fluid other than clean brake fluid meeting manufacturer's specification. Additionally, do not use brake fluid that has been previously drained. Following these instructions will help prevent system contamination, brake component damage and the risk of serious personal injury.
WARNING: Carefully read cautionary information on product label. For EMERGENCY MEDICAL INFORMATION seek medical advice. In the USA or Canada on Ford/Motorcraft products call: 1-800-959-3673. For additional information, consult the product Material Safety Data Sheet (MSDS) if available. Failure to follow these instructions may result in serious personal injury.
CAUTION: Brake fluid is harmful to painted and plastic surfaces. If brake fluid is spilled onto a painted or plastic surface, immediately wash it with water.
1. Check the brake fluid level in the brake master cylinder reservoir.
If required, remove the fluid until the brake master cylinder reservoir is half full.
2. Remove the wheel and tire.
3. CAUTION: Do not pry in the caliper sight hole to retract the pistons, as this can damage the pistons and boots.
CAUTION: Do not allow the brake caliper to hang from the brake hose or damage to the hose can occur.
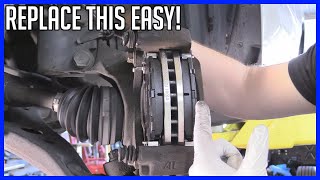
Remove the 2 brake caliper bolts and position the caliper aside.
Support the caliper using mechanic's wire.
4. WARNING: Always install new brake shoes or pads at both ends of an axle to reduce the possibility of brakes pulling vehicle to one side. Failure to follow this instruction may result in uneven braking and serious personal injury.
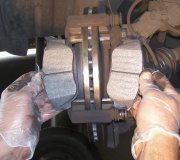
Remove the 2 brake pads and 4 retraction clips.
Discard the 4 retraction clips.
5. Measure the brake disc thickness, machine if necessary.
Install a new brake disc if it is not within specification.
Installation
1. CAUTION: Do not allow grease, oil, brake fluid or other contaminants to contact the pad lining material. Do not install contaminated pads or damage to components may occur.
NOTE: If installing new brake pads, install all new hardware as supplied with the brake pad kit.
Install the 4 new retracting clips and the 2 brake pads.
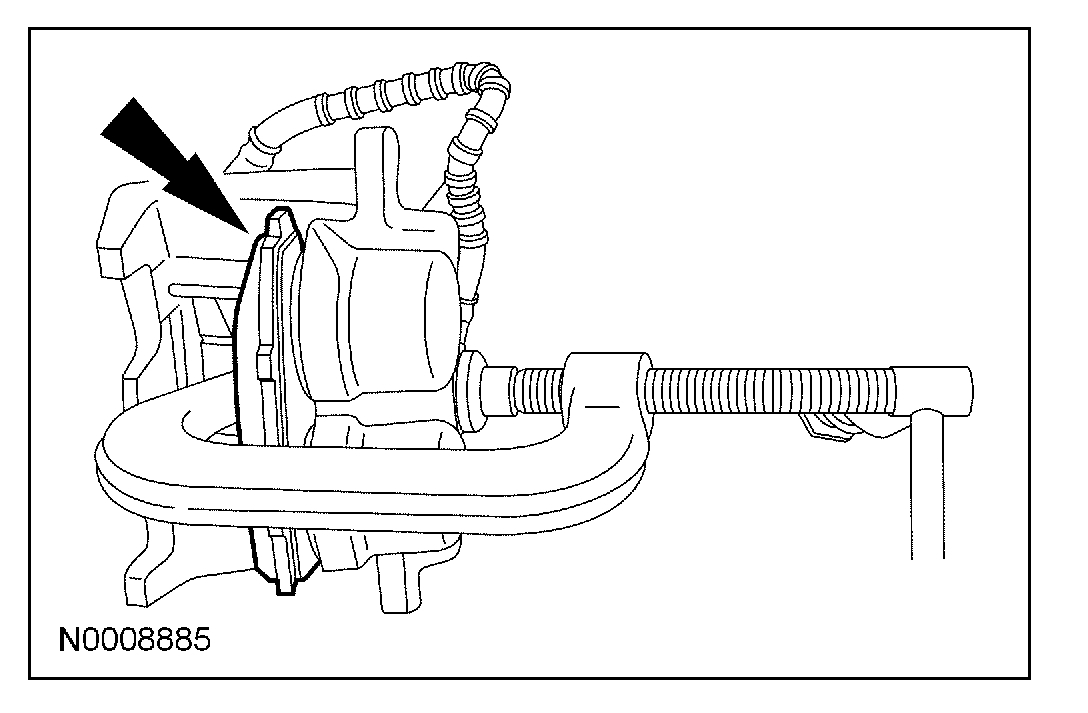
2. CAUTION: Protect the piston and boots when pushing the caliper piston into the caliper piston bores or damage to components may occur.
If installing new brake pads, using a suitable tool and a worn brake pad, compress the disc brake caliper pistons into the caliper.
Pic 3
3. CAUTION: Tighten the bottom caliper bolt before tightening the top caliper bolt or damage to guide pins may occur.
CAUTION: Make sure the caliper pin boots are correctly seated to prevent damage to the guide pins.
Position the brake caliper and install the 2 bolts.
On F-250, F-350, tighten to 76 Nm (56 lb-ft).
On F-450, F-550, tighten to 63 Nm (46 lb-ft).
4. Install the wheel and tire.
5. Fill the brake master cylinder reservoir with clean brake fluid.
6. Test the brakes for normal operation.
____________________________________
Brake Rotor Replacement
2008 Ford Truck F 350 2WD Super Duty V8-5.4L
Disc Removal and Installation, Front
Vehicle Brakes and Traction Control Disc Brake System Brake Rotor/Disc Service and Repair Removal and Replacement Disc Removal and Installation, Front
DISC REMOVAL AND INSTALLATION, FRONT
Brake Disc
Material
Pic 4
pic 5
Removal
NOTE: The brake disc and the wheel bearing hub are the same part on rear wheel drive (RWD) F-250-F-350 vehicles.
All vehicles
1. Remove the wheel and tire.
CAUTION: Do not allow the brake caliper to hang from the brake hose or damage to the hose can occur.
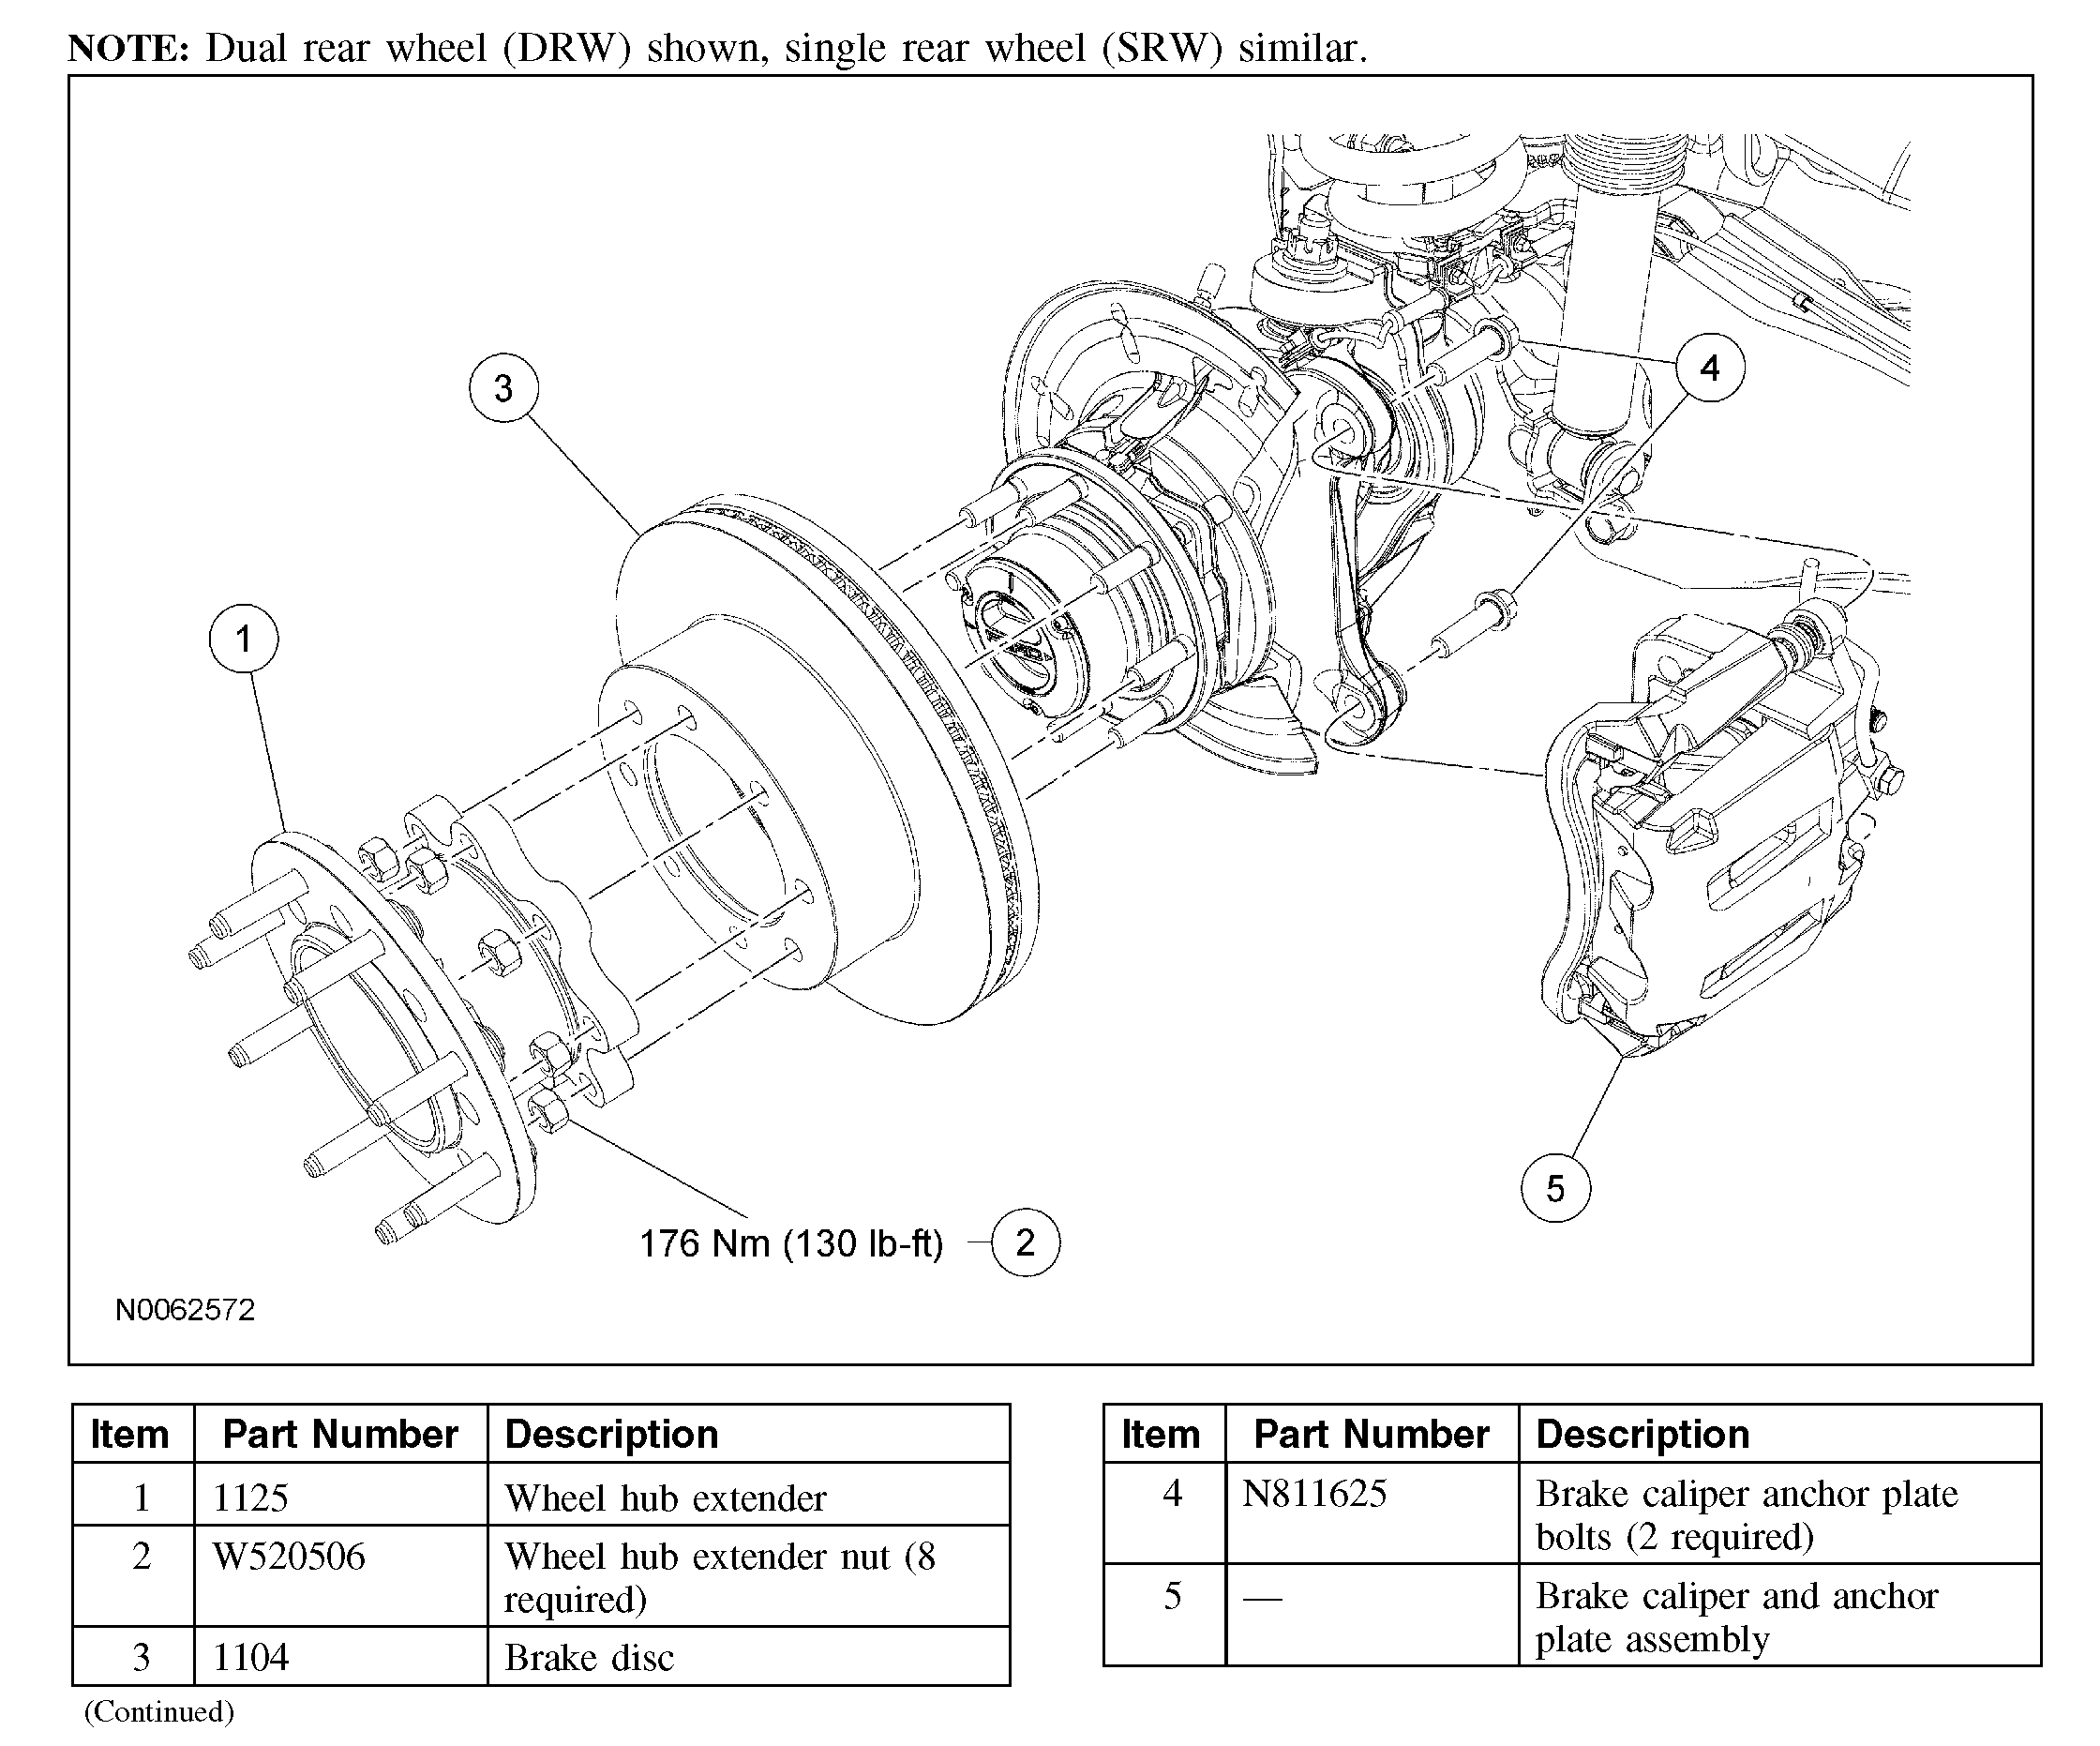
2. Remove and discard the 2 caliper anchor plate bolts and position the brake caliper and anchor plate assembly aside.
Support the caliper and anchor plate using mechanic's wire.
Single rear wheel (SRW) vehicles
3. NOTE: If the brake disc cannot be removed easily, apply penetrating and lock lubricant on the brake disc-to-wheel hub mating surfaces.
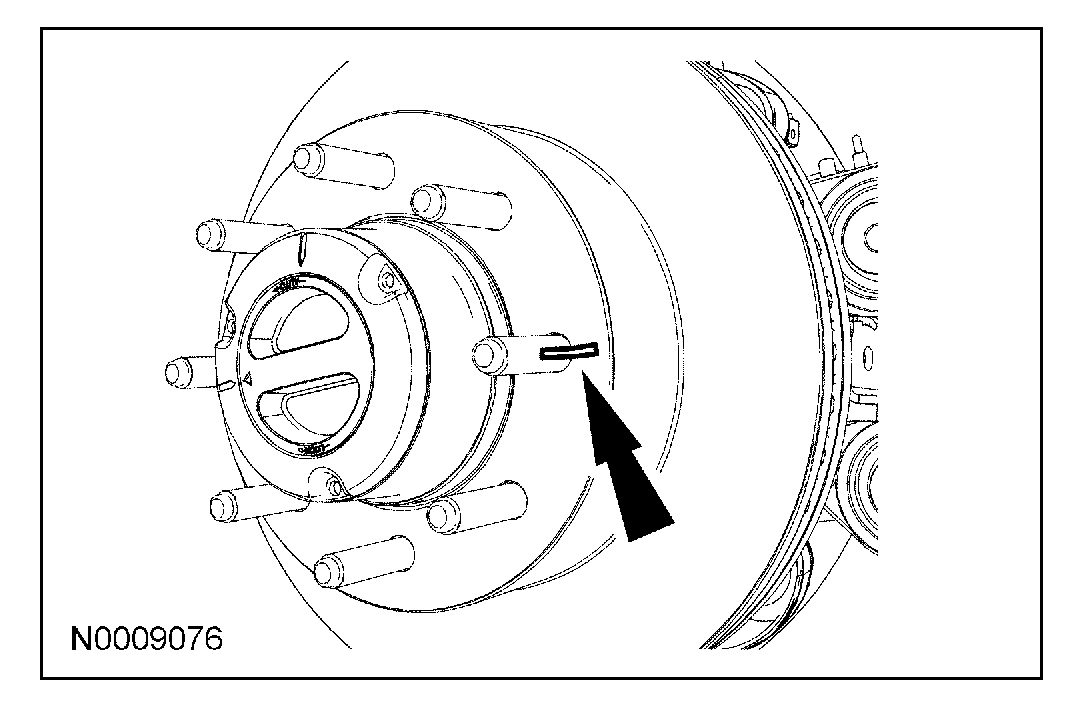
Mark a wheel stud and the corresponding brake disc stud hole.
This helps to make sure the lowest front brake disc runout is maintained during reassembly.
Pic 6
Dual rear wheel (DRW) vehicles
4. Remove the hub extender nuts and the hub extender.
5. NOTE: If the brake disc cannot be removed easily, apply penetrating and lock lubricant on the brake disc-to-wheel hub mating surface.
Mark the hub extender stud and the corresponding brake disc extender stud hole.
This helps to make sure the lowest front brake disc runout is maintained during reassembly.
Pic 7
All vehicles
6. Remove the front brake disc.
Installation
All vehicles
1. Clean any rust or foreign material from the brake disc and wheel hub.
Use brake parts cleaner to clean the front brake disc and hub surfaces.
2. Apply a thin coat of anti-seize lubricant to the hub flange.
3. Align the marks on the disc and the hub and install the brake disc.
DRW vehicles
4. Position the hub extender and install the nuts.
Tighten to 176 Nm (130 lb-ft).
All vehicles
5. CAUTION: Protect the piston and boots when pushing the caliper piston into the caliper piston bores or damage to components may occur.
If installing a new brake disc, using a suitable tool and a worn brake pad, compress the disc brake caliper pistons into the caliper.
6. Position the brake disc caliper anchor plate and install 2 new bolts.
On F-250, F-350, tighten to 225 Nm (166 lb-ft).
On F-450, F-550, tighten to 400 Nm (295 lb-ft).
7. Install wheel and tire.
___________________________________
I hope this helps. Let me know if you have other questions.
Take care and God Bless,
Joe
Images (Click to make bigger)
SPONSORED LINKS
Wednesday, February 10th, 2021 AT 7:14 PM