Good afternoon,
I attached the procedure below for you to view.
https://www.2carpros.com/articles/replace-blend-door-motor
Roy
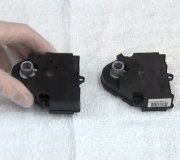
Air Temperature Actuator Replacement
Removal Procedure
imageOpen In New TabZoom/Print
Caution: Refer to Battery Disconnect Caution (See: Battery > Technician Safety Information > Battery Disconnect Caution).
1. Disconnect the negative battery cable.
2. Remove the instrument panel assembly. Refer to Instrument Panel Assembly Replacement (Notchback) (See: Dashboard / Instrument Panel > Removal and Replacement)Instrument Panel Assembly Replacement (Hatchback) (See: Dashboard / Instrument Panel > Removal and Replacement).
3. Disconnect the electrical connector.
4. Remove the actuating rod by snapping it out of the lever with needle-nose pliers.
5. Remove the air temperature actuator retaining screws.
6. Remove the air temperature actuator.
Installation Procedure
imageOpen In New TabZoom/Print
1. Install the air temperature actuator.
2. Install the retaining screws and tighten.
3. Install the actuating rod.
4. Connect the electrical connector.
5. Install the instrument panel assembly. Refer to Instrument Panel Assembly Replacement (Notchback) (See: Dashboard / Instrument Panel > Removal and Replacement)Instrument Panel Assembly Replacement (Hatchback) (See: Dashboard / Instrument Panel > Removal and Replacement).
6. Connect the negative battery cable.
Dash board removal
Instrument Panel Assembly Replacement (Hatchback)
Removal Procedure
imageOpen In New TabZoom/Print
Caution: Refer to Battery Disconnect Caution (See: Battery > Technician Safety Information > Battery Disconnect Caution).
1. Disconnect the negative battery cable. Refer to Battery Negative Cable Disconnection and Connection (See: Negative > Removal and Replacement).
2. Remove the driver air bag module from the steering wheel, if equipped. Refer to Inflatable Restraint Steering Wheel Module Replacement (See: Air Bag > Removal and Replacement).
3. Remove the steering wheel from the steering column. Refer to Steering Wheel Replacement (Hatchback) (See: Steering Column > Removal and Replacement > Steering Wheel Replacement (Hatchback))Steering Wheel Replacement (Notchback) (See: Steering Column > Removal and Replacement > Steering Wheel Replacement (Notchback)).
4. Remove the steering column trim cover. Refer to Steering Column Replacement (Hatchback) (See: Steering Column > Removal and Replacement > Steering Column Replacement (Hatchback))Steering Column Replacement (Notchback) (See: Steering Column > Removal and Replacement > Steering Column Replacement (Notchback)).
imageOpen In New TabZoom/Print
5. Remove the signal lamp switch and the wiper switch. Refer to Turn Signal Multifunction Switch Replacement (Hatchback) (See: Steering Column > Removal and Replacement > Turn Signal Multifunction Switch Replacement (Hatchback))Turn Signal Multifunction Switch Replacement (Notchback) (See: Steering Column > Removal and Replacement > Turn Signal Multifunction Switch Replacement (Notchback)) and Windshield Wiper and Washer Switch Replacement (See: Windshield Washer Switch > Removal and Replacement > Windshield Wiper and Washer Switch Replacement).
6. Remove the windshield pillar garnish moldings. Refer to Windshield Pillar Garnish Molding Replacement (See: Trim Panel > Removal and Replacement).
7. Remove the instrument cluster assembly. Refer to Instrument Cluster Replacement (Notchback) (See: Instrument Cluster / Carrier > Removal and Replacement > Instrument Cluster Replacement (Notchback))Instrument Cluster Replacement (Hatchback) (See: Instrument Cluster / Carrier > Removal and Replacement > Instrument Cluster Replacement (Hatchback)).
8. Remove the side cover.
9. Remove the instrument panel lower cover. Refer to Instrument Panel Lower Trim Panel Replacement (Hatchback) (See: Dashboard / Instrument Panel > Removal and Replacement).
10. Remove the instrument panel center upper cover. Refer to Instrument Panel Center Trim Panel Replacement (Hatchback) (See: Dashboard / Instrument Panel > Removal and Replacement).
11. Remove the cigar lighter and ashtray. Refer to Cigar Lighter Housing Replacement (See: Auxiliary Power Outlet > Removal and Replacement > Cigar Lighter Housing Replacement) and Ashtray Replacement (See: Ash Tray > Removal and Replacement).
12. Remove the cupholder. Refer to Cupholder Replacement (Hatchback) (See: Drink Holders > Removal and Replacement)Cupholder Replacement (Notchback) (See: Drink Holders > Removal and Replacement).
imageOpen In New TabZoom/Print
13. Remove the A/C controller from the instrument. Refer to Heater and Air Conditioning Control Replacement (Hatchback) (See: Control Assembly, HVAC > Removal and Replacement > Heater and Air Conditioning Control Replacement (Hatchback))Heater and Air Conditioning Control Replacement (Notchback) (See: Control Assembly, HVAC > Removal and Replacement > Heater and Air Conditioning Control Replacement (Notchback)).
14. Remove the audio system from the instrument panel. Refer to Radio Replacement (Notchback) (See: Radio/Stereo > Removal and Replacement > Radio Replacement (Notchback))Radio Replacement (Hatchback) (See: Radio/Stereo > Removal and Replacement > Radio Replacement (Hatchback)).
15. Remove the digital clock. Refer to Clock Replacement (Hatchback) (See: Clock > Removal and Replacement > Clock Replacement (Hatchback))Clock Replacement (Notchback) (See: Clock > Removal and Replacement > Clock Replacement (Notchback)).
16. Remove the glove box assembly from the instrument panel. Refer to Instrument Panel Storage Compartment Replacement (See: Dashboard / Instrument Panel > Removal and Replacement).
17. Remove the passenger air bag module from the instrument panel, if equipped. Refer to Inflatable Restraint Instrument Panel Module Replacement (See: Air Bag > Removal and Replacement).
18. Remove the screws from the ALDL connector.
19. Disconnect the necessary electrical connectors.
imageOpen In New TabZoom/Print
20. Remove the three bolts from the upper instrument panel.
imageOpen In New TabZoom/Print
21. Remove the instrument panel screws behind the heating, ventilation, and air conditioning (HVAC) controls.
22. Remove the instrument panel bolts above the steering column.
23. Remove the instrument panel bolts from the ends of the instrument panel.
24. Remove the two nuts from the lower left center of the instrument panel.
imageOpen In New TabZoom/Print
25. Remove the instrument panel end screws.
26. Remove the two nuts from the lower right center of the instrument panel.
27. Disconnect the wire harness from the instrument panel.
28. Remove the tie-bar retaining bolts.
29. Remove the instrument panel from the vehicle.
Images (Click to make bigger)
SPONSORED LINKS
Sunday, March 14th, 2021 AT 3:29 PM