If bolts are rusted or seized badly, that would be a different story. It might take more than a 2 or 3 hours to get them off.
PROPELLER SHAFT REMOVAL
NOTE: Do not drop or damage the propeller shaft during removal.
1. Raise the vehicle off the ground, and support it with safety stands in the proper locations.
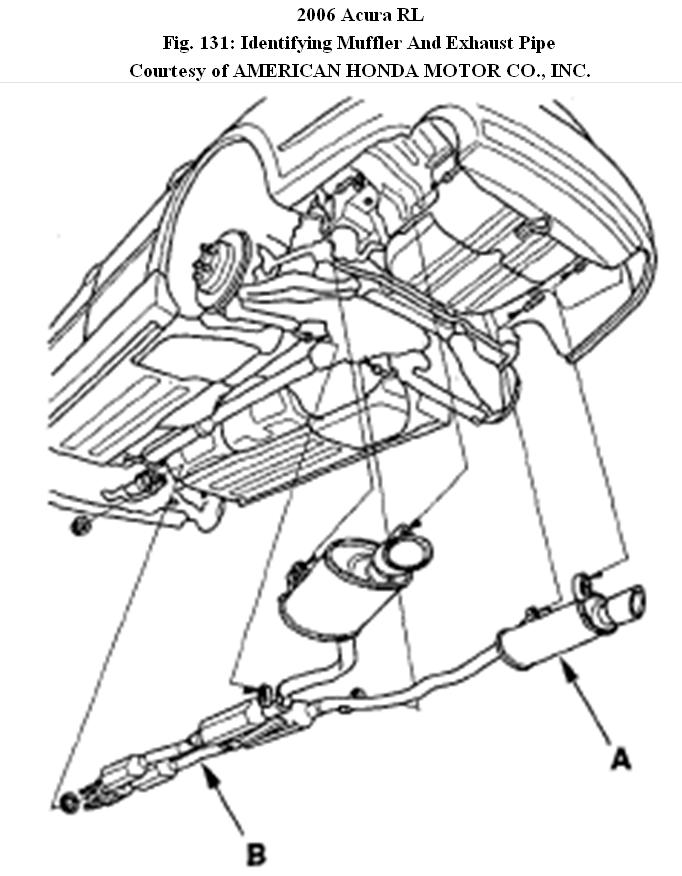
2. Remove the muffler (A) and the exhaust pipe B.
Fig. 131: Identifying Muffler And Exhaust Pipe
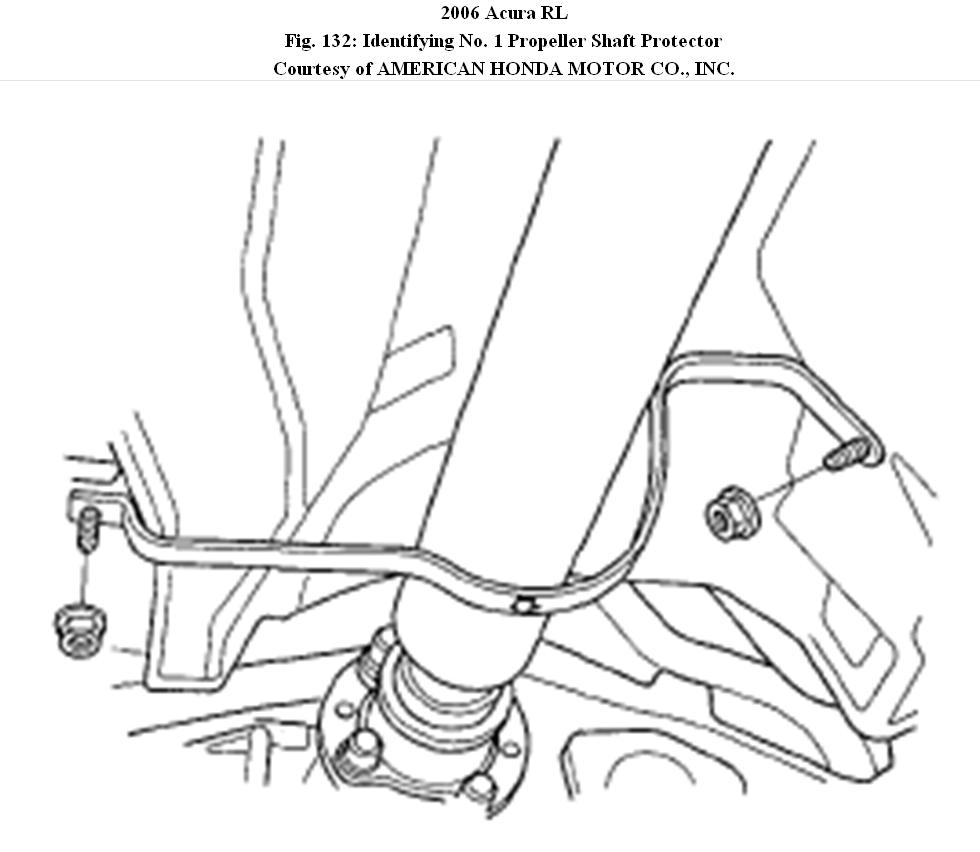
3. Remove the No. 1 propeller shaft protector.
Fig. 132: Identifying No. 1 Propeller Shaft Protector
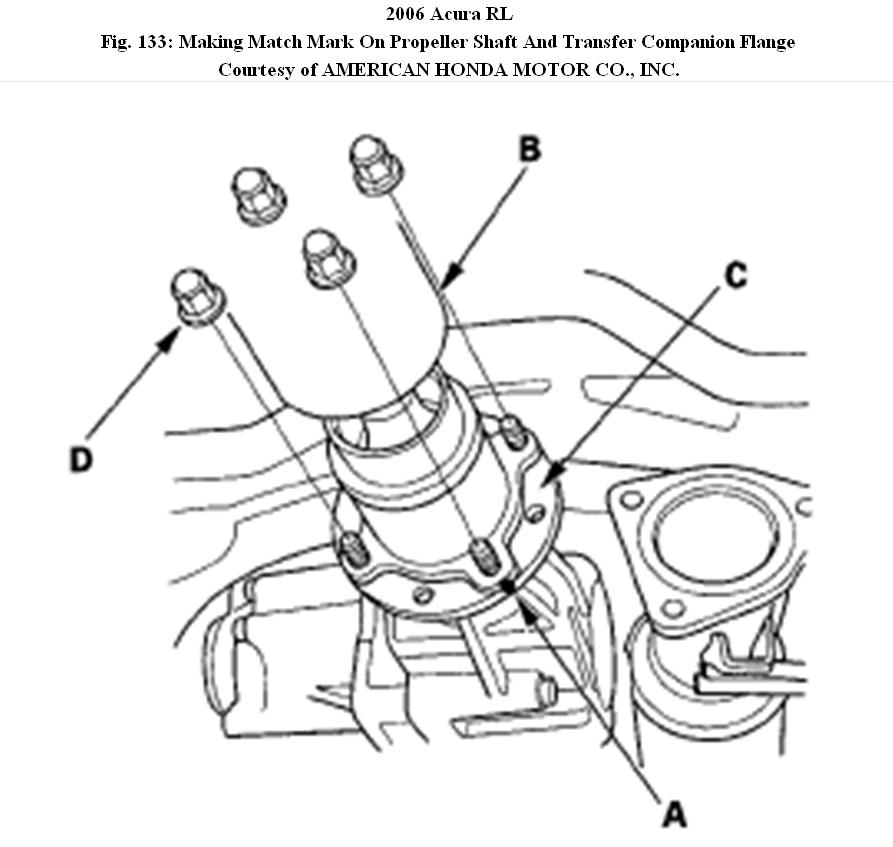
4. Make a reference mark (A) across the propeller shaft (B) and transfer companion flange (C).
NOTE: Wrap the length of each propeller shaft with cardboard, at least
5 mm thick, before removing the propeller shaft.
Fig. 133: Making Match Mark On Propeller Shaft And Transfer Companion Flange
5. Remove the nuts (D).
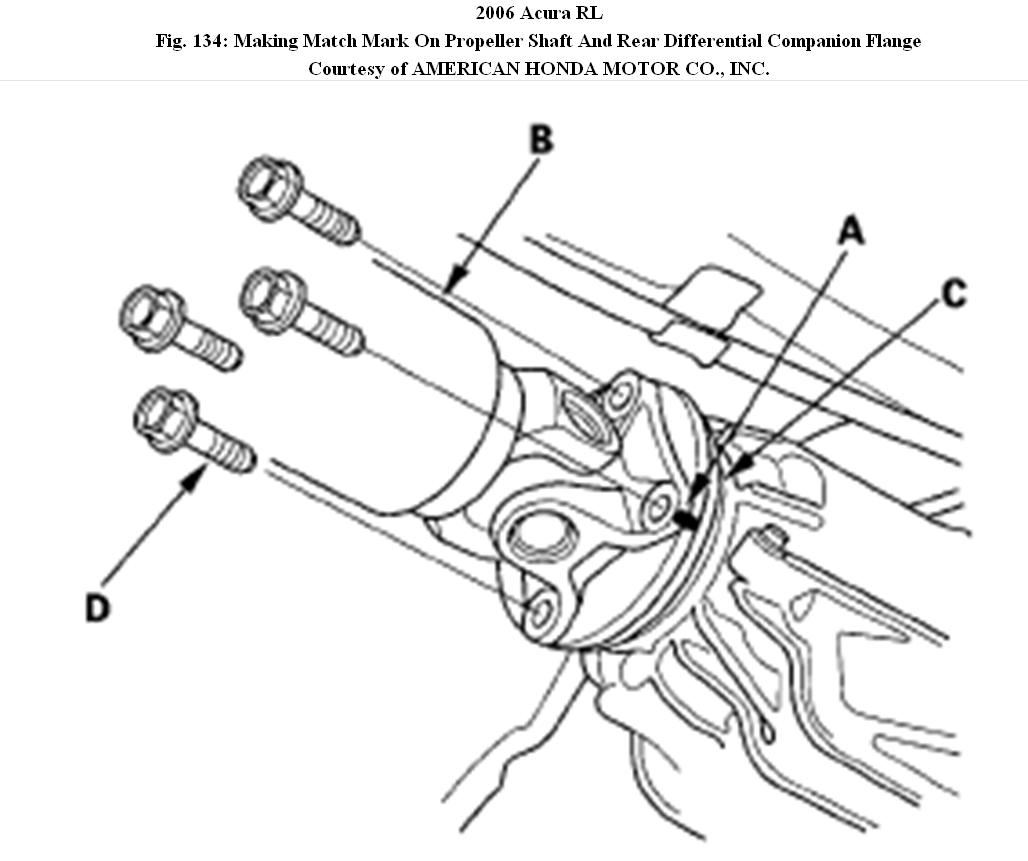
6. Make a reference mark (A) across the propeller shaft (B) and rear differential companion flange (C).
Fig. 134: Making Match Mark On Propeller Shaft And Rear Differential Companion Flange
7. Remove the bolts (D).
8. Remove the center support bearing mounting bolts.
NOTE: Do not exceed the angle of center support bearing joint.
Fig. 135: Identifying Center Support Bearing Mounting Bolts
9. Slide the propeller shaft (A) toward the rear differential, then flex the No. 2 joint (B), and remove the No. 1 propeller shaft from the transfer.
NOTE: Keep the protector on the propeller shaft after removing it from
the vehicle. Be careful not to damage the propeller shaft.
Fig. 136: Removing Propeller Shaft
10. Remove the propeller shaft from the vehicle.
Check out the diagrams (Below). Please let us know if you need anything else to get the problem fixed.
Images (Click to make bigger)
Sunday, February 20th, 2011 AT 12:23 PM