A bearing hub is used to allow the wheel to rotate while supporting the weight of the car and is mounted to the front or rear of the suspension system. The hub consists of a flange which the wheel is bolted to, two roller bearings pressed into the housing which is then attached to the spindle. When a bearing hub goes bad it can cause a rumbling, roaring or squeaking sound. The following guide we help walk you though the repair or show you what needs to be done to complete the job.
Tools and Supplies Needed
- Hydraulic jack and jack stands
- Wheel blocks
- Breaker Bar
- Tire iron or impact wrench
- Socket set
- Ratchet and extensions
- Torque wrench
- Replacement hub bearing assembly
- Wire brush and cleaning solvent
- Anti-seize compound
- Thread locker (optional)
- Hammer and punch (if required)
Before you begin, park your car on level ground with the transmission in park. You will need to raise up your car with a floor jack and secure it using jack stands for safety, then remove and reinstall the wheel. Never get under the vehicle unless jack stands are in place. The brake caliper will need to be removed along with the caliper mount and the brake pads.
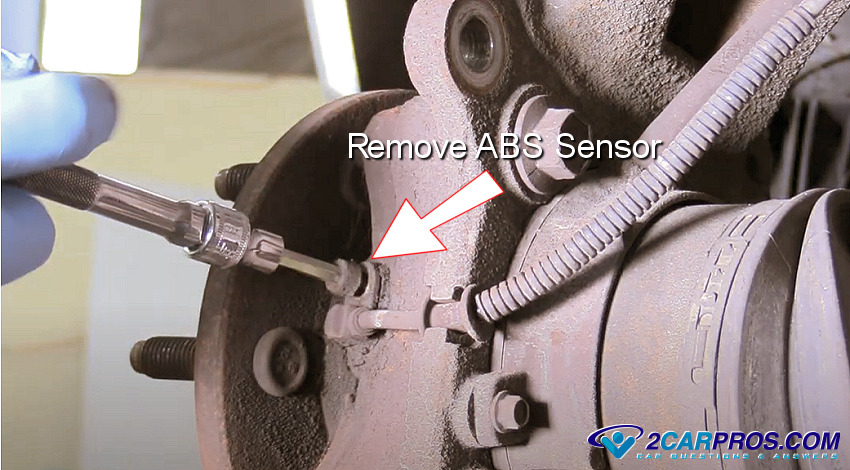
1. Position the steering to gain access to the rear of the bearing hub, is this application the wheel speed sensor will need to be removed which will be the same in most cases.
SPONSORED LINKS
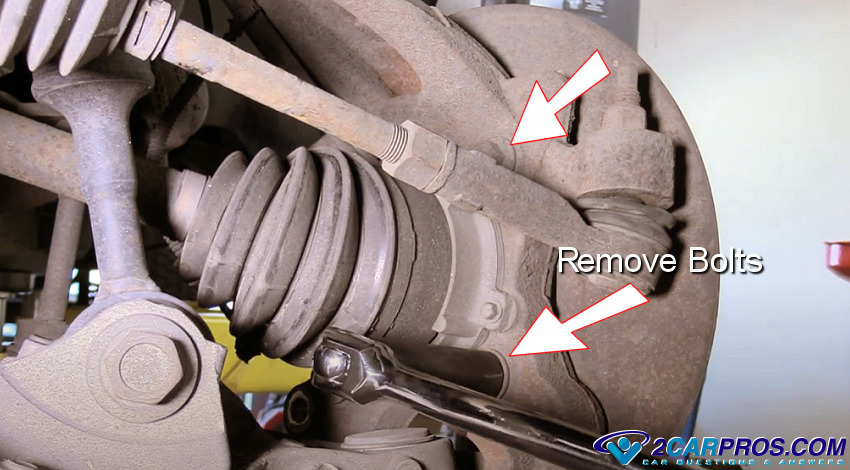
2. The bearing hub will be held to the spindle by three or four mounting bolts, these bolts will be tight so use a breaker bar to help loosen and remove them. You can apply WD40 to the base of the bolt to aid in their removal, avoid getting WD40 on the head of the bolt. The bolts size is 15mm, 17mm and 18mm in most cases, and will be fairly tight so be ready. Position the wrench or ratchet to push downward to loosen. If you are lifting upward it can hurt your back which is no fun especially when you have the reminder of the job to do.
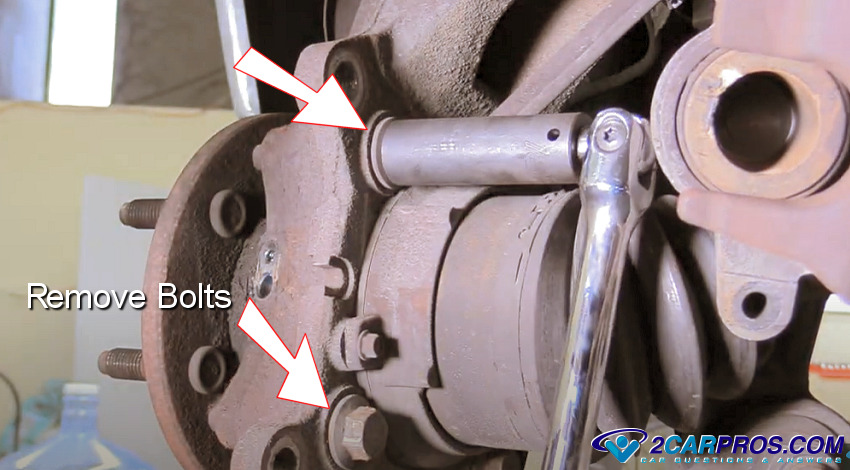
Here are the bolt locations for the front of the bearing hub that must be removed as well.
SPONSORED LINKS
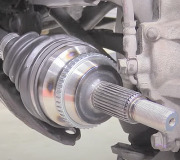
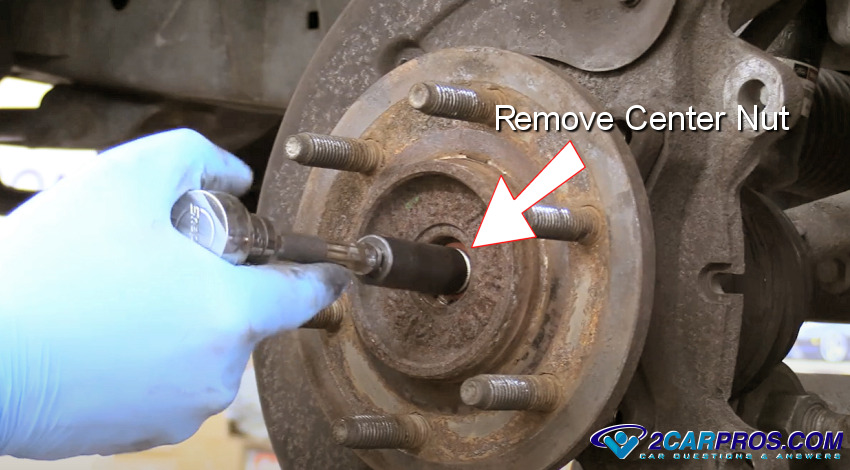
3. Because this vehicle is four wheel drive there is a center nut which holds the front CV axle in place which must be removed, a two wheel drive car will not have this nut.
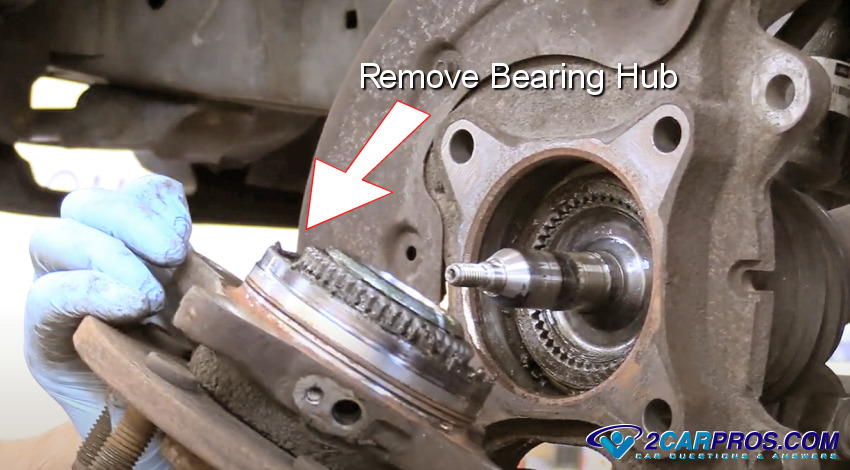
4. Grasp the bearing hub to remove it from the spindle, you might need to tap it using a plastic hammer to break the seal/rust loose.
SPONSORED LINKS
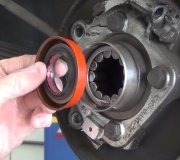
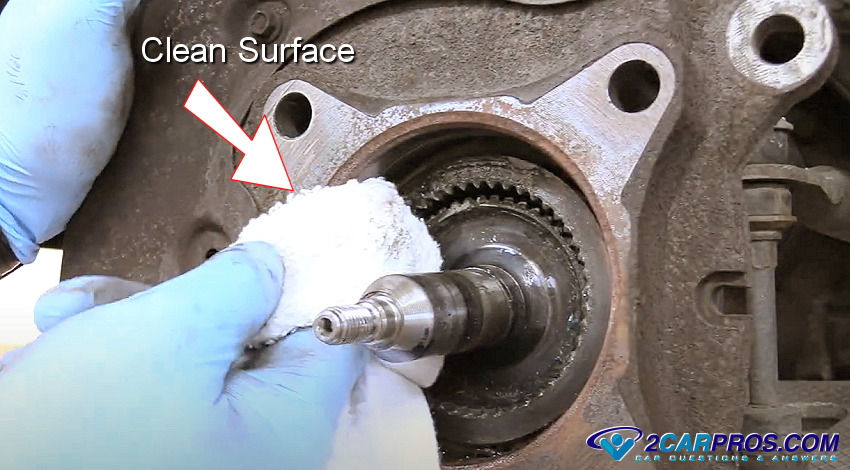
5. Once the bearing hub has been removed, use a shop towel and emery cloth to clean the mounting surface. You want it to be as rust free as possible to ensure the proper installation of the new part.
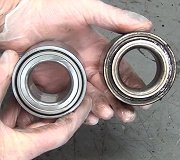
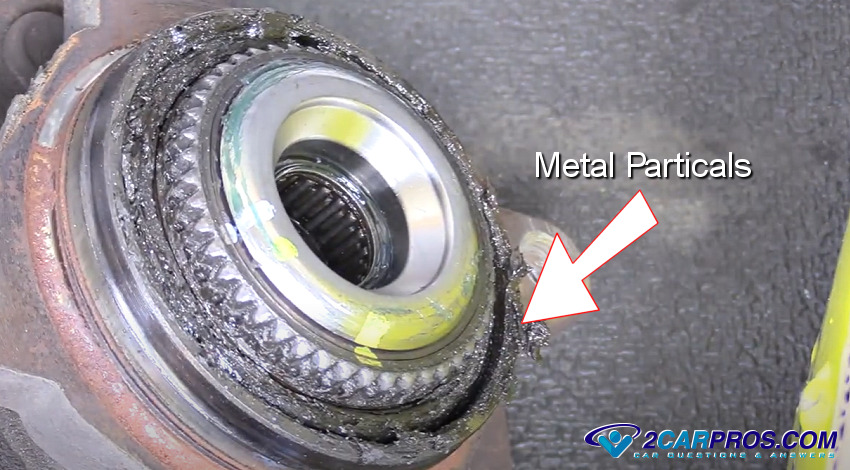
Here is an example of a failed bearing hub, please note the metal particles produced from disintegrating ball bearings.
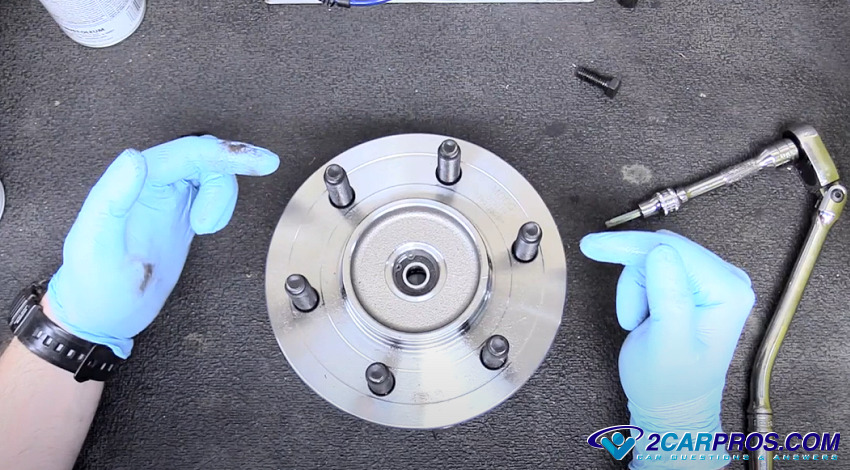
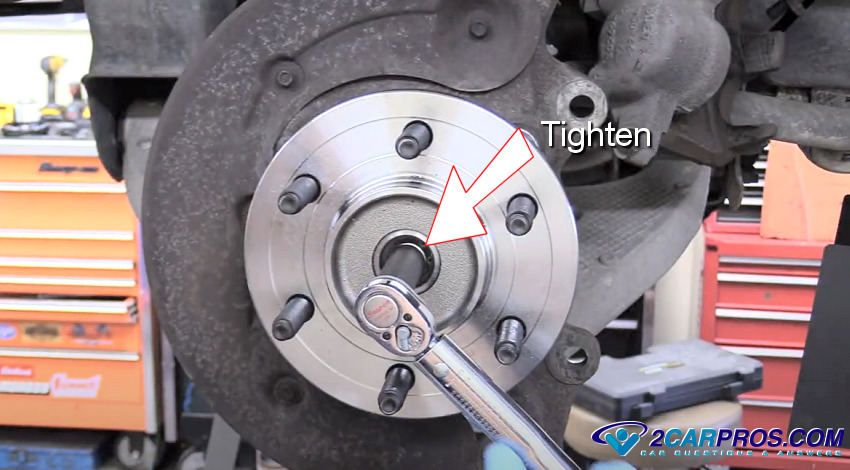
6. Before installing the new bearing hub make sure the match the old part to the new one to ensure a proper installation. Next, hold the hub in place and start all four mounting bolts by hand, then use a torque wrench to do the final tighten in a star pattern which is usually about 55- 70 ft pounds, each application will be different. Refer to the vehicle's service manual for specific instructions and torque specifications. These bolts can be installed with thread lock for added protection against loosening. Reconnect the ABS wiring connector and reassemble the remainder of the job as described in the linked repairs above.

SPONSORED LINKS
7. Install and tighten the center nut in this case which is a four wheel drive application, this will have a torque value as well.
Note: Use a top quality replacement parts, these bearings have added strain on them especially when you have large tires on the vehicle. When driving the car for the first time listen for any strange noises which can be an indication of the problem and should be explored further.
Watch the Video!
Please watch this video of the job being done to glean additional helpful information.
Credits
This guide knowledge base was created by the 2CarPros Team, and by Ken Lavacot: Automobile repair shop owner and certified master automobile technician of over 30 years. If you have question or need help please ask one of our experts we are happy to help. Please visit our 2CarPros YouTube Channel.

Article published 2024-04-24