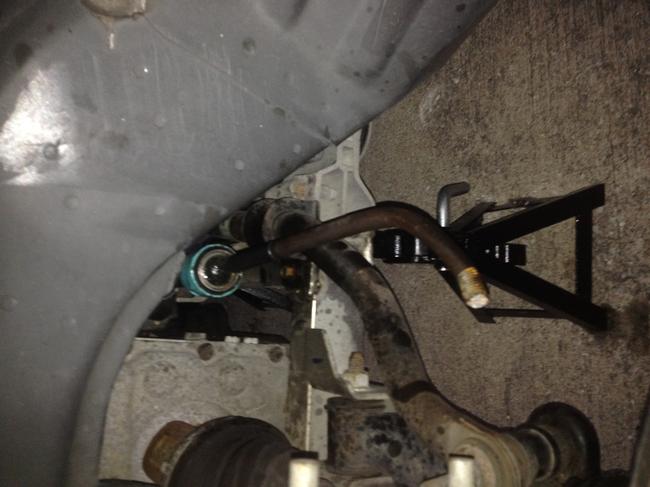
For your first question, yes, crimp the back side if it has that lip I mentioned. It is about 3/16" deep. You will see the old one is dented in two places after you remove it. It is normal thread. Unscrewing it will bend those crimps back out most of the way. You do not have to do that yourself. Nothing terrible will happen if you do not do this, I hope, but if the car is ever involved in a crash that was caused by the other guy, this is the type of thing his lawyer or insurance investigator loves to find, (along with altered ride height), so they can shift some of the blame onto you.
Here is a link that will help:
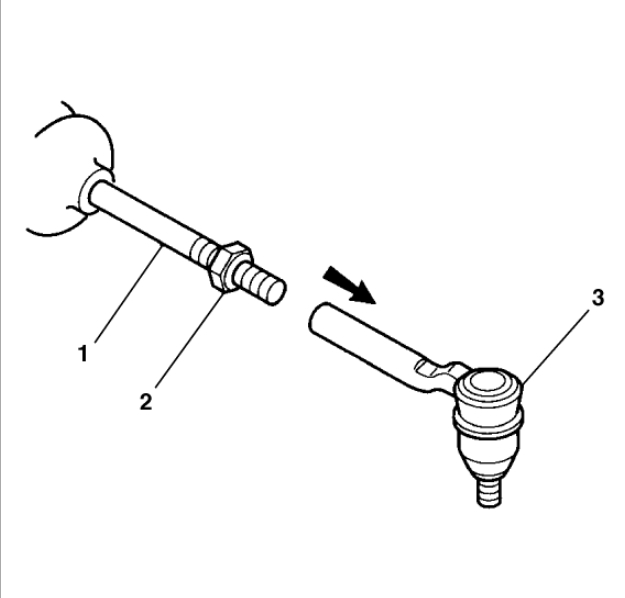
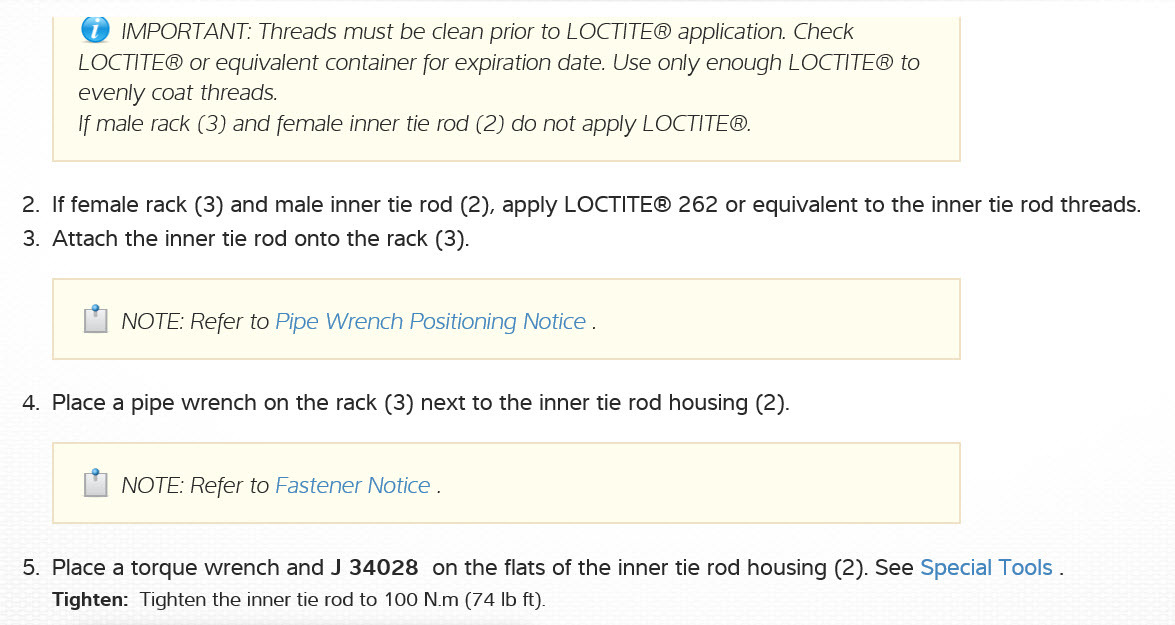
https://www.2carpros.com/articles/tie-rod-end-replacement
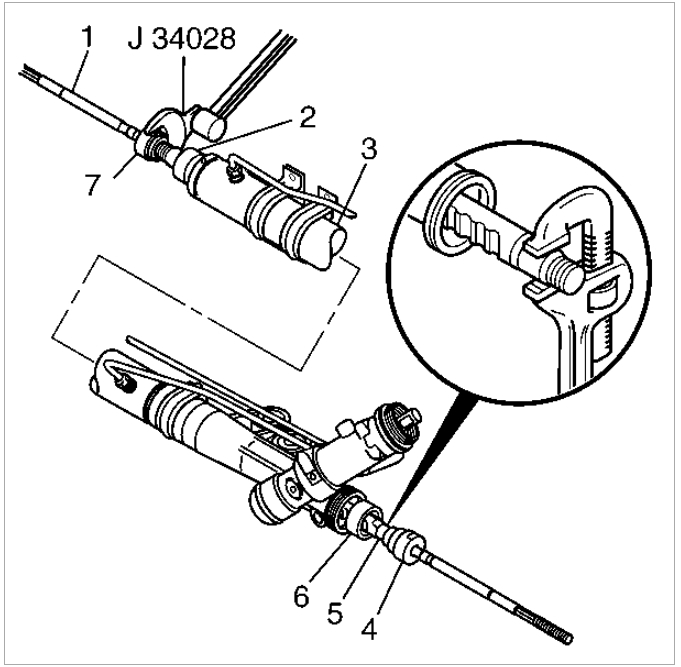
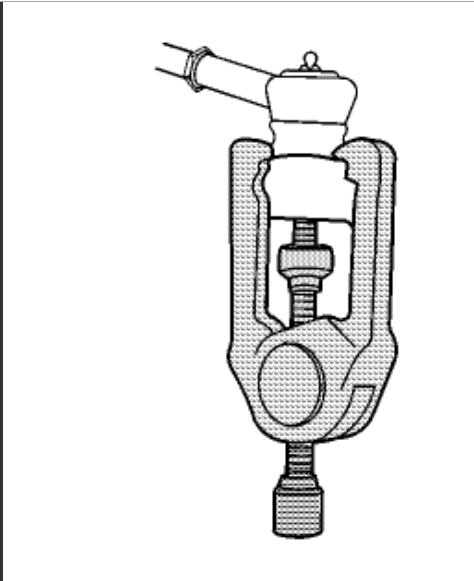
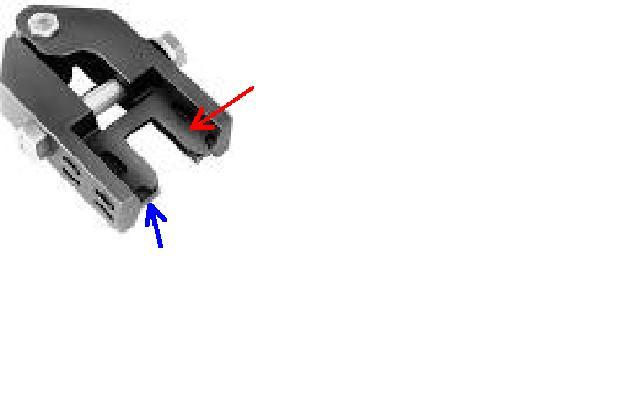
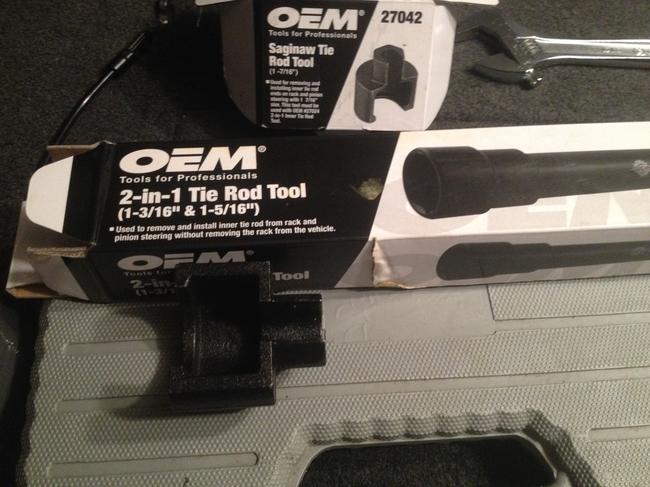
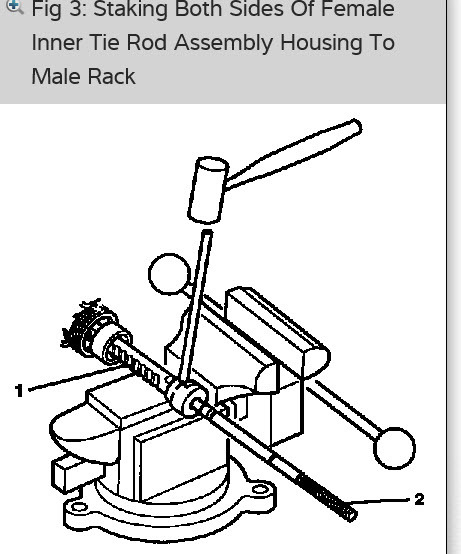
I searched through two web sites for Mac and Matco tools and could not find the tool, then I got smart and did a Google search for "GM inner tie rod crimper". The first two listings show the tool. You might find this at an auto parts store that rents or borrows tools. It looks a lot more complicated than it really is. In this photo, there are two hinged parts and each has a piece cast into it that you can see. The pretty blue arrow is pointing to the end of one of them. Those two parts are what does the crimping when you tighten the bolt. The three-sided black square piece of metal in the middle, shown by my nifty red arrow, is simply there to set the depth of the crimp. In this case, the steering gear would be up over your right shoulder, and the inner tie rod's shaft would be behind the tool pointing to the lower left of the picture. You slide the tool along the rack until the black metal part hits the housing of the tie rod. That places the crimping fingers in the right spot.
If you cannot find that tool, you may be able to get in there with a small hammer, Vise-Grip pliers, or even a C-clamp to do the job. All these crimps are for is a little extra insurance. First the tie rod has to work loose, which rarely happens, then it has to unscrew, which nothing is trying to make it do that, then the crimps catch on the threads of the rack so it cannot unscrew all the way. You will have squealing tires and horrendous tire wear long before it gets bad enough to come apart, but I know a couple of people who would not recognize those warnings.
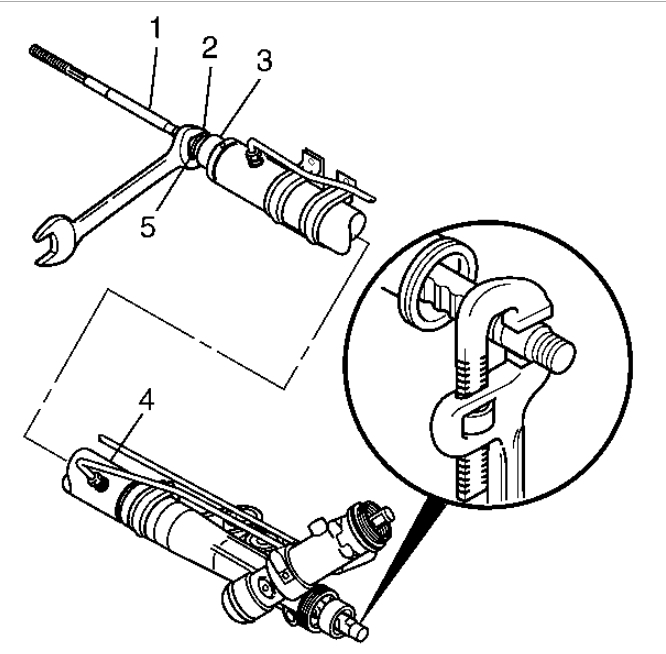
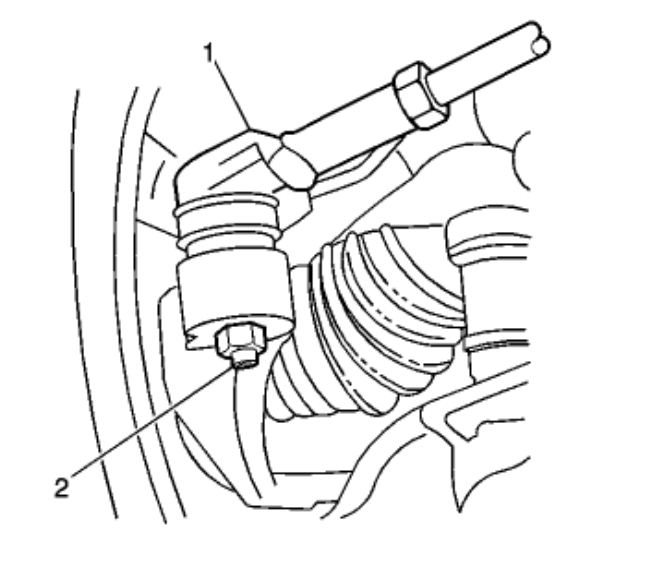
If you need to hold the rack from twisting, that is where the adjustable wrench I mentioned comes in. Unless the last person got really carried away, you can just use the specialty socket and a large ratchet to unscrew the tie rod. After two or three turns, you will feel the resistance as the crimps straighten out. There is little chance of over-twisting the rack here. It is putting the new tie rod on where if tight is good, tighter must be better. I still go by feel and common sense, but if you were to measure the torque, I am sure I am going beyond the minimum spec. That is where I will find a helper to hold the adjustable wrench so I can convince myself the tie rod is tight enough.
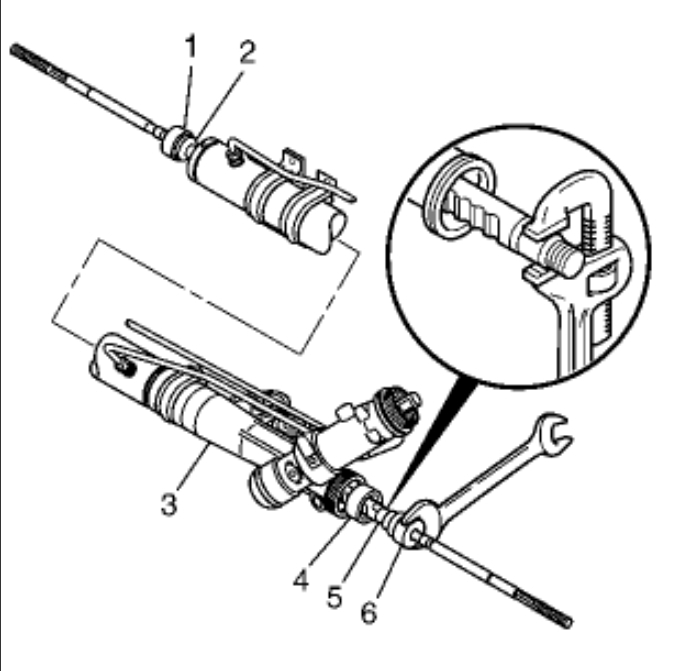
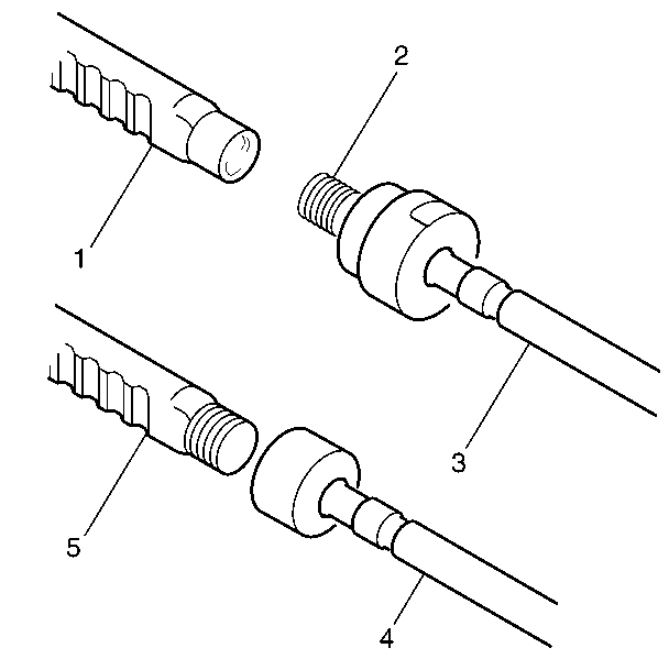
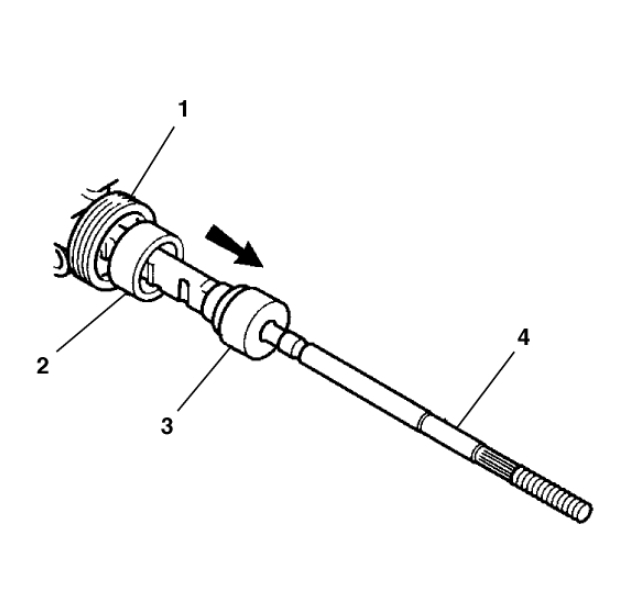
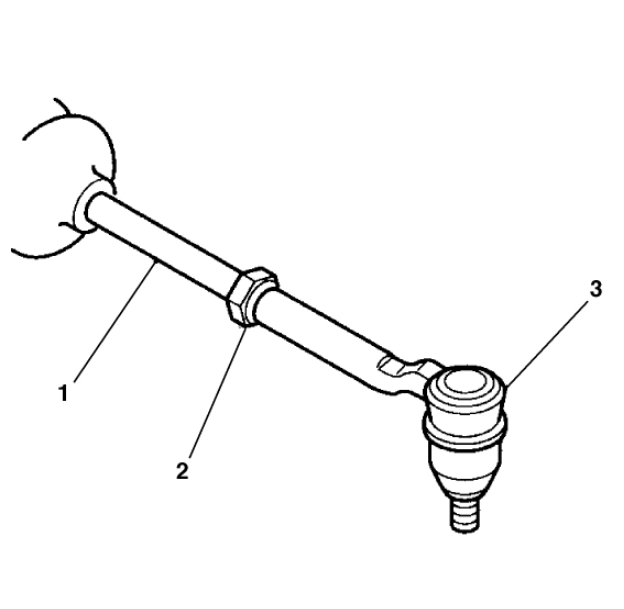
Auto parts stores will have the sockets to borrow too. If both tie rods have a normal hex-shaped housing, you just use a deep socket of the right size. I have two sizes, but there might be more now. Those tie rods do not get crimped. If you only have two flats on the backside, that is the GM design that gets crimped. You will get a set of five or six crow's foot inserts with a socket they fit into. Use the one that is the right size, then slide the socket over it and the tie rod, and lock it in place with the ring on the end. Pull the socket toward you to keep the crow's foot on the flats, then turn it with your ratchet.
Nov 18, 2015 at 12:22 AM