I just replace the head gasket and now I have a bad lifter. How do I replace the lifters?

Tiny
POOLDAVE1
  • MEMBER
  • 2001 SAAB 9-3
  • 75,000 MILES
The oil sump was clogged and no oil got to the lifters. It started to make a lot of noise. The cylinder head gasket all ready needed to be replaced. I dropped the oil pan and cleaned the oil pick up. I took off the cylinder head and replaced the bad gasket and reinstalled the cylinder head. I didn't see any damage to the valves and hoped that the tapping sound would go away after the oil pick up tube was cleaned. I was wrong. Its still tapping bad and I'm pretty sure that there are some lifters that are bad. So I'm asking how do I replace the lifters? Do I just unbolt the cams and take the old ones out and then put the new ones in and bolt the cams back down? Please let me know what I need to do. Thank you! Sincerely, David.
Friday, January 27th, 2012 AT 4:06 AM

9 Replies

Tiny
RIVERMIKERAT
  • MECHANIC
  • 6,110 POSTS
We need to know what engine it has.
Was this
answer
helpful?
Yes
No
Friday, January 27th, 2012 AT 4:12 AM
Tiny
POOLDAVE1
  • MEMBER
  • 5 POSTS
Sorry about that. Its a 2001 9-3 turbo se with the 2.0 engine.
Was this
answer
helpful?
Yes
No
Friday, January 27th, 2012 AT 6:43 AM
Tiny
RIVERMIKERAT
  • MECHANIC
  • 6,110 POSTS
BASIC ENGINE, 4-CYLINDER PETROL -2001 Saab 9-3 SE
Page 1 of 2
VALVE GEAR

(Cylinder head removed, fitted in fixture, part no. 83 93 795)
Fig. 148: Illustration For Steps 1-2-3
To Remove

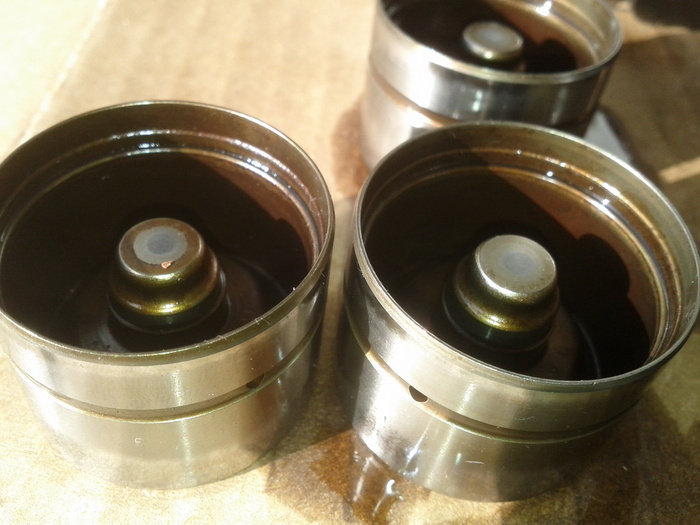
IMPORTANT: The cylindrical surfaces round the valve springs are sealing surfaces for
the tappets and must not be scratched or scored. Therefore, fit protective collars, part no. 83 93 746, round the tappet cylinders.
1.
Remove the camshaft bearing caps. It is important to finish removal of the bearing caps with the one where the tappets are under load. Lift out the camshafts.
Remove the tappets and place them in the valve stand, part no. 83 93 787. Fit the protective collars, part no. 83 93 746.
Press down the valve heads with the valve spring compressor, part no. 83 95 246, and remove the collars.
2. 3. 4.
Fig. 149: Illustration For Steps 4-5-6
5. 6.
Lift out the spring discs and valve spring. Do not forget the washer. Remove the valves and place them in the valve stand, part no. 83 93 787.
To Fit

Fig. 150: Illustration For Steps 1-2
IMPORTANT: Defective valve stem seals must be replaced and the sealing surfaces
with bearings lubricated before the valves are fitted. Make sure that the cylinder head is mounted in the fixture, part no. 83 93 795, so that the
valves are not bent when the camshafts are tightened.
1. 2. 3.
Fit the valves and springs.
Use valve spring compressor, part no. 83 95 246, to fit the spring discs and collars.
Place the clearance gauge, part no. 83 93 753, across two of the camshaft bearing seats with the depth gauge against the end of the valve stem.
Check that the maximum gauge depth of 20.5 mm actually reaches down to the end of the valve stem (noticed by the valve clearance gauge not bottoming against the bearing seat closest to the
depth gauge).
Then, check that the minimum gauge depth of 19.5 mm does not reach down to the end of the valve stem. The correct valve clearance is between the minimum and maximum gauge depths. If
the clearance is less than the minimum, the valve stem must be shortened and if it is greater than the maximum, the valve seat must be reground.
Remove the protective sleeves and fit the valve tappets.

1/26/2012
BASIC ENGINE, 4-CYLINDER PETROL -2001 Saab 9-3 SE
Page 2 of 2
Fig. 151: Illustration For Steps 6-7
7.
Fit the camshafts and bearing caps, start where cams are pointing down and acting on the tappets. The bearing caps are marked 1-5 for the intake side and 6-10 for the exhaust side.
Tightening torque: 15 N.M (11 lbf ft)
IMPORTANT: The black bolts have an oilway and should be fitted on the spark plug side.
8.
Line up the marks on the camshafts with their timing marks.
Was this
answer
helpful?
Yes
No
Friday, January 27th, 2012 AT 7:39 AM
Tiny
POOLDAVE1
  • MEMBER
  • 5 POSTS
I would like to thank you for your responses. I do have another question. I there any way for me to visible see a defective lifter? I've taken the cams out and removed all of the lifters and the only thing that I can see that's different is on the under side of the lifter there is a small difference in the height of where the lifter touches the valve stem. Some are compressed in and others seem to be fully extended? Please let me know if I should just replace them all or only replace the ones that are compressed? Thank you for your help.
Sincerely, David B.
Was this
answer
helpful?
Yes
No
Saturday, January 28th, 2012 AT 9:45 PM
Tiny
MHPAUTOS
  • MECHANIC
  • 31,938 POSTS
I WOULD BE REPLACING THEM AS A SET.
Was this
answer
helpful?
Yes
No
Saturday, January 28th, 2012 AT 9:47 PM
Tiny
POOLDAVE1
  • MEMBER
  • 5 POSTS
Thank you!
Was this
answer
helpful?
Yes
No
Saturday, January 28th, 2012 AT 9:58 PM
Tiny
RIVERMIKERAT
  • MECHANIC
  • 6,110 POSTS
Our pleasure. Let us know if you need any more help and be sure to tell your friends about us.
Was this
answer
helpful?
Yes
No
+1
Saturday, January 28th, 2012 AT 10:12 PM
Tiny
POOLDAVE1
  • MEMBER
  • 5 POSTS
Will do.
Was this
answer
helpful?
Yes
No
+1
Monday, January 30th, 2012 AT 12:56 AM
Tiny
RIVERMIKERAT
  • MECHANIC
  • 6,110 POSTS
Closing thread.
Was this
answer
helpful?
Yes
No
Monday, January 30th, 2012 AT 2:30 AM

Please login or register to post a reply.

Sponsored links