A window regulator and motor is the mechanism inside a door or tailgate that holds the window in place while it travels upward or downward when commanded by the window switch.
What Goes Wrong?
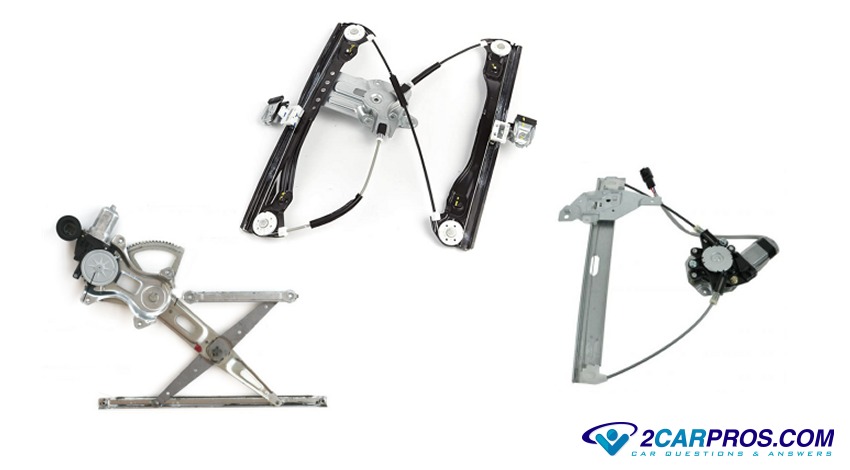
There are mainly two kinds of window regulators, the first type uses a scissor-like
arrangement with a ring gear and an electric motor with a pinion gear to drive it.
More modern types use a cable drive system whereas a series of pulleys are supported
on a framework or single main support rail. The motor is fitted with a clutched
wheel that drives the cable in both directions. In time these motors can burn out
or the cable system can break down hindering the window operation, this is usually
due to excessive resistance inside the window track which should be cleaned.
How Much Does It Cost?
Typically replacement parts will cost between $50.00 and $80.00 on Amazon (US) and will require the removal of the door panel. Labor time can be between 1.5 and 2.5 hours at a shop or dealer. If exact times or procedures are needed you can ask our experts to supply you with the information (free), or consult an online resource such as AllData DIY (pay) but this guide and video will be sufficient in most cases.
Let's Jump In
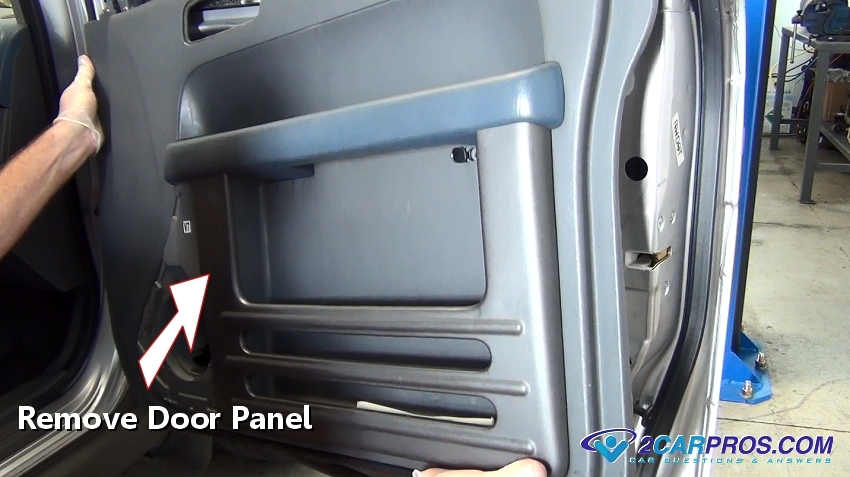
To access the window regulator and motor assembly the
door panel must be removed. This is done
with the door open with the window in the up position if possible. If the window
will not go up don't worry, once the door panel is off we will be able to lift the
window up manually.
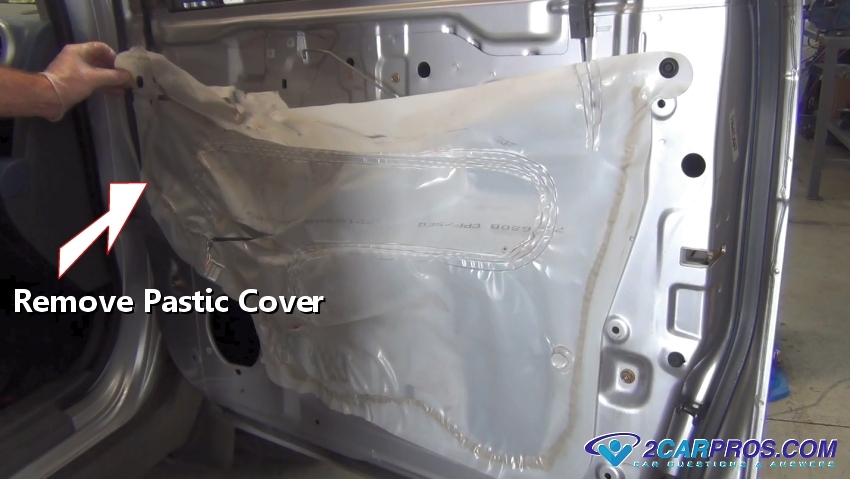
There will be a plastic door liner designed to keep water and moisture away from
the door panel. Gently remove the plastic cover and set it to the side.
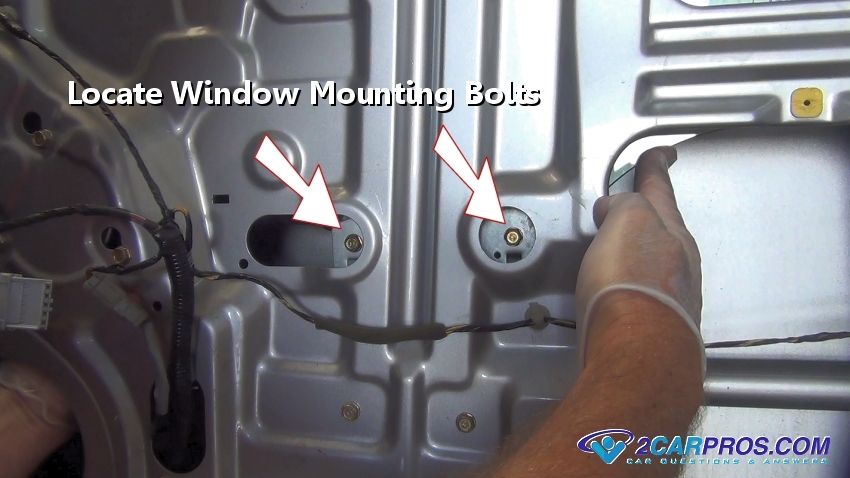
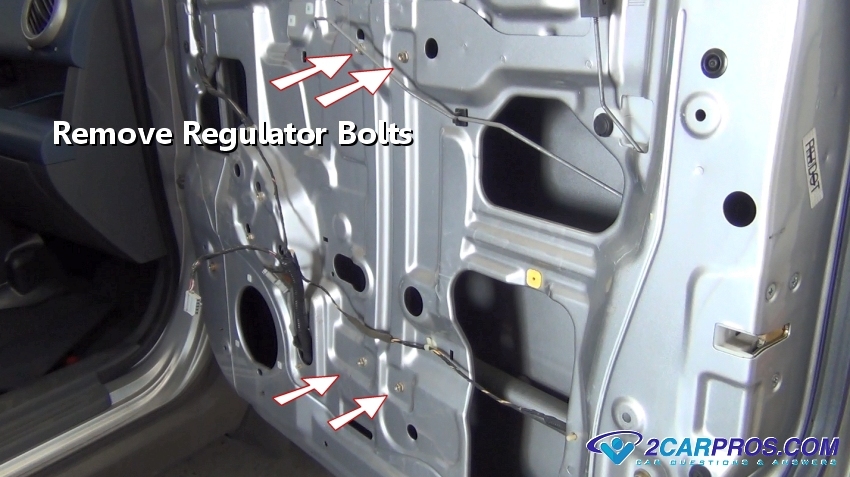
There will be access holes which are used to service the regulator, mounting
bolts attach the window to the regulator framework. In this case the bolt size is
10mm. If the regulator is burned out and not working reach inside the door and use
a small wrench to remove the bolts. In some cases the window will be down inside
the door which can be raised up manually and held in place.
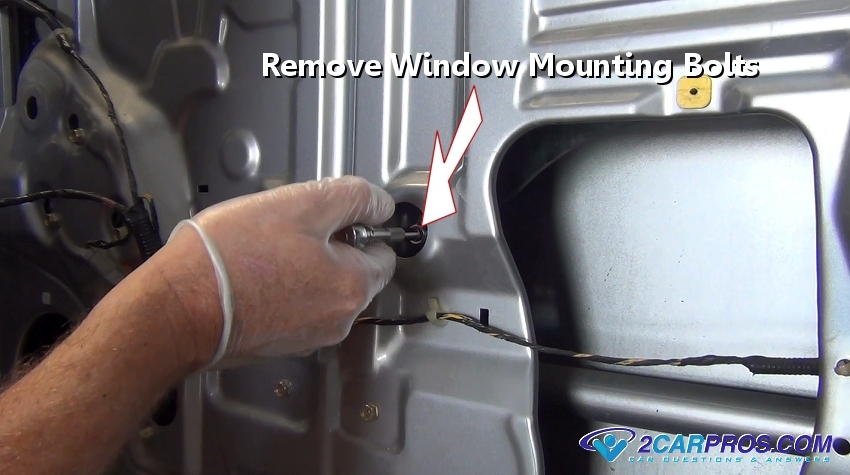
Remove the window mounting bolts from the window regulator, once the bolts have
been removed the window will become loose in its track, be gentle with the window.
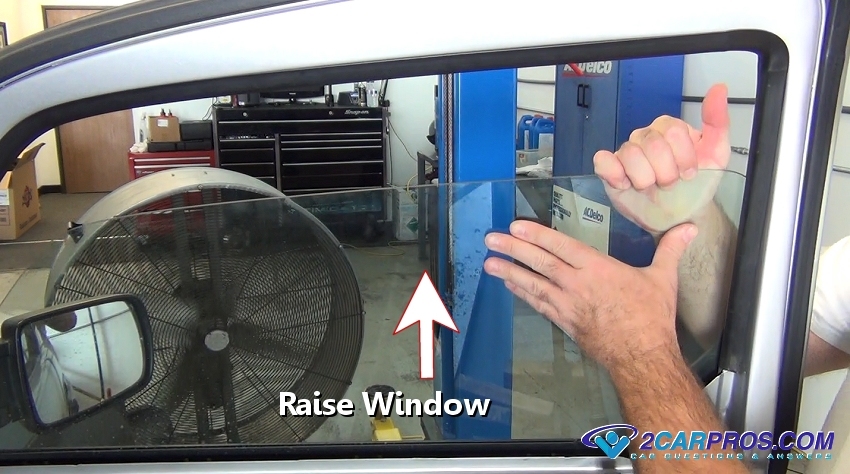
Grasp the window and pull upward, it will slide with minor resistance until it
contacts the upper portion of the frame, do not allow the glass to fall back down
inside the door.
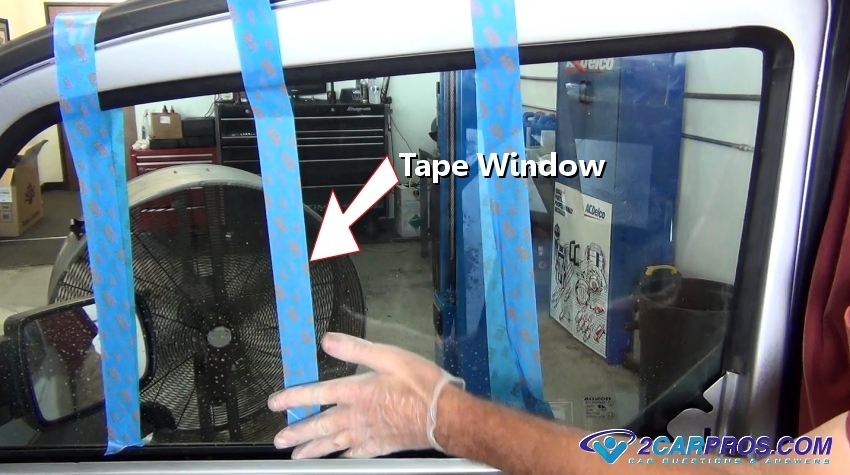
While holding the window in place, use masking tape to secure the window at the
top of the frame. This step keeps the glass out of the way and safe while removing
the regulator and motor.
Locate and remove the window regulator mounting bolts, then gently allow the
regulator to sit inside the door until the motor is removed, (in some cases the
motor is attached separately).
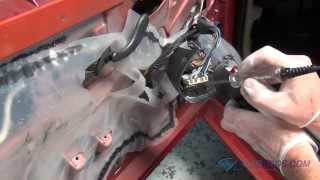
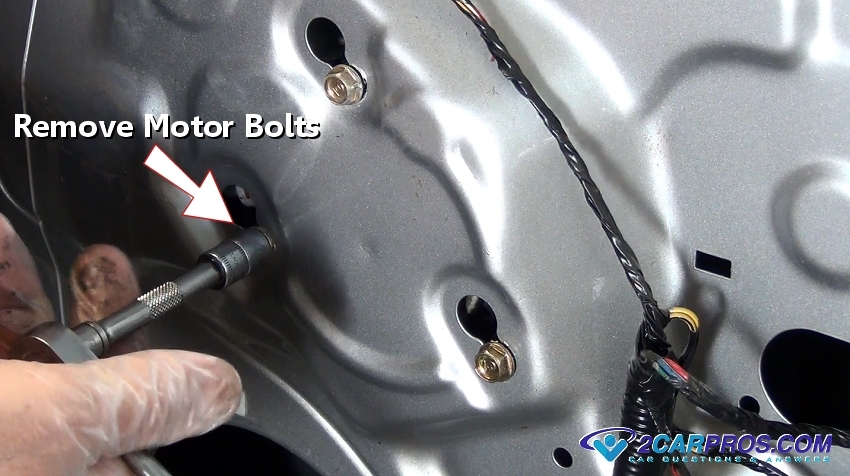
Locate and remove the window motor mounting bolts, in this application the bolts
can be loosened which will remove the motor by moving it upward.
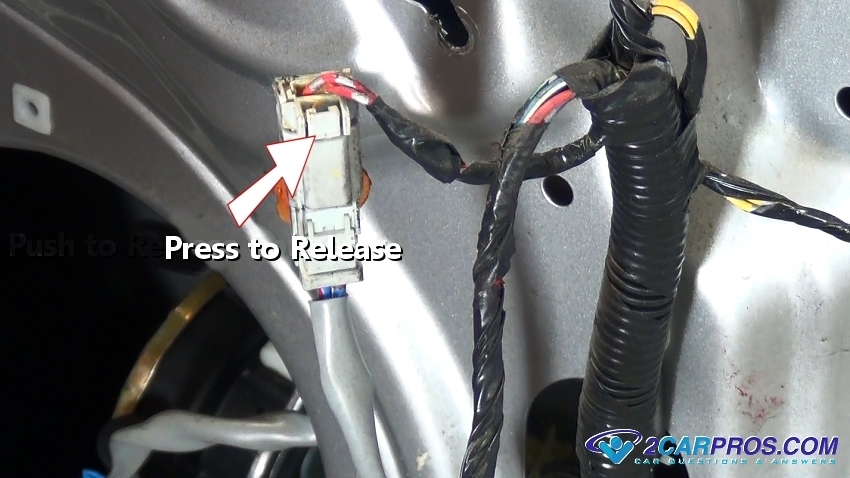
There will be an electrical connector attached to the motor which can be accessed
before or after the motor has been removed, whatever ever is easier, press the release
tab to disconnect.
Remove the regulator and motor assembly through the large door access port. Use
care when working inside the door because the door "skin" is the outside of the
door, if damaged (dented) it will show up on the outside of the car door.
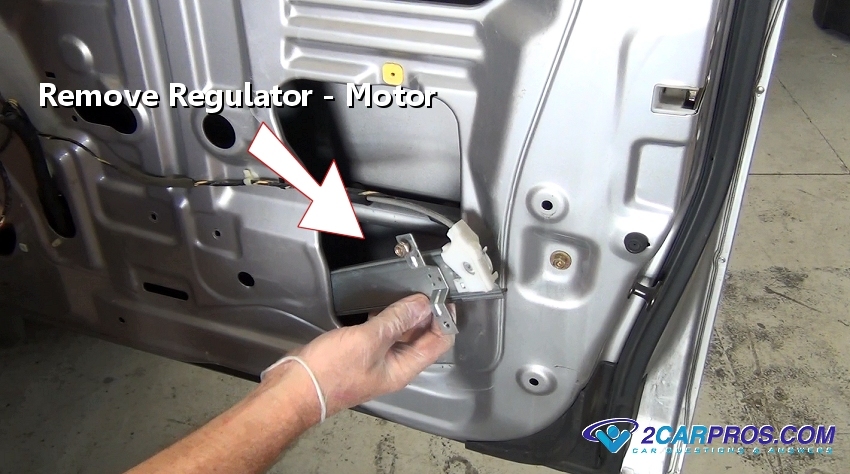
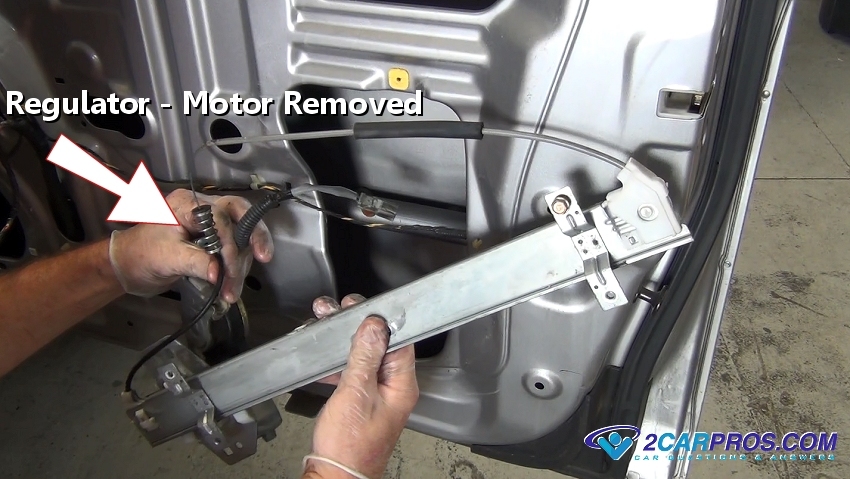
This is what the window regulator and motor looks like once it is removed, yours
may vary. Please watch this video of the job being done, then continue down the guide to
glean additional helpful information. It is important to match the old unit to the new replacement part, this will
ensure a proper installation, also check the electrical connectors as well. Gently feed the new motor and regulator assembly back into position, this can
be a little tricky so hang in there. Once the motor and regulator have been repositioned, re-install all mounting
bolts leaving them loose until all bolts have been threaded. Using a ratchet or wrench tighten the motor and regulator mounting bolts. Don't
over tighten, these are small bolts and don't need hulk-like strength to reassemble.
There is no torque spec for these bolts but in general it would be between 3 and
5 pounds. Feed the electrical connector from the window motor through the access hole and
reconnect it to the door wiring harness, you should hear a click which tells you
it is fully seated. The window is ready to be lower back into place, while holding the window firmly
and remove the masking tape to lower the window onto the new regulator cradle. Clean
the side window tracks with soap and water if necessary, this will help the window
operation. You may need to turn the ignition switch on and work the window switch to move
the regulator cradle into position so the window mounting bolts can be installed.
Keep your fingers and hands out of the way. Thread in and tighten the mounting bolts,
again these don't not need to be super tight. If the window is non operational start
by checking the fuses. Recheck all mounting bolts for tightness to make sure you didn't forget any,
re-install the plastic weather liner and
reinstall the door panel assembly. Now that the job is complete, test the window operation by working the switch
in both directions, the window should work smoothly while not causing the motor
to labor. In some cases there are minor adjustments for the window rails to be re-position,
check the vertical operation for hard spots or clicking noises and adjust if necessary.
Ford Truck Window Motor and Regulator Replacement Video Our certified technicians are ready to answer car repair
questions for free. We hope you saved money and learned from this guide. We
are creating a full set of car repair guides. Please subscribe
to our 2CarPros YouTube channel
and check back often for new videos which are uploaded regularly.
Watch the Video!
Questions?
Article published 2022-03-08