A master window control switch is designed to supply power and ground to the various windows in the vehicle. Subsequent window control switches, for example on the passenger and rear doors, are fed through the master window switch. Electric window systems are common technology which is universal throughout the automotive industry. These systems work from a simple polarity change to activate an electric window motor which will rotate the motor in one direction or the other. Usually, for high end vehicles window switches can be bypassed by the BCM (body control module) which are designed with control relays that activate the window motors remotely.
What Goes Wrong?
The master window switch contains electrical contact points which make up the switch. As amperage is pulled through the switch via the window motor it can cause these contacts to overheat and burn out rendering the switch non-operational or semi-operational. Dirt and soda can also contaminate the switch contacts causing high resistance which also stops the switch from functioning.
How Much Does it Cost?
A replacement master window switch can cost between $65.00 and $140.00 US depending on configuration and manufacturer, Amazon offers window switches at a reasonable price, passenger and rear door control switches are less. A shop will charge between .7 and 1.5 hours to change the switch out without testing, which will be an additional charge. If all windows are not working or just one window is not working the switch will need to be tested for power and ground which is covered in this guide.
SPONSORED LINKS
Before We Begin
There are two types of window switch replacement methods, the first is a simple removal of the window switch bezel which is held in with one or two screws or a snap clip which can be released using a small flat blade screwdriver. The second type is a little more difficult because the door panel will need to be removed before the switch can be accessed and replaced. This guide will walk you through the job, if you need specific panel or switch removal procedures ask our experts to help (free) or check out the AllData DIY site (pay). Testing and replacement is similar for passenger and rear door window switches.
Let's Jump In!
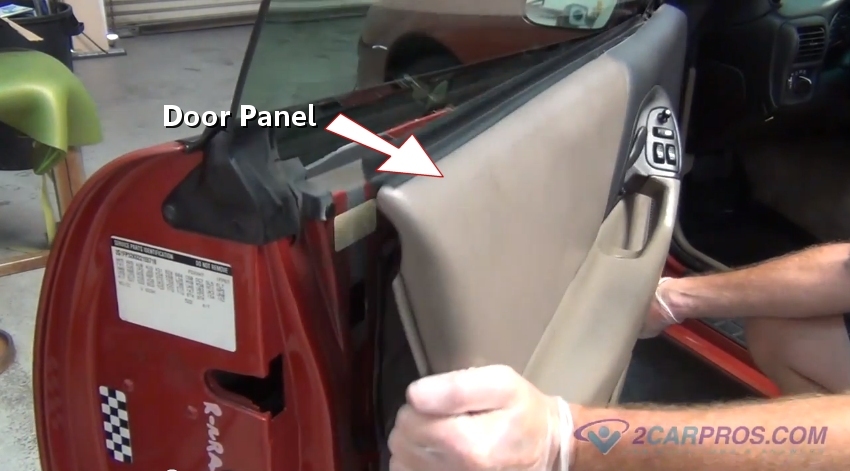
In this example the door panel will need to be removed to access the switch.
To tell which type you have, look for a mounting screw near the switch bezel or
try to gently pry up on the switch to see if it gives way and pops out, if not the
door panel will need to be removed.
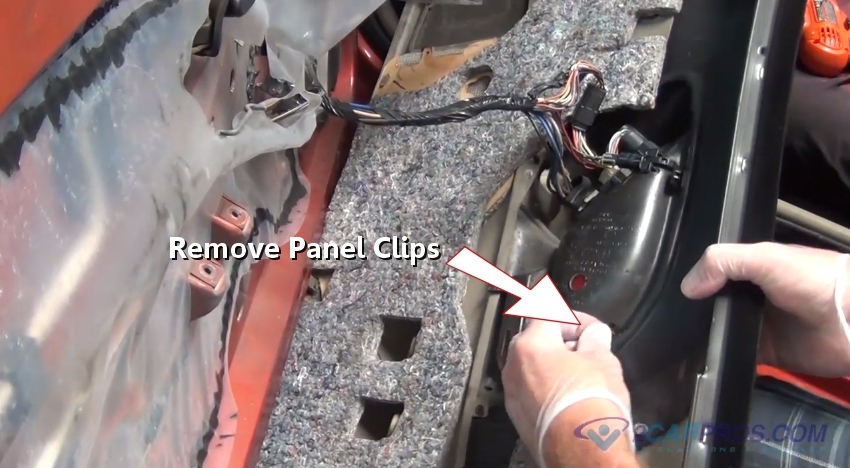
At the rear of the door panel disconnect the wiring harness from the switch or
undo the switch bezel mount screws or clips to access the rear of the switch. Then
reattach the wiring harness so testing can begin.
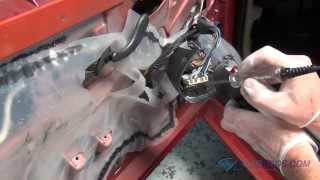
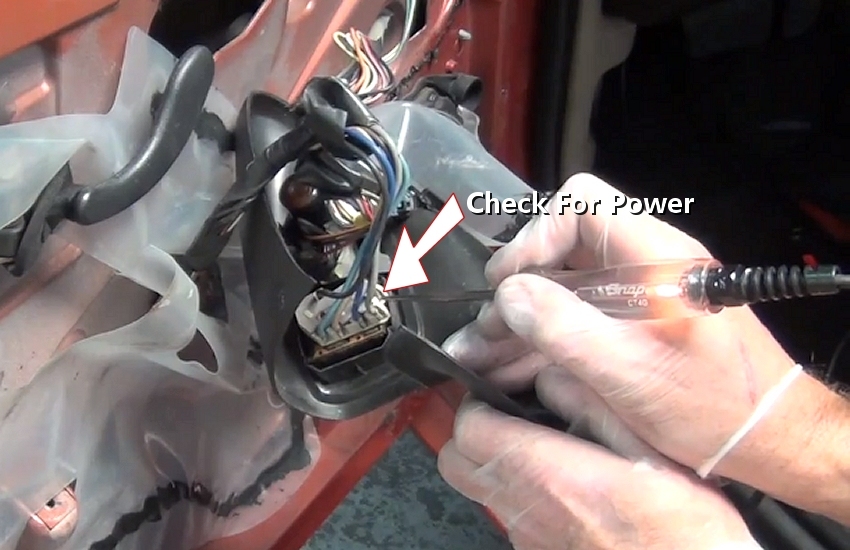
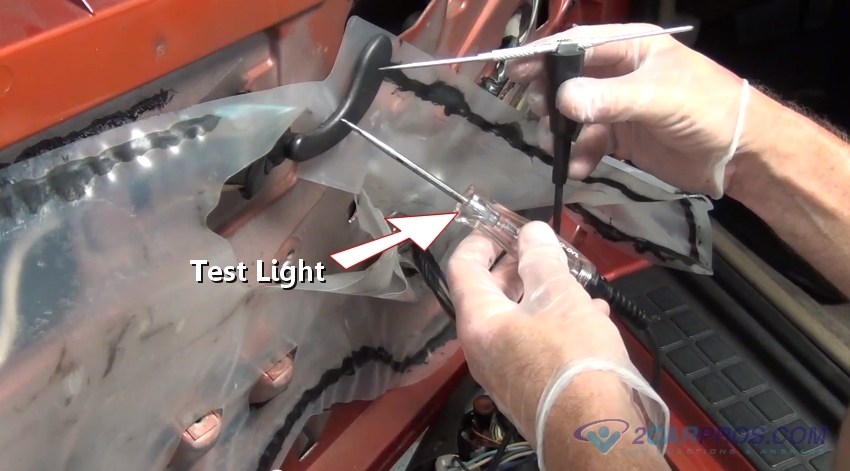
With the ignition key on,
use a test light
to probe the switch terminals or wiring connectors, one of them should have power.
This test shows the window system is powered up and a fuse or relay is not the problem,
(test light on). If power is not found,
check the fuses in the fuse panel.
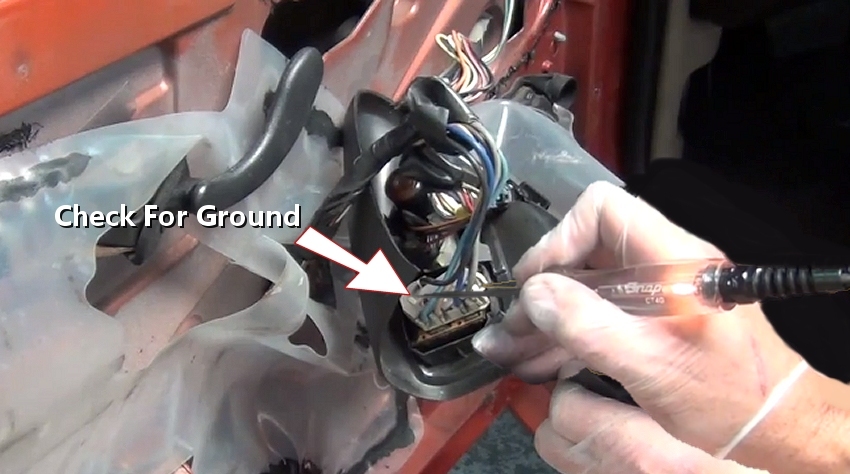
Next, connect the test light lead to power with an extender wire to the positive
battery terminal and test the remaining terminals for ground, this wire is usually
black or brown. One should light up, if not inspect the wiring and harness for damage
and use a wiring schematic to trace the ground circuit and repair. It is common
for the wiring to break near the door jam where the wiring harness goes from the
door to the vehicle.
SPONSORED LINKS
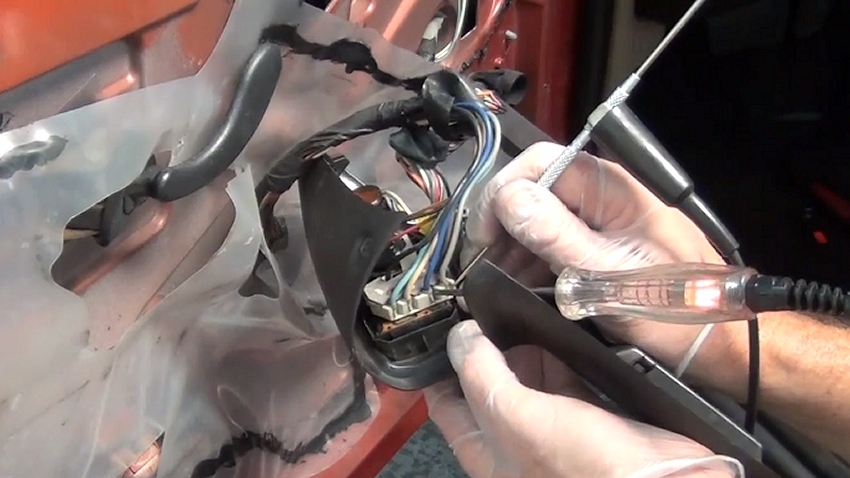
Insert a sharp metal object such as this scribe into the ground clip of the test
light, this will be used to test the switches internal circuitry.
Using the circuit tester, insert both probe ends into the individual window activation
terminals. Working the switch back and forth the test light should illuminate in
both directions, this determines if the internal switch connections are working.
Do not allow the probes to touch together during the test. If no illumination is
detected in one or both directions the master switch has failed. You have just tested
the electrical portion of the system much like a trained mechanic would have. Window switch test and replacement video, when completed continue down the guide
to glean additional information for the repair. Turn the ignition key off and remove the wiring connector from the switch. Some
master window switches are designed with a wiring harness connector attached. Remove any additional wiring connectors attached to the window switch panel such
as mirror or lock controls if needed. Remove the window switch plate by releasing the mounting clips which hold the
bezel in place. Use a small screwdriver to release the mounting clips to separate the window
switch from the bezel, on some switches the bezel is included with the new switch. The switch will become free from the bezel. Remove the replacement window switch from the packaging and compare it to the
failed switch. Flip the switches over to compare the electrical side terminals, they should
match identically. Press the replacement switch into the bezel which will be accompanied by a click,
some switches are held in place by mounting screws. After the new switch has been installed, reinsert the bezel plate into the plastic
cover plate and reassemble and you are all set. Continue the reassembly until completed, test the job by activating the window
and checking the operation of all windows. Our certified technicians are ready to answer car repair
questions for free. We hope you saved money and learned from this guide and
video. We are creating a full set of car repair guides.
Please subscribe to our 2CarPros
YouTube channel and check back often for new videos which are uploaded regularly.
Watch the Video!
SPONSORED LINKS
SPONSORED LINKS
Questions?
Article published 2022-03-08
SPONSORED LINKS