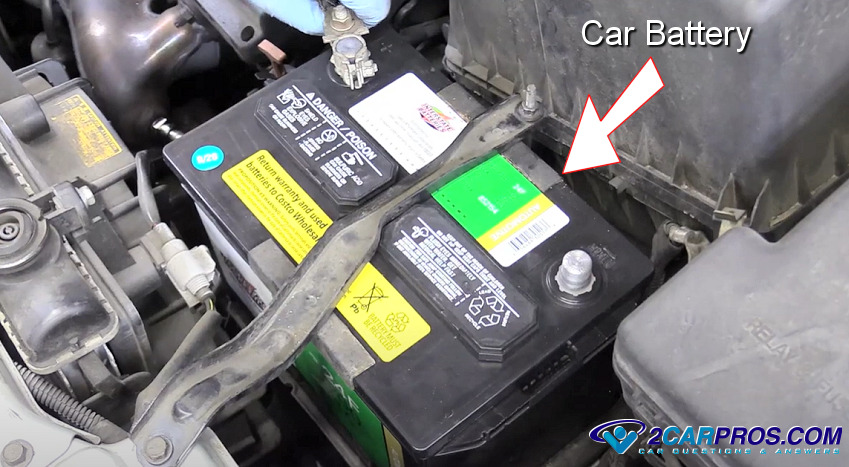
A car battery should hold its charge for a few months before needing to be recharged, if not the battery has gone bad or the car has a parasitic draw, something is staying on that shouldn't be which can be a simple fix which we will show you in this guide.
General Information
The ignition switch/button will cut the power to many of the vehicle's electrical circuits. There are several "live" electrical circuits that bypass the ignition switch which draw electrical power when the system is off, these checks are quick and easy to do. When a component is left on for extended periods of time it will heat up. This can be due to a bad sensor, sticking relay or a failed computer, also a low hum such as a fuel pump or ticking such as a HVAC blend door actuator can be a clue as well. Start in a quiet place with the vehicle cold and the battery fully charged.
Easy Repairs
We'll go over the easy stuff and then escalate to the more difficult issues further down in the guide.
1. The most common problem for a battery to be dead in the morning or after the car has been sitting for a while is a weak battery. To confirm this issue charge the battery, then use this battery load test guide which is easy because there is no tools or equipment needed. If the battery fails the load test it will need to be replaced. A sure sign the battery is bad is a sulfur or rotten egg like smell. A battery will typically last between 4 to 5 years in most cases, if the battery is okay please continue.

2. Inspect the glove box light which is controlled by a small pin switch inside the box door frame. If this switch malfunctions or is misaligned it will allow the light to stay on draining the battery. This can be sometimes tough to see in the bright light of day so it's best to check this during the evening time. Look for light inside the glove box through the small cracks in and around the box door. If the light is on, open and inspect the light switch to replace if needed, or make minor adjustments to help it work correctly and turn the light off.
This can be applied to the trunk light as well. Pop the trunk open to observe the light, then slowly close the lid while watching the light through a small opening near the rear of the trunk lid, the light should go off. If the light stays on, replace or adjust the pin control switch or trunk latch.

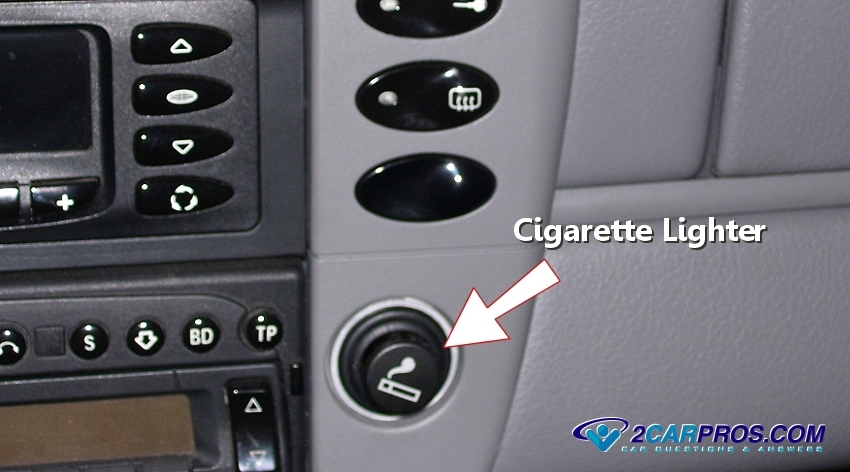
3. Check the cigarette lighters in both front and rear passenger compartments to see if the lighter itself is stuck down which is usually accompanied by a fair amount of heat, pull the lighter upward to stop the electrical draw, in this case the lighter has gone bad and needs replacement.
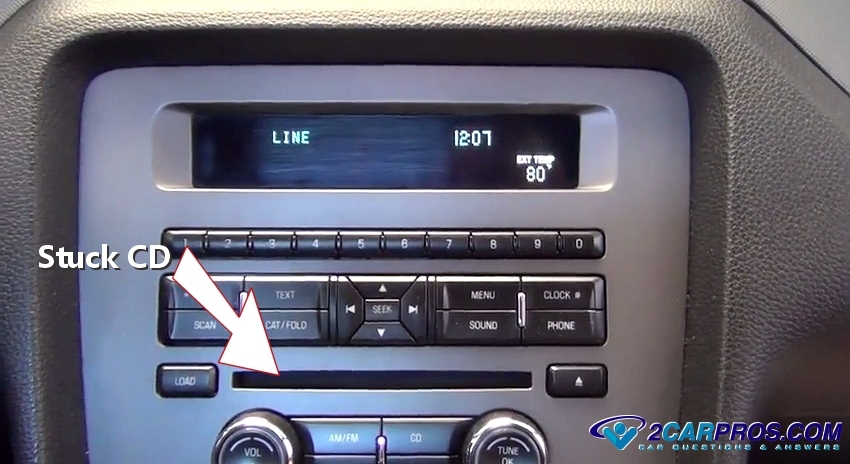
4. When you shut the ignition key off the radio turns off as well, this is not true for the CD player and changer. If a CD gets stuck in the load or eject position it will continue to work the small motor inside the player while draining the electrical system. With the key off listen closely to the player, if you hear a motor running a CD is stuck. Try to work the CD either in or out using a small tweezers or flat blade screwdriver. If you cannot retrieve the CD, pull out the radio fuse until you can replace the unit or have it repaired, this will stop the battery draw.
5. The door lock switch is constantly hot or live with electrical power. Sometimes the control switch will get gummed up with dirt or soda which makes the switch stick in the lock or unlock position. This will force the lock actuator in the door to stay on which will draw the battery down. Inspect the lock switch to make sure it returns to its neutral position. If this switch is broken or permanently stuck, replacement is required.

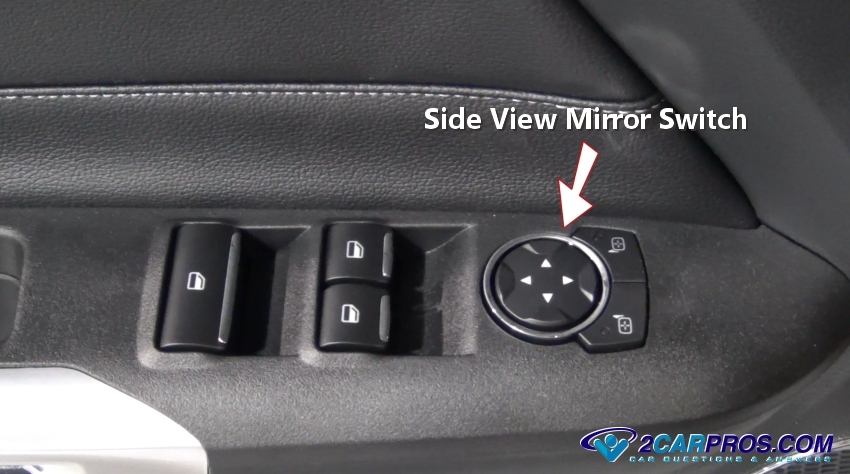
6. The side view mirror switch continues to get power after the ignition switch
is off. This switch like other switches can get gummed up from grime and soda which
can hold the switch on forcing the motor to draw power. Check the switch operation
to ensure that it returns to its neutral position. If this switch is broken or stuck
it will need to be replaced.
7. Inspect the electric seat control switches, this switch can become sticky or weak allowing the switch to stay engaged forcing the seat motor to draw power from the battery. To check for this condition observe the operation of the seat control switch if it doesn't return to it's neutral position or is sticking in one position replace the seat switch with a new part which you can get from Amazon or the dealership.

8. A vanity mirror located in the passenger or driver's side sun visor has a light in most cases that can stick on. To check for this problem move the visor slightly downward to observe a light, if the light is still on in the up position pull the visor down to inspect the small pin switch and repair or replace as needed.
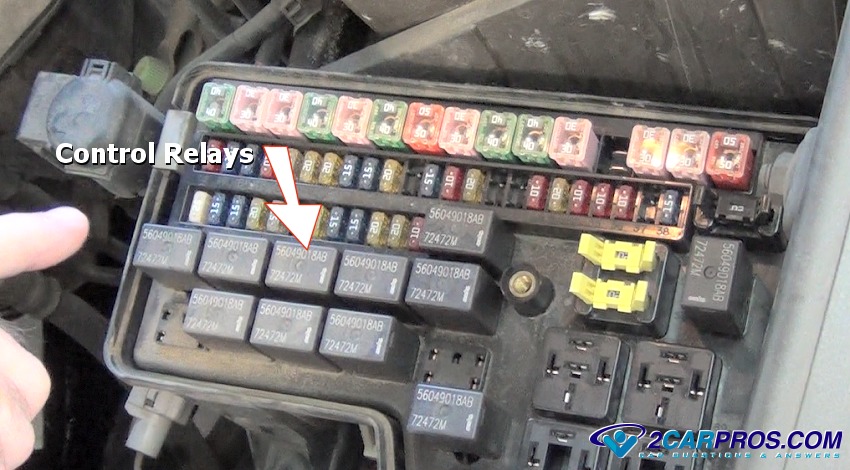
9. A control relay is a small electrical component that turns on and off larger items such as a fuel pump or an air conditioning compressor. When a relay goes bad they can "stick" causing the component to stay on even when the key is off. Locate the under hood and interior fuse and relay panels and remove their covers. Next, touch each relay to check for heat, if a relay is found remove and replace it with a new relay.
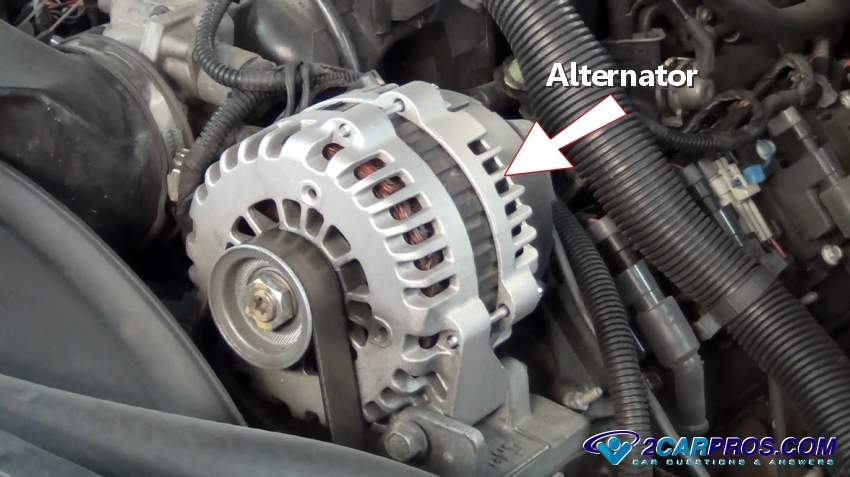
10. Check for warm components such as the alternator, air conditioner compressor clutch and electric steering rack motor (if equipped). Locate the alternator and feel it with your hand to check for warmth, if the alternator is warm with a possible burning smell there is an internal short and the alternator must be replaced.
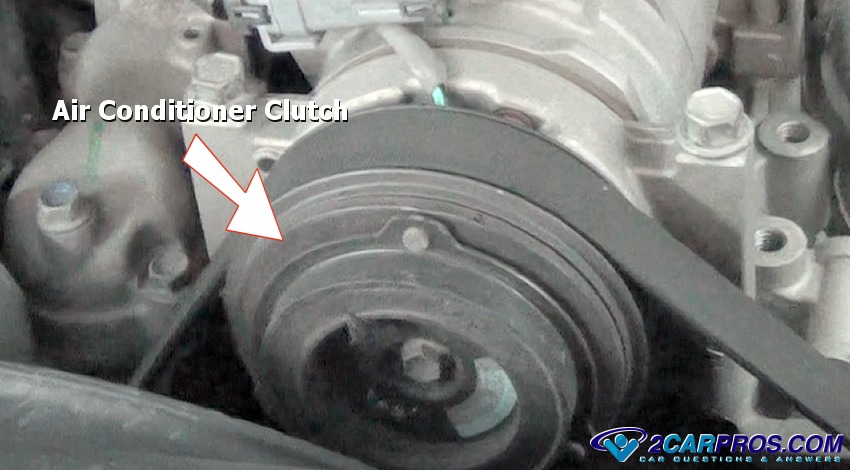
11. An air conditioner clutch is common to create a battery draw due to a stuck relay, to see if this is your problem place your hand on the front of the compressor to check for heat.
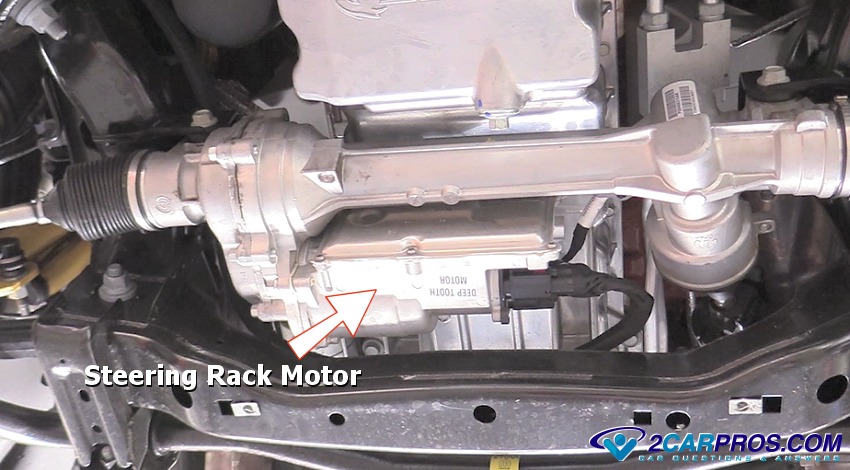
12. A steering rack is powered by an electric motor which is controlled by a relay or module, either should be cool to the touch.
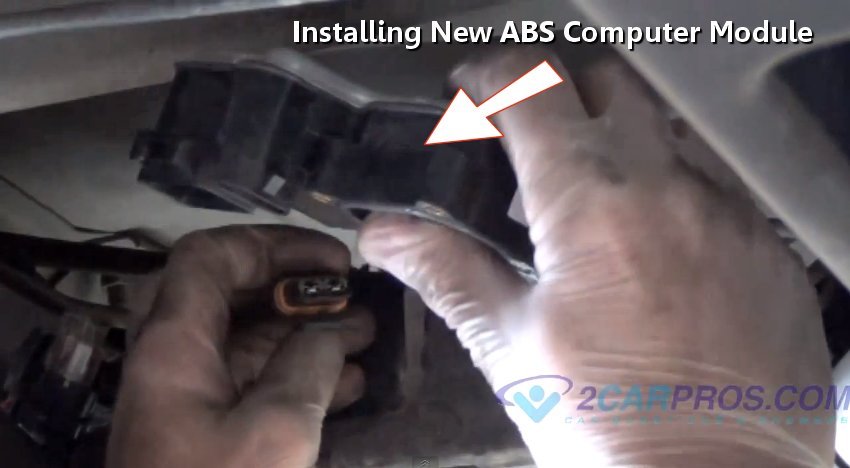
13. Listen to the vehicle by sitting inside, lift the hood and trunk and try to hear anything that might be left on indicated by a hum or light ticking. In this case the ABS control module was stuck on creating a low hum and needed to be replaced.
14. The Powertrain Control Module (PCM) Body Control Module (BCM) or Security Module can internally short circuit which can cause various electrical systems in the car to stay "live" which creates an electrical draw. This problem can be checked by locating the fuse of the systems and removing them or removing the controllers altogether. If the vehicle starts the next morning you have found the problem. Also, a CAN scan (controller area network) will sometimes detect a malfunctioning computer.
Conclusion
If you have completed this guide and still can't find the cause of the battery drain, a manual draw check of the electrical system will need to be performed. With the ignition key in the off position and the doors closed (driver's side window down) wait 15 minutes, then disconnect the battery cable on the negative side, (Note: A fifteen minute wait time allows the computers to go into "sleep mode" which shuts down most electrical systems).
Attach a test light between the negative battery cable end, and the negative battery terminal, the test light should light up dimly or not at all. If the test light is on brightly there is a strong electrical draw in the system. To locate the draw start removing fuses one at a time, when the test light goes out the circuit in question has been located. Identify all accessories in a particular circuit by using a wiring schematic.
An alternative method is to use a voltmeter to perform a manual draw test. With the ignition key in the off position and the doors closed (driver's side window down) disconnect the battery cable on the negative side. Set your voltmeter on the DC amp scale, then attach the red lead to the negative battery post. Attach the black lead to the battery negative cable.
Use a small jumper wire along side of the voltmeter and wait for 15 minutes to allow the modules to go to sleep, then remove the small jumper wire leaving just the voltmeter. Then look at your reading, it should be about 50 to 75 milliamps which is considered a normal draw to keep the modules backup systems charged. If the draw is higher than that, then start removing the fuses one by one until the draw drops to the normal levels.
Once you find the fuse, you will need to look for a power distribution wiring diagram that will show what components are fused on that circuit. Install the fuse and go to each component on that circuit and disconnect them one at a time until the draw drops to the normal range. At this point, you have found the draw. Replace the component and recheck the draw to confirm your repair.
Watch the Video!
Please watch this video of the job being done to glean additional helpful information.
Credits
This guide knowledge base was created by the 2CarPros Team, and by Ken Lavacot: Automobile repair shop owner and certified master automobile technician of over 30 years. If you have question or need help please ask one of our experts we are happy to help. Please visit our 2CarPros YouTube Channel.

Article published 2024-04-30